利用openssl生成的https的ca来访问web服务器
准备:
3台虚拟机的作用非常大,之前搭建zookeeper,至少要用到3个。搭建完全分布式的hadoop集群和hbase也是逐渐在这台三台计算机上做的实验。
slave-03用作CA服务器
slave-02用作http服务器
slave-01用作客户端访问https和http
还是和之前一样,使用的系统是centos 6.5。系统已经为我们提供了openssl和httpd,但是默认缺少mod_ssl模块,因此,建议在实验前,先安装这个模块,如果你已经有的话就可以省略掉安装了。如果没有ssl的模块,我们是无法使用https的,这个模块一会还要配置。
------yum install mod_ssl。
我们可以查看一下新添加的东西
[root@slave-02 ~]# rpm -ql mod_ssl
/etc/httpd/conf.d/ssl.conf
/usr/lib64/httpd/modules/mod_ssl.so
/var/cache/mod_ssl
/var/cache/mod_ssl/scache.dir
/var/cache/mod_ssl/scache.pag
/var/cache/mod_ssl/scache.sem
执行步骤
一、首先是制作CA的证书。
我们可以提前修改一下/etc/pki/tls/openssl.cnf。因为在签证的时候,我们需要输入很多的信息,如果提前设置默认值的话,我们在之后的签证可以直接点回车,使用默认值来签证,这样会比较的方便,但这里我使用手动的方法。
1、cd /etc/pki/tls/CA中,执行命令(umask 077;openssl genrsa -out private/cakey.pem 1024)
这句话是生成密钥,umask077是设定掩码,文件的默认权限就会变成777-077=700.最后的1024是密钥的长度。
2、openssl req -new -x509 -key private/cakey.pem -out cacert.pem
生成自签证书,这个需要写一些东西,在/etc/pki/tls/openssl.cnf文件可以定义要填写的内容。
[root@slave-03 CA]# openssl req -new -x509 -key private/cakey.pem-out cacert.pem
You are about to be asked to enter information that will beincorporated
into your certificate request.
What you are about to enter is what is called a Distinguished Nameor a DN.
There are quite a few fields but you can leave some blank
For some fields there will be a default value,
If you enter '.', the field will be left blank.
-----
Country Name (2 letter code) [XX]:---国家,两个字符
State or Province Name (full name) []:--省
Locality Name (eg, city) [Default City]:--市
Organization Name (eg, company) [Default Company Ltd]:--组织名
Organizational Unit Name (eg, section) []:--组织部门
Common Name (eg, your name or your server's hostname) []:--你的名字,这个重要,要配置ssl
Email Address []:--邮箱地址
3、touch index.txt 和touch serial,执行echo 01 >serial
在/etc/pki/tls/openssl.cnf配置文件中有这么几个目录,如果没有,就自己创建。由于这里的crl和certs都有,所以我只创建了index.txt和serial文件。
dir =/etc/pki/CA # Where everythingis kept
certs =$dir/certs # Where the issuedcerts are kept
crl_dir =$dir/crl # Where the issuedcrl are kept
database =$dir/index.txt # database indexfile.
二、配置web服务器
我们依然需要为服务器创建一个密钥。
1、cd /etc/httpd/,mkdir ssl,cd ssl,执行(umask 077;openssl genrsa -out httpd.key)
接下来的工作是生成一个证书颁发请求。这个命令依然弹出很多的东西需要填写,所填的东西最好跟刚才CA端填写的内容一样,否则认证的时候会报错。
2、openssl req -new -key httpd.key -out httpd.csr
把httpd.csr发送到ca进行认证
3、scp httpd.csr root@slave-03:/tmp
进行认证,有效期是1年
4、openssl ca -in /tmp/httpd.csr -out /tmp/httpd.crt -days 365
进行认证后,我们还需要将httpd.crt发回到httpd服务器,放到和httpd.key同一目录下。
5、[root@slave-03 CA]# cat index.txt
V 171018042626Z 01 unknown /C=CH/ST=beijing/O=lenove/OU=research/CN=zzy/[email protected]
[root@slave-03 CA]# cat serial
02
查看就会发现,index.txt多了一条认证信息,而且之前写入serial中是1,现在也增加为2。
三、配置ssl模块
配置了ssl模块,我们才可以使用https访问网页。
需要配置的文件是/etc/httpd/conf.d/ssl.conf
1、DocumentRoot "/var/www/html"
2、ServerName zzy:443
3、ErrorLog logs/ssl_error_log
4、TransferLog logs/ssl_access_log
5、LogLevel warn
6、SSLEngine on
7、SSLCertificateFile /etc/httpd/ssl/httpd.crt
8、SSLCertificateKeyFile /etc/httpd/ssl/httpd.key
主要的参数就是这几个。
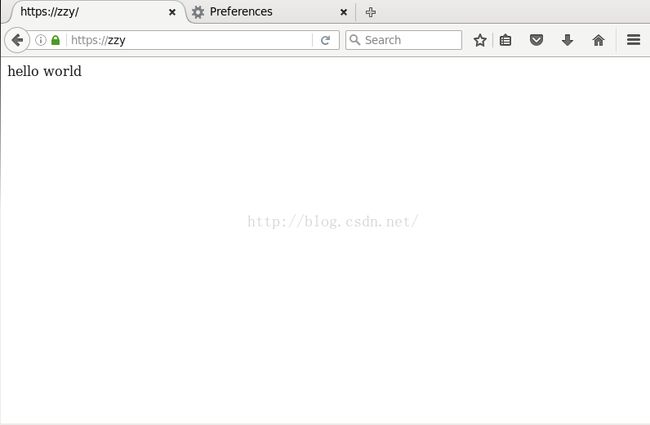
1这里文档的目录沿用了httpd服务器默认的html的目录,着这个目录建一个index.html,写进一句话“hello world”
2使用刚才提到的很重要的名字,另外,这个名称要么写入hosts,要么加入dns,需要能被解析。后面的443是固定的。
3、4、5不用管
6必须是on
7,8使用的刚才生成的key和CA发送回来的crt的绝对路径。
四、访问测试
web服务器端首先要关闭防火墙,service iptables stop。其次是开启httpd服务,service httpd start。因为centos6.5默认已经安装了httpd,而且页面目录默认就在/var/www/html,我们可以在里面创建一个index.html文件,随便写点东西进去就可以。访问的时候,默认就是找index.html文件。
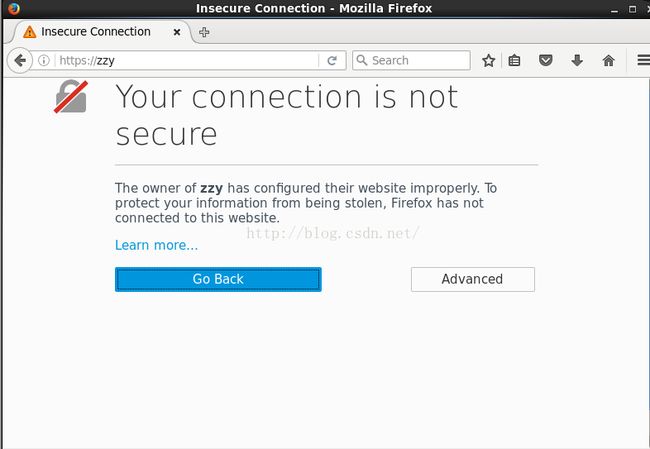
现在,我们需要用到ca服务器上的/etc/pki/CA/cacert.pem文件,把它复制到测试机上,后缀改成crt就可以,在windows下是可以直接识别安装的,在linux下则需要手动导入。你可先试试用http+ip访问,是没有问题的。再试试https://zzy访问出线如下界面
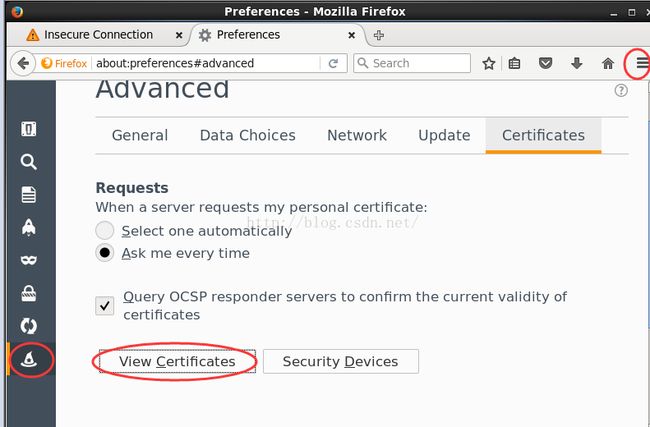
把刚才提到的httpd.crt加入到浏览器的证书模块。先点右上角的open menu,选择preference,再点左下角的advanced,再点view certificates,进入导入crt的界面。
点击import,找到文件后,点击open即可
清空缓存再访问。


