Spring AOP的实现原理
Spring的Aop原理
本文讲解Spring AOP的整体的流程。
一、基本术语:
前置通知:@Before 在执行方法之前执行
后置通知:@After 方法后执行
返回通知:@AfterReturning 方法执行完返回执行
异常通知:@AfterThrowing 出现异常的时候执行
环绕通知:@Around 环绕通知
在切面类上加入@Aspect说明这个类是通知类
在配置类上用@EnableAspectJAutoProxy开启通知的功能
二、@EnableAspectJAutoProxy
@Target(ElementType.TYPE)
@Retention(RetentionPolicy.RUNTIME)
@Documented
@Import(AspectJAutoProxyRegistrar.class)// 用 @Import 导入AspectJAutoProxyRegistrar组件 让Spring给我们进行管理
public @interface EnableAspectJAutoProxy {
根据源代码,可以知道,底层用的是创建 AnnotationAwareAspectJAutoProxyCreator 组件,这个组件实际上是一个 bean的后置处理器。
我们知道,bean的后置处理器会在创建我们的bean组件的时候,会给他们一次机会创建代理对象,所以,AOP的底层实现就是运用代理来进行实现的。
所以我们要着重看这几个类以及父类:
AnnotationAwareAspectJAutoProxyCreator
AspectJAwareAdvisorAutoProxyCreator
AbstractAdvisorAutoProxyCreator
AbstractAutoProxyCreator
implements SmartInstantiationAwareBeanPostProcessor, BeanFactoryAware
我们根据 SmartInstantiationAwareBeanPostProcessor 知道,这个对象是一个 BeanPostProcessor
/**
	 * Apply this BeanPostProcessor before the target bean gets instantiated.
	 * The returned bean object may be a proxy to use instead of the target bean,
	 * effectively suppressing default instantiation of the target bean.
	 * If a non-null object is returned by this method, the bean creation process
	 * will be short-circuited. The only further processing applied is the
	 * {@link #postProcessAfterInitialization} callback from the configured
	 * {@link BeanPostProcessor BeanPostProcessors}.
	 * This callback will be applied to bean definitions with their bean class,
	 * as well as to factory-method definitions in which case the returned bean type
	 * will be passed in here.
	 * Post-processors may implement the extended
	 * {@link SmartInstantiationAwareBeanPostProcessor} interface in order
	 * to predict the type of the bean object that they are going to return here.
	 * @param beanClass the class of the bean to be instantiated
	 * @param beanName the name of the bean
	 * @return the bean object to expose instead of a default instance of the target bean,
	 * or {@code null} to proceed with default instantiation
	 * @throws org.springframework.beans.BeansException in case of errors
	 * @see #postProcessAfterInstantiation
	 * @see org.springframework.beans.factory.support.AbstractBeanDefinition#getBeanClass()
	 * @see org.springframework.beans.factory.support.AbstractBeanDefinition#getFactoryMethodName()
	 */
	Object postProcessBeforeInstantiation(Class<?> beanClass, String beanName) throws BeansException;

	/**
	 * Perform operations after the bean has been instantiated, via a constructor or factory method,
	 * but before Spring property population (from explicit properties or autowiring) occurs.
	 * This is the ideal callback for performing custom field injection on the given bean
	 * instance, right before Spring's autowiring kicks in.
	 * @param bean the bean instance created, with properties not having been set yet
	 * @param beanName the name of the bean
	 * @return {@code true} if properties should be set on the bean; {@code false}
	 * if property population should be skipped. Normal implementations should return {@code true}.
	 * Returning {@code false} will also prevent any subsequent InstantiationAwareBeanPostProcessor
	 * instances being invoked on this bean instance.
	 * @throws org.springframework.beans.BeansException in case of errors
	 * @see #postProcessBeforeInstantiation
	 */
	boolean postProcessAfterInstantiation(Object bean, String beanName) throws BeansException;
在创建一个bean的实例之前会调用这个方法:
Object postProcessBeforeInstantiation(Class beanClass, String beanName) throws BeansException;返回的对象有可能是代理对象来代替 目标的 bean,
org.springframework.aop.framework.autoproxy.AbstractAutoProxyCreator.postProcessBeforeInstantiation(Class, String):
@Override
	public Object postProcessBeforeInstantiation(Class<?> beanClass, String beanName) throws BeansException {
		Object cacheKey = getCacheKey(beanClass, beanName);

		if (beanName == null || !this.targetSourcedBeans.contains(beanName)) {
			if (this.advisedBeans.containsKey(cacheKey)) {
				return null;
			}
			if (isInfrastructureClass(beanClass) || shouldSkip(beanClass, beanName)) {
				this.advisedBeans.put(cacheKey, Boolean.FALSE);
				return null;
			}
		}

		// Create proxy here if we have a custom TargetSource.
		// Suppresses unnecessary default instantiation of the target bean:
		// The TargetSource will handle target instances in a custom fashion.
		if (beanName != null) {
			TargetSource targetSource = getCustomTargetSource(beanClass, beanName);
			if (targetSource != null) {
				this.targetSourcedBeans.add(beanName);
				Object[] specificInterceptors = getAdvicesAndAdvisorsForBean(beanClass, beanName, targetSource);
				Object proxy = createProxy(beanClass, beanName, specificInterceptors, targetSource);
				this.proxyTypes.put(cacheKey, proxy.getClass());
				return proxy;
			}
		}

		return null;
}
/**
	 * Create a proxy with the configured interceptors if the bean is
	 * identified as one to proxy by the subclass.
	 * @see #getAdvicesAndAdvisorsForBean
	 */
	@Override
	public Object postProcessAfterInitialization(Object bean, String beanName) throws BeansException {
		if (bean != null) {
			Object cacheKey = getCacheKey(bean.getClass(), beanName);
			if (this.earlyProxyReferences.remove(cacheKey) != bean) {
				return wrapIfNecessary(bean, beanName, cacheKey);
			}
		}
		return bean;
}
/**
	 * Wrap the given bean if necessary, i.e. if it is eligible for being proxied.
	 * @param bean the raw bean instance
	 * @param beanName the name of the bean
	 * @param cacheKey the cache key for metadata access
	 * @return a proxy wrapping the bean, or the raw bean instance as-is
	 */
	protected Object wrapIfNecessary(Object bean, String beanName, Object cacheKey) {
		if (beanName != null && this.targetSourcedBeans.contains(beanName)) {
			return bean;
		}
		if (Boolean.FALSE.equals(this.advisedBeans.get(cacheKey))) {
			return bean;
		}
		if (isInfrastructureClass(bean.getClass()) || shouldSkip(bean.getClass(), beanName)) {
			this.advisedBeans.put(cacheKey, Boolean.FALSE);
			return bean;
		}

		// Create proxy if we have advice.
    // 得到通知的方法
		Object[] specificInterceptors = getAdvicesAndAdvisorsForBean(bean.getClass(), beanName, null);
		if (specificInterceptors != DO_NOT_PROXY) {
			this.advisedBeans.put(cacheKey, Boolean.TRUE);
      // 创建代理对象
			Object proxy = createProxy(
					bean.getClass(), beanName, specificInterceptors, new SingletonTargetSource(bean));
			this.proxyTypes.put(cacheKey, proxy.getClass());
			return proxy;
		}

		this.advisedBeans.put(cacheKey, Boolean.FALSE);
		return bean;
	}
接下来,我们调试:
整体的调用过程:
1)、调用Spring的refresh();方法创建容器
2)、在创建容器的过程中,调用BeanFactoryPostProcessors的后置处理器:
// 调用Spring的后置处理器
invokeBeanFactoryPostProcessors(beanFactory);
// 真正调用的方法
PostProcessorRegistrationDelegate.invokeBeanFactoryPostProcessors(beanFactory, getBeanFactoryPostProcessors());
// 调用 BeanDefinitionRegistryPostProcessors 的后置处理器
invokeBeanDefinitionRegistryPostProcessors(currentRegistryProcessors, registry);
// 执行调用
postProcessor.postProcessBeanDefinitionRegistry(registry);
在@EnableAspectJAutoProxy的注解类里面是这么定义的:
@Target(ElementType.TYPE)
@Retention(RetentionPolicy.RUNTIME)
@Documented
@Import(AspectJAutoProxyRegistrar.class) // 直接使用的 @Import 来引入我们的组件 之后 创建他 ,它实际上是一个 ImportBeanDefinitionRegistrar的注册器 可以注册我们的 特殊的bean
public @interface EnableAspectJAutoProxy {
所以在上面 执行
BeanFactoryPostProcessors的后置处理器的时候 会调用 这个 注册bean的方法,使用
AopConfigUtils.registerAspectJAnnotationAutoProxyCreatorIfNecessary(registry);这个方法注册我们的
AnnotationAwareAspectJAutoProxyCreator组件,这个组件的主要用途是创建 AOP的代理对象;实际上 他是一个 bean的后置处理器,在我们创建bean的时候,会给他们一个机会创建代理对象,进行返回,这样就实现了 代理对象的创建

注册一个:internalAutoProxyCreator=AnnotationAwareAspectJAutoProxyCreator的bean的定义;
		RootBeanDefinition beanDefinition = new RootBeanDefinition(cls);
		beanDefinition.setSource(source);
		beanDefinition.getPropertyValues().add("order", Ordered.HIGHEST_PRECEDENCE);
		beanDefinition.setRole(BeanDefinition.ROLE_INFRASTRUCTURE);
		// 将 AnnotationAwareAspectJAutoProxyCreator 组件注册到IOC容器中,方便我们以后创建 代理的对象
		registry.registerBeanDefinition(AUTO_PROXY_CREATOR_BEAN_NAME, beanDefinition);
		return beanDefinition;
紧随其后,我们看一看创建bean的过程,是如何使用上面的bean的后置呢处理器来创建我们的代理对象的;
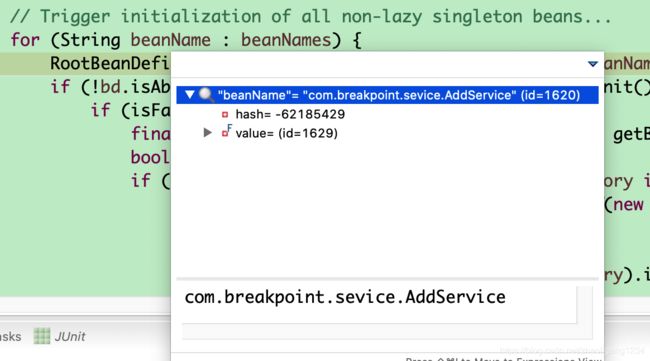
如下图所示:创建我们AddService的代理对象:
跟踪一下我们的代理的过程:
1、获取到bean的定义信息
RootBeanDefinition bd = getMergedLocalBeanDefinition(beanName);
2、判断是否是FactoryBean的对象,如果是的话,用FactoryBean的getObject()方法创建bean,显然,我们现在创建的不是FactoryBean对象;
3、getBean(beanName);、doGetBean(name, null, null, false);
4、检查是否有依赖的bean,比如:dependsOn的bean,如果有,先创建以来的bean
5、如果没有,执行创建我们目标bean
6、先从IOC容器里面查看是否有原先创建的bean,如果有,直接返回,如果没有,在进行创建
Object singletonObject = this.singletonObjects.get(beanName);
7、singletonObject = singletonFactory.getObject();:执行创建
8、运用后置处理器创建bean的代理对象
// Give BeanPostProcessors a chance to return a proxy instead of the target bean instance.
Object bean = resolveBeforeInstantiation(beanName, mbdToUse);
9、调用bean的后置处理器
bean = applyBeanPostProcessorsBeforeInstantiation(targetType, beanName);
这一步会判断InstantiationAwareBeanPostProcessor的后置处理器 ,它实际上是XXXXAware的后置处理
for (BeanPostProcessor bp : getBeanPostProcessors()) {
			if (bp instanceof InstantiationAwareBeanPostProcessor) {
				InstantiationAwareBeanPostProcessor ibp = (InstantiationAwareBeanPostProcessor) bp;
				Object result = ibp.postProcessBeforeInstantiation(beanClass, beanName);
				if (result != null) {
					return result;
				}
			}
		}
		return null;
这一步没有返回我们所需要的代理对象,后面还会有很多的机会
10、Object beanInstance = doCreateBean(beanName, mbdToUse, args);:获取我们的bean组件
11、给创建好的bean进行赋值
populateBean(beanName, mbd, instanceWrapper);
12、初始化bean:exposedObject = initializeBean(beanName, exposedObject, mbd);
当执行到后置 AnnotationAwareAspectJAutoProxyCreator 处理器的After的方法的时候,会创建代理对象:
org.springframework.aop.framework.autoproxy.AbstractAutoProxyCreator.wrapIfNecessary(Object, String, Object)

/**
* 在这个方法中 会得到所有的Advice 通知
*/
 Object[] specificInterceptors = getAdvicesAndAdvisorsForBean(bean.getClass(), beanName, null);


// 这个方法中 会找到我们的 execution的表达式 查看是否匹配 如果匹配 那么就加入结果中
org.springframework.aop.support.AopUtils.canApply(Advisor, Class<?>, boolean)
public static boolean canApply(Advisor advisor, Class<?> targetClass, boolean hasIntroductions) {
		if (advisor instanceof IntroductionAdvisor) {
			return ((IntroductionAdvisor) advisor).getClassFilter().matches(targetClass);
		}
		else if (advisor instanceof PointcutAdvisor) {
			PointcutAdvisor pca = (PointcutAdvisor) advisor;
			return canApply(pca.getPointcut(), targetClass, hasIntroductions);
		}
		else {
			// It doesn't have a pointcut so we assume it applies.
			return true;
		}
}
在 org.springframework.aop.framework.DefaultAopProxyFactory.createAopProxy(AdvisedSupport) 的方法中创建我们的代理对象;
因为我们的组件没有实现接口 ,所以使用的是 new ObjenesisCglibAopProxy(config); 创建的对象;
@Override
	public AopProxy createAopProxy(AdvisedSupport config) throws AopConfigException {
		if (config.isOptimize() || config.isProxyTargetClass() || hasNoUserSuppliedProxyInterfaces(config)) {
			Class<?> targetClass = config.getTargetClass();
			if (targetClass == null) {
				throw new AopConfigException("TargetSource cannot determine target class: " +
						"Either an interface or a target is required for proxy creation.");
			}
			if (targetClass.isInterface() || Proxy.isProxyClass(targetClass)) {
				return new JdkDynamicAopProxy(config);
			}
			return new ObjenesisCglibAopProxy(config);
		}
		else {
			return new JdkDynamicAopProxy(config);
		}
}
这样我们就得到了一个代理对象:

真正执行的过程:
首先会调用:
org.springframework.aop.framework.CglibAopProxy.DynamicAdvisedInterceptor.intercept(Object, Method, Object[], MethodProxy)
这个方法进行执行:
获取到执行的链 chain
List<Object> chain = this.advised.getInterceptorsAndDynamicInterceptionAdvice(method, targetClass);
之后进行执行:
retVal = new CglibMethodInvocation(proxy, target, method, args, targetClass, chain, methodProxy).proceed();
最后返回我们想得到的值,这就是AOP的整体的流程。
总结:AOP的实现原理
1)、@EnableAspectJAutoProxy 开启AOP的功能
2)、 @EnableAspectJAutoProxy 会给我们的容器注册一个组件 AnnotationAwareAspectJAutoProxyCreator
3)、AnnotationAwareAspectJAutoProxyCreator 是一个后置处理器
4)、容器的创建的流程:
registerBeanPostProcessors(beanFactory);注册后置处理器;这一步会创建我们的AnnotationAwareAspectJAutoProxyCreator 对象
finishBeanFactoryInitialization(beanFactory); 初始化剩余的但实例的bean;
1.创建业务组件以及切面的组件
2.AnnotationAwareAspectJAutoProxyCreator 拦截组件创建的过程 创建组件的过程
3.在组件创建完成之后,判断组件是否需要增强,
是:切面的通知方法包装称增强器(Advisor);给业务逻辑组件会创建一个代理的对象(默认是cglib)
否:创建的普通对象5)、执行目标的方法:
1.代理对象执行目标方法 2.使用org.springframework.aop.framework.CglibAopProxy.intercept(Object, Method, Object[], MethodProxy)进行拦截
1)。得到目标方法的拦截器链:(增强器包装成拦截器:MethodInterceptor)
2)、利用的链的链式机制,依次进入每一个拦截器进行执行 3)、效果
  		正常执行:前置通知--》目前方法-》后置通知--》返回通知

  		异常执行:前置通知--》目前方法-》后置通知--》异常通知