MAC 用 Intellij Idea 创建 Spring Cloud Eureka Server 例子
1、在intellij idea的IDE里,File -> New -> Project -> Maven -> Next
设置组名:
GroupId : service-server-2
ArtifactId : service-server-2
Next
设置工程名称
Project Name:serviceserver2
Finish
总体结构:
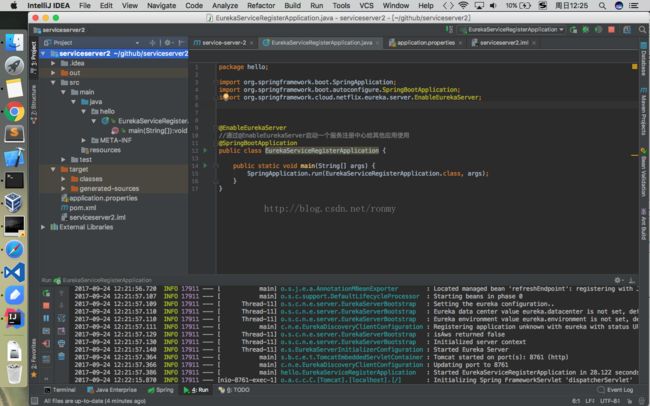
2、创建入口类 EurekaServiceRegisterApplication.java
标上
@EnableEurekaServer
@SpringBootApplication
特性
package hello;

import org.springframework.boot.SpringApplication;
import org.springframework.boot.autoconfigure.SpringBootApplication;
import org.springframework.cloud.netflix.eureka.server.EnableEurekaServer;


@EnableEurekaServer
@SpringBootApplication
public class EurekaServiceRegisterApplication {

    public static void main(String[] args) {
        SpringApplication.run(EurekaServiceRegisterApplication.class, args);
    }
}3、修改 pom.xml
更新 spring-boot,spring-cloud的类库,需要点时间,别着急;
    4.0.0

    service-server-2
    service-server-2
    1.0-SNAPSHOT

        org.springframework.boot
        spring-boot-starter-parent
        1.5.1.RELEASE


        UTF-8
        1.8


        service-center-1


                org.springframework.boot
                spring-boot-maven-plugin


            junit
            junit
            3.8.1
            test


            org.springframework.cloud
            spring-cloud-starter-eureka-server


            org.springframework.boot
            spring-boot-starter-test
            test


                org.springframework.cloud
                spring-cloud-dependencies
                Camden.SR5
                pom
                import
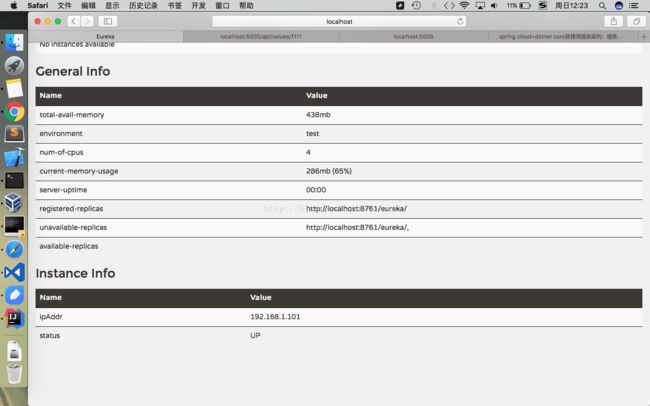
4、增加 application.properties
默认端口:8761
#注册服务的端口号
server.port=8761

#是否需要注册到注册中心,因为该项目本身作为服务注册中心,所以为false
eureka.client.register-with-eureka=false
#是否需要从注册中心获取服务列表,原因同上,为false
eureka.client.fetch-registry=false
#注册服务器的地址:服务提供者和服务消费者都要依赖这个地址
eureka.client.service-url.defaultZone=http://localhost:${server.port}/eureka

logging.level.com.netflix.eureka=OFF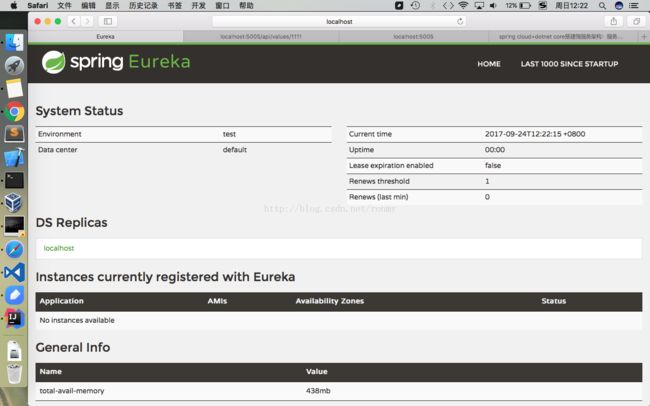
logging.level.com.netflix.discovery=OFF5、跑起来
菜单:Run -> EurekaServiceRegisterApplication
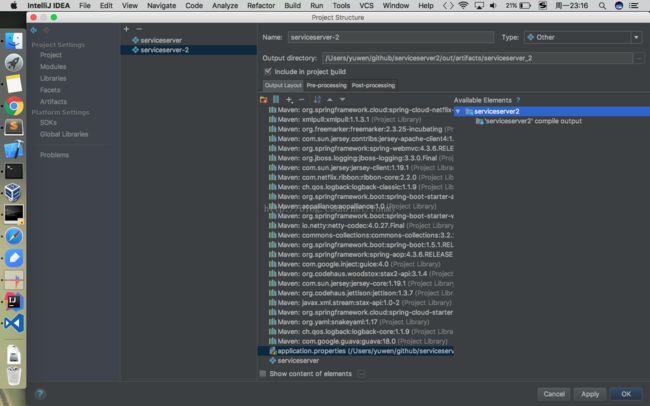
6、发布jar
1).点击菜单:File -> Project Stucture,进入工程配置界面;
2).在配置界面的左侧:
*选中“Artifacts” ,点 “+”,
*选择“JAR”,二级选择 “From Modules With Dependencies”,
*选择“Main Class” 入口对应的类;
*选择其它类库的导出方式:复制;
*最后 点击“OK”,配置完成;
上述默认生成的jar,会运行不成功,
1、相关依赖的jar签过名,采用嵌入模式生成的jar没签名执行时会提示签名有问题;
2、采用复制模式时,MANIFEST.MF文件始终不能打包进入jar,总提示找不到入口类;
经过一天的苦研,最终采用分离式(采用两个art),一个为了生成本工程的jar文件,另一个是为了复制出相关的依赖文件;
生成本工程的jar文件,采用手分增加文件,用默认的编辑果结死活不行。
过程如下:
*设置独立serviceserver.jar,并加入
/hello/EurekaServiceRegisterApplication.class
/META-INF/MANIFEST.MF
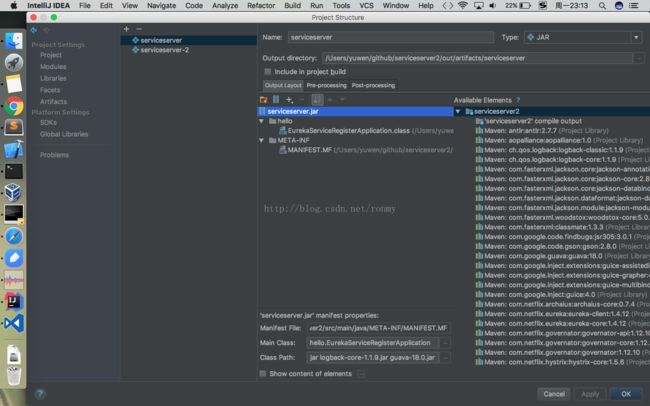
*相关依赖文件采用复制模式:
输出文件包括(serviceserver-2,type:other):
相关依赖的.jar(n个)
serviceserver.jar
application.properties
3).点击菜单:Build -> Make Project生成目标文件
4).查看jar文件:工程根目录/out/artifacts/serviceserver_2下;
5).运行:
cd 工程根目录/out/artifacts/serviceserver_2
java -jar serviceserver.jar;
源代码 :https://github.com/ronmy/EurekaAndDotnetCore2.0