翻金币小游戏QT实现(一)
翻金币小游戏(一)
1.项目基本配置
1.1 创建项目
打开Qt-Creator,创建项目:注意名称不要包含空格和回车,路径不要有中文
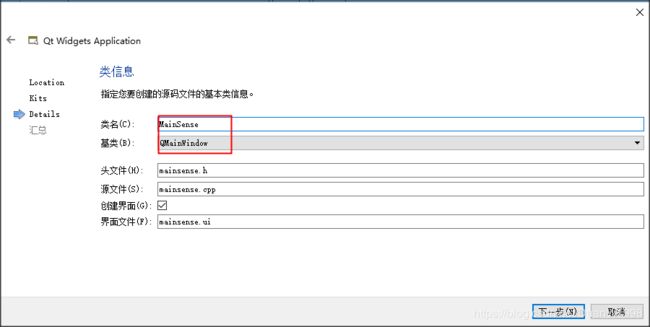
类信息中,选择基类为QMainWindow,类名称为 MainScene,代表着主场景。
点击完成,创建出项目:
创建的项目结构如下:
1.2 添加资源
首先将资源添加到当前项目的文件夹下
然后创建.qrc文件
进入编辑模式,添加前缀 “/” ,添加文件
添加结果如下:
至此将所有需要的资源添加到了本项目中。
2.主场景
2.1 设置游戏主场景配置
点击mainscene.ui文件,设计其菜单栏如下:
设计“退出”菜单项,objectName为 actionQuit, text 为 退出;
移除自带的工具栏与状态栏
回到MainScene.cpp文件,进入构造函数中,进行场景的基本配置,代码如下:
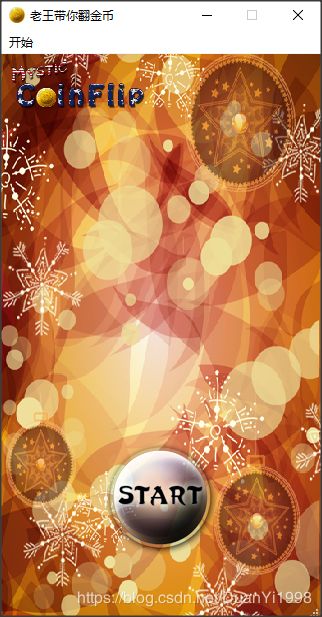
效果如下:
2.2 设置背景图片
重写MainScene的PaintEvent事件,并添加一下代码,绘制背景图片
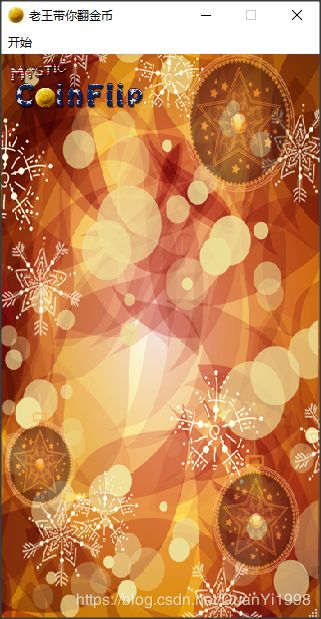
效果如下图:
2.3 创建开始按钮
开始按钮点击后有弹跳效果,这个效果是我们利用自定义控件实现的(QPushButton不会自带这类特效),我们可以自己封装出一个按钮控件,来实现这些效果。
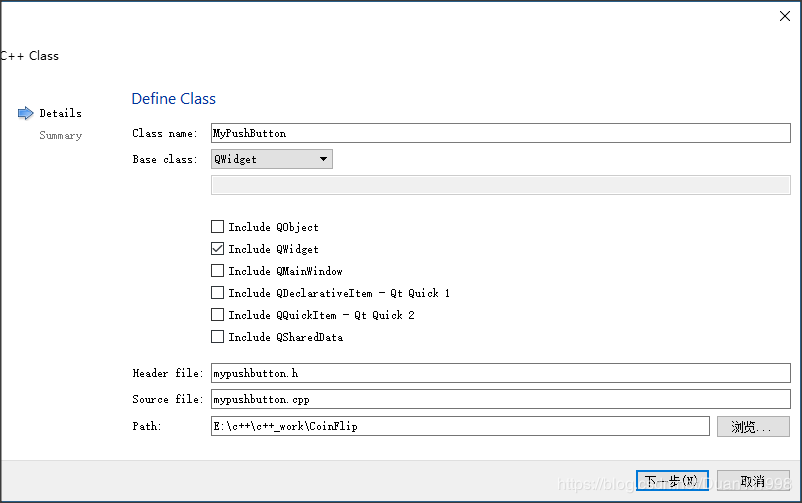
创建MyPushButton,继承与QPushButton
点击完成。
修改MyPushButton的父类为QPushButton
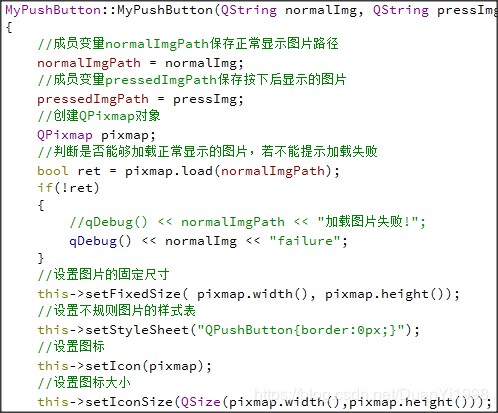
并且创建MyPushButton的构造的重载版本,可以让MyPushButton提供正常显示的图片以及按下后显示的图片
实现的重载版本MyPushButton构造函数代码如下:
运行效果如图:
不规则的开始按钮添加完成。
2.4 开始按钮跳跃特效实现
连接信号槽,监听开始按钮点击
//监听点击事件,执行特效
    connect(startBtn,&MyPushButton::clicked,[=](){
        startBtn->zoom1(); //向下跳跃
        startBtn->zoom2(); //向上跳跃

    });
zoom1与zoom2 为MyPushButton中扩展的特效代码,具体如下:
void MyPushButton::zoom1()
{
    //创建动画对象
    QPropertyAnimation * animation1 = new QPropertyAnimation(this,"geometry");
    //设置时间间隔,单位毫秒
    animation1->setDuration(200);
    //创建起始位置
    animation1->setStartValue(QRect(this->x(),this->y(),this->width(),this->height()));
    //创建结束位置
    animation1->setEndValue(QRect(this->x(),this->y()+10,this->width(),this->height()));
    //设置缓和曲线,QEasingCurve::OutBounce 为弹跳效果    animation1->setEasingCurve(QEasingCurve::OutBounce);
    //开始执行动画
    animation1->start(QAbstractAnimation::DeleteWhenStopped);
}

void MyPushButton::zoom2()
{
    QPropertyAnimation * animation1 =  new QPropertyAnimation(this,"geometry");
    animation1->setDuration(200);
    animation1->setStartValue(QRect(this->x(),this->y()+10,this->width(),this->height()));
    animation1->setEndValue(QRect(this->x(),this->y(),this->width(),this->height()));
    animation1->setEasingCurve(QEasingCurve::OutBounce);
    animation1->start(QAbstractAnimation::DeleteWhenStopped);
}
运行代码,点击按钮就能出现弹动效果了。
2.5 创建选择关卡场景
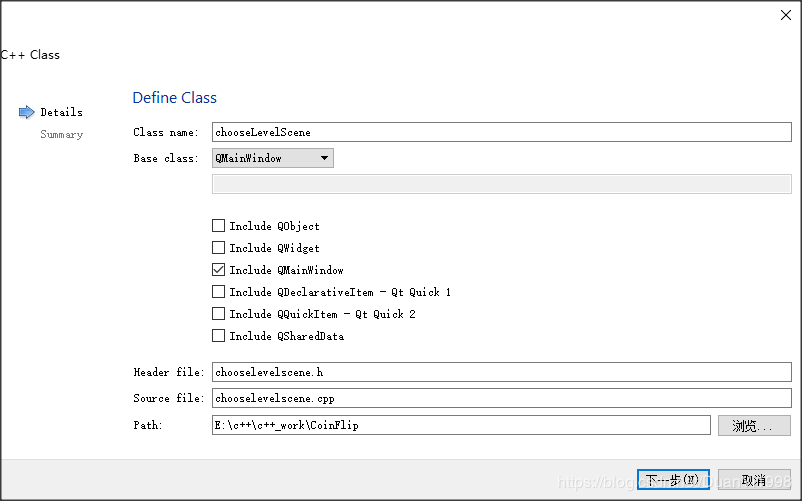
首先我们先创建选择关卡场景,添加新的C++文件
类名为chooseLevelScene,基类为QMainWindow
2.6 点击开始按钮进入选择关卡界面
目前点击主场景的开始按钮,只有弹跳特效,但是我们还需要有功能上的实现,特效结束后,我们应该进入选择关卡场景。
在MainScene.h中 保存ChooseScene选择关卡场景对象
 //选择关卡场景
ChooseLevelScene *chooseScene = new ChooseLevelScene;
我们在zoom1和zoom2特效后,延时0.5秒,进入选择关卡场景,需要在mainscene.cpp中的连接函数中添加代码如下:
//连接信号槽,监听开始按钮点击
    connect(startBtn,&MyPushButton::clicked,[=](){
        startBtn->zoom1();//向下跳跃
        startBtn->zoom2();//向上跳跃
        QTimer::singleShot(500,this,[=](){
            this->hide();
            chooseScene->show();
        });
    });
测试点击开始,执行特效后延时0.5秒进入选择关卡场景。
3 选择关卡场景
3.1 场景基本设置
选择关卡构造函数如下:
ChooseLevelScene::ChooseLevelScene(QWidget *parent) : QMainWindow(parent)
{
    //设置窗口固定大小
    this->setFixedSize(320,588);
    //设置窗口图标
    this->setWindowIcon(QPixmap(":/res/Coin0001.png"));
    //设置标题
    this->setWindowTitle("选择关卡");

    //创建菜单栏
    QMenuBar * bar = this->menuBar();
    this->setMenuBar(bar);
    //创建开始菜单
    QMenu * startMenu = bar->addMenu("开始");
    //创建按钮菜单项
    QAction * quitAction = startMenu->addAction("退出");
    //点击退出,退出游戏
    connect(quitAction,&QAction::triggered,[=](){
        this->close();
    });
}
运行效果如下:
3.2 背景设置
void ChooseLevelScene::paintEvent(QPaintEvent *){
    QPainter painter(this);
    QPixmap pix;
    pix.load(":/res/OtherSceneBg.png");
    painter.drawPixmap(0,0,this->width(),this->height(),pix);

    //加载标题
    pix.load(":/res/Title.png");
    painter.drawPixmap((this->width()-pix.width())*0.5,30,pix.width(),pix.height(),pix);
}
3.3 创建返回按钮
MyPushButton * backBtn = new
            MyPushButton(":/res/BackButton.png",":/res/BackButtonSelected.png");
    backBtn->setParent(this);
    backBtn->move(this->width()-backBtn->width(),this->height()-backBtn->height());
返回按钮是有正常显示图片和点击后显示图片的两种模式,所以我们需要重写MyPushButton中的 MousePressEvent和MouseReleaseEvent
//鼠标事件
void MyPushButton::mousePressEvent(QMouseEvent *e)
{
    if(pressedImgPath != "")//选中路径不为空,显示选中图片
    {
        QPixmap pixmap;
        bool ret = pixmap.load(pressedImgPath);
        if(!ret)
        {
             qDebug() << pressedImgPath << "加载图片失败!";
        }

        this->setFixedSize(pixmap.width(),pixmap.height());
        this->setStyleSheet("QPushButton{border:0px}");
        this->setIcon(pixmap);
        this->setIconSize(QSize(pixmap.width(),pixmap.height()));
    }
    //交给父类执行按下事件
    return QPushButton::mousePressEvent(e);
}
void MyPushButton::mouseReleaseEvent(QMouseEvent *e)
{
    if(normalImgPath != "")//选中路径不为空,显示选中图片
    {
        QPixmap pixmap;
        bool ret = pixmap.load(normalImgPath);
        if(!ret)
        {
             qDebug() << normalImgPath << "加载图片失败!";
        }

        this->setFixedSize(pixmap.width(),pixmap.height());
        this->setStyleSheet("QPushButton{border:0px}");
        this->setIcon(pixmap);
        this->setIconSize(QSize(pixmap.width(),pixmap.height()));
    }
    //交给父类执行按下事件
    return QPushButton::mouseReleaseEvent(e);
}
接下来,我们点击返回后,延时0.5后隐藏自身,并且发送自定义信号,告诉外界自身已经选择了返回按钮。
//返回按钮功能实现
    connect(closeBtn,&MyPushButton::clicked,[=](){
        QTimer::singleShot(500, this,[=](){
            this->hide();
            //触发自定义信号,关闭自身,该信号写到 signals下做声明
            emit this->chooseSceneBack();
             }
        );
    });
然后,在mainscene.cpp中写一个连接函数,接受自定义信号,并把主场景显现。
//监听选择场景的返回按钮
    connect(chooseScene,&ChooseLevelScene::chooseSceneBack,[=](){
                    this->show();
    });

