《Android编程权威指南》项目三 MVVM架构实战解析
本文将通过一个BeatBox项目详细解析MVVM架构的使用以及android中主题样式的使用分析
目录
- 效果如图
- 项目结构
- 前期准备
- SingleFragmentActivity
- activity_single_fragment
- BeatBoxActivity
- MVVM
- BeatBox
- Sound
- list_item_sound.xml
- SoundViewModel
- 核心完成代码
- fragment_beat_box.xml
- BeatBoxFragment
- 样式
- styles.xml
效果如图
每一个按钮都设置了指定的样式,每点击一个按钮都会发出相应的声音,如果对每一个按钮都进行设置的话,将非常繁琐,但是直接修改主题即可全部完成
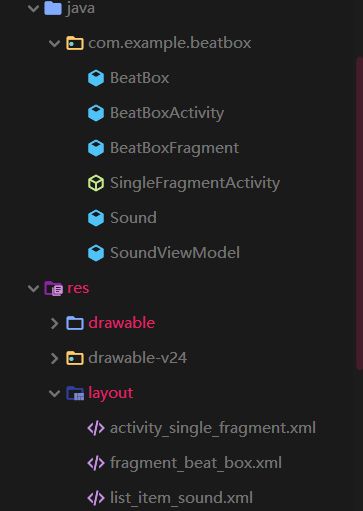
项目结构
java和xml有9个主要文件(还有一些配置文件设定)
前期准备
SingleFragmentActivity是一个抽象类,因为我们所有的显示工作都在**BeatBoxFragment中完成, BeatBoxActivity仅仅作为创造BeatBoxFragment**的入口activity即可,他的一些通用操作继承 SingleFragmentActivity
SingleFragmentActivity
public abstract class SingleFragmentActivity extends AppCompatActivity {
    protected abstract Fragment createFragment();

    protected int getLayoutResId() {
        return R.layout.activity_single_fragment;
    }
    @Override
    protected void onCreate(Bundle savedInstanceState) {
        super.onCreate(savedInstanceState);
        setContentView(R.layout.activity_single_fragment);
        FragmentManager fragmentManager = getSupportFragmentManager();
        Fragment fragment = fragmentManager.findFragmentById(R.id.fragment_container);
        if (fragment == null) {
            fragment = createFragment();
            fragmentManager.beginTransaction().add(R.id.fragment_container, fragment).commit();
        }
    }
}
这里就是连接他的资源id和创建Fragment管理器的通用功能,
activity_single_fragment
<FrameLayout xmlns:android="http://schemas.android.com/apk/res/android"
    android:id="@+id/fragment_container"
    android:layout_width="match_parent"
    android:layout_height="match_parent" />
然后在 BeatBoxActivity中只需要创建 **BeatBoxFragment**的实例即可
BeatBoxActivity
public class  BeatBoxActivity extends  SingleFragmentActivity {

    @Override
    protected Fragment createFragment() {
        return BeatBoxFragment.newInstance();
    }
}
MVVM
接下来就是BeatBoxFragment的工作了,他的作用是设计recyclerview,将一个一个的BeatBox放入其中,并设置主题,每个BeatBox包含一个sound,这里我们用sound保存每一个音频的路径(资源都在assets文件夹中)文件名以及id,这个id是在BeatBox通过mAssetManager加载获得
BeatBox
/**
 * 管理assets资源,创建Sound,维护Sound的集合
 */
public class BeatBox {
    //日志记录
    private static final String TAG = "BeatBox";
    private List<Sound> mSounds = new ArrayList<>();
    //音频播放池
    private static final int MAX_SOUNDS = 5;
    //存储资源目录
    private static final String SOUND_FOLDER = "sample_sounds";
    //访问assets的类
    private AssetManager mAssetManager;
    private SoundPool mSoundPool;
    public BeatBox(Context context) {
        mAssetManager = context.getAssets();
        //指定最大播放音频数,确定音频流类型,指定采样率
        mSoundPool = new SoundPool(MAX_SOUNDS, AudioManager.STREAM_MUSIC, 0);

        loadSounds();
    }

    /**
     * 播放音乐
     * @param sound
     */
    public void play(Sound sound) {
        Integer soundId = sound.getSoundId();
        if (soundId == null) {
            return;
        }
        mSoundPool.play(soundId, 1.0f, 1.0f, 1, 0, 1.0f);
    }

    public void relese() {
        mSoundPool.release();
    }
    /**
     * 加载文件夹里面的声音
     */
    private void loadSounds() {
        String [] soundNames;
        try {
            soundNames = mAssetManager.list(SOUND_FOLDER);//列出文件夹下所有的文件名
            Log.i(TAG, "loadSounds: " + soundNames.length + " sounds");
        } catch (IOException ioe) {
            Log.e(TAG, "loadSounds: could not list assets",ioe );
            return;
        }
        for (String filename : soundNames) {
            try {
                String assetPath = SOUND_FOLDER + "/" + filename;
                Sound sound = new Sound(assetPath);
                load(sound);  //每获得一个音频就将其加载
                mSounds.add(sound);
            } catch (IOException e) {
                Log.e(TAG, "loadSounds: "+filename,e );
            }

        }

    }

    /**
     * 用AssetFileDescriptor打开对应路径的音频,获得对应Id
     * @param sound
     * @throws IOException
     */
    private void load(Sound sound) throws IOException {
        AssetFileDescriptor assetFileDescriptor = mAssetManager.openFd(sound.getAssetPath());
        int soundId = mSoundPool.load(assetFileDescriptor, 1);
        sound.setSoundId(soundId);

    }
    public List<Sound> getSounds() {
        return mSounds;
    }
}
Sound
public class Sound {
    private String mAssetPath;
    private String mName;
    private Integer mSoundId; //Sound Pool需要预加载音频,需要设置自己的ID

    public Integer getSoundId() {
        return mSoundId;
    }

    public void setSoundId(Integer soundId) {
        mSoundId = soundId;
    }
    /**
     * 获得wav名字并修改,资源名后缀为wav
     * @param assetPath
     */
    public Sound(String assetPath) {
        mAssetPath = assetPath;
        String[] components = assetPath.split("/");
        String filename = components[components.length - 1];
        mName = filename.replace(".wav", "");
    }

    public String getAssetPath() {
        return mAssetPath;
    }

    public String getName() {
        return mName;
    }
}
现在,出现了一个问题,试想一下,Sound是model,假如我在View,也就是视图中,想要获得sound的内容怎么办?就像前面gif图中的,每个按钮上面都显示了音频的文件名。这个时候你可能会说,在BeatBoxFragment中设置不就好了吗?这就是MVC模式,BeatBoxFragment作为控制器链接M和V。
但是这导致Sound出现在了BeatBoxFragment中,Sound是具体的数据,而BeatBoxFragment本应该负责对BeatBox的整个排布处理,BeatBox又是对Sound的各种操作,如播放等。所以如果Sound出现在了BeatBoxFragment中,那么将会打乱代码分工
所以,Sound和xml文件之间的数据传输应该有他们自己的联系通道,作为ViewModel,这就是MVVM模式
联系Sound文件的是list_item_sound.xml
list_item_sound.xml
<layout xmlns:android="http://schemas.android.com/apk/res/android"
    xmlns:tools="http://schemas.android.com/tools" >

    <data>
        <variable
            name="viewModel"
            type="com.example.BeatBox.SoundViewModel" />
    data>

    <FrameLayout
        android:layout_width="match_parent"
        android:layout_height="wrap_content"
        android:layout_margin="8dp">
        <Button
            android:layout_width="match_parent"
            android:layout_height="match_parent"
            android:onClick="@{()->viewModel.onButtonClicked()}"
            android:text="@{viewModel.title}"
            tools:text="Sound name"/>
    FrameLayout>

layout>
这里将新建一个 SoundViewModel类,而让他两连接起来。很简单,只需要上面代码中的data部分即可,不过你需要同时在build.gradle(app)里面设置可以进行数据绑定
android {
   compileSdkVersion 29
   buildToolsVersion "29.0.2"
   ……
   dataBinding{
       enabled=true
   }
}
还有一行代码值得注意
android:onClick="@{()->viewModel.onButtonClicked()}"
进行viewModel绑定时特殊的写法,只需要在ViewModel中创建onButtonCilicked方法即可完成点击事件,无需监听器
然后创建
SoundViewModel
import androidx.databinding.BaseObservable;

/**
 * 为了让sound与布局文件联系,如果使用Fragment作为中转的话,必须要再定义一个专门针对Sound
 * 的fragment,这和Sound模型有冲突,所以定义这个ViewModel,来联系Sound和View
 */
public classSoundViewModel extends BaseObservable {
    private final String TAG = " SoundViewModel";
    private Sound mSound;
    private BeatBox mBeatBox;

    public SoundViewModel(BeatBox beatBox) {
        mBeatBox = beatBox;
    }

    public Sound getSound() {
        return mSound;
    }

    //获取sound的名字
    public String getTitle() {
        return mSound.getName();
    }
    public void setSound(Sound sound) {
        mSound = sound;
        notifyChange();//针对继承的BaseObservable,只要有更新就会通知绑定类
    }

    public void onButtonClicked() {
        mBeatBox.play(mSound);
//        Log.d(TAG, "onButtonClicked: 已点击播放"+mSound.getName());
    }
}
这个 SoundViewModel的作用在于可以实时的将Sound的数据显示到list_item_sound.xml文件中,也可以让BeatBox开始播放音乐,完成这些方法,最后我们只需要在BeatBoxFragment随便调用即可
核心完成代码
BeatBoxFragment的布局文件如下,就是一个简单的recyclerview
fragment_beat_box.xml
<layout
    xmlns:android="http://schemas.android.com/apk/res/android">
    <androidx.recyclerview.widget.RecyclerView
        android:id="@+id/recycler_view"
        android:layout_width="match_parent"
        android:layout_height="match_parent" />
layout>
注意,这里我们使用的layout布局,他可以告诉数据绑定工具:“这个布局由你来处理”,同时默认生成了一个绑定类FragmentBeatBoxBinding,所以现在如果要实例化视图层级结构,就不用LayoutInflater了,只需实例化FragmentBeatBoxBinding类即可
他将以getRoot()方法引用整个布局,其他子布局将以android:id标签引用
比如对于fragment_beat_box.xml这个文件,getRoot()获得整个RecyclerView布局,而get_recycler_view()获得id名为recycler_view的布局,当然,在这里,他们是同一个布局
BeatBoxFragment
万事俱备,我们来看看最后的代码
首先,创建数据和fragment,在这里获取BeatBox,此时的BeatBox里面有一个list,包含所有的sound,每个sound包含id,路径和文件名
 public void onCreate(Bundle savedInstanceState) {
        super.onCreate(savedInstanceState);
        //fragment中的保护实例不被销毁的方法,所在的activity被销毁时,他将保留传给新的activity,解决设备旋转问题
        setRetainInstance(true);
        mBeatBox = new BeatBox(getActivity());
        Log.d(TAG, "onCreate: ");
    }
其次,创建视图
 @Override
    public View onCreateView(LayoutInflater inflater, ViewGroup container, Bundle savedInstanceState) {
        FragmentBeatBoxBinding binding= DataBindingUtil.inflate(inflater,R.layout.fragment_beat_box,container,false);
        binding.recyclerView.setLayoutManager(new GridLayoutManager(getActivity(),3));
        binding.recyclerView.setAdapter(new SoundAdapter(mBeatBox.getSounds()));
        Log.d(TAG, "onCreateView: ");
        return binding.getRoot();
    }
看见了吗,这里直接可以定义FragmentBeatBoxBinding 类,通过DataBindingUtil类获取到fragment_beat_box就完成了视图的实例化,很方便有木有!
然后给recyclerView设置布局和适配器,最后返回整个布局即可
接下来就是关键,适配器的设置
/**
     * 适配器获取每一个绑定的item,返回到SoundHolder
     */
    private class SoundAdapter extends RecyclerView.Adapter<SoundHolder>{
        private List<Sound> mSounds;
        public SoundAdapter(List<Sound> sounds) {
            mSounds = sounds;
        }
        @NonNull
        @Override
        public SoundHolder onCreateViewHolder(@NonNull ViewGroup parent, int viewType) {
            LayoutInflater inflater = LayoutInflater.from(getActivity());
            ListItemSoundBinding listItemSoundBinding = DataBindingUtil.inflate(inflater, R.layout.list_item_sound, parent, false);
            return new SoundHolder(listItemSoundBinding);
        }

        @Override
        public void onBindViewHolder(@NonNull SoundHolder holder, int position) {
            Sound sound = mSounds.get(position);
            holder.bind(sound);
        }

        @Override
        public int getItemCount() {
            return mSounds.size();
        }
    }
这里的适配器也是直接通过ListItemSoundBinding 类获取到list_item_sound.xml的实例,然后将其传到SoundHolder中
private class SoundHolder extends RecyclerView.ViewHolder {
        private ListItemSoundBinding mListItemSoundBinding;
        private SoundHolder(ListItemSoundBinding binding) {
            super(binding.getRoot());
            mListItemSoundBinding=binding;
            //在数据绑定对象中设置ViewModel,这样mListItemSoundBinding
            // 就通过ViewModel获得了BeatBox
            mListItemSoundBinding.setViewModel(new SoundViewModel(mBeatBox));
        }
        //更新新的sound数据
        public void bind(Sound sound) {
            mListItemSoundBinding.getViewModel().setSound(sound);
            mListItemSoundBinding.executePendingBindings();//强迫recyclerView刷新,更加流畅
        }
    }
在Soundholder中,mListItemSoundBinding就将mBeatBox放到新建的 SoundViewModel中,让 SoundViewModel可以操纵数据,这样list_item_sound就和SoundView联系起来,可以进行数据交互了
样式
最后还有关于为什么按钮全部变成一样的操作,在styles中,我们这样
styles.xml
<resources>
<style name="AppTheme" parent="Theme.AppCompat">
- "colorPrimary"
>@color/red
- "colorPrimaryDark">@color/dark_red
- "colorAccent">@color/gray
- "android:windowBackground">@color/soothing_blue
- "buttonStyle">@style/BeatBoxButton
style>
<style name="BeatBoxButton" parent="Widget.AppCompat.Button">
- "android:background"
>@drawable/button_beat_box
style>
resources>
这里是对主题进行修改
android:windowBackground就是设置整个窗口颜色为蓝色
buttonStyle就是设置按钮样式为BeatBoxButton
而我们在下面定义了BeatBoxButton样式的背景为button_beat_box
在drawable中
完整资源和代码文件在github中,有兴趣可以去看看