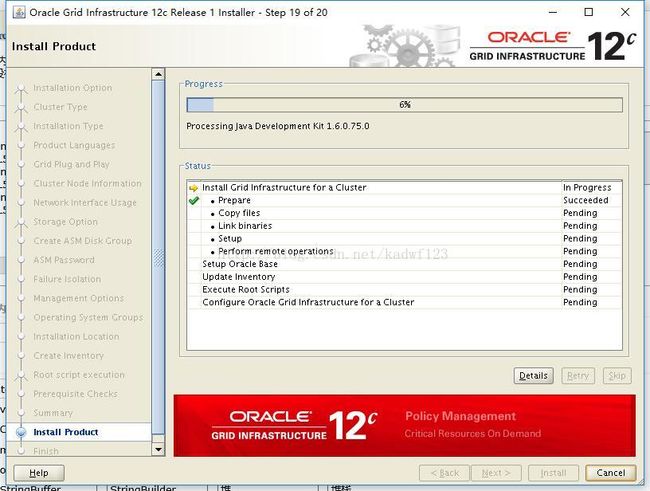
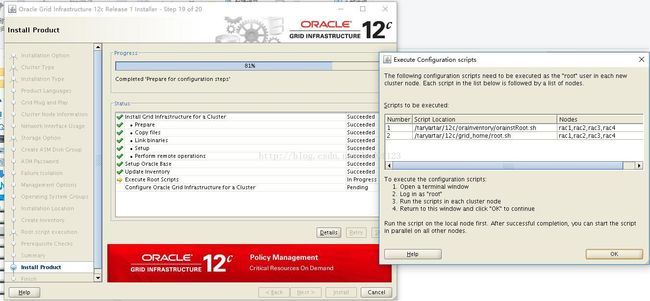
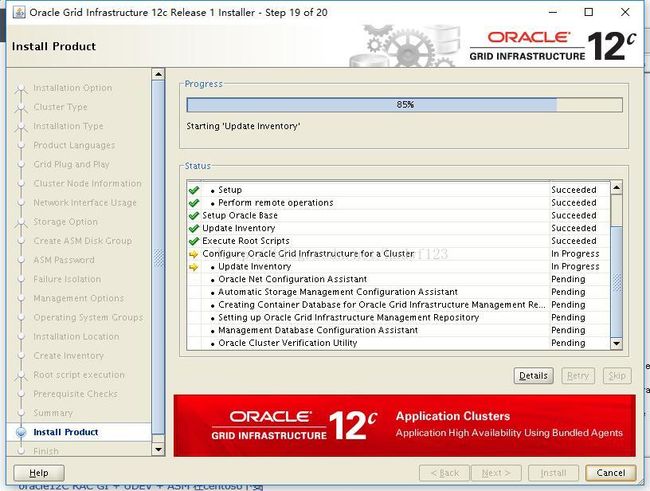
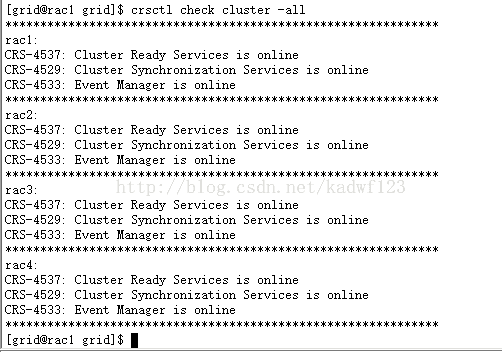
oracle 12c GI安装详细步骤(oracle 12C + Grid Infrastructure(GI) + UDEV + ASM +centos6.4)
1、前面准备阶段博客:
http://blog.csdn.net/kadwf123/article/details/78235488
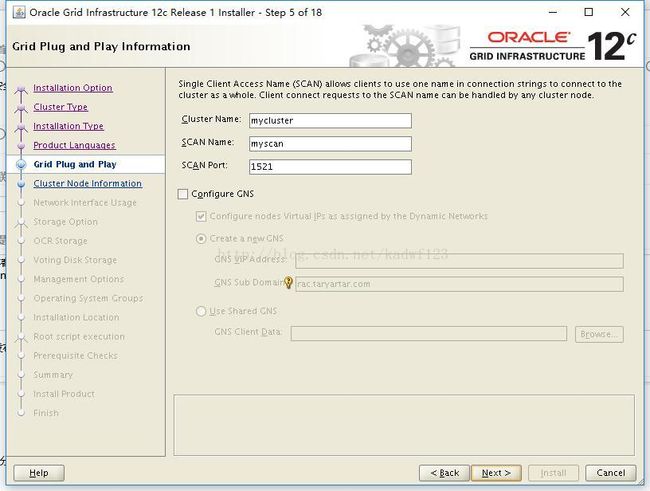
2、scan初体验:
[root@rac1 ~]# nslookup rac4
Server:         192.168.0.88
Address:        192.168.0.88#53

Name:   rac4.taryartar.com
Address: 192.168.0.54

[root@rac1 ~]# ping myscan
PING myscan.taryartar.com (192.168.0.61) 56(84) bytes of data.
From rac1.taryartar.com (192.168.0.51) icmp_seq=2 Destination Host Unreachable
From rac1.taryartar.com (192.168.0.51) icmp_seq=3 Destination Host Unreachable
From rac1.taryartar.com (192.168.0.51) icmp_seq=4 Destination Host Unreachable
From rac1.taryartar.com (192.168.0.51) icmp_seq=6 Destination Host Unreachable
From rac1.taryartar.com (192.168.0.51) icmp_seq=7 Destination Host Unreachable
From rac1.taryartar.com (192.168.0.51) icmp_seq=8 Destination Host Unreachable
^C
--- myscan.taryartar.com ping statistics ---
10 packets transmitted, 0 received, +6 errors, 100% packet loss, time 9363ms
pipe 3
[root@rac1 ~]# ping myscan
PING myscan.taryartar.com (192.168.0.62) 56(84) bytes of data.
From rac1.taryartar.com (192.168.0.51) icmp_seq=2 Destination Host Unreachable
From rac1.taryartar.com (192.168.0.51) icmp_seq=3 Destination Host Unreachable
From rac1.taryartar.com (192.168.0.51) icmp_seq=4 Destination Host Unreachable
^C
--- myscan.taryartar.com ping statistics ---
5 packets transmitted, 0 received, +3 errors, 100% packet loss, time 4403ms
pipe 3
[root@rac1 ~]# ping myscan
PING myscan.taryartar.com (192.168.0.63) 56(84) bytes of data.
From rac1.taryartar.com (192.168.0.51) icmp_seq=2 Destination Host Unreachable
From rac1.taryartar.com (192.168.0.51) icmp_seq=3 Destination Host Unreachable
From rac1.taryartar.com (192.168.0.51) icmp_seq=4 Destination Host Unreachable
^C
--- myscan.taryartar.com ping statistics ---
4 packets transmitted, 0 received, +3 errors, 100% packet loss, time 3406ms
pipe 3
[root@rac1 ~]#
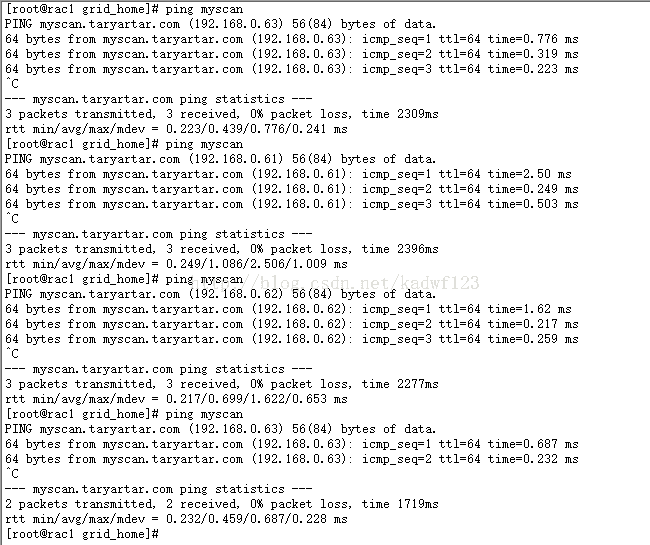
可以看出ping了三次myscan返回了三个不同ip地址。这个就是负载均衡,dns轮询算法,该功能由dns提供的,因为目前我们未安装任何oracle的产品。
3、截止到目前,我们还没有设置四台虚拟机的grid用户和oracle用户的密码。
[root@rac1 ~]# passwd grid
更改用户 grid 的密码 。
新的 密码:
无效的密码: 它基于用户名
重新输入新的 密码:
passwd: 所有的身份验证令牌已经成功更新。
[root@rac1 ~]# passwd oracle
更改用户 oracle 的密码 。
新的 密码:
无效的密码: 它基于用户名
重新输入新的 密码:
passwd: 所有的身份验证令牌已经成功更新。
[root@rac1 ~]#
这个在通过oui安装并且通过oui配置grid和oracle用户等价性的时候会用到,所以要提前设置。四个grid用户的密码要一样,同样四个oracle用户密码也应该一致。
4、配置ftp,把GI安装文件和database安装文件上传到虚拟机。
http://blog.csdn.net/kadwf123/article/details/78255194
5、目录权限问题。
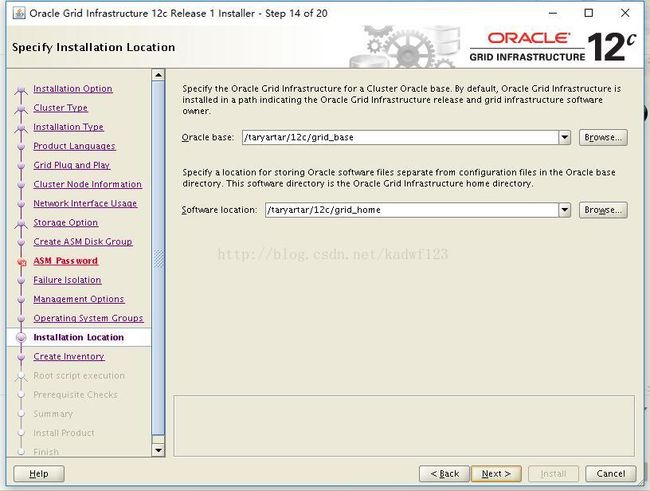
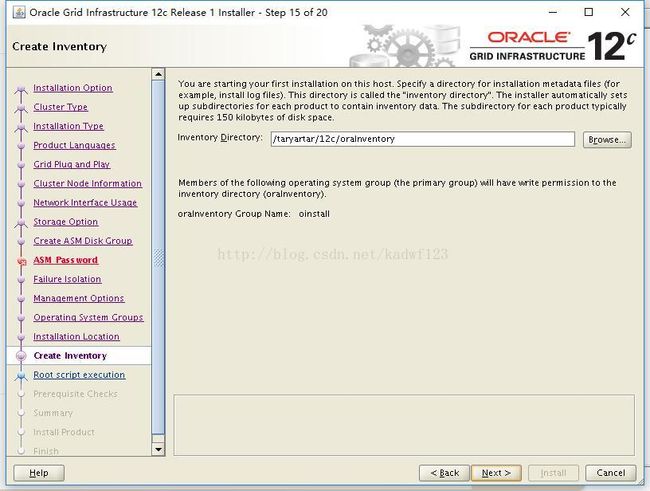
我的安装文件都放在/taryartar/12c目录下面,所以必须保证12c目录必须能够被grid可读可写。同时,oracle OUI安装时会产生产品清单文件默认选在这个目录。
所以这个目录最后给足权限:
四个节点都执行。
6、NTPD时间同步服务;
从oralce11g开始,oracle已经对集群同步专门开发了ctss服务,我们不需要在使用操作系统的NTPD服务,所以,我们可以直接禁用NTPD服务;
oracle的ctss节点时间同步服务会自动检测ntpd服务,如果ntpd服务存在并且在运行,则ctss服务进入观察者模式,节点间的时间同步由ntpd服务来做。
如果ctss发现ntpd服务不存在,则直接接管结群的时间同步任务。
如果ntpd服务没有关闭,请先关闭
service ntpd stop
然后禁止开机自启动。
然后把ntpd的配置文件名改掉。
四个节点都需要做。
7、安装cvudisk包
其中grid目录是安装文件解压缩后创建的目录。
注意,四个节点都要安装。
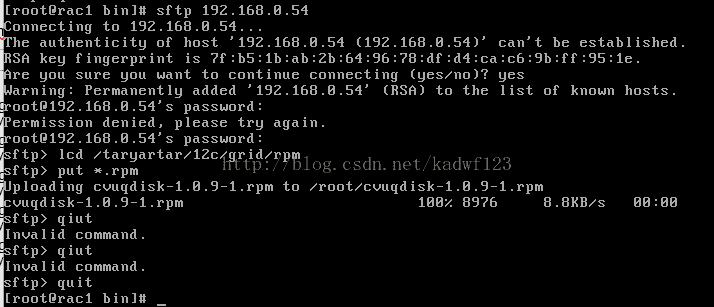
可以通过第一个节点把rpm包ftp到另外三个节点,然后安装:
在节点1上:
sftp 192.168.0.52
lcd /taryartar/12c/grid/rpm
put *.rpm
quit
去节点2root家目录下:
rpm -ivh *.rpm
8、/dev/shm文件系统过小的问题。
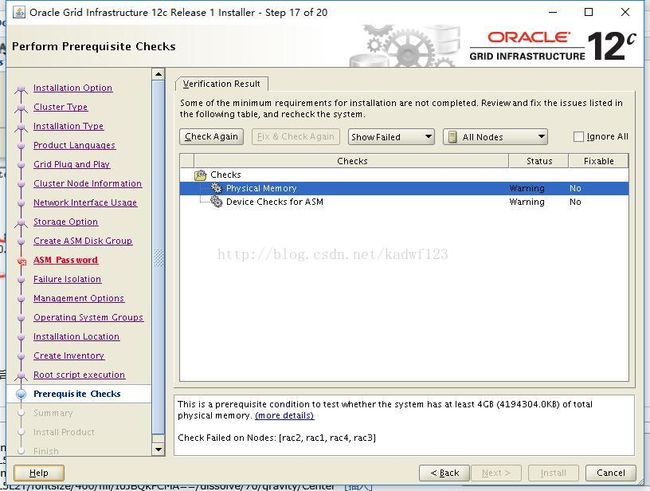
/dev/shm文件系统oracle建议2g,我这边目前只有750m,需要增大,方法如下:
vi /etc/fstab
修改
tmpfs /dev/shm tmpfs defaults 0 0
为
tmpfs /dev/shm tmpfs defaults,size=2048m 0 0
然后重新挂载
umount /dev/shm
mount /dev/shm
就行了。
如果umount的时候遇到文件busy,可以查看哪些进程占用文件系统,可以直接杀掉,然后在umount。
fuser -m /dev/shm
命令输出比如:/dev/shm: 2481m 2571m
查看占用的进程号
然后kill
kill -9 2481 2571
然后重新umount
注意,四个节点都做。
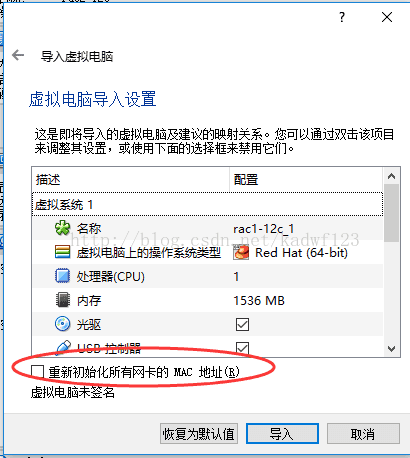
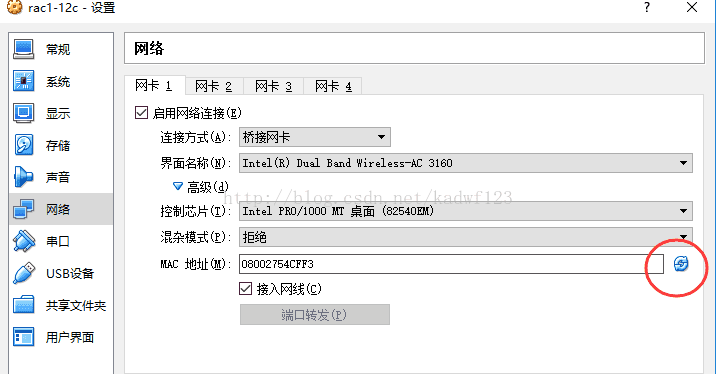
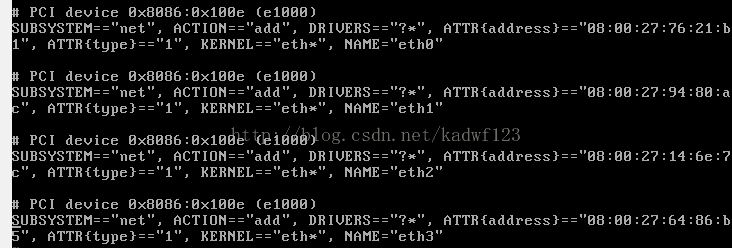
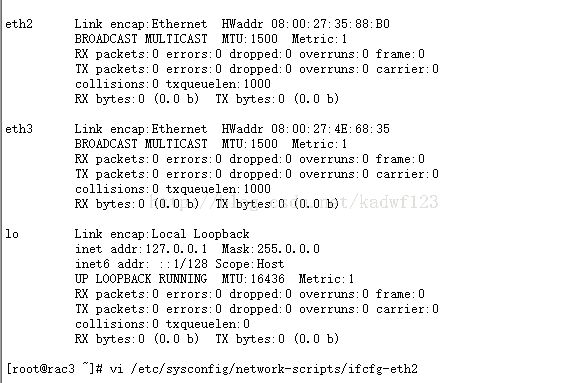
9、通过节点1导入导出产生的节点2-4导致的网卡mac地址都一样的问题。
如果选择导入虚拟机的时候:
[root@rac3 rules.d]# cat 70-persistent-net.rules
# This file was automatically generated by the /lib/udev/write_net_rules
# program, run by the persistent-net-generator.rules rules file.
#
# You can modify it, as long as you keep each rule on a single
# line, and change only the value of the NAME= key.

# PCI device 0x8086:0x100e (e1000)
SUBSYSTEM=="net", ACTION=="add", DRIVERS=="?*", ATTR{address}=="08:00:27:b4:2f:11", ATTR{type}=="1", KERNEL=="eth*", NAME="eth0"

# PCI device 0x8086:0x100e (e1000)
SUBSYSTEM=="net", ACTION=="add", DRIVERS=="?*", ATTR{address}=="08:00:27:68:23:42", ATTR{type}=="1", KERNEL=="eth*", NAME="eth1"

# PCI device 0x8086:0x100e (e1000)
SUBSYSTEM=="net", ACTION=="add", DRIVERS=="?*", ATTR{address}=="08:00:27:4e:68:35", ATTR{type}=="1", KERNEL=="eth*", NAME="eth3"

# PCI device 0x8086:0x100e (e1000)
SUBSYSTEM=="net", ACTION=="add", DRIVERS=="?*", ATTR{address}=="08:00:27:35:88:b0", ATTR{type}=="1", KERNEL=="eth*", NAME="eth2"[root@rac3 ~]# vi /etc/sysconfig/network-scripts/ifcfg-eth2
DEVICE=eth2
HWADDR=08:00:27:35:88:b0
TYPE=Ethernet
ONBOOT=yes
NM_CONTROLLED=yes
BOOTPROTO=none
IPV6INIT=no
USERCTL=no
IPADDR=10.0.10.5
NETMASK=255.255.255.0
GATEWAY=192.168.0.1
[root@rac3 ~]# vi /etc/sysconfig/network-scripts/ifcfg-eth3

DEVICE=eth3
HWADDR=08:00:27:4e:68:35
TYPE=Ethernet
ONBOOT=yes
BOOTPROTO=none
IPADDR=10.0.10.6
NETMASK=255.255.255.0
GATEWAY=192.168.0.1
IPV6INIT=no
USERCTL=no
export LANG=en
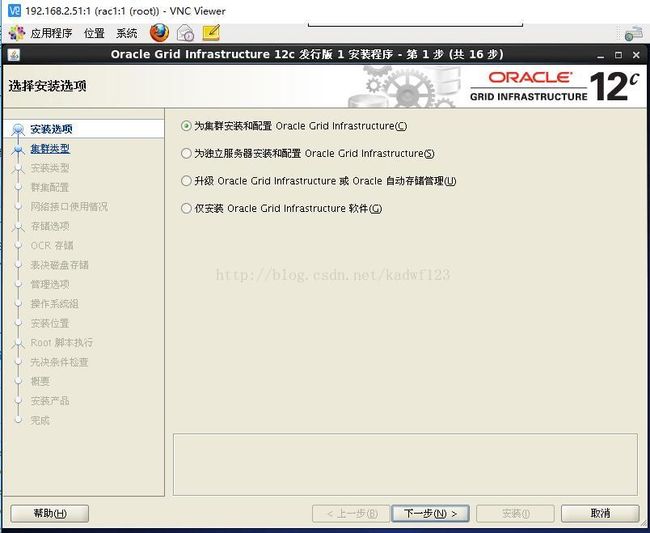
export DISPLAY=192.168.0.4:0.0[wufan@rac1 桌面]$ cat /etc/sysconfig/vncservers
# The VNCSERVERS variable is a list of display:user pairs.
#
# Uncomment the lines below to start a VNC server on display :2
# as my 'myusername' (adjust this to your own). You will also
# need to set a VNC password; run 'man vncpasswd' to see how
# to do that.
#
# DO NOT RUN THIS SERVICE if your local area network is
# untrusted! For a secure way of using VNC, see this URL:
# https://access.redhat.com/knowledge/solutions/7027
# Use "-nolisten tcp" to prevent X connections to your VNC server via TCP.
# Use "-localhost" to prevent remote VNC clients connecting except when
# doing so through a secure tunnel. See the "-via" option in the
# `man vncviewer' manual page.
# VNCSERVERS="2:myusername"
# VNCSERVERARGS[2]="-geometry 800x600 -nolisten tcp -localhost"
VNCSERVERS="1:root"
VNCSERVERARGS[1]="-geometry 1024x800"
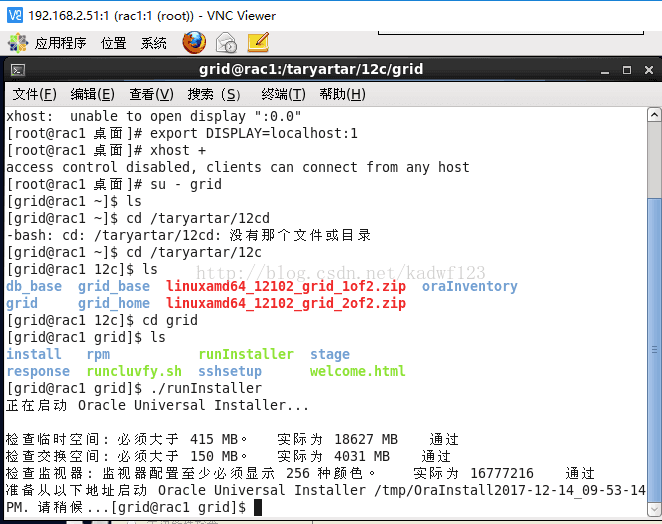
[wufan@rac1 桌面]$ 去grid的解压目录,本例是/taryartar/12c/grid/
[grid@rac1 grid]$ ll
total 44
drwxr-xr-x.  4 grid oinstall 4096 Oct 18 15:03 install
drwxrwxr-x.  2 grid oinstall 4096 Jul  7  2014 response
drwxr-xr-x.  2 grid oinstall 4096 Jul  7  2014 rpm
-rwxr-xr-x.  1 grid oinstall 8534 Jul  7  2014 runInstaller
-rwxr-xr-x.  1 grid oinstall 5085 Dec 20  2013 runcluvfy.sh
drwxrwxr-x.  2 grid oinstall 4096 Jul  7  2014 sshsetup
drwxr-xr-x. 14 grid oinstall 4096 Jul  7  2014 stage
-rwxr-xr-x.  1 grid oinstall  500 Feb  7  2013 welcome.html
[grid@rac1 grid]$ pwd
/taryartar/12c/grid
[grid@rac1 grid]$ ./runcluvfy.sh stage -pre crsinst -n rac1,rac2,rac3,rac4 -fixup -verbose[grid@rac1 grid]$ ./runcluvfy.sh stage -pre crsinst -n rac1,rac2,rac3,rac4 -fixup -verbose
执行 集群服务设置 的预检查
正在检查节点的可访问性...
检查: 节点 "rac1" 的节点可访问性
目标节点 是否可访问?
------------------------------------ ------------------------
rac1 是
rac2 是
rac3 是
rac4 是
结果:节点 "rac1" 的节点可访问性检查已通过
正在检查等同用户...
检查: 用户 "grid" 的等同用户
节点名 状态
------------------------------------ ------------------------
rac2 失败
rac1 失败
rac4 失败
rac3 失败
PRVG-2019 : 用户 "grid" 在节点 "rac1" 和节点 "rac2" 之间的等同性检查出错
PRKC-1044 : 无法利用 Shell /usr/bin/ssh 和 /usr/bin/rsh 检查节点 rac2 的远程命令执行安装
节点 "rac2" 上不存在文件 "/usr/bin/rsh"
No RSA host key is known for rac2 and you have requested strict checking.Host key verification failed.
PRVG-2019 : 用户 "grid" 在节点 "rac1" 和节点 "rac1" 之间的等同性检查出错
PRKC-1044 : 无法利用 Shell /usr/bin/ssh 和 /usr/bin/rsh 检查节点 rac1 的远程命令执行安装
节点 "rac1" 上不存在文件 "/usr/bin/rsh"
No RSA host key is known for rac1 and you have requested strict checking.Host key verification failed.
PRVG-2019 : 用户 "grid" 在节点 "rac1" 和节点 "rac4" 之间的等同性检查出错
PRKC-1044 : 无法利用 Shell /usr/bin/ssh 和 /usr/bin/rsh 检查节点 rac4 的远程命令执行安装
节点 "rac4" 上不存在文件 "/usr/bin/rsh"
No RSA host key is known for rac4 and you have requested strict checking.Host key verification failed.
PRVG-2019 : 用户 "grid" 在节点 "rac1" 和节点 "rac3" 之间的等同性检查出错
PRKC-1044 : 无法利用 Shell /usr/bin/ssh 和 /usr/bin/rsh 检查节点 rac3 的远程命令执行安装
节点 "rac3" 上不存在文件 "/usr/bin/rsh"
No RSA host key is known for rac3 and you have requested strict checking.Host key verification failed.
ERROR:
等同用户在所有指定的节点上都不可用
验证无法继续
在所有节点上预检查 集群服务设置 失败。
NOTE:
没有要修复的可修复验证故障
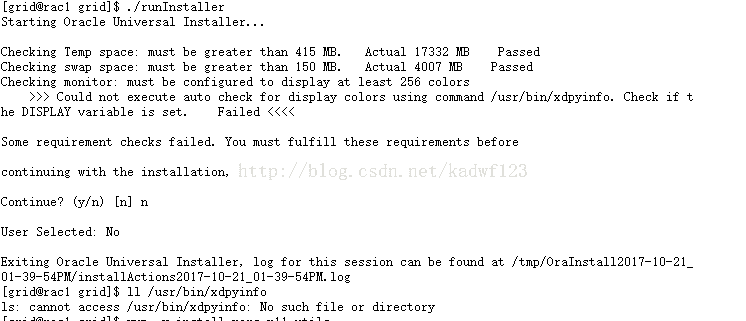
[grid@rac1 grid]$ [root@rac1 grid]# yum -y install xorg-x11-utils
Loaded plugins: fastestmirror, security
Loading mirror speeds from cached hostfile
Setting up Install Process
Resolving Dependencies
--> Running transaction check
---> Package xorg-x11-utils.x86_64 0:7.5-14.el6 will be installed
--> Processing Dependency: libdmx.so.1()(64bit) for package: xorg-x11-utils-7.5-14.el6.x86_64
--> Processing Dependency: libXxf86dga.so.1()(64bit) for package: xorg-x11-utils-7.5-14.el6.x86_64
--> Running transaction check
---> Package libXxf86dga.x86_64 0:1.1.4-2.1.el6 will be installed
---> Package libdmx.x86_64 0:1.1.3-3.el6 will be installed
--> Finished Dependency Resolution
Dependencies Resolved
===================================================================================================
Package Arch Version Repository Size
===================================================================================================
Installing:
xorg-x11-utils x86_64 7.5-14.el6 base 101 k
Installing for dependencies:
libXxf86dga x86_64 1.1.4-2.1.el6 base 18 k
libdmx x86_64 1.1.3-3.el6 base 15 k
Transaction Summary
===================================================================================================
Install 3 Package(s)
Total download size: 133 k
Installed size: 270 k
Downloading Packages:
(1/3): libXxf86dga-1.1.4-2.1.el6.x86_64.rpm | 18 kB 00:00
(2/3): libdmx-1.1.3-3.el6.x86_64.rpm | 15 kB 00:00
(3/3): xorg-x11-utils-7.5-14.el6.x86_64.rpm | 101 kB 00:00
------------------------------------------------------------------------------------------------------------------------------------
Total 9.3 kB/s | 133 kB 00:14
Running rpm_check_debug
Running Transaction Test
Transaction Test Succeeded
Running Transaction
Warning: RPMDB altered outside of yum.
Installing : libXxf86dga-1.1.4-2.1.el6.x86_64 1/3
Installing : libdmx-1.1.3-3.el6.x86_64 2/3
Installing : xorg-x11-utils-7.5-14.el6.x86_64 3/3
Verifying : libdmx-1.1.3-3.el6.x86_64 1/3
Verifying : xorg-x11-utils-7.5-14.el6.x86_64 2/3
Verifying : libXxf86dga-1.1.4-2.1.el6.x86_64 3/3
Installed:
xorg-x11-utils.x86_64 0:7.5-14.el6
Dependency Installed:
libXxf86dga.x86_64 0:1.1.4-2.1.el6 libdmx.x86_64 0:1.1.3-3.el6
Complete!
[root@rac1 grid]# tail -f /taryartar/12c/grid_home/log/rac1/ohasd/ohasd.log
tail -f /taryartar/12c/grid_home/log/rac1/agent/ohasd/oraagent_grid/oraagent_grid.log
tail -f $GRID_HOME/log/`hostname`/”alert`hostname`.log”tail -f /var/log/messages要以root用户登陆到每个节点,进入grid_home目录
cd $ORACLE_HOME
cd /crs/install
perl rootcrs.pl -deconfig -force (在单节点执行,然后重复执行这条命令在每个节点)
perl rootcrs.pl -deconfig -force -lastnode (如果是想删除所有的节点,加上选项-lastnode很危险,因为它会导致清除OCR和vote disks的数据)
在从新执行root.sh脚本。
有时候进行多次运行root.sh以后可能导致无法解释的错误,此时,比较好的办法是对GI进行干净的卸载,然后重新安装。
一旦root.sh在第一个脚本执行成功后,可以并行在另外3个节点执行。
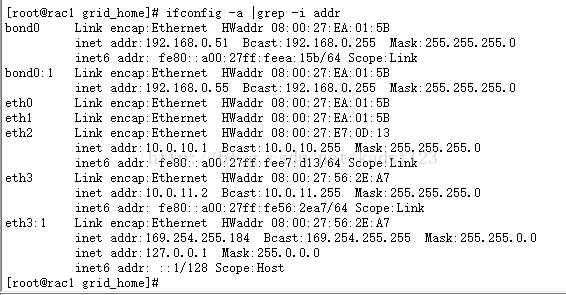
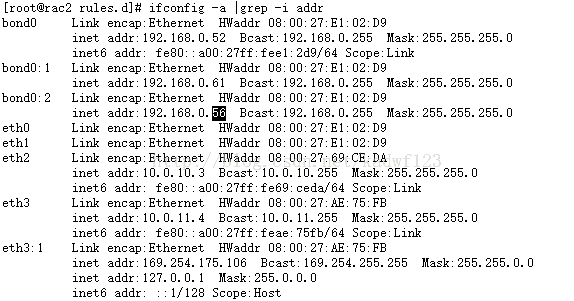
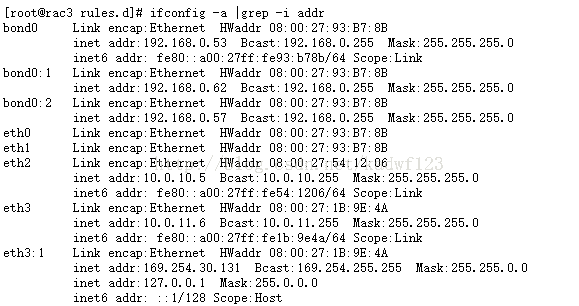
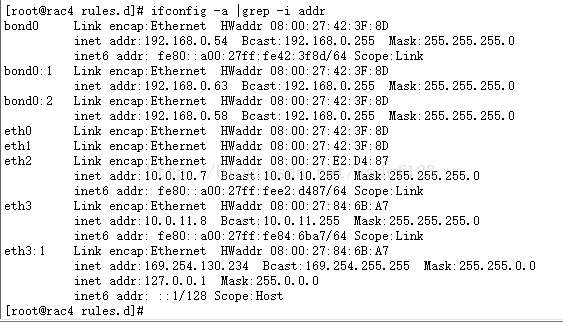
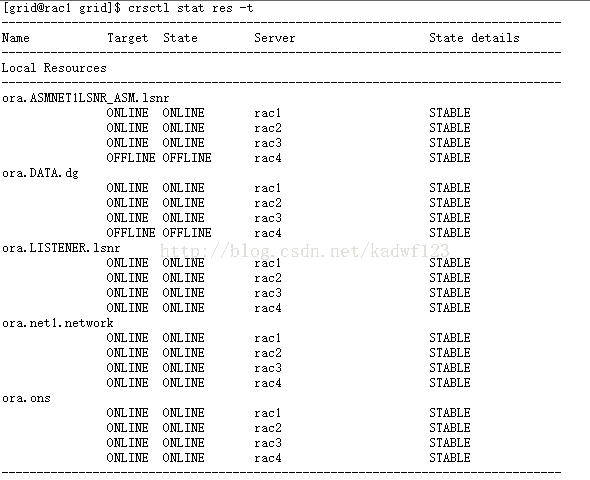
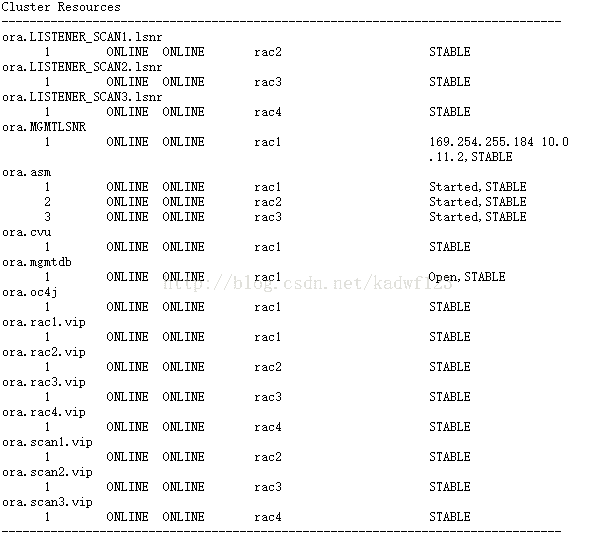
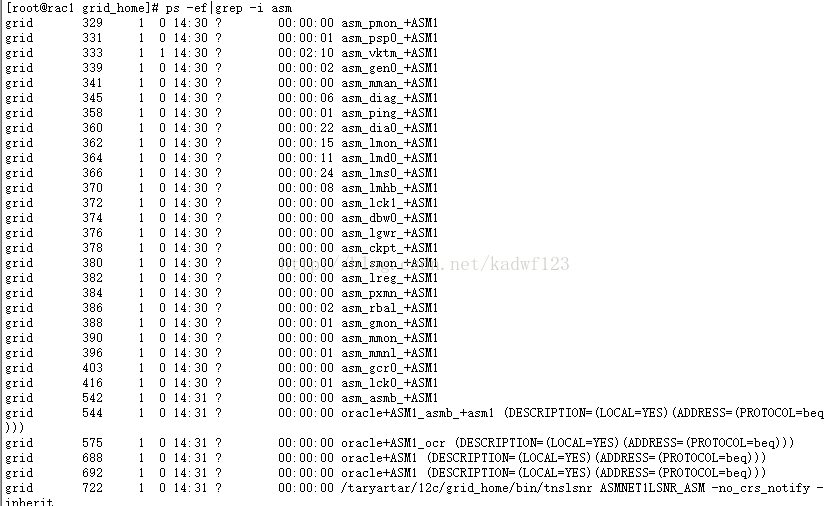
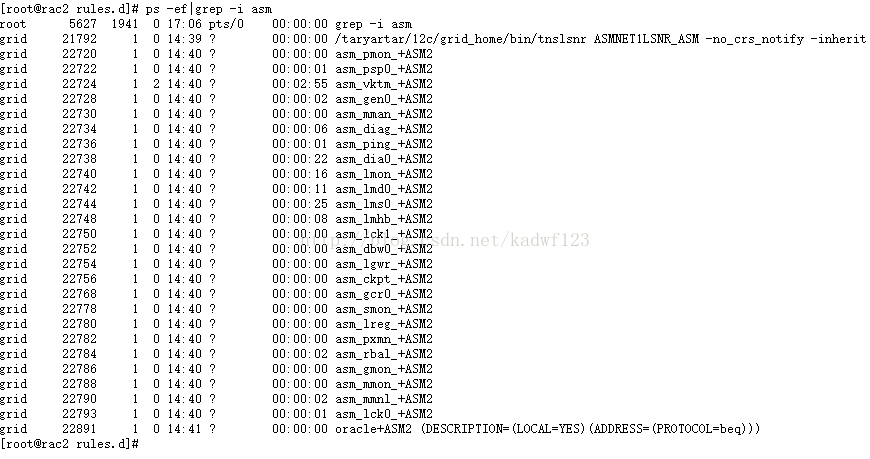
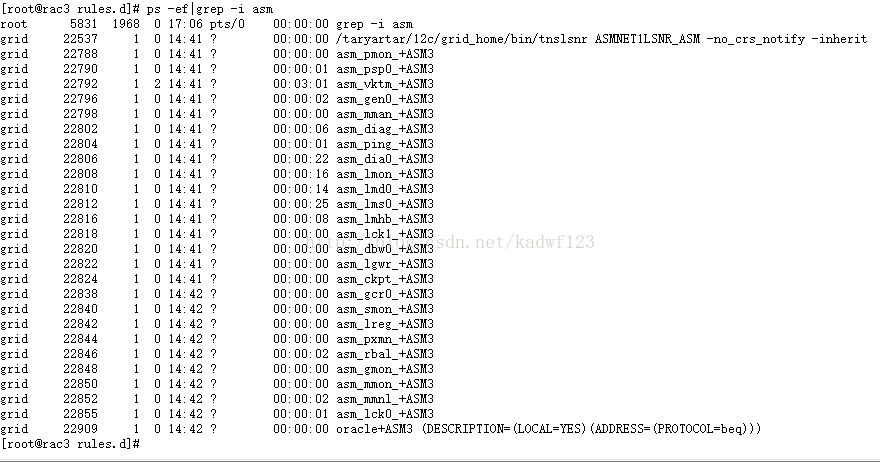
olsnodes -scrsctl check crsifconfig -a |grep -i addrps -ef|grep -i scansrvctl status scan_listenerasmcmd showclusterstatecrsctl stat res -tps -ef|grep -i asmsrvctl config asm


