android自定义view-打造圆形ImageView(一)
前言:
大家在很多应用不难发现,用户的头像那一块的imageview是圆形的,可是我们并没有现成的圆形ImageView调用,那么最常见的思路就是自己去写一个属于自己的圆形ImageView,基于这样的出发点,今天我们就自己动手去写一个圆形ImageView方便日后直接使用。为什么标题会有(一)呢,其实打造圆形ImageView,我能想到的有三种方式,
- BitmapShader(渲染器,将画笔用bitmap图形填充)
- Xfermode
- 继承drawable
其实就我个人使用而言的话,使用很多三方图片加载框架如picasso,universal-image-loader,volley的时候,使用继承自ImageView方式的圆形Imageview比较方便一点,也就是我们这里的前两种方式,不过我们的drawable方式是最简单的。当然了,最简单的当然是留到最后再说啦。
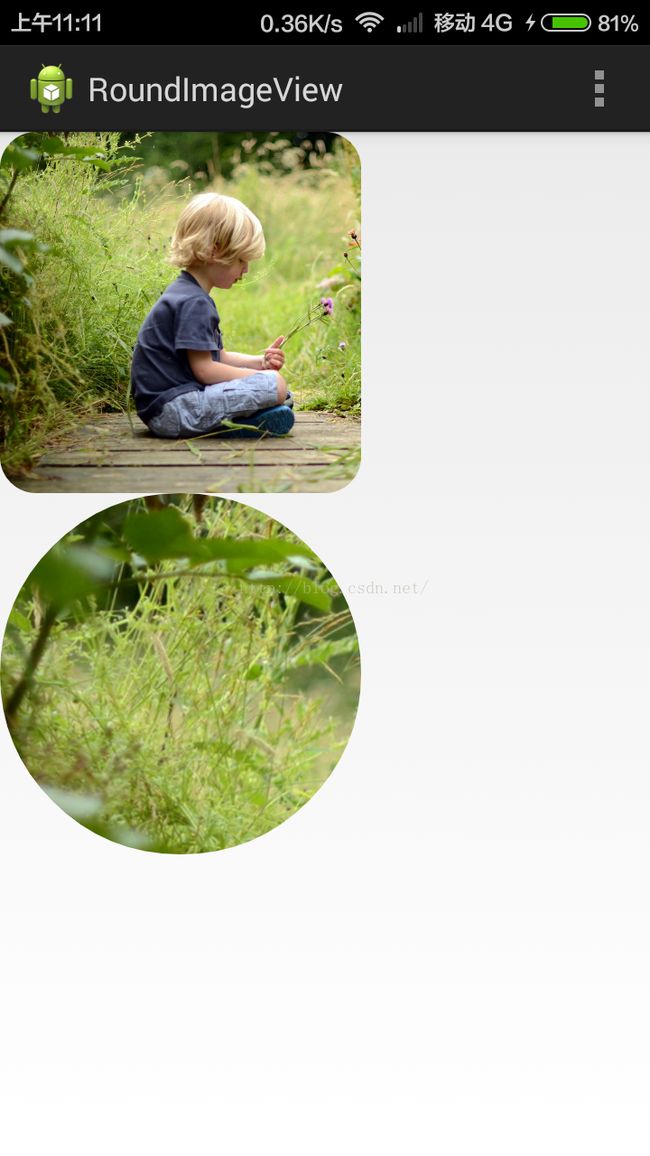
截图:
这边我们的imageview可以设置成圆形或者圆角的,原来我们写圆角的ImageView的时候要设置xml,然后设置drawable,这里直接使用,很方便的。
正文:
首先,任何重写view都需要的几个步骤:
- 继承view
- 自定义属性
- 重写onMeasure方法【可不重写】
- 重写onDraw方法
Step1:继承View
public class RoundImageView extends ImageView
Step3:在构造器中初始化值
	public RoundImageView(Context context) {
		this(context, null);
	}

	public RoundImageView(Context context, AttributeSet attrs) {
		this(context, attrs, 0);
	}

	public RoundImageView(Context context, AttributeSet attrs, int defStyle) {
		super(context, attrs, defStyle);
		// 初始化画笔等属性
		mMatrix = new Matrix();
		mPaint = new Paint();
		mPaint.setAntiAlias(true);
		// 获取自定义属性值
		TypedArray array = context.getTheme().obtainStyledAttributes(attrs, R.styleable.RoundImageView, defStyle, 0);
		int count = array.getIndexCount();
		for (int i = 0; i < count; i++) {
			int attr = array.getIndex(i);
			switch (attr) {
			case R.styleable.RoundImageView_borderRadius:
				// 获取圆角大小
				mBorderRadius = array.getDimensionPixelSize(R.styleable.RoundImageView_borderRadius, (int) TypedValue.applyDimension(TypedValue.COMPLEX_UNIT_DIP, BORDER_RADIUS_DEFAULT, getResources().getDisplayMetrics()));
				break;
			case R.styleable.RoundImageView_imageType:
				// 获取ImageView的类型
				type = array.getInt(R.styleable.RoundImageView_imageType, TYPE_CIRCLE);
				break;
			}
		}
		// Give back a previously retrieved StyledAttributes, for later re-use.
		array.recycle();
	}
Step4:重写onMeasure方法
@Override
	protected void onMeasure(int widthMeasureSpec, int heightMeasureSpec) {
		super.onMeasure(widthMeasureSpec, heightMeasureSpec);
		// 如果是圆形,则强制宽高一致,以最小的值为准
		if (type == TYPE_CIRCLE) {
			mWidth = Math.min(getMeasuredWidth(), getMeasuredHeight());
			mRadius = mWidth / 2;
			setMeasuredDimension(mWidth, mWidth);
		}
	}
Step5:重写onDraw方法
@Override
	protected void onDraw(Canvas canvas) {
		if (getDrawable() == null) {
			return;
		}
		// 设置渲染器
		setShader();
		if (type == TYPE_ROUND) {
			canvas.drawRoundRect(mRectF, mBorderRadius, mBorderRadius, mPaint);
		} else {
			canvas.drawCircle(mRadius, mRadius, mRadius, mPaint);
		}
}private void setShader() {
Drawable drawable = getDrawable();
if (drawable == null) {
return;
}
Bitmap bitmap = drawable2Bitmap(drawable);
mBitmapShader = new BitmapShader(bitmap, TileMode.CLAMP, TileMode.CLAMP);
float scale = 1.0f;
if (type == TYPE_ROUND) {
scale = Math.max(getWidth() * 1.0f / bitmap.getWidth(), getHeight() * 1.0f / bitmap.getHeight());
} else if (type == TYPE_CIRCLE) {
// 取小值,如果取大值的话,则不能覆盖view
int bitmapWidth = Math.min(bitmap.getWidth(), getHeight());
scale = mWidth * 1.0f / bitmapWidth;
}
mMatrix.setScale(scale, scale);
mBitmapShader.setLocalMatrix(mMatrix);
mPaint.setShader(mBitmapShader);
}
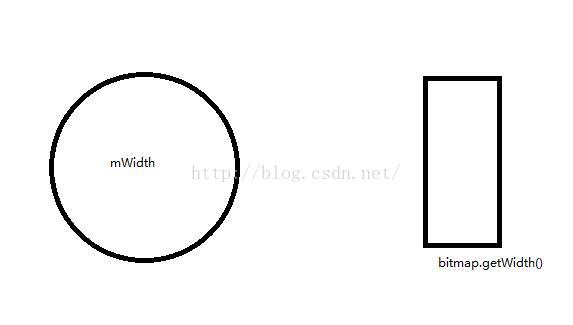
我上面代码的分子分母颠倒了,所以取的是大值。如果是圆形呢?
如果是我们的drawable宽度小的话,就方法至圆形宽度,如果是大于drawble宽度的话,就缩小至view的宽度。接下来就是变换Shader的Matrix矩阵了:
mMatrix.setScale(scale, scale);
mBitmapShader.setLocalMatrix(mMatrix);
mPaint.setShader(mBitmapShader);
贴一下完整的代码:
RoundImageView.java:
package com.beyole.view;
import com.beyole.roundimageview.R;
import android.content.Context;
import android.content.res.TypedArray;
import android.graphics.Bitmap;
import android.graphics.BitmapShader;
import android.graphics.Canvas;
import android.graphics.Matrix;
import android.graphics.Paint;
import android.graphics.Bitmap.Config;
import android.graphics.RectF;
import android.graphics.Shader.TileMode;
import android.graphics.drawable.BitmapDrawable;
import android.graphics.drawable.Drawable;
import android.util.AttributeSet;
import android.util.TypedValue;
import android.widget.ImageView;
public class RoundImageView extends ImageView {
// ImageView类型
private int type;
// 圆形图片
private static final int TYPE_CIRCLE = 0;
// 圆角图片
private static final int TYPE_ROUND = 1;
// 默认圆角宽度
private static final int BORDER_RADIUS_DEFAULT = 10;
// 获取圆角宽度
private int mBorderRadius;
// 画笔
private Paint mPaint;
// 半径
private int mRadius;
// 缩放矩阵
private Matrix mMatrix;
// 渲染器,使用图片填充形状
private BitmapShader mBitmapShader;
// 宽度
private int mWidth;
// 圆角范围
private RectF mRectF;
public RoundImageView(Context context) {
this(context, null);
}
public RoundImageView(Context context, AttributeSet attrs) {
this(context, attrs, 0);
}
public RoundImageView(Context context, AttributeSet attrs, int defStyle) {
super(context, attrs, defStyle);
// 初始化画笔等属性
mMatrix = new Matrix();
mPaint = new Paint();
mPaint.setAntiAlias(true);
// 获取自定义属性值
TypedArray array = context.getTheme().obtainStyledAttributes(attrs, R.styleable.RoundImageView, defStyle, 0);
int count = array.getIndexCount();
for (int i = 0; i < count; i++) {
int attr = array.getIndex(i);
switch (attr) {
case R.styleable.RoundImageView_borderRadius:
// 获取圆角大小
mBorderRadius = array.getDimensionPixelSize(R.styleable.RoundImageView_borderRadius, (int) TypedValue.applyDimension(TypedValue.COMPLEX_UNIT_DIP, BORDER_RADIUS_DEFAULT, getResources().getDisplayMetrics()));
break;
case R.styleable.RoundImageView_imageType:
// 获取ImageView的类型
type = array.getInt(R.styleable.RoundImageView_imageType, TYPE_CIRCLE);
break;
}
}
// Give back a previously retrieved StyledAttributes, for later re-use.
array.recycle();
}
@Override
protected void onMeasure(int widthMeasureSpec, int heightMeasureSpec) {
super.onMeasure(widthMeasureSpec, heightMeasureSpec);
// 如果是圆形,则强制宽高一致,以最小的值为准
if (type == TYPE_CIRCLE) {
mWidth = Math.min(getMeasuredWidth(), getMeasuredHeight());
mRadius = mWidth / 2;
setMeasuredDimension(mWidth, mWidth);
}
}
@Override
protected void onDraw(Canvas canvas) {
if (getDrawable() == null) {
return;
}
// 设置渲染器
setShader();
if (type == TYPE_ROUND) {
canvas.drawRoundRect(mRectF, mBorderRadius, mBorderRadius, mPaint);
} else {
canvas.drawCircle(mRadius, mRadius, mRadius, mPaint);
}
}
private void setShader() {
		Drawable drawable = getDrawable();
		if (drawable == null) {
			return;
		}
		Bitmap bitmap = drawable2Bitmap(drawable);
		mBitmapShader = new BitmapShader(bitmap, TileMode.CLAMP, TileMode.CLAMP);
		float scale = 1.0f;
		if (type == TYPE_ROUND) {
			scale = Math.max(getWidth() * 1.0f / bitmap.getWidth(), getHeight() * 1.0f / bitmap.getHeight());
		} else if (type == TYPE_CIRCLE) {
			// 取小值,如果取大值的话,则不能覆盖view
			int bitmapWidth = Math.min(bitmap.getWidth(), getHeight());
			scale = mWidth * 1.0f / bitmapWidth;
		}
		mMatrix.setScale(scale, scale);
		mBitmapShader.setLocalMatrix(mMatrix);
		mPaint.setShader(mBitmapShader);
	}
/**
* 将Drawable转化为Bitmap
*
* @param drawable
* @return
*/
private Bitmap drawable2Bitmap(Drawable drawable) {
if (drawable instanceof BitmapDrawable) {
BitmapDrawable bd = (BitmapDrawable) drawable;
return bd.getBitmap();
}
int w = drawable.getIntrinsicWidth();
int h = drawable.getIntrinsicHeight();
// 创建画布
Bitmap bitmap = Bitmap.createBitmap(w, h, Config.ARGB_8888);
Canvas canvas = new Canvas(bitmap);
drawable.setBounds(0, 0, w, h);
drawable.draw(canvas);
return bitmap;
}
@Override
protected void onSizeChanged(int w, int h, int oldw, int oldh) {
super.onSizeChanged(w, h, oldw, oldh);
mRectF = new RectF(0, 0, getWidth(), getHeight());
}
/**
* 对外公布的设置borderRadius方法
*
* @param borderRadius
*/
public void setBorderRadius(int borderRadius) {
int pxValue = dp2px(borderRadius);
if (this.mBorderRadius != pxValue) {
this.mBorderRadius = pxValue;
// 这时候不需要父布局的onLayout,所以只需要调用onDraw即可
invalidate();
}
}
/**
* 对外公布的设置形状的方法
*
* @param type
*/
public void setType(int type) {
if (this.type != type) {
this.type = type;
if (this.type != TYPE_CIRCLE && this.type != TYPE_ROUND) {
this.type = TYPE_CIRCLE;
}
// 这个时候改变形状了,就需要调用父布局的onLayout,那么此view的onMeasure方法也会被调用
requestLayout();
}
}
/**
* dp2px
*/
public int dp2px(int val) {
return (int) TypedValue.applyDimension(TypedValue.COMPLEX_UNIT_DIP, val, getResources().getDisplayMetrics());
}
}
Step6:使用
嗯,到这里我们的项目就算是结束了。大家有没有觉得不是很难(不敢说简单)。
csdn下载地址:http://download.csdn.net/detail/smarticeberg/9475334
题外话:
android交流群:279031247(广告勿入)
新浪微博:SmartIceberg


