ActiveMQ之整合SpringBoot
基础设施搭建
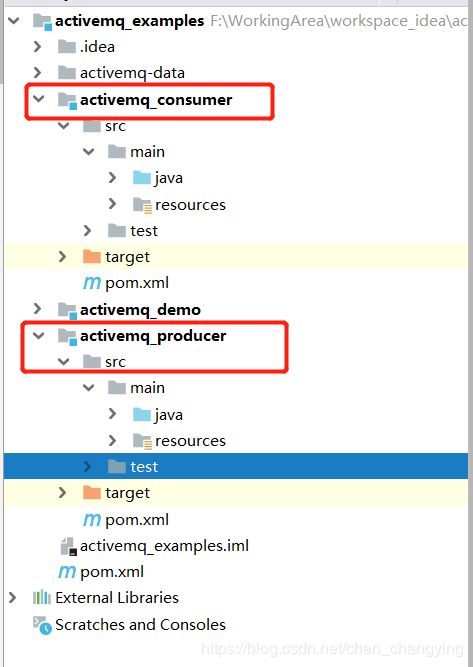
新建生产者和消费者模块:
修改pom文件,增加依赖jar包:
        org.springframework.boot
        spring-boot-starter
        2.1.5.RELEASE


        org.springframework.boot
        spring-boot-starter-web
        2.1.5.RELEASE


        org.springframework.boot
        spring-boot-starter-activemq
        2.1.5.RELEASE
消息生产者
生产者application.yml:
server:
    port: 8081 # 端口号

spring:
    activemq:
        # activemq的broker的url
        broker-url: tcp://192.168.0.166:61616
        # 连接activemq的broker所需的账号和密码
        user: admin
        password: admin
    jms:
        # 目的地是queue还是topic, false(默认) = queue    true =  topic
        pub-sub-domain: false

#  自定义队列名称。这只是个常量
queueName: boot-activemq-queue

# 主题名称
topicName: boot-activemq-topic
生产者配置类:
package com.chaytech.producer;

import org.apache.activemq.command.ActiveMQQueue;
import org.apache.activemq.command.ActiveMQTopic;
import org.springframework.beans.factory.annotation.Value;
import org.springframework.context.annotation.Bean;
import org.springframework.jms.annotation.EnableJms;
import org.springframework.stereotype.Component;

@Component
@EnableJms // 开启jms
public class Config {

    @Value("${queueName}")
    private String queueName;
    @Value("${topicName}")
    private String topicName;

    @Bean
    public ActiveMQQueue activeMQQueue(){
        return new ActiveMQQueue(queueName);
    }

    @Bean
    public ActiveMQTopic activeMQTopic(){
        return new ActiveMQTopic(topicName);
    }
}
生产者消息发送Controller:
package com.chaytech.producer;

import org.springframework.beans.factory.annotation.Autowired;
import org.springframework.jms.core.JmsMessagingTemplate;
import org.springframework.web.bind.annotation.GetMapping;
import org.springframework.web.bind.annotation.PathVariable;
import org.springframework.web.bind.annotation.RequestMapping;
import org.springframework.web.bind.annotation.RestController;

import javax.jms.Queue;
import javax.jms.Topic;

/**
 * 消息生产者
 *
 * @author Chency
 * @email [email protected]
 * @Date 2020/03/25 20:55
 */
@RestController
@RequestMapping("/producer")
public class ProducerController {

    @Autowired
    private JmsMessagingTemplate jmsMessagingTemplate;
    @Autowired
    private Queue queue;
    @Autowired
    private Topic topic;

    /**
     * 发送队列消息
     *
     * @param msg
     */
    @GetMapping("/sendQueueMessage/{msg}")
    public void sendQueueMessage(@PathVariable String msg){
        jmsMessagingTemplate.convertAndSend(this.queue, msg);
    }

    /**
     * 发送主题消息
     *
     * @param msg
     */
    @GetMapping("/sendTopicMessage/{msg}")
    public void sendTopicMessage(@PathVariable String msg){
        jmsMessagingTemplate.convertAndSend(this.topic, msg);
    }
}
启动类:
package com.chaytech;

import org.springframework.boot.SpringApplication;
import org.springframework.boot.autoconfigure.SpringBootApplication;
import org.springframework.scheduling.annotation.EnableScheduling;

/**
 * 生产者启动类
 *
 * @author Chency
 * @email [email protected]
 * @Date 2020/03/25 21:04
 */
@SpringBootApplication
public class ProducerApplication {

    public static void main(String[] args) {
        SpringApplication.run(ProducerApplication.class, args);
    }
}
消息消费者
消费者application.yml:
server:
  port: 8091 # 端口号
spring:
  activemq:
    # activemq的broker的url
    broker-url: tcp://192.168.0.166:61616
    # 连接activemq的broker所需的账号和密码
    user: admin
    password: admin
  jms:
    # 目的地是queue还是topic, false(默认) = queue    true =  topic
    pub-sub-domain: false

#  自定义队列名称。这只是个常量
queueName: boot-activemq-queue

# 主题名称
topicName: boot-activemq-topic
消费者消息监听器,当生产者有发出新的消息后,此处会自动消费:
package com.chaytech.consumer;

import org.springframework.jms.annotation.JmsListener;
import org.springframework.stereotype.Component;

import javax.jms.JMSException;
import javax.jms.TextMessage;

/**
 * 消费者消息监听器
 *
 * @author Chency
 * @email [email protected]
 * @Date 2020/03/25 21:14
 */
@Component
public class ConsumerListener {

    @JmsListener(destination = "${queueName}")
    public void receiveQueueMsg(TextMessage textMessage) throws JMSException {
        System.out.println("消费者监听到的队列消息:" + textMessage.getText());
    }

    @JmsListener(destination = "${topicName}")
    public void receiveTopicMsg(TextMessage textMessage) throws JMSException {
        System.out.println("消费者监听到的主题消息:" + textMessage.getText());
    }
}
启动类:
package com.chaytech;

import org.springframework.boot.SpringApplication;
import org.springframework.boot.autoconfigure.SpringBootApplication;

/**
 * 消费者启动类
 *
 * @author Chency
 * @email [email protected]
 * @Date 2020/03/25 21:11
 */
@SpringBootApplication
public class ConsumerApplication {

    public static void main(String[] args) {
        SpringApplication.run(ConsumerApplication.class, args);
    }
}
队列消息与主题消息切换
前面我们都是往队列里面发消息,那如果需要发主题消息,怎么办呢?
我们只需要修改生产者和消费者的配置文件以及将发送消息时的目的地指向Topic即可:
# 目的地是queue还是topic, false(默认) = queue    true =  topic
spring.jms.pub-sub-domain: false
package com.chaytech.producer;

import org.springframework.beans.factory.annotation.Autowired;
import org.springframework.jms.core.JmsMessagingTemplate;
import org.springframework.web.bind.annotation.GetMapping;
import org.springframework.web.bind.annotation.PathVariable;
import org.springframework.web.bind.annotation.RequestMapping;
import org.springframework.web.bind.annotation.RestController;

import javax.jms.Queue;
import javax.jms.Topic;

/**
 * 消息生产者
 *
 * @author Chency
 * @email [email protected]
 * @Date 2020/03/25 20:55
 */
@RestController
@RequestMapping("/producer")
public class ProducerController {

    @Autowired
    private JmsMessagingTemplate jmsMessagingTemplate;
    @Autowired
    private Topic topic;

    /**
     * 发送主题消息
     *
     * @param msg
     */
    @GetMapping("/sendTopicMessage/{msg}")
    public void sendTopicMessage(@PathVariable String msg){
        jmsMessagingTemplate.convertAndSend(this.topic, msg);
    }
}
定时消息投递
前面我们讲的都是触发式消息投递,那么activeMQ还支持定时消息投递,示例代码如下:
package com.chaytech.producer;

import org.springframework.beans.factory.annotation.Autowired;
import org.springframework.jms.core.JmsMessagingTemplate;
import org.springframework.scheduling.annotation.Scheduled;
import org.springframework.stereotype.Component;

import javax.jms.Queue;
import java.util.UUID;

/**
 * 定时投递消息
 *
 * @author Chency
 * @email [email protected]
 * @Date 2020/03/25 21:07
 */
@Component
public class ProducerScheduled {

    @Autowired
    private JmsMessagingTemplate jmsMessagingTemplate;
    @Autowired
    private Queue queue;

    /**
     * 定时投递消息,间隔3秒
     */
    @Scheduled(fixedDelay = 3000)
    public void scheduledSendQueueMessage(){
        jmsMessagingTemplate.convertAndSend(this.queue, "定时投递消息 —> " + UUID.randomUUID());
    }
}
修改启动类,开启定时投递:
package com.chaytech;

import org.springframework.boot.SpringApplication;
import org.springframework.boot.autoconfigure.SpringBootApplication;
import org.springframework.scheduling.annotation.EnableScheduling;

/**
 * 生产者启动类
 *
 * @author Chency
 * @email [email protected]
 * @Date 2020/03/25 21:04
 */
@SpringBootApplication
@EnableScheduling // 开启定时投递消息
public class ProducerApplication {

    public static void main(String[] args) {
        SpringApplication.run(ProducerApplication.class, args);
    }
}