water ripple shader
https://www.shadertoy.com/view/MsBSz1
http://blog.csdn.net/chenxizhibi/article/details/51291930
const float timeFactor = 10.0;
float ripple(float dist, float rippleIntensity, float rippleScale) {
return rippleScale * (sin(dist * rippleIntensity - iTime * timeFactor) / (dist * rippleIntensity));
}
return rippleScale * (sin(dist * rippleIntensity - iTime * timeFactor) / (dist * rippleIntensity));
}
void mainImage( out vec4 fragColor, in vec2 fragCoord ) {
float intensity = ripple(distance(fragCoord.xy / iResolution.xy, iMouse.xy / iResolution.xy), 100., 5.);
for(int x = 0; x < 2; x++) {
for(int y = 0; y < 2; y++) {
vec2 center = vec2(0.375 + float(x) * 0.25, 0.375 + float(y) * 0.25);
float dist = distance(fragCoord.xy / iResolution.xy, center);
intensity += ripple(dist, 50. + 100. * float(x), 2.5 + 5. * float(y));
}
}
vec4 color = vec4(0.,0.,intensity,1.0);
fragColor = color;
}
这次分析了shadertoy上的一个例子
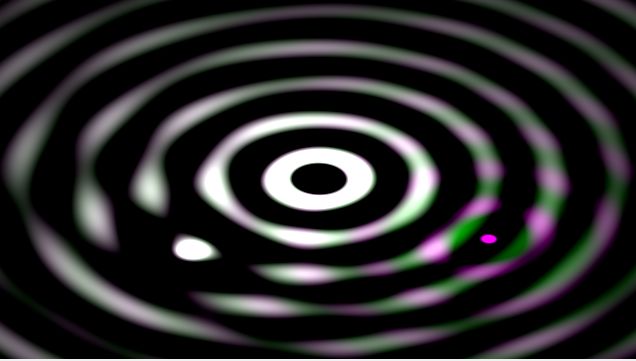
先上效果图。 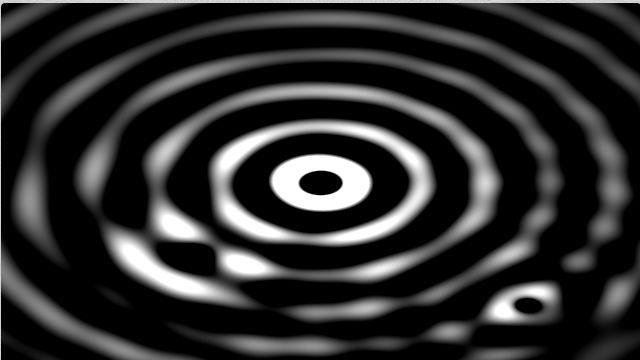
中心是一个大的波纹,我们可以用鼠标控制小的波纹,产生干涉。
用opengl模拟水纹是一个复杂的过程,这里我们采用的方法是。。。欺骗法。
将水纹看成黑白相间的圆环,因为只有黑白两色,水纹上的圆环移动时会产生干涉的假象。
我们还是直接来一步一步的看代码,先在屏幕上画一个圆环。
- 1
- 2
- 3
- 4
- 5
#define PI 3.1415
float ripple(float dis){
    return sin(dis*2.*PI);//返回一个-1到1的值
}

void mainImage( out vec4 fragColor, in vec2 fragCoord )
{
    vec2 uv = fragCoord.xy / iResolution.xy;//每一点的像素
    vec2 center=vec2(0.5,0.5);//圆环中心位置
    float dis=distance(uv,center);//距离
    float value=ripple(dis);
    fragColor = vec4(value,value,value,1.0);
}- 1
- 2
- 3
- 4
- 5
- 6
- 7
- 8
- 9
- 10
- 11
- 12
- 13
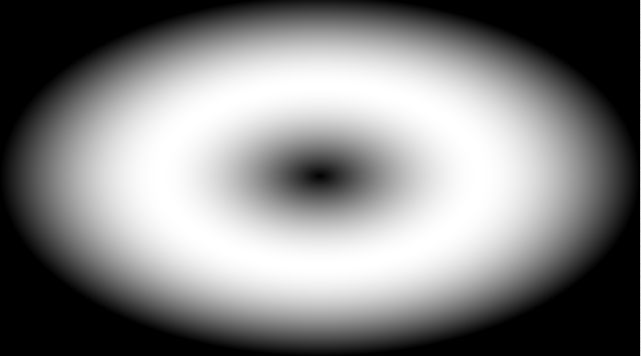
圆环的原理就是定一个中心,如果像素的值到圆环都相等,则这一圈像素颜色一样,sin函数会返回-1到1,如果返回的值小于0,在赋颜色的时候会将其置为0,也就是黑色。
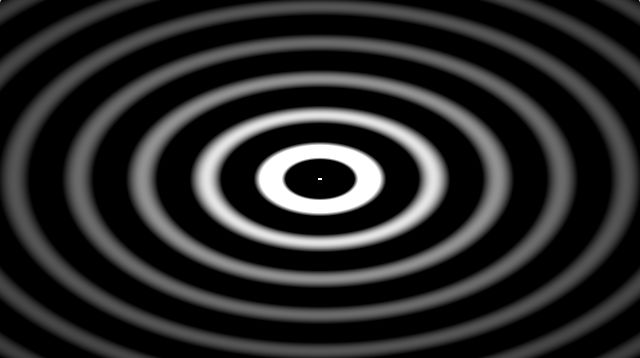
然后我们可以根据正弦函数的性质,给圆环加上大小,疏密等属性。
- 1
- 2
- 3
float ripple(float dis,float scale,float width,float num,float speed){
    return width*(sin(dis*2.*PI*num-iGlobalTime*speed)/(1./scale*dis*2.*PI*num));
}//dis:距离 scale:圆环扩散的距离 width:圆环宽度 num:圆环疏密 speed:圆环扩散速度 - 1
- 2
- 3
这个公式可以试着调调看,比如`-iGlobalTime*speed` 改变他的正负值,`(1./scale*dis*2.*PI*num)`不要这个值试试。
然后我们再画一个小圆,距离为鼠标到每一个像素的值。
- 1
- 2
- 3
value+=ripple(distance(uv,iMouse.xy/iResolution.xy),2.,1.,10.,5.);- 1
将小圆的像素值叠加到中心波纹上,最后返回的仍然是value的值。
如果你想要更多的圆,照画鼠标圆的方法叠上去就ok了。
最后上一下全部的代码。
- 1
- 2
- 3
- 4
#define PI 3.1415
//画圆环
float ripple(float dis,float scale,float width,float num,float speed){
    return width*(sin(dis*2.*PI*num-iGlobalTime*speed)/(1./scale*dis*2.*PI*num));
}

void mainImage( out vec4 fragColor, in vec2 fragCoord )
{
    vec2 uv = fragCoord.xy / iResolution.xy;//遍历像素
    vec2 center=vec2(0.5,0.5);//大圆中心
    float dis=distance(uv,center);//大圆距离
    float value=ripple(dis,5.,2.,10.,3.);//大圆的像素值
    value+=ripple(distance(uv,center-0.2),2.,1.,5.,5.);//叠加一个小圆
    value+=ripple(distance(uv,iMouse.xy/iResolution.xy),2.,1.,10.,5.);//叠加一个鼠标控制的小圆

    fragColor = vec4(value,value,value,1.0);
}- 1
- 2
- 3
- 4
- 5
- 6
- 7
- 8
- 9
- 10
- 11
- 12
- 13
- 14
- 15
- 16
- 17
但是这种方法有一个缺陷,只有各个圆的颜色相同时才能有波纹干涉的假象,甚至alpha值也必须相同,这就导致了我们不能做更加真实的水面倒影效果(假设鼠标为人物的行走,将大圆的alpha值降低,跟随鼠标的小圆高亮,波纹的假象就会被破坏。)
比如这样:
- 1
- 2
- 3