Android 自定义底部导航栏和动态添加fragment
Android开发工作也一年了,以前在CSDN博客看了许多优秀博客文章,做为新人的我,这是我写的第一篇博客,希望各位朋友多多支持,给予意见谢谢! 这篇文件主要是介绍自定义底部导航和动态添加fragment,实现的代码并不复杂。
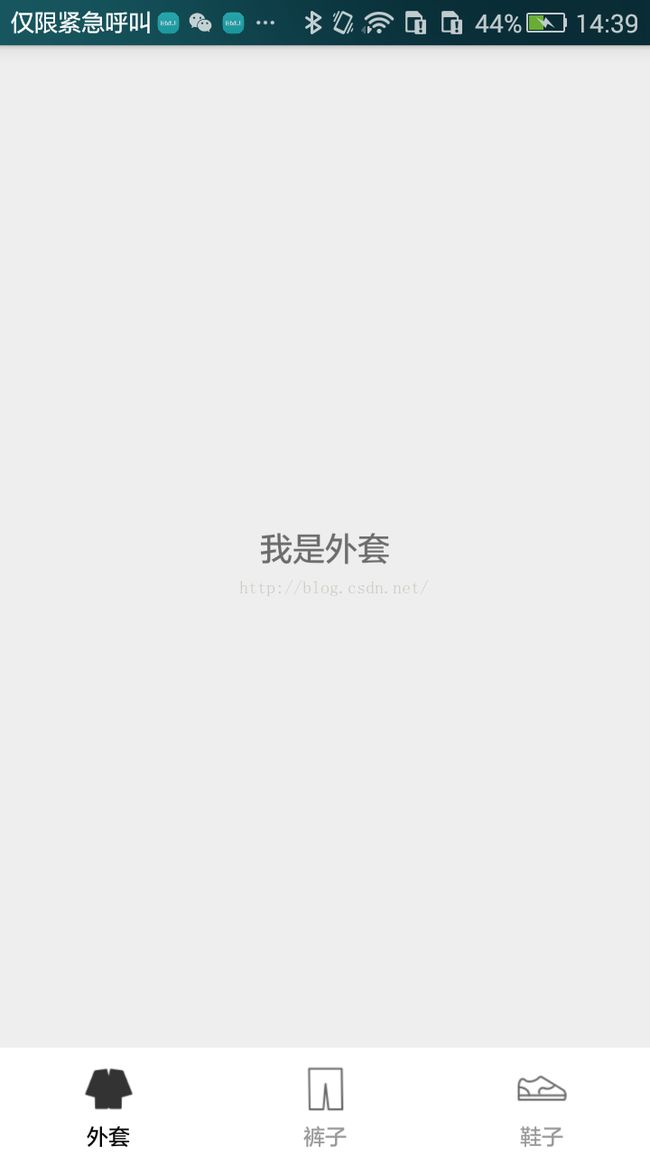
请看下面效果图,这个将是我今天会给大家实现的效果。

attrs属性的定义
接下来大家先看自定义底部导航的代码
package com.haiwei.navigation;


import java.util.ArrayList;


import android.annotation.SuppressLint;
import android.app.Activity;
import android.content.Context;
import android.content.res.TypedArray;
import android.graphics.Color;
import android.util.AttributeSet;
import android.util.DisplayMetrics;
import android.view.Display;
import android.view.Gravity;
import android.view.View;
import android.widget.ImageView;
import android.widget.LinearLayout;
import android.widget.TextView;


public class NavigationView extends LinearLayout {


private int image_width;
private int image_height;
private float text_size;
private Context context;
/**
* 选中图片数组
*/
private int[] selectedImage;
/**
* 未选中图片数组
*/
private int[] unSelectedImage;


private ArrayList textViews = new ArrayList();


private ArrayList imageViews = new ArrayList();


public OnItemClickListener onItemClickListener;


public NavigationView(Context context, AttributeSet attrs) {
this(context, attrs, 0);
}


public NavigationView(Context context, AttributeSet attrs, int defStyleAttr) {
super(context, attrs, defStyleAttr);
TypedArray typedArray = context.obtainStyledAttributes(attrs, R.styleable.NavigationView);
image_height = typedArray.getInteger(R.styleable.NavigationView_image_height, 20);
image_width = typedArray.getInteger(R.styleable.NavigationView_image_width, 20);
text_size = typedArray.getDimension(R.styleable.NavigationView_text_size, 12);
typedArray.recycle();
}


public void setOnItemClickListener(OnItemClickListener onItemClickListener) {
this.onItemClickListener = onItemClickListener;
}


/**
* 动态添加布局
*
* @param titles
*            导航标题
* @param selectedImage
*            选中时的图片
* @param unSelectedImage
*            未选中时的图片
* @param screenWidth
*            屏幕的宽度
* @param mHeight
*            控件自身高度
* @param context
*/
@SuppressWarnings("deprecation")
public void setLayout(String[] titles, int[] selectedImage, int[] unSelectedImage, int screenWidth, int mHeight,
Context context) {
this.context = context;
this.selectedImage = selectedImage;
this.unSelectedImage = unSelectedImage;
setOrientation(LinearLayout.HORIZONTAL);
if (titles != null && titles.length != 0) {
int widthScale = screenWidth / titles.length;
for (int i = 0; i < titles.length; i++) {
LinearLayout layout = new LinearLayout(context);
layout.setOrientation(LinearLayout.VERTICAL);
layout.setGravity(Gravity.CENTER);


LinearLayout.LayoutParams layoutLp = new LinearLayout.LayoutParams(widthScale,
LinearLayout.LayoutParams.MATCH_PARENT);
layoutLp.gravity = Gravity.CENTER;
layout.setLayoutParams(layoutLp);


ImageView image = new ImageView(context);
LinearLayout.LayoutParams imageLp = new LinearLayout.LayoutParams(image_width, image_height);
imageLp.topMargin = 5;
image.setImageDrawable(context.getResources().getDrawable(unSelectedImage[i]));
image.setLayoutParams(imageLp);


TextView tv_title = new TextView(context);
LinearLayout.LayoutParams textLp = new LinearLayout.LayoutParams(LinearLayout.LayoutParams.WRAP_CONTENT,
LinearLayout.LayoutParams.WRAP_CONTENT);
tv_title.setTextSize(text_size);
tv_title.setText(titles[i]);
tv_title.setLayoutParams(textLp);


layout.addView(image);
layout.addView(tv_title);


layout.setOnClickListener(new OnClickListener() {


@Override
public void onClick(View v) {
int position = (Integer) v.getTag();
setColorLing(position);
if (onItemClickListener != null) {
onItemClickListener.onItemClick(position);
}


}
});


layout.setTag(i);
addView(layout, widthScale, mHeight);
imageViews.add(image);
textViews.add(tv_title);
}
}
}


/**
* 底部导航点击接口回调
*/
public interface OnItemClickListener {
void onItemClick(int position);
}


/**
* 设置文本和图片为亮色
*
* @param position
*/
public void setColorLing(int position) {
setColorDark();
for (int i = 0; i < textViews.size(); i++) {
if (position == i) {
textViews.get(i).setTextColor(Color.parseColor("#000000"));
imageViews.get(i).setImageDrawable(context.getResources().getDrawable(selectedImage[i]));
}
}
}


/**
* 设置文本和图片为暗色
*/
public void setColorDark() {
for (int i = 0; i < textViews.size(); i++) {
textViews.get(i).setTextColor(Color.parseColor("#999999"));
imageViews.get(i).setImageDrawable(context.getResources().getDrawable(unSelectedImage[i]));
}
}


}
通过根据底部导航标题数组的长度,动态的添加控件 int widthScale = screenWidth / titles.length;通过屏幕的宽度除以数组的长度 最后就得到了添加每个itme的宽度 通过layout.setTag(i);缓存每一个itme的下标 并在执行OnClickListener 通过v.getTag()取出下标 然后通过接口回调给activity操作具体是哪个下标 以方便准确的动态添加fragment
下面是fragment代码3个fragment 都是同样的代码 布局很简单 就不贴了
如果使用Android3.0以下的版本,需要引入v4的包,然后Activity继承FragmentActivity,然后通过getSupportFragmentManager获得FragmentManager。不过还是建议版Menifest文件的uses-sdk的minSdkVersion和targetSdkVersion都改为11以上,这样就不必引入v4包了
package com.haiwei.navigation;


import android.os.Bundle;
import android.support.v4.app.Fragment;
import android.view.LayoutInflater;
import android.view.View;
import android.view.ViewGroup;


public class CoatFragment extends Fragment{


@Override
public View onCreateView(LayoutInflater inflater, ViewGroup container, Bundle savedInstanceState) {
View view = inflater.inflate(R.layout.fragment_coat, container,false);
return view;
}

}
我们在来看MainActivity是如何引用的先 看布局
是不是很简单呀 接着我们看MainActivity是如何实现动态添加fragment
package com.haiwei.navigation;


import com.haiwei.navigation.NavigationView.OnItemClickListener;


import android.os.Bundle;
import android.support.v4.app.Fragment;
import android.support.v4.app.FragmentActivity;
import android.support.v4.app.FragmentManager;
import android.support.v4.app.FragmentTransaction;
import android.view.Display;
import android.view.ViewTreeObserver;
import android.view.ViewTreeObserver.OnPreDrawListener;


public class MainActivity extends FragmentActivity implements OnItemClickListener {


private NavigationView nv;
private Fragment coatFragment;
private Fragment trousersFragment;
private Fragment shoeFragment;
private String[] titles = { "外套", "裤子", "鞋子" };
private int[] selectedImage = { R.drawable.icon_loose_coat_two, R.drawable.icon_trousers_two,
R.drawable.icon_male_shoes_two };
private int[] unSelectedImage = { R.drawable.icon_loose_coat, R.drawable.icon_trousers,
R.drawable.icon_male_shoes };
private int mHeight;
private boolean isGetHeight = true;


@Override
protected void onCreate(Bundle savedInstanceState) {
super.onCreate(savedInstanceState);
setContentView(R.layout.main);
initView();
}


private void initView() {
// 获取屏幕宽度
Display dm = getWindowManager().getDefaultDisplay();
final int screenWidth = dm.getWidth();
nv = (NavigationView) findViewById(R.id.nv);
// 初始化获取底部导航自身高度
final ViewTreeObserver vt = nv.getViewTreeObserver();
vt.addOnPreDrawListener(new OnPreDrawListener() {
@Override
public boolean onPreDraw() {
if (isGetHeight) {
mHeight = nv.getMeasuredHeight();
nv.setLayout(titles, selectedImage, unSelectedImage, screenWidth, mHeight, MainActivity.this);
nv.setColorLing(0);
nv.setOnItemClickListener(MainActivity.this);
isGetHeight = false;
}
return true;
}
});
showFragment(0);
}


@Override
public void onItemClick(int position) {
showFragment(position);
}


/**
* 动态添加和显示fragment
*
* @param position
*/
private void showFragment(int position) {
FragmentManager fm = getSupportFragmentManager();
FragmentTransaction transaction = fm.beginTransaction();
hideFragment(transaction);
switch (position) {
case 0:
if (coatFragment == null) {
coatFragment = new CoatFragment();
transaction.add(R.id.fragment_content, coatFragment);
} else {
transaction.show(coatFragment);
}
break;
case 1:
if (trousersFragment == null) {
trousersFragment = new TrousersFragment();
transaction.add(R.id.fragment_content, trousersFragment);
} else {
transaction.show(trousersFragment);
}
break;
case 2:
if (shoeFragment == null) {
shoeFragment = new ShoeFragment();
transaction.add(R.id.fragment_content, shoeFragment);
} else {
transaction.show(shoeFragment);
}
break;
}
transaction.commit();
}


/**
* 隐藏所有fragment
*
* @param transaction
*/
private void hideFragment(FragmentTransaction transaction) {
if (coatFragment != null) {
transaction.hide(coatFragment);
}


if (trousersFragment != null) {
transaction.hide(trousersFragment);
}


if (shoeFragment != null) {
transaction.hide(shoeFragment);
}
}

}
Fragment家族常用的API
Fragment常用的三个类:
android.app.Fragment 主要用于定义Fragment
android.app.FragmentManager 主要用于在Activity中操作Fragment
android.app.FragmentTransaction 保证一些列Fragment操作的原子性,熟悉事务这个词,一定能明白~
1、获取FragmentManage的方式:
getFragmentManager() // v4中,getSupportFragmentManager
2、主要的操作都是FragmentTransaction的方法
FragmentTransaction transaction = fm.benginTransatcion();//开启一个事务
transaction.add()
往Activity中添加一个Fragment
transaction.remove()
从Activity中移除一个Fragment,如果被移除的Fragment没有添加到回退栈(回退栈后面会详细说),这个Fragment实例将会被销毁。
transaction.replace()
使用另一个Fragment替换当前的,实际上就是remove()然后add()的合体~
transaction.hide()
隐藏当前的Fragment,仅仅是设为不可见,并不会销毁
transaction.show()
显示之前隐藏的Fragment
transaction.commit()
是所有操作之后执行提交