JavaFx入门3 - 使用Spring boot开发一个微服务作为后台数据接收处理
第2篇 JavaFx入门2 - JavaFX Scene Builder 2.0 构建fxml
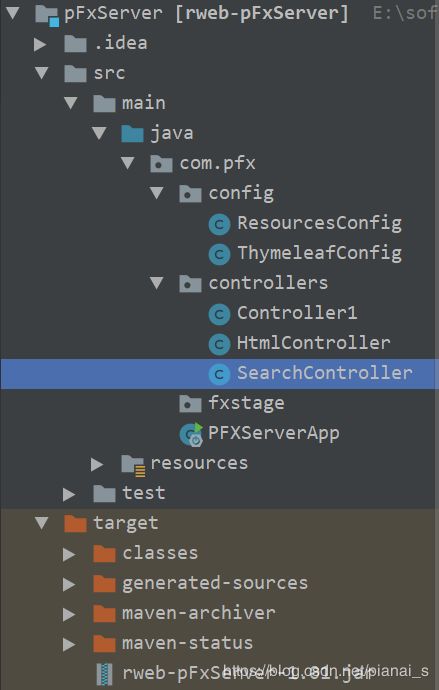
工程结构
新建一个Maven项目,pom文件参考如下进行修改
<?xml version="1.0" encoding="UTF-8"?>
<project xmlns="http://maven.apache.org/POM/4.0.0"
         xmlns:xsi="http://www.w3.org/2001/XMLSchema-instance"
         xsi:schemaLocation="http://maven.apache.org/POM/4.0.0 http://maven.apache.org/xsd/maven-4.0.0.xsd">
    <parent>
        <groupId>org.springframework.boot</groupId>
        <artifactId>spring-boot-starter-parent</artifactId>
        <version>2.0.4.RELEASE</version>
        <relativePath/> <!-- lookup parent from repository -->
    </parent>
    <modelVersion>4.0.0</modelVersion>
    <artifactId>rweb-pFxServer</artifactId>
    <version>1.01</version>
    <packaging>jar</packaging>

    <properties>
        <java.version>1.8</java.version>
        <project.build.sourceEncoding>UTF-8</project.build.sourceEncoding>
        <project.reporting.outputEncoding>UTF-8</project.reporting.outputEncoding>
    </properties>

    <dependencies>

        <dependency>
            <groupId>org.springframework.boot</groupId>
            <artifactId>spring-boot-starter-web</artifactId>
        </dependency>
        <!--thymeleaf 模板-->
        <dependency>
            <groupId>org.springframework.boot</groupId>
            <artifactId>spring-boot-starter-thymeleaf</artifactId>
        </dependency>
    </dependencies>

    <build>
        <!--此plugin 打包成jar包时可以java - XX.jar运行不报xx.jar中没有主清单属性-->
        <plugins>
            <!--springboot打包成jar需要的plugin-->
            <plugin>
                <groupId>org.springframework.boot</groupId>
                <artifactId>spring-boot-maven-plugin</artifactId>
            </plugin>
            <!--javaFx app打包成jar需要的plugin-->
            <plugin>
                <groupId>org.apache.maven.plugins</groupId>
                <artifactId>maven-compiler-plugin</artifactId>
                <configuration>
                    <source>1.8</source>
                    <target>1.8</target>
                </configuration>
            </plugin>


        </plugins>
        <!--资源文件-->
        <resources>
            <resource>
                <directory>src/main/resources</directory>
                <includes>
                    <include>**/*.*

                true
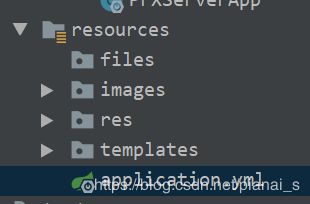
新建一个 application.yml 配置如下 使用8029端口
##使用8029端口
server:
  port: 8029
spring:
  application:
    name: rweb-pFxServer
###ThymeLeaf配置
  thymeleaf:
    #模板的模式,支持 HTML, XML TEXT JAVASCRIPT
    mode: HTML5
    #编码 可不用配置
    encoding: UTF-8
    #内容类别,可不用配置
    #content-type: text/html
    #开发配置为false,避免修改模板还要重启服务器
    cache: false
    #配置模板路径,默认是templates,可以不用配置
    prefix: classpath:/templates
### Spring boot admin 监控
  #热部署
  devtools:
    restart:
      enabled: true
新建一个PFXServerApp,使用@SpringBootApplication注解表示是一个SpringBoot程序
package com.pfx;

import org.springframework.boot.SpringApplication;
import org.springframework.boot.autoconfigure.SpringBootApplication;
import java.util.logging.Logger;

@SpringBootApplication
public class PFXServerApp {
    static Logger log = Logger.getLogger("日志");
    public static void main(String[] args) {
        SpringApplication.run(PFXServerApp.class, args);
        //System.out.print("--------------port:8029\n");

    }

}
写一个Controller,返回数据
@RestController注解表示返回的是文本格式的数据
package com.pfx.controllers;


import org.springframework.web.bind.annotation.*;

@RestController
public class SearchController {


    //http://localhost:8029/doGet?id=aa&name=bb
    @GetMapping("/doGet")
    public String doGetTest(@RequestParam(value = "id",required = false) String id,
                            @RequestParam(value = "name",required = false)String name){
        return "doGet Test";
    }


    @PostMapping("/doPot")
    public String doPotTest(@RequestParam("id") String id, @RequestParam("name")String name){
        return "doPot Test";
    }


}
运行PFXServerApp

在浏览器输入http://localhost:8029/doGet?id=aa&name=bb 进入可看到返回的数据。至此一个简单微服务就Ok了

但是怎么让JavaFx请求呢,这里使用Apache的httpclient,在pom文件引入依赖
    <!-- https://mvnrepository.com/artifact/org.apache.httpcomponents/httpclient -->
    <dependency>
        <groupId>org.apache.httpcomponents</groupId>
        <artifactId>httpclient</artifactId>
        <version>4.5.5</version>
    </dependency>

    <!-- https://mvnrepository.com/artifact/org.apache.commons/commons-io -->
    <dependency>
        <groupId>org.apache.commons</groupId>
        <artifactId>commons-io</artifactId>
        <version>1.3.2</version>
    </dependency>
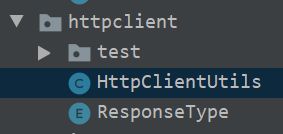
一个工具类,供JavaFx进行网络请求
package sugar.utils.httpclient;

import org.apache.http.client.methods.CloseableHttpResponse;
import org.apache.http.client.methods.HttpGet;
import org.apache.http.client.methods.HttpPost;
import org.apache.http.impl.client.CloseableHttpClient;
import org.apache.http.impl.client.HttpClients;
import org.apache.http.util.EntityUtils;

public class HttpClientUtils {

    public static Object doGet(String url,ResponseType respType) throws Exception{
        // 创建Httpclient对象
        CloseableHttpClient httpclient = HttpClients.createDefault();

        // 创建http GET请求
        HttpGet httpGet = new HttpGet(url);

        CloseableHttpResponse response = null;
        try {
            // 执行请求
            response = httpclient.execute(httpGet);
            // 判断返回状态是否为200
            if (response.getStatusLine().getStatusCode() == 200) {
                if (respType==ResponseType.String){
                    String content = EntityUtils.toString(response.getEntity(), "UTF-8");
                    System.out.println("内容长度:" + content.length());
                    System.out.println(content);//响应的内容
                    return content;
                }else if (respType==ResponseType.Byte){
                    return  EntityUtils.toByteArray(response.getEntity());

                }

            }
        } finally {
            if (response != null) {
                response.close();
            }
            httpclient.close();
            return "error";
        }
    }

    public static Object doPost(String url) throws Exception{

        // 创建Httpclient对象
        CloseableHttpClient httpclient = HttpClients.createDefault();

        // 创建http POST请求
        HttpPost httpPost = new HttpPost(url);

        httpPost.setHeader("User-Agent", "");
        CloseableHttpResponse response = null;
        try {
            // 执行请求
            response = httpclient.execute(httpPost);
            // 判断返回状态是否为200
            if (response.getStatusLine().getStatusCode() == 200) {
                String content = EntityUtils.toString(response.getEntity(), "UTF-8");
                System.out.println(content);
                return content;
            }
        } finally {
            if (response != null) {
                response.close();
            }
            httpclient.close();
            return "error";
        }

    }
}
枚举类
package sugar.utils.httpclient;

public enum ResponseType {
    String,Byte
}
使用方法测试
package sugar.utils.httpclient.test;

import sugar.utils.httpclient.HttpClientUtils;
import sugar.utils.httpclient.ResponseType;

public class HttpTest {
    public static void main(String[] args) throws Exception{
    //输入 https://blog.csdn.net/pianai_s/article/details/105140297
        HttpClientUtils.doGet("输入任意一个超链接", ResponseType.String);
    }
}
在SpringBoot我们要写一个配置文件才能进行本地资源访问
package com.pfx.config;
import org.springframework.context.annotation.Configuration;
import org.springframework.web.servlet.config.annotation.ResourceHandlerRegistry;
import org.springframework.web.servlet.config.annotation.WebMvcConfigurationSupport;

@Configuration
public class ResourcesConfig extends WebMvcConfigurationSupport{
    @Override
    public void addResourceHandlers(ResourceHandlerRegistry registry) {
        /**
         * @Description: 对文件的路径进行配置,创建一个虚拟路径/file/** ,
         * 即只要在
         * 便可以直接引用图片
         *这是图片的物理路径 "file:/+本地图片的地址"
         * @Date: Create in 14:08 2017/12/20
         *
         */
        //读取配置文件中的上传路径
//        Props prop = new Props("application.properties");
//        String url = prop.getProperty("sword.uploadPath");
//        registry.addResourceHandler("/file/**").addResourceLocations("file:"+url);
//        super.addResourceHandlers(registry);

        /**
         * @Description: 对文件的路径进行配置,创建一个虚拟路径/Path/** ,
         *
         * 即只要在<source src="/Path/picName.jpg" />便可以直接引用图片
         *
         *这是图片的物理路径  "file:/+本地图片的地址"
         * @Date: Create in 14:08 2017/12/20
         *
         *
         */
        // http://localhost:8021/filePath/write.txt  ---> F:\write.txt
        registry.addResourceHandler("/files/**").addResourceLocations("classpath:/files/");
        registry.addResourceHandler("/images/**").addResourceLocations("classpath:/images/");
        registry.addResourceHandler("/templates/**").addResourceLocations("classpath:/templates/");
        registry.addResourceHandler("/res/**").addResourceLocations("classpath:/res/");
        super.addResourceHandlers(registry);


    }
}
package com.pfx.controllers;

import org.springframework.stereotype.Controller;
import org.springframework.web.bind.annotation.GetMapping;
import org.springframework.web.bind.annotation.RequestParam;

@Controller
public class HtmlController {
    @GetMapping(value = "/a")
    public String html(@RequestParam(value = "name",required = false)String s){
        return "/a.html";
    }

}
在JavaFx中的使用
>可以开启一个线程更新,此时需要注意
 //因为ui是单线程,解决其他线程更新ui方法

>//不允许不是主线程去修改,本人测试试过会报类似如下错误
    //Exception in thread "Thread-5" java.lang.IllegalStateException:
    // Not on FX application thread; currentThread = Thread-5
    // v.getChildren().add(new Button("1111111111"));
//runAsync 不支持返回值
            CompletableFuture<Void> future =
                    CompletableFuture.runAsync(() -> {
                        System.out.println("线程已经开始运行!!");
                        //更新请求网络数据更新ui
                        updateUi();
                    });
//更新ui
    private void updateUi() {
        Platform.runLater(() -> {
         //更新ui
        });
上一篇代码修改如下
 //请求网络数据
    private void requestNetData(String v) {
        //runAsync 不支持返回值
        CompletableFuture<Void> future =
                CompletableFuture.runAsync(() -> {
                    System.out.println("线程已经开始运行!!");
                    //请求网络数据
            //http://localhost:8026/doGet?id=aa&name=bb
             //传入的是url
              try {
                 HttpClientUtils.doGet("http://localhost:8029/doGet?id=aa&name=bb", ResponseType.String);
            } catch (Exception e) {
                e.printStackTrace();
            }
              //更新ui 传入接收的数据
                    updateUi(v);
                });

    }

    //更新ui
    private void updateUi(String arg) {

        Platform.runLater(() -> {
            //先清空
            gridPane.getChildren().clear();

            //根据请求到的数据生成控件
            GridPane pane = new GridPane();
            pane.getChildren().add(0,new Text(""));
            List<GridPane> lists = new ArrayList<>();

            //更新ui  添加到GridPane
            GridPaneUtils.setNodeToPane(gridPane,lists);

        });
    }
上面是个简单的示例,实际可以发送json数据让SpringBoot(服务端)处理,SpringBoot连接MySQL数据库,如何处理数据返回给客户端json或者其他格式数据,客户端再解析动态生成控件
后续博客会对 updateUi()方法进行修改。


