Android查缺补漏之Toolbar
在移动应用中,顶部工具栏是一种很常见的东西,尤其是在iOS中,顶部工具栏放上一个返回按钮几乎成了标配,而大部分设计人员,会趋向于iOS和Android两端保持一致,所以在自带返回键的安卓设备中,顶部栏也越来越多。
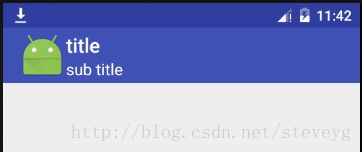
图为Android某版本系统应用的工具栏
Android系统在3.0版本就提供了Actionbar的功能,但是当时的Actionbar并不是很完善,就连Google官方都在一定程度上承认Actionbar限制了Android开发与设计的弹性。因此在以前的开发中很少使用原生的Actionbar,大多都是自己封装一个View来实现顶部栏所需的各种功能。
在Android5.0中,Google提供了一种全新的控件,叫做Toolbar,并且建议开发者使用Toolbar替换Actionbar。在Material design中也规范了其名称:App bar.
Toolbar的优势
相比于Actionbar,Toolbar具有很多的优点,包括但不仅限于:
- Toolbar继承于ViewGroup而Actionbar继承于Object,因此Toolbar在配置的时候更加方便;
- 可定制性高,使用起来更加灵活;
- 能够显示用户当前所处的位置;
- 能够提供一些重要的交互操作;
- 可以实现导航功能,使用户更加方便的回到HomeActivity。
Toolbar基本使用方法
Toolbar存在于support v7中,我们在使用时需要先导入这个包,在Android Studio中,可以直接在gradle里面增加,如果仍在使用Eclipse,可以切到Android Studio再修改gradle :)
dependencies {
    compile fileTree(dir: 'libs', include: ['*.jar'])
    compile 'com.android.support:appcompat-v7:24.2.0'
}
Toolbar自定义属性
进入Toolbar的源码中,能够看到定义了一些view常规属性之外的属性 * @attr ref android.support.v7.appcompat.R.styleable#Toolbar_buttonGravity
* @attr ref android.support.v7.appcompat.R.styleable#Toolbar_collapseContentDescription
* @attr ref android.support.v7.appcompat.R.styleable#Toolbar_collapseIcon
* @attr ref android.support.v7.appcompat.R.styleable#Toolbar_contentInsetEnd
* @attr ref android.support.v7.appcompat.R.styleable#Toolbar_contentInsetLeft
* @attr ref android.support.v7.appcompat.R.styleable#Toolbar_contentInsetRight
* @attr ref android.support.v7.appcompat.R.styleable#Toolbar_contentInsetStart
* @attr ref android.support.v7.appcompat.R.styleable#Toolbar_contentInsetStartWithNavigation
* @attr ref android.support.v7.appcompat.R.styleable#Toolbar_contentInsetEndWithActions
* @attr ref android.support.v7.appcompat.R.styleable#Toolbar_android_gravity
* @attr ref android.support.v7.appcompat.R.styleable#Toolbar_logo
* @attr ref android.support.v7.appcompat.R.styleable#Toolbar_logoDescription
* @attr ref android.support.v7.appcompat.R.styleable#Toolbar_maxButtonHeight
* @attr ref android.support.v7.appcompat.R.styleable#Toolbar_navigationContentDescription
* @attr ref android.support.v7.appcompat.R.styleable#Toolbar_navigationIcon
* @attr ref android.support.v7.appcompat.R.styleable#Toolbar_popupTheme
* @attr ref android.support.v7.appcompat.R.styleable#Toolbar_subtitle
* @attr ref android.support.v7.appcompat.R.styleable#Toolbar_subtitleTextAppearance
* @attr ref android.support.v7.appcompat.R.styleable#Toolbar_subtitleTextColor
* @attr ref android.support.v7.appcompat.R.styleable#Toolbar_title
* @attr ref android.support.v7.appcompat.R.styleable#Toolbar_titleMargin
* @attr ref android.support.v7.appcompat.R.styleable#Toolbar_titleMarginBottom
* @attr ref android.support.v7.appcompat.R.styleable#Toolbar_titleMarginEnd
* @attr ref android.support.v7.appcompat.R.styleable#Toolbar_titleMarginStart
* @attr ref android.support.v7.appcompat.R.styleable#Toolbar_titleMarginTop
* @attr ref android.support.v7.appcompat.R.styleable#Toolbar_titleTextAppearance
* @attr ref android.support.v7.appcompat.R.styleable#Toolbar_titleTextColorxmlns:app="http://schemas.android.com/apk/res-auto"
不过在测试的时候发现,并不是所有属性在布局文件中设置都会生效,有一些需要在activity中设置supportActionBar之后才可以,有些则需要在这之前(这些可以在xml中直接使用),例如:
 mToolbar = (Toolbar)findViewById(R.id.toolbar);
 mToolbar.setTitle("title");
 setSupportActionBar(mToolbar);
 mToolbar.setNavigationIcon(R.mipmap.ic_launcher);
Toolbar个性化设置
设置标题、子标题、logo
 private void initToolbar(){
        mToolbar = (Toolbar)findViewById(R.id.toolbar);
        mToolbar.setTitle("title");
        mToolbar.setSubtitle("sub title");
        mToolbar.setTitleTextColor(0xffffffff);
        mToolbar.setSubtitleTextColor(0xffffffff);
        mToolbar.setLogo(R.mipmap.back);
        setSupportActionBar(mToolbar);
    }
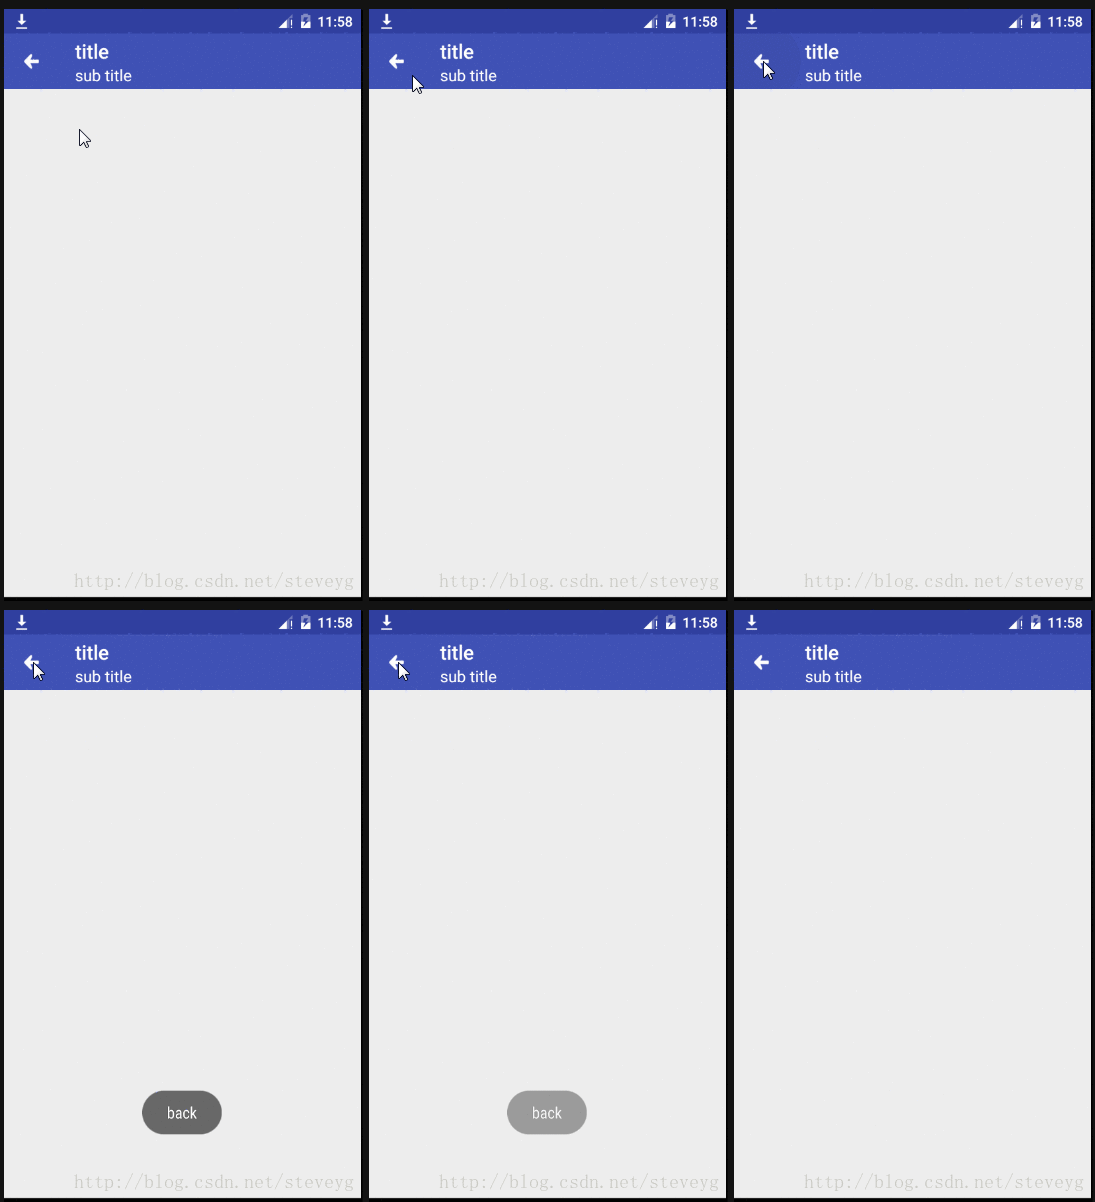
设置返回按钮
    private void initToolbar(){
        mToolbar = (Toolbar)findViewById(R.id.toolbar);
        mToolbar.setTitle("title");
        mToolbar.setSubtitle("sub title");
        mToolbar.setTitleTextColor(0xffffffff);
        mToolbar.setSubtitleTextColor(0xffffffff);
        mToolbar.setNavigationIcon(R.mipmap.back);
        setSupportActionBar(mToolbar);
        mToolbar.setNavigationOnClickListener(new View.OnClickListener() {
            @Override
            public void onClick(View v) {
                Toast.makeText(MainActivity.this,"back",Toast.LENGTH_SHORT).show();
            }
        });
    }
overflow
overflow是安卓标题栏中弹出的menu,首先需要写一个menu对应的xml文件
    @Override
    public boolean onCreateOptionsMenu(Menu menu) {
        getMenuInflater().inflate(R.menu.menu,menu);
        return true;
}app:theme="@style/ThemeOverlay.AppCompat.Dark.ActionBar" app:popupTheme="@style/OverFlowMenuTheme" @Override
public boolean onOptionsItemSelected(MenuItem item) {
switch (item.getItemId()){
case R.id.item1:
Toast.makeText(MainActivity.this,"选择第一个选项",Toast.LENGTH_SHORT).show();
break;
case R.id.item2:
Toast.makeText(MainActivity.this,"选择第二个选项",Toast.LENGTH_SHORT).show();
break;
}
return super.onOptionsItemSelected(item);
}搜索
在Toolbar中,我们可以很容易实现搜索的功能,先在menu.xml中定义一个按钮
然后在activity中重写onCreateOptionMenu方法
    @Override
    public boolean onCreateOptionsMenu(Menu menu) {
        getMenuInflater().inflate(R.menu.menu,menu);
        MenuItem searchItem = menu.findItem(R.id.action_search);
        SearchView searchView = (SearchView) MenuItemCompat.getActionView(searchItem);;
        //设置searchView相关逻辑
        return true;
    }
Toolbar的相关使用方法基本就是这样,可以看出Toolbar比Actionbar确实提升了很多,完全能够满足日常开发的需要,我们也不需要再去自己定义Actionbar了。当然,Toolbar的用法远不止这些,要实现什么效果,就要看各位开发者的了。
参考文章:
http://blog.csdn.net/h_zhang/article/details/51232773
http://www.tuicool.com/articles/RjYfq27
http://blog.csdn.net/c12366456/article/details/51534816


