Ubuntu16.04下用luvcview对摄像头功能调试(一)
Ubuntu16.04下用luvcview对摄像头功能调试(一)
今天从老师那got了个摄像头和lucview的源码包,随后的几天里将用这个工具对摄像头进行调试,希望能够在PC上调通(各种功能,如自动白平衡、gamma矫正,自动曝光,增益等),以便后续移植到板子上。。
环境搭建
安装依赖 sudo apt-get install debhelper
sudo apt-get install libsdl1.2-dev
sudo apt-get install libv4l-dev
sudo apt-get install pkg-config
将两个文件夹解压,进入,命令行执行make
make
报错1:
... linux/videodev.h : No such file or directory
解决1:
ln -s /usr/include/linux/videodev2.h /usr/include/linux/videodev.h
报错2:
...fatal error :SDL/SDL.h :没那个文件或目录 No such file or directory
解决2:
很明显有是缺少环境依赖了
apt-get install libsdl1.2-dev
前面一开始不是装了???(没装起难道?)再装了一次,不报错了
命令窗口执行
make一下,ok插上usb摄像头,插上之前,个人喜欢监测一下日志消息(方便查看USB的设备的节点映射,产品PID,VID等)
tail -f /var/log/syslog
部分结果显示
...
Jul 22 13:55:43 lowfree02 kernel: [19028.269735] usb 3-5: new high-speed USB device number 5 using xhci_hcd
Jul 22 13:55:43 lowfree02 kernel: [19028.635065] usb 3-5: New USB device found, idVendor=046d, idProduct=0825
Jul 22 13:55:43 lowfree02 kernel: [19028.635071] usb 3-5: New USB device strings: Mfr=0, Product=0, SerialNumber=2
Jul 22 13:55:43 lowfree02 kernel: [19028.635075] usb 3-5: SerialNumber: 14961B90
Jul 22 13:55:43 lowfree02 kernel: [19028.635901] uvcvideo: Found UVC 1.00 device  (046d:0825)
Jul 22 13:55:43 lowfree02 kernel: [19028.726084] uvcvideo 3-5:1.0: Entity type for entity Extension 4 was not initialized!
Jul 22 13:55:43 lowfree02 kernel: [19028.726088] uvcvideo 3-5:1.0: Entity type for entity Extension 6 was not initialized!
Jul 22 13:55:43 lowfree02 kernel: [19028.726091] uvcvideo 3-5:1.0: Entity type for entity Extension 7 was not initialized!
Jul 22 13:55:43 lowfree02 kernel: [19028.726094] uvcvideo 3-5:1.0: Entity type for entity Processing 2 was not initialized!
Jul 22 13:55:43 lowfree02 kernel: [19028.726096] uvcvideo 3-5:1.0: Entity type for entity Extension 3 was not initialized!
Jul 22 13:55:43 lowfree02 kernel: [19028.726099] uvcvideo 3-5:1.0: Entity type for entity Camera 1 was not initialized!
Jul 22 13:55:43 lowfree02 kernel: [19028.726350] input: UVC Camera (046d:0825) as /devices/pci0000:00/0000:00:14.0/usb3/3-5/3-5:1.0/input/input12
Jul 22 13:55:45 lowfree02 kernel: [19030.069056] usb 3-5: set resolution quirk: cval->res = 384
Jul 22 13:55:45 lowfree02 mtp-probe: checking bus 3, device 5: "/sys/devices/pci0000:00/0000:00:14.0/usb3/3-5"
Jul 22 13:55:45 lowfree02 mtp-probe: bus: 3, device: 5 was not an MTP device
Jul 22 13:55:45 lowfree02 systemd-udevd[27428]: Process '/usr/sbin/alsactl -E HOME=/run/alsa restore 1' failed with exit code 99.
Jul 22 13:55:45 lowfree02 pulseaudio[2078]: [pulseaudio] source.c: Default and alternate sample rates are the same.
Jul 22 13:55:45 lowfree02 rtkit-daemon[1032]: Supervising 3 threads of 1 processes of 1 users.
Jul 22 13:55:45 lowfree02 rtkit-daemon[1032]: Successfully made thread 27436 of process 2078 (n/a) owned by '1000' RT at priority 5.
Jul 22 13:55:45 lowfree02 rtkit-daemon[1032]: Supervising 4 threads of 1 processes of 1 users.
在dev/下看看vedio设备节点映设名
ls /dev
# ./luvcview -d /dev/video0 -f yuv -s 640x480

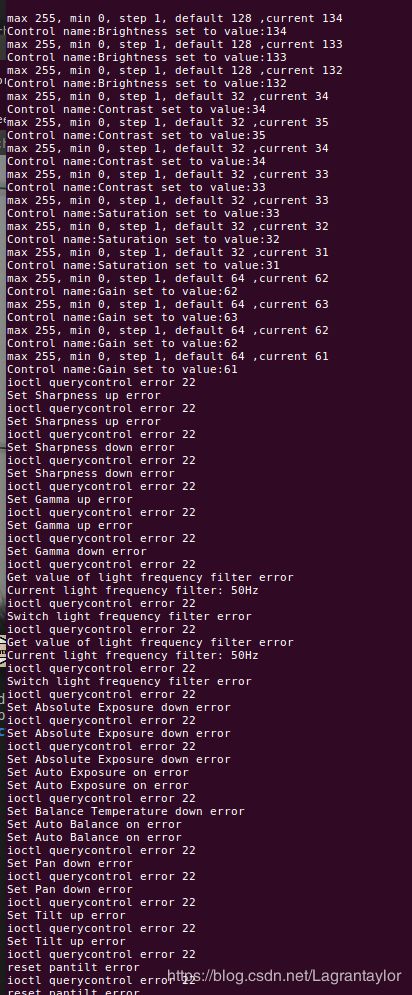
果然有些功能现在是有问题的。。那么现在得进入源码里面去看看到底发生了什么。。
调试工具就用VScode吧
调试准备
直接用vscode打开再按F5是8行的,得改点东西报错3
vscode对话框:
launch:program .... dose not exist
然后可以 直接open launch.json
解决3:
很简单,进入该文件后将“program”这一行改为:
"program": "{workspaceFolder}/luvcview",
后面的/luvcview是我make生成的执行文件名称,这个依照自己生成的名称修改
然后由于我们执行的时候是带了参数,所以在紧跟着的下面一行,改为
"args": ["-d","/dev/video0/","-f","yuv","-s","640x480"],
另外,按ctrl+shift+p打开控制台,输入task。。进入configure task,点击按照模板,再点others,即创建了个task.json
修改
"command":"make"
ok,这下可以在VScode中调试了,
一按F5。。我去,,刚刚都还是呵呵哒。。DEBUGCONSOLE报错
报错4
Stopping due to fatal error: NullReferenceException: Object reference not set to an instance of an object
解决4
github里大家说这是官方bug。。。附上链接
https://github.com/Microsoft/vscode-cpptools/issues/2922
有说把launch.json中"externalConsole"值设为"false"。。无效
找了一圈,,算了重新解压,用VScode打开,F5,看到左上debug旁边的齿轮符号有个小红点,点它,然后可生成一个launch.json,按照前面的进行修改,完毕,F5,ojbk。
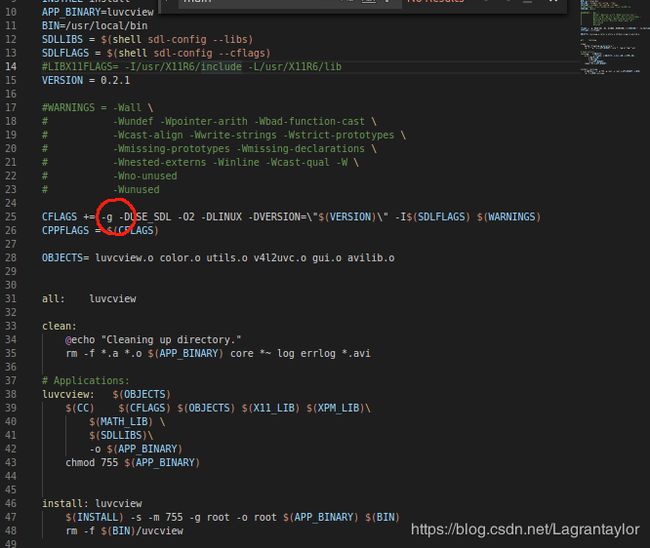
*注意: 由于这里的command 为make 所以Makefile中在写gcc或g++编译命令时注意带上 -g,否则可能出不来调试信息
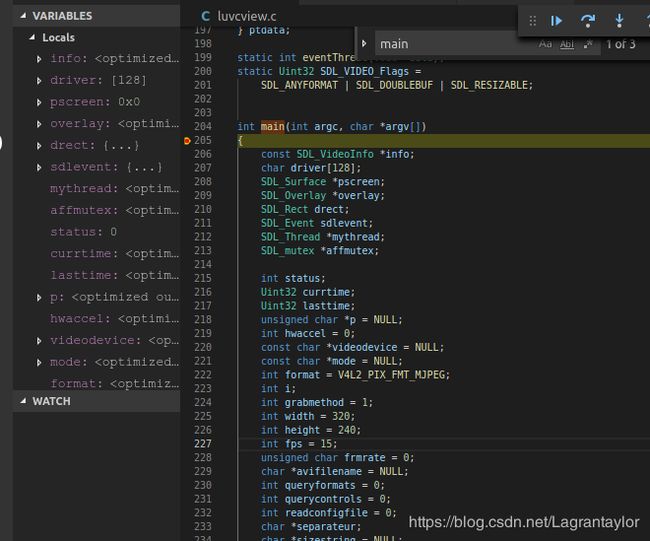
如下 (先打断点,再make)然后就可以进行调试了
 接下来的任务:
找到各种功能(前面的曝光、gamma校正、白平衡等)的实现接口,分析摄像头其他不能(未)实现功能的接口(以及摄像头本身是否支持这些功能?)
Ubuntu16.04下用luvcview对摄像头功能调试(二)

