【Unity】Unity接入讯飞语音的IOS SDK
因为在工作中的项目要求 要博主去接讯飞的IOS SDK 相信网上大多数资料都是接Android的SDK
说道接IOS 的SDK 对于不懂OC 的博主 这就头大了 ,恰巧在蛮牛上看到双哥的一个视频从中了解到如何接IOS 的SDK,并整理下来。
地址:http://edu.manew.com/course/112
在蛮牛教育中的视频 要花钱的 不过 蛮牛的会员 可以免费观看。
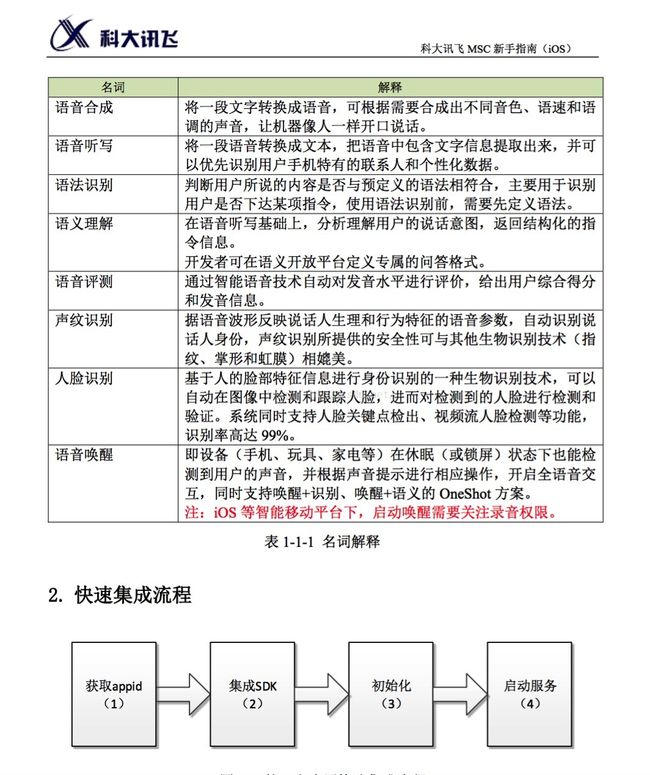
首先在讯飞IOS 的SDK 中有一个Demo 把它直接拖到Xcode中运行
得知要使用这个 SDK的详细步骤,下面就开始使用吧;
我们在这里可以看到OC代码中 注释的第五行和第六行是我们需要的 截取下来。
然后在Xcode 创建一个新的工程 我们会发现有ViewController.h和ViewController.m文件
大概理解为.h中定义的方法要在.m文件中实现 所以 主要的代码都在.m文件中
所以在.h文件定义一个方法
//
//  ViewController.h
//  xunfeitest
//
//  Created by dys on 15/11/21.
//  Copyright (c) 2015年 dys. All rights reserved.
//

#import
#import "iflyMSC/iflyMSC.h"
#import "Reachability.h"

@interface ViewController : UIViewController


@property (nonatomic, strong) IFlySpeechRecognizer *iFlySpeechRecognizer;//不带界面的识别对象
@property (nonatomic, strong) NSString * result;
@property (nonatomic, assign) BOOL isCanceled;


+ (ViewController*) instance;
-(void) isConnectionAvailable;//判断是否有网络

void _startup(void);


@end
就是_startup 方法 然后我们在.h文件中实现它
void _startup()
{
    //创建语音配置,appid必须要传入,仅执行一次则可
    NSString *initString = [[NSString alloc] initWithFormat:@"appid=%@",@"578df2bd"];

    //所有服务启动前,需要确保执行createUtility
    [IFlySpeechUtility createUtility:initString];
}appid=%@",@"578df2bd"第二步如何初始化 还是看说明文档看你项目中的需求 博主是只需要语音听写
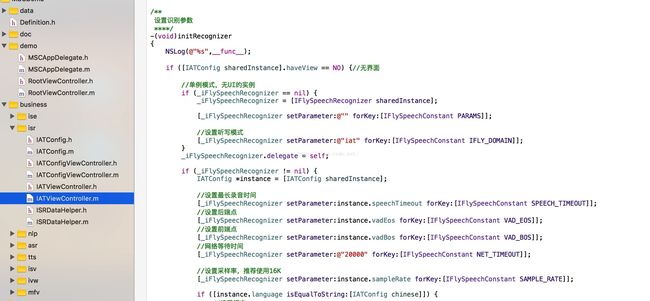
可以在文档中找出相关代码 我们在IATViewController.m中发现 然后并截取其中的一部分作为使用,
放入我们的ViewController.m文件中
-(void)initRecognizer
{
    NSLog(@"%s",__func__);


    //单例模式,无UI的实例
    if (_iFlySpeechRecognizer == nil) {
        _iFlySpeechRecognizer = [IFlySpeechRecognizer sharedInstance];

        [_iFlySpeechRecognizer setParameter:@"" forKey:[IFlySpeechConstant PARAMS]];

        //设置听写模式
        [_iFlySpeechRecognizer setParameter:@"iat" forKey:[IFlySpeechConstant IFLY_DOMAIN]];
    }
    _iFlySpeechRecognizer.delegate = self;

    if (_iFlySpeechRecognizer != nil) {


        //设置最长录音时间
        [_iFlySpeechRecognizer setParameter:@"30000" forKey:[IFlySpeechConstant SPEECH_TIMEOUT]];
        //设置后端点
        [_iFlySpeechRecognizer setParameter:@"500" forKey:[IFlySpeechConstant VAD_EOS]];
        //设置前端点
        [_iFlySpeechRecognizer setParameter:@"10000" forKey:[IFlySpeechConstant VAD_BOS]];
        //网络等待时间
        [_iFlySpeechRecognizer setParameter:@"5000" forKey:[IFlySpeechConstant NET_TIMEOUT]];

        //设置采样率,推荐使用16K
        [_iFlySpeechRecognizer setParameter:@"16000" forKey:[IFlySpeechConstant SAMPLE_RATE]];


        //设置语言
        [_iFlySpeechRecognizer setParameter:@"zh_cn" forKey:[IFlySpeechConstant LANGUAGE]];


        //设置是否返回标点符号
        [_iFlySpeechRecognizer setParameter:@"0" forKey:[IFlySpeechConstant ASR_PTT]];

    }

}
还是在刚才的那个文件中我们可以找到
同样我们也是截取我们能用的地方 想xcode 里面自带的一些东西我们 就可以删除掉 最后放在我们的.m文件中
-(void) StartVoice
{

    if(_iFlySpeechRecognizer == nil)
    {
        [self initRecognizer];
    }

    [_iFlySpeechRecognizer cancel];

    //设置音频来源为麦克风
    [_iFlySpeechRecognizer setParameter:IFLY_AUDIO_SOURCE_MIC forKey:@"audio_source"];

    //设置听写结果格式为json
    [_iFlySpeechRecognizer setParameter:@"json" forKey:[IFlySpeechConstant RESULT_TYPE]];

    //保存录音文件,保存在sdk工作路径中,如未设置工作路径,则默认保存在library/cache下
    [_iFlySpeechRecognizer setParameter:@"asr.pcm" forKey:[IFlySpeechConstant ASR_AUDIO_PATH]];

    [_iFlySpeechRecognizer setDelegate:self];

    [_iFlySpeechRecognizer startListening];

}
#import
#import "iflyMSC/iflyMSC.h"
#import "Reachability.h"

@interface ViewController : UIViewController


@property (nonatomic, strong) IFlySpeechRecognizer *iFlySpeechRecognizer;//不带界面的识别对象 接下来我们还需要得到SDK听写后的返回结果
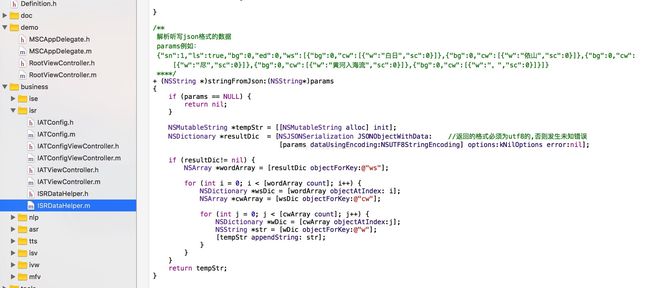
我们在ISRDataHelper.m文件中找到了相应的方法
然后也是截取下来放在我们的.m文件中,只用我们用到的部分
- (NSString *)stringFromJson:(NSString*)params
{
    if (params == NULL) {
        return nil;
    }

    NSMutableString *tempStr = [[NSMutableString alloc] init];
    NSDictionary *resultDic  = [NSJSONSerialization JSONObjectWithData:    //返回的格式必须为utf8的,否则发生未知错误
                                [params dataUsingEncoding:NSUTF8StringEncoding] options:kNilOptions error:nil];

    if (resultDic!= nil) {
        NSArray *wordArray = [resultDic objectForKey:@"ws"];

        for (int i = 0; i < [wordArray count]; i++) {
            NSDictionary *wsDic = [wordArray objectAtIndex: i];
            NSArray *cwArray = [wsDic objectForKey:@"cw"];

            for (int j = 0; j < [cwArray count]; j++) {
                NSDictionary *wDic = [cwArray objectAtIndex:j];
                NSString *str = [wDic objectForKey:@"w"];
                [tempStr appendString: str];
            }
        }
    }
    return tempStr;
}
另外在博主的项目中 还需要加一些检测网络 和 错误返回(SDK有)所以博主就先附上我的.h文件和.m文件吧
.h
//
//  ViewController.h
//  xunfeitest
//
//  Created by dys on 15/11/21.
//  Copyright (c) 2015年 dys. All rights reserved.
//

#import
#import "iflyMSC/iflyMSC.h"
#import "Reachability.h"

@interface ViewController : UIViewController


@property (nonatomic, strong) IFlySpeechRecognizer *iFlySpeechRecognizer;//不带界面的识别对象
@property (nonatomic, strong) NSString * result;
@property (nonatomic, assign) BOOL isCanceled;


+ (ViewController*) instance;
-(void) isConnectionAvailable;//判断是否有网络

void _startup(void);


@end
//
//  ViewController.m
//  xunfeitest
//
//  Created by dys on 15/11/21.
//  Copyright (c) 2015年 dys. All rights reserved.
//

#import "ViewController.h"
#import "iflyMSC/IFlyMSC.h"


@interface ViewController ()

@end

@implementation ViewController

- (void)viewDidLoad {
    [super viewDidLoad];
    // Do any additional setup after loading the view, typically from a nib.
}

- (void)didReceiveMemoryWarning {
    [super didReceiveMemoryWarning];
    // Dispose of any resources that can be recreated.
}

static ViewController* gameMgr=nil;

- (id)init
{
    self = [super init];
    if (self) {
        // Initialization code here.
    }

    return self;
}

+ (ViewController*) instance
{
    if (gameMgr==nil)
    {
        gameMgr=[[ViewController alloc]init];
    }

    return gameMgr;
}

-(void)initRecognizer
{
    NSLog(@"%s",__func__);


    //单例模式,无UI的实例
    if (_iFlySpeechRecognizer == nil) {
        _iFlySpeechRecognizer = [IFlySpeechRecognizer sharedInstance];

        [_iFlySpeechRecognizer setParameter:@"" forKey:[IFlySpeechConstant PARAMS]];

        //设置听写模式
        [_iFlySpeechRecognizer setParameter:@"iat" forKey:[IFlySpeechConstant IFLY_DOMAIN]];
    }
    _iFlySpeechRecognizer.delegate = self;

    if (_iFlySpeechRecognizer != nil) {


        //设置最长录音时间
        [_iFlySpeechRecognizer setParameter:@"30000" forKey:[IFlySpeechConstant SPEECH_TIMEOUT]];
        //设置后端点
        [_iFlySpeechRecognizer setParameter:@"500" forKey:[IFlySpeechConstant VAD_EOS]];
        //设置前端点
        [_iFlySpeechRecognizer setParameter:@"10000" forKey:[IFlySpeechConstant VAD_BOS]];
        //网络等待时间
        [_iFlySpeechRecognizer setParameter:@"5000" forKey:[IFlySpeechConstant NET_TIMEOUT]];

        //设置采样率,推荐使用16K
        [_iFlySpeechRecognizer setParameter:@"16000" forKey:[IFlySpeechConstant SAMPLE_RATE]];


        //设置语言
        [_iFlySpeechRecognizer setParameter:@"zh_cn" forKey:[IFlySpeechConstant LANGUAGE]];


        //设置是否返回标点符号
        [_iFlySpeechRecognizer setParameter:@"0" forKey:[IFlySpeechConstant ASR_PTT]];

    }

}

-(void) StartVoice
{

    if(_iFlySpeechRecognizer == nil)
    {
        [self initRecognizer];
    }

    [_iFlySpeechRecognizer cancel];

    //设置音频来源为麦克风
    [_iFlySpeechRecognizer setParameter:IFLY_AUDIO_SOURCE_MIC forKey:@"audio_source"];

    //设置听写结果格式为json
    [_iFlySpeechRecognizer setParameter:@"json" forKey:[IFlySpeechConstant RESULT_TYPE]];

    //保存录音文件,保存在sdk工作路径中,如未设置工作路径,则默认保存在library/cache下
    [_iFlySpeechRecognizer setParameter:@"asr.pcm" forKey:[IFlySpeechConstant ASR_AUDIO_PATH]];

    [_iFlySpeechRecognizer setDelegate:self];

    [_iFlySpeechRecognizer startListening];

}

- (NSString *)stringFromJson:(NSString*)params
{
    if (params == NULL) {
        return nil;
    }

    NSMutableString *tempStr = [[NSMutableString alloc] init];
    NSDictionary *resultDic  = [NSJSONSerialization JSONObjectWithData:    //返回的格式必须为utf8的,否则发生未知错误
                                [params dataUsingEncoding:NSUTF8StringEncoding] options:kNilOptions error:nil];

    if (resultDic!= nil) {
        NSArray *wordArray = [resultDic objectForKey:@"ws"];

        for (int i = 0; i < [wordArray count]; i++) {
            NSDictionary *wsDic = [wordArray objectAtIndex: i];
            NSArray *cwArray = [wsDic objectForKey:@"cw"];

            for (int j = 0; j < [cwArray count]; j++) {
                NSDictionary *wDic = [cwArray objectAtIndex:j];
                NSString *str = [wDic objectForKey:@"w"];
                [tempStr appendString: str];
            }
        }
    }
    return tempStr;
}

- (void) onError:(IFlySpeechError *) error
{
    NSLog(@"%s",__func__);

    NSString *text ;

    if (self.isCanceled) {
        text = @"识别取消";

    } else if (error.errorCode == 0 ) {
        if (_result.length == 0) {
            text = @"无识别结果";
        }else {
            text = @"识别成功";
        }
    }else {
        text = [NSString stringWithFormat:@"发生错误:%d %@", error.errorCode,error.errorDesc];
        NSLog(@"%@",text);
    }
}


- (void) onResults:(NSArray *) results isLast:(BOOL)isLast
{

    NSMutableString *resultString = [[NSMutableString alloc] init];
    NSDictionary *dic = results[0];
    for (NSString *key in dic) {
        [resultString appendFormat:@"%@",key];
    }

    NSString *temp = [[NSString alloc] init];

    _result =[NSString stringWithFormat:@"%@%@", temp,resultString];
    NSString * resultFromJson =  [gameMgr stringFromJson:resultString];
    temp = [NSString stringWithFormat:@"%@%@", temp,resultFromJson];

    if (isLast){
        NSLog(@"听写结果(json):%@测试",  self.result);
    }
    NSLog(@"_result=%@",_result);
    NSLog(@"resultFromJson=%@",resultFromJson);
    NSLog(@"isLast=%d,_textView.text=%@",isLast,temp);
    char* str1 = [temp UTF8String];
    UnitySendMessage("VoiceObject","UnityGet",str1);
}

-(void) isConnectionAvailable{

    NSString *isExistenceNetwork = [[NSString alloc] init];

    Reachability *reach = [Reachability reachabilityWithHostName:@"www.baidu.com"];

    NSParameterAssert([reach isKindOfClass:[Reachability class]]);

    NetworkStatus stats = [reach currentReachabilityStatus];

    if (stats == ReachableViaWiFi)
        isExistenceNetwork = @"检测已连接wifi";
    else
        isExistenceNetwork = @"检测没有连接wifi";

    char* networkstatus = [isExistenceNetwork UTF8String];
    UnitySendMessage("Canvas","UnityNetWork",networkstatus);

}


void _startup()
{
    //创建语音配置,appid必须要传入,仅执行一次则可
    NSString *initString = [[NSString alloc] initWithFormat:@"appid=%@",@"578df2bd"];

    //所有服务启动前,需要确保执行createUtility
    [IFlySpeechUtility createUtility:initString];
}

void _startVoice()
{
    [gameMgr StartVoice];
}

-(void) closeVoice
{
    [_iFlySpeechRecognizer cancel];
}
void _closeVoice()
{
    [gameMgr closeVoice];
}
void _enterURL(char* url)
{
    NSString* str_URL = [NSString stringWithUTF8String:url];
    [[UIApplication sharedApplication] openURL:[NSURL URLWithString:str_URL]];
}
void _networkTest()
{
    [ViewController instance];

    [gameMgr isConnectionAvailable];
}


@end
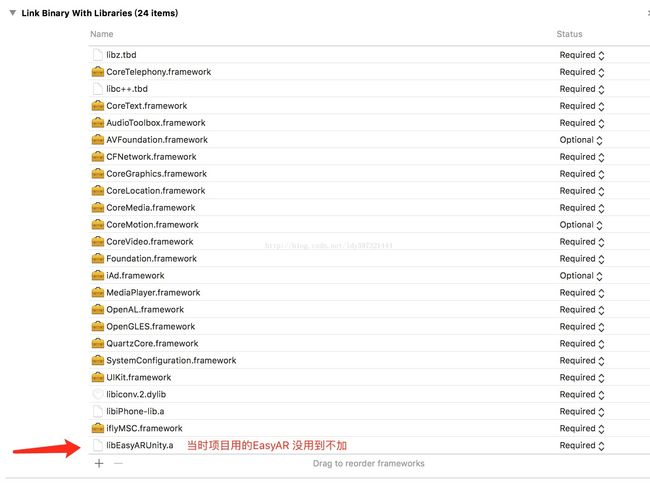
添加的类库
这样我们基本的功能就都可以实现了 注意 我说的实现 是可以使用了 此时还没有和Unity 做一些交互
吊大的朋友一定发现了 我在.m文件中 定义了一个单例
ViewController instancevoid _networkTest() 等等 那是为什么呢?上文说了我们还没有和unity交互 这里就简单说一下
unity 调用OC 需要 把 OC 封装成C 然后在调用
而OC 调用Unity 目前我查到的是用
UnitySendMessage("Canvas","UnityNetWork",networkstatus);
这里的参数1 就是OC发送unity 中的哪一个对象,参数2 就是定义好的方法,参数3 就是 OC 传給unity 的参数 Str 也好其他的也好
接下来我们就看看 unity 中的准备工作吧
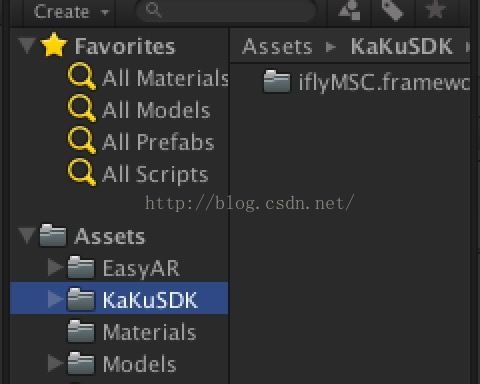
放入我们的SDK
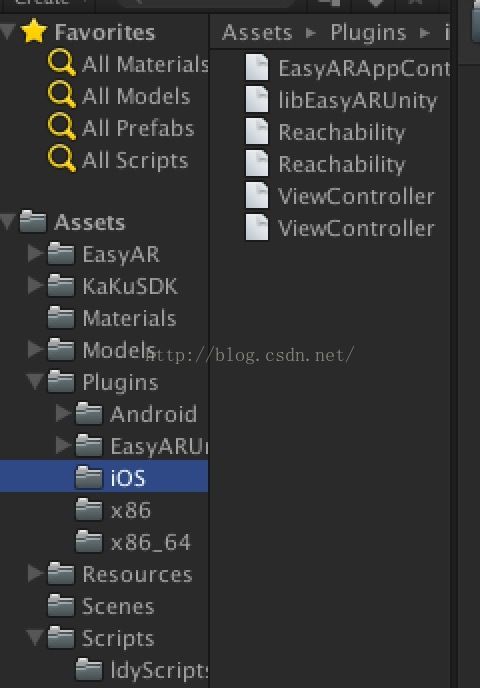
在Plugins 中的ios 文件夹下放入我们的.h和.m文件
然后 创建一个脚本
using UnityEngine;
using System.Collections;
using System.Runtime.InteropServices;


public static class IOS_Test
{


	[DllImport ("__Internal")]
	private static extern void _startup ();

	[DllImport ("__Internal")]
	private static extern void _startVoice ();

	[DllImport ("__Internal")]
	private static extern void _enterURL (string url);

	[DllImport ("__Internal")]
	private static extern void _networkTest ();

	public static void StartUp ()
	{
		_startup ();
	}

	public static void StartVoice ()
	{
		_startVoice ();
	}

	public static void EnterURL (string url)
	{
		_enterURL (url);
	}

	public static void NetWorkStatus ()
	{
		_networkTest ();
	}
}
那么OC 如何传参給Unity呢
using UnityEngine;
using System.Collections;
using UnityEngine.UI;

public class IosFuc : MonoBehaviour
{

	public Text label;
	// Use this for initialization
	void Start ()
	{
		IOS_Test.NetWorkStatus ();
	}

	public void UnityNetWork (string info)
	{
		label.text = info;
		StartCoroutine (LabelActive (2));
	}

	IEnumerator LabelActive (float time)
	{
		yield return new WaitForSeconds (time);
		label.text = null;
	}
}
和下面这个方法完全对应上了
UnitySendMessage( "Canvas" , "UnityNetWork" ,networkstatus);
OK了 接下来我们就可以愉快的使用了 博主并不会OC代码 以至于 有些 OC代码为什么这么写 博主也是现查的。好了目前讯飞的语音SDK 可以告一段落了。
QQ群 : 593906968 有什么不懂的可以加群咨询互相学习


