ES7.5集群开启Xpath验证(xpath-morning)
ES7.5集群开启Xpath验证(xpath-morning)
- Elastic Stack 新版本6.8.0 和7.x的核心安全功能现免费提供。
- Elasticsearch-xpath
- Logstash配置
- Kibana配置
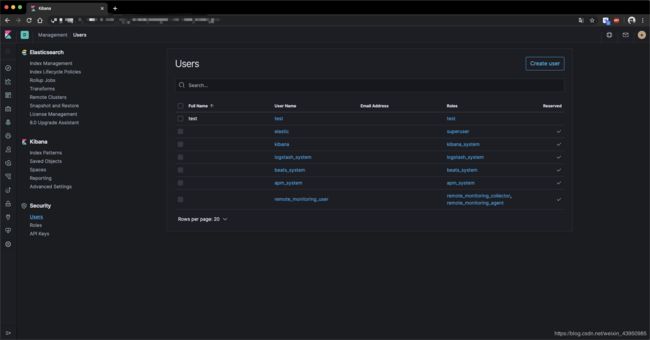
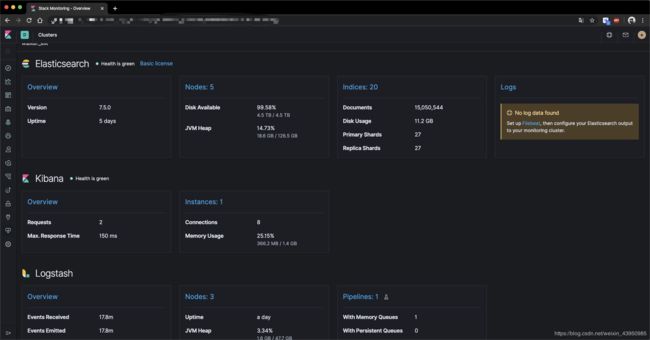
- 效果展示
Elastic Stack 新版本6.8.0 和7.x的核心安全功能现免费提供。
这意味着用户现在能够对网络流量进行加密、创建和管理用户、定义能够保护索引和集群级别访问权限的角色,并且使用 Spaces 为 Kibana
提供全面保护。 免费提供的核心安全功能如下:
TLS 功能。 可对通信进行加密;
文件和原生 Realm。 可用于创建和管理用户;
基于角色的访问控制。 可用于控制用户对集群 API 和索引的访问权限;
通过针对 Kibana Spaces 的安全功能,还可允许在Kibana 中实现多租户。
Elasticsearch-xpath
(1)修改配置文件 elasticsearch.yml 增加如下配置:
# 开启安全认证
xpack.security.enabled: true
# 开启ssl
xpack.security.transport.ssl.enabled: true
xpack.security.transport.ssl.verification_mode: certificate
# 生成ca证书
xpack.security.transport.ssl.keystore.path: /es/elasticsearch-7.5.0/config/elastic-certificates.p12
xpack.security.transport.ssl.truststore.path: /es/elasticsearch-7.5.0/config/elastic-certificates.p12
(2)配置TLS和身份验证
步骤1:生产证书文件,bin下执行(一路回车,就完事)
./elasticsearch-certutil ca
./elasticsearch-certutil cert --ca elastic-stack-ca.p12
(3)配置文件权限问题(非常重要!!!)
# 添加组权限
chgrp elk elastic-certificates.p12 elastic-stack-ca.p12
chow -R elk:elk elastic-certificates.p12 elastic-stack-ca.p12

# 授予文件权限
chmod 640 elastic-certificates.p12 elastic-stack-ca.p12

# 移动文件只config文件夹下
mv elastic-certificates.p12 elastic-stack-ca.p12  config
(4)若为集群,将证书分发至所有节点下config文件中,并且配置同(1)
# 分发至所有节点
scp elastic-certificates.p12 elastic-stack-ca.p12   [email protected]:/XX/XX
(5)设置密码
# 配置密码
./elasticsearch-setup-passwords interactive

[root@EXP-ES01 bin]#./elasticsearch-setup-passwords interactive
Initiating the setup of passwords for reserved users 				elastic,apm_system,kibana,logstash_system,beats_system,remote_monitoring_user.
You will be prompted to enter passwords as the process progresses.
Please confirm that you would like to continue [y/N]y

Enter password for [elastic]:
Reenter password for [elastic]:
Passwords do not match.
Try again.
Enter password for [elastic]:
Reenter password for [elastic]:
Enter password for [apm_system]:
Reenter password for [apm_system]:
Enter password for [kibana]:
Reenter password for [kibana]:
Enter password for [logstash_system]:
Reenter password for [logstash_system]:
Enter password for [beats_system]:
Reenter password for [beats_system]:
Enter password for [remote_monitoring_user]:
Reenter password for [remote_monitoring_user]:
Changed password for user [apm_system]
Changed password for user [kibana]
Changed password for user [logstash_system]
Changed password for user [beats_system]
Changed password for user [remote_monitoring_user]
Changed password for user [elastic]
####分别设置 elastic、apm_system、kibana、logstash_system、beats_system、remote_monitoring_user账号的密码。下边是输入刚才输入的用户名和		密码进行查看

[root@EXP-ES01]# curl EXP-ES01:9220/_cat/indices?v -u elastic
Enter host password for user 'elastic':
health status index       uuid                   pri rep docs.count docs.deleted store.size pri.store.size
green  open   .security-7 7phIYLTcTbugIbSimRI03g   1   0          6            0     19.3kb         19.3kb
Logstash配置
(1)修改配置文件 logstash.yml 增加如下配置:
xpack.monitoring.enabled: true
xpack.monitoring.elasticsearch.username: logstash_system
xpack.monitoring.elasticsearch.password: xxxxxxxxxxxxx
xpack.monitoring.elasticsearch.hosts: ["http://EXP-ES01:9220", "http://EXP-ES02:9220", "http://EXP-ES03:9220", "http://EXP-ES04:9220"]
(2)这里user和password是明文,如果不想配置在文件中,可以使用keystore
bin/logstash-keystore create

bin/logstash-keystore add LG_USER
logstash_system
bin/logstash-keystore add LG_PWD

bin/logstash-keystore add ES_USER
elastic
bin/logstash-keystore add ES_PWD
Kibana配置
(1)修改配置文件 kibana.yml 增加如下配置:
server.port: 9400 # kibana 对外访问端口
server.host: "xx.xx.xx.xx"  # kibana 对外访问ip
elasticsearch.hosts: ["http://xx.xx.xx.xx:9220"]
elasticsearch.username: "elastic"
elasticsearch.password: "xxxxxxxxxxxxx"
(2)这里user和password是明文,如果不想配置在文件中,可以使用keystore
./kibana-keystore --allow-root create
./kibana-keystore add elasticsearch.username --allow-root # 存储用户名
./kibana-keystore add elasticsearch.password --allow-root # 存储密码


