android hidl简单实例1
刚接触android 的hidl,项目中要用到,就尝试写了一个简单的实例。
一、定义HIDL接口文件
1.进入hardware/interfaces/目录下建立新的接口文件
首先建立对应的文件夹:android/hardware/interfaces/sample/1.0/default
接着在android/hardware/interfaces/sample/1.0/目录创建接口描述文件ISample.hal
android/hardware/interfaces/sample/1.0/ISample.hal内容如下:
package [email protected];

interface ISample {
	helloWorld(string name) generates (string result);
	init();
};
2.通过hidl-gen工具(源码中编译生成hidl-gen)生成Sample.cpp,Sample.h ,Android.bp文件。 步骤如下:
1.source build/envsetup.sh
2.lunch 9            (根据自己的项目选)
3.export [email protected]      //设置变量
4.export LOC=hardware/interfaces/sample/1.0/default/   //设置变量生成目录的所在地
5.hidl-gen -o $LOC -Lc++-impl -randroid.hardware:hardware/interfaces -randroid.hidl:system/libhidl/transport $PACKAGE
 //在hardware/interfaces/sample/1.0/default/生成Sample.cpp和Sample.h
6.hidl-gen -o $LOC -Landroidbp-impl -randroid.hardware:hardware/interfaces -randroid.hidl:system/libhidl/transport $PACKAGE
//在hardware/interfaces/sample/1.0/default/生成Android.bp
7.在android目录下执行 ./hardware/interfaces/update-makefiles.sh
 在hardware/interfaces/sample/1.0/目录下生成Android.bp
这时文件目录结构如下
@user-virtual-machine:~/android/hardware/interfaces/sample$ ls 1.0/
Android.bp default ISample.hal
@user-virtual-machine:~/android/hardware/interfaces/sample$ ls 1.0/default/
Android.bp Sample.cpp Sample.h
生成的代码如下:
3.android/hardware/interfaces/sample/1.0/default/Sample.h
去掉注释.采用直通模式
//extern "C" ISample* HIDL_FETCH_ISample(const char* name);android/hardware/interfaces/sample/1.0/default/Sample.h内容如下
#ifndef ANDROID_HARDWARE_SAMPLE_V1_0_SAMPLE_H
#define ANDROID_HARDWARE_SAMPLE_V1_0_SAMPLE_H
#include
#include
#include
namespace android {
namespace hardware {
namespace sample {
namespace V1_0 {
namespace implementation {
using ::android::hardware::hidl_array;
using ::android::hardware::hidl_memory;
using ::android::hardware::hidl_string;
using ::android::hardware::hidl_vec;
using ::android::hardware::Return;
using ::android::hardware::Void;
using ::android::sp;
struct Sample : public ISample {
// Methods from ::android::hardware::sample::V1_0::ISample follow.
Return helloWorld(const hidl_string& name, helloWorld_cb _hidl_cb) override;
Return init() override;
// Methods from ::android::hidl::base::V1_0::IBase follow.
};
// FIXME: most likely delete, this is only for passthrough implementations
extern "C" ISample* HIDL_FETCH_ISample(const char* name);
} // namespace implementation
} // namespace V1_0
} // namespace sample
} // namespace hardware
} // namespace android
#endif // ANDROID_HARDWARE_SAMPLE_V1_0_SAMPLE_H 4.android/hardware/interfaces/sample/1.0/default/Sample.cpp
//ISample* HIDL_FETCH_ISample(const char* /* name */) {
//    return new Sample();
//}
去掉上面的注释
android/hardware/interfaces/sample/1.0/default/Sample.cpp内容如下

#include "Sample.h"
namespace android {
namespace hardware {
namespace sample {
namespace V1_0 {
namespace implementation {

// Methods from ::android::hardware::sample::V1_0::ISample follow.
Return Sample::helloWorld(const hidl_string& name, helloWorld_cb _hidl_cb) {
    // TODO implement
    return Void();
}

Return Sample::init() {
    // TODO implement
    return Void();
}


// Methods from ::android::hidl::base::V1_0::IBase follow.

ISample* HIDL_FETCH_ISample(const char* /* name */) {
    return new Sample();
}
//
}  // namespace implementation
}  // namespace V1_0
}  // namespace sample
}  // namespace hardware
}  // namespace android
5.上面大部分都是通过hidl工具生成的,下面完善一下接口代码。
android/hardware/interfaces/sample/1.0/default/Sample.cpp

#include "Sample.h"
#define LOG_TAG "xingchen"
#include
namespace android {
namespace hardware {
namespace sample {
namespace V1_0 {
namespace implementation {

// Methods from ::android::hardware::sample::V1_0::ISample follow.
Return Sample::helloWorld(const hidl_string& name, helloWorld_cb _hidl_cb) {
    // TODO implement
	char buf[128];
	::memset(buf,0,128);
	::snprintf(buf,128,"Hello World,%s",name.c_str());
	hidl_string result(buf);

	_hidl_cb(result);
	//ALOGI("xingchen helloWorld Sample:: ___%s__",__fun__);
	ALOGI("xingchen helloWorld Sample::----");
    return Void();
}

Return Sample::init() {
    // TODO implement
	//ALOGI("xingchen Sample:: ___%s__",__fun__);
	ALOGI("xingchen Sample::---");
    return Void();
}


// Methods from ::android::hidl::base::V1_0::IBase follow.

ISample* HIDL_FETCH_ISample(const char* /* name */) {
    return new Sample();
}
//
}  // namespace implementation
}  // namespace V1_0
}  // namespace sample
}  // namespace hardware
}  // namespace android
6.android/hardware/interfaces/sample/1.0/default/Android.bp
android/hardware/interfaces/sample/1.0/default/Android.bp内容如下

cc_library_shared {
    // FIXME: this should only be -impl for a passthrough hal.
    // In most cases, to convert this to a binderized implementation, you should:
    // - change '-impl' to '-service' here and make it a cc_binary instead of a
    //   cc_library_shared.
    // - add a *.rc file for this module.
    // - delete HIDL_FETCH_I* functions.
    // - call configureRpcThreadpool and registerAsService on the instance.
    // You may also want to append '-impl/-service' with a specific identifier like
    // '-vendor' or '-' etc to distinguish it.
    name: "[email protected]",
    relative_install_path: "hw",
    // FIXME: this should be 'vendor: true' for modules that will eventually be
    // on AOSP.
    proprietary: true,
    srcs: [
        "Sample.cpp",
    ],
    shared_libs: [
        "libhidlbase",
        "libhidltransport",
		"libhardware",
        "libutils",
		"liblog",
        "[email protected]",
    ],
}
7.到这里基本上代码就写完了,大部分都是生成的,下面开始编译.
 mmm hardware/interfaces/sample/1.0/default/ 生成库文件
/vendor/lib64/hw/[email protected]
/vendor/lib/hw/[email protected]
/system/lib64/[email protected]
/system/lib/[email protected]
二、构建binder service
1.现在有了库,我们还需要构建binder通信服务.
文件名:hardware/interfaces/sample/1.0/default/[email protected]
代码
service sample_service /vendor/bin/hw/[email protected]
		class hal
		user system
		group system
		seclabel u:r:init:s0   //我的android9.0的环境关闭了selinux所以加上这行
2.设定sample_service服务.接下来完善服务代码:
文件路径:android/hardware/interfaces/sample/1.0/default/service.cpp
代码:
#define LOG_TAG "[email protected]"

#include
#include  //need log lib

using android::hardware::sample::V1_0::ISample;
using android::hardware::defaultPassthroughServiceImplementation;

int main()
{
	return defaultPassthroughServiceImplementation();
}
3.在Android.bp中添加对服务器的编译:
文件路径:android/hardware/interfaces/sample/1.0/default/Android.bp
在文件最后面加上以下代码
cc_binary {
	name: "[email protected]",
	defaults: ["hidl_defaults"],
	proprietary: true,
	relative_install_path: "hw",
	srcs: ["service.cpp"],
	init_rc: ["[email protected]"],
	shared_libs: [
		"libhidlbase",
		"libhidltransport",
		"libhardware",
		"libutils",
		"liblog",
		"[email protected]",
	],
}
4.android/hardware/interfaces/sample/1.0/default/如下
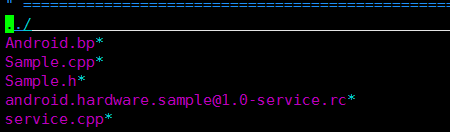
为了让服务器被客户端访问到,还需要在device/autochips/ac8257_demo/manifest.xml(不同厂商路径不同)添加如下:
               android.hardware.sample
               hwbinder
               1.0

                       ISample
                       default
5.mmm编译生成库文件和service文件
 mmm hardware/interfaces/sample/1.0/default/ 生成库文件和service文件
/vendor/lib64/hw/[email protected]
/vendor/lib/hw/[email protected]
/system/lib64/[email protected]
/system/lib/[email protected]
/vendor/etc/init/[email protected] (在out目录删除文件,项目全编的时候不会生成)
/vendor/bin/hw/[email protected](在out目录删除文件,项目全编的时候不会生成)
6.修改build/make/target/product/vndk/28.txt和 build/make/target/product/vndk/current.txt
添加如下,记得按照字母排列顺序位置添加
+VNDK-core: [email protected]
三、添加测试程序
/hardware/interfaces/sample/client/helloworld.cpp
文件路径:/hardware/interfaces/sample/client/helloworld.cpp
代码:
#include
#include
#include
#include
#include
#include

using android::hardware::sample::V1_0::ISample;
using android::sp;
using android::hardware::hidl_string;

int main()
{
	android::sp service = ISample::getService();
	if(service == nullptr){
		printf("xingchen Failed to get service\n");
		return -1;
	}

	printf("xingchen succeed to get service\n");

	service->init();

	return 0;

}
/hardware/interfaces/sample/client/Android.mk
文件路径:/hardware/interfaces/sample/client/Android.mk
代码:
LOCAL_PATH := $(call my-dir)

include $(CLEAR_VARS)
LOCAL_PROPRIETARY_MODULE := true
LOCAL_MODULE := helloworld
LOCAL_SRC_FILES := helloworld.cpp
LOCAL_SHARED_LIBRARIES := \
	liblog \
	libhidlbase \
	libutils \
	[email protected]	\

include $(BUILD_EXECUTABLE)
四、把上面的service,rc和client端的可执行文件helloworld打包进固件.
/device/autochips/ac8257/device.mk文件中加入代码

PRODUCT_PACKAGES += helloworld
PRODUCT_PACKAGES += \
            [email protected] \
            [email protected]
五、全编整个工程并烧入机器。
在全编之前可以把out目录下的上面mmm出来的文件删除,确保全编的时候相关文件可以一起编译出来。
cd out/target/product/ac8257_demo/
find ./system -name "*android.hardware.sample*" | xargs rm -rf
find ./vendor -name "*android.hardware.sample*" | xargs rm -rf/vendor/lib64/hw/[email protected]
/vendor/lib/hw/[email protected]
/system/lib64/[email protected]
/system/lib/[email protected]
/vendor/etc/init/[email protected]
/vendor/bin/hw/[email protected] (服务端)
/vendor/bin/helloworld (客户端)六、启动机器 ps - A | grep [email protected] 发现server已经起来了
logcat -s xingchen & 然后执行客户端helloworld

客户端已经成功调用服务器的接口.
七、遇到的问题
1. 在调试的时候手动执行/vendor/bin/hw/[email protected]出现
CANNOT LINK EXECTABLE ...... :library ......;错误

原因是在hardware/interfaces/sample/1.0/default/Android.bp中加入了"[email protected]"导致的,删除即可。
cc_binary {
	name: "[email protected]",
	defaults: ["hidl_defaults"],
	proprietary: true,
	relative_install_path: "hw",
	srcs: ["service.cpp"],
	init_rc: ["[email protected]"],
	shared_libs: [
		"libhidlbase",
		"libhidltransport",
		"libhardware",
		"libutils",
		"liblog",
		"[email protected]",
     "[email protected]", //加入这行导致,删除即可,网上参考,想不到这个地方是个坑
	],
}