学习《第一行代码》第三版第4章敲的代码
由于主要在acitivity_main.xml和MainActivity.kt, 这里一般只展示这两个
然后代码用到的资源(例如图片)请自行到 第一行代码——Android(第3版)图灵社区下载
4.1 至 4.2

点击一下按钮, 会发现图片会变化并且进度条会增加,当点击4次时,发现又回到了樱桃即上图的样子。
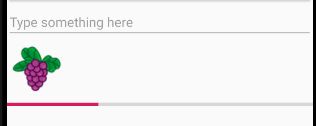


acitivity_main.xml
<LinearLayout xmlns:android="http://schemas.android.com/apk/res/android"
    xmlns:app="http://schemas.android.com/apk/res-auto"
    xmlns:tools="http://schemas.android.com/tools"
    android:layout_width="match_parent"
    android:layout_height="match_parent"
    android:orientation="vertical"
    tools:context=".MainActivity">

    <TextView
        android:id="@+id/textView"
        android:layout_width="match_parent"
        android:layout_height="wrap_content"
        android:text="This is TextView"
        android:gravity="center"
        android:textColor="#00ff00"
        android:textSize="24sp"
        tools:ignore="HardcodedText" />

        <Button
            android:id="@+id/button"
            android:layout_width="match_parent"
            android:layout_height="wrap_content"
            android:text="Button"
            android:textSize="30sp"
            android:textAllCaps="false"
            tools:ignore="HardcodedText"
            />

        <EditText
            android:id="@+id/editText"
            android:layout_width="match_parent"
            android:layout_height="wrap_content"
            android:hint="Type something here"
            android:maxLines="2"
            tools:ignore="HardcodedText" />

        <ImageView
            android:id="@+id/imageView"
            android:layout_width="wrap_content"
            android:layout_height="wrap_content"
            android:src="@drawable/grape_pic"/>

        <ProgressBar
            android:id="@+id/progressBar"
            android:layout_width="match_parent"
            android:layout_height="wrap_content"
            style="?android:attr/progressBarStyleHorizontal"
            android:max="100"/>
LinearLayout>
MainActivity.kt
package com.example.helloworld

import androidx.appcompat.app.AppCompatActivity
import android.os.Bundle
import android.util.Log
import android.view.View
import android.widget.Toast
import androidx.appcompat.app.AlertDialog
import kotlinx.android.synthetic.main.activity_main.*


class MainActivity : AppCompatActivity(), View.OnClickListener {
    private var flag = 0

    override fun onCreate(savedInstanceState: Bundle?) {
        super.onCreate(savedInstanceState)
        setContentView(R.layout.activity_main)
        button.setOnClickListener(this)
    }

    override fun onClick(v: View?) {
        when (v?.id) {
            R.id.button -> {
//                val inputText = editText.text.toString()
//                Toast.makeText(this, inputText, Toast.LENGTH_SHORT).show()

                when (flag) {
                    0 -> imageView.setImageResource(R.drawable.cherry_pic)
                    1 -> imageView.setImageResource(R.drawable.grape_pic)
                    2 -> imageView.setImageResource(R.drawable.watermelon_pic)
                    3 -> imageView.setImageResource(R.drawable.strawberry_pic)
                }
                flag = (flag + 1) % 4

//                AlertDialog.Builder(this).apply {
//                    setTitle("你点开了Dialog")
//                    setMessage("Something important")
//                    setCancelable(false)
//                    setPositiveButton("Ok") {dialog, which ->
//                    }
//                    setNegativeButton("Cancel"){dialog, which->
//                    }
//                    show()
//                }

                progressBar.progress = (progressBar.progress + 25) % 110
            }

        }
    }
}
4.4自定义组件
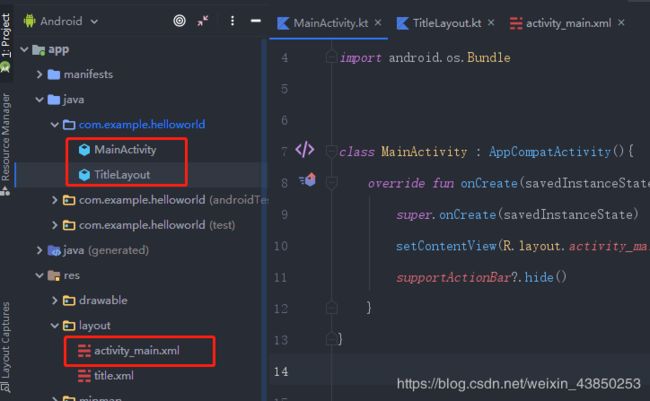
package com.example.helloworld

import androidx.appcompat.app.AppCompatActivity
import android.os.Bundle


class MainActivity : AppCompatActivity(){
    override fun onCreate(savedInstanceState: Bundle?){
        super.onCreate(savedInstanceState)
        setContentView(R.layout.activity_main)
        supportActionBar?.hide()
    }
}
activity_main.xml
<LinearLayout xmlns:android="http://schemas.android.com/apk/res/android"
    xmlns:app="http://schemas.android.com/apk/res-auto"
    xmlns:tools="http://schemas.android.com/tools"
    android:layout_width="match_parent"
    android:layout_height="match_parent"
    tools:context=".MainActivity">

    <com.example.helloworld.TitleLayout
        android:layout_width="match_parent"
        android:layout_height="wrap_content"/>
LinearLayout>
TitleLayout.kt
package com.example.helloworld

import android.app.Activity
import android.content.Context
import android.util.AttributeSet
import android.view.LayoutInflater
import android.widget.LinearLayout
import android.widget.Toast
import kotlinx.android.synthetic.main.title.view.*


class TitleLayout(context: Context, attrs: AttributeSet): LinearLayout(context, attrs){
    init {
        LayoutInflater.from(context).inflate(R.layout.title, this)
        titleBack.setOnClickListener{
            val activity = context as Activity
            activity.finish()
        }
        titleEdit.setOnClickListener{
            Toast.makeText(context, "you clicked Edit button", Toast.LENGTH_SHORT).show()
        }
    }
}
4.5ListView
package com.example.helloworld

import androidx.appcompat.app.AppCompatActivity
import android.os.Bundle
import android.widget.ArrayAdapter
import kotlinx.android.synthetic.main.activity_main.*


class MainActivity : AppCompatActivity(){
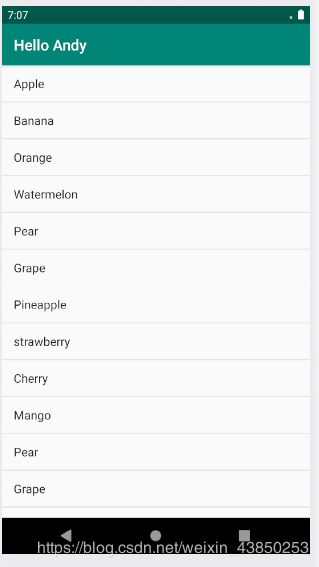
    private val data = listOf("Apple", "Banana", "Orange", "Watermelon",
        "Pear", "Grape", "Pineapple", "strawberry", "Cherry", "Mango",
        "Pear", "Grape", "Pineapple", "strawberry", "Cherry")

    override fun onCreate(savedInstanceState: Bundle?){
        super.onCreate(savedInstanceState)
        setContentView(R.layout.activity_main)
        val adapter = ArrayAdapter<String>(this, android.R.layout.simple_list_item_1, data)
        listView.adapter = adapter
    }
}
activity_main.xml
<LinearLayout xmlns:android="http://schemas.android.com/apk/res/android"
    xmlns:app="http://schemas.android.com/apk/res-auto"
    xmlns:tools="http://schemas.android.com/tools"
    android:layout_width="match_parent"
    android:layout_height="match_parent"
    tools:context=".MainActivity">

    <ListView
        android:id="@+id/listView"
        android:layout_height="match_parent"
        android:layout_width="match_parent"/>

LinearLayout>
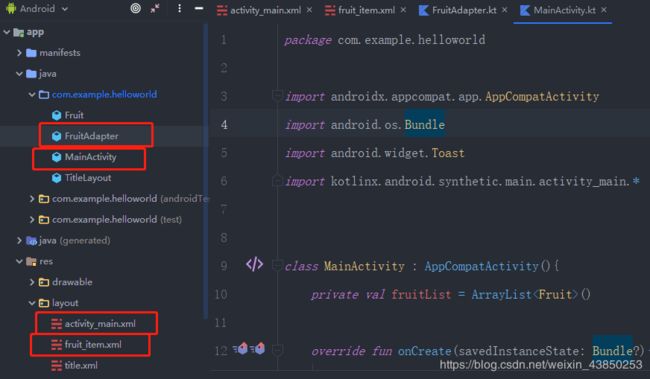
package com.example.helloworld

import androidx.appcompat.app.AppCompatActivity
import android.os.Bundle
import android.widget.Toast
import kotlinx.android.synthetic.main.activity_main.*


class MainActivity : AppCompatActivity(){
    private val fruitList = ArrayList<Fruit>()

    override fun onCreate(savedInstanceState: Bundle?){
        super.onCreate(savedInstanceState)
        setContentView(R.layout.activity_main)
        initFruits()
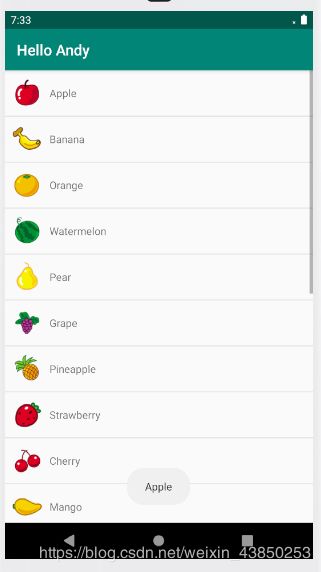
        val adapter = FruitAdapter(this, R.layout.fruit_item, fruitList)
        listView.adapter = adapter
        listView.setOnItemClickListener{_, _, position, _->
            val fruit = fruitList[position]
            Toast.makeText(this, fruit.name, Toast.LENGTH_SHORT).show()
        }
    }

    private fun initFruits(){
        repeat(2){
            fruitList.add(Fruit("Apple", R.drawable.apple_pic))
            fruitList.add(Fruit("Banana", R.drawable.banana_pic))
            fruitList.add(Fruit("Orange", R.drawable.orange_pic))
            fruitList.add(Fruit("Watermelon", R.drawable.watermelon_pic))
            fruitList.add(Fruit("Pear", R.drawable.pear_pic))
            fruitList.add(Fruit("Grape", R.drawable.grape_pic))
            fruitList.add(Fruit("Pineapple", R.drawable.pineapple_pic))
            fruitList.add(Fruit("Strawberry", R.drawable.strawberry_pic))
            fruitList.add(Fruit("Cherry", R.drawable.cherry_pic))
            fruitList.add(Fruit("Mango", R.drawable.mango_pic))
        }
    }
}
activity_main.xml
<LinearLayout xmlns:android="http://schemas.android.com/apk/res/android"
    xmlns:app="http://schemas.android.com/apk/res-auto"
    xmlns:tools="http://schemas.android.com/tools"
    android:layout_width="match_parent"
    android:layout_height="match_parent"
    tools:context=".MainActivity">

    <ListView
        android:id="@+id/listView"
        android:layout_height="match_parent"
        android:layout_width="match_parent"/>

LinearLayout>
fruit_item.xml
<LinearLayout xmlns:android="http://schemas.android.com/apk/res/android"
    xmlns:tools="http://schemas.android.com/tools"
    android:layout_width="match_parent"
    android:layout_height="60dp">

    <ImageView
        android:id="@+id/fruitImage"
        android:layout_width="40dp"
        android:layout_height="40dp"
        android:layout_gravity="center_vertical"
        android:layout_marginLeft="10dp"
        tools:ignore="ContentDescription,RtlHardcoded" />

    <TextView
        android:id="@+id/fruitName"
        android:layout_width="wrap_content"
        android:layout_height="wrap_content"
        android:layout_gravity="center_vertical"
        android:layout_marginLeft="10dp"
        tools:ignore="RtlHardcoded" />

LinearLayout>
FruitAdapter.kt
package com.example.helloworld

import android.app.Activity
import android.view.View
import android.view.ViewGroup
import android.widget.ArrayAdapter
import android.widget.ImageView
import android.widget.TextView
import android.view.LayoutInflater

class FruitAdapter(activity: Activity, val resourceId: Int, data: List<Fruit>):
ArrayAdapter<Fruit>(activity, resourceId, data){
    inner class ViewHolder(val fruitImage: ImageView, val fruitName: TextView)

    override fun getView(position: Int, convertView: View?, parent: ViewGroup): View {
        val view: View
        val viewHolder: ViewHolder
        if (convertView == null) {
            view = LayoutInflater.from(context).inflate(resourceId, parent, false)
            val fruitImage: ImageView = view.findViewById(R.id.fruitImage)
            val fruitName: TextView = view.findViewById(R.id.fruitName)
            viewHolder = ViewHolder(fruitImage, fruitName)
            view.tag = viewHolder
        } else {
            view = convertView
            viewHolder = view.tag as ViewHolder
        }
        var fruit = getItem(position)
        if(fruit != null){
            viewHolder.fruitImage.setImageResource(fruit.imageId)
            viewHolder.fruitName.text = fruit.name
        }
        return view
    }
}
4.7编写聊天界面

可以打字后,如果输入框非空,点击发送即可。
由于我们会用到RecyclerView, 所以首先需要在app/build.gradle当中添加依赖库
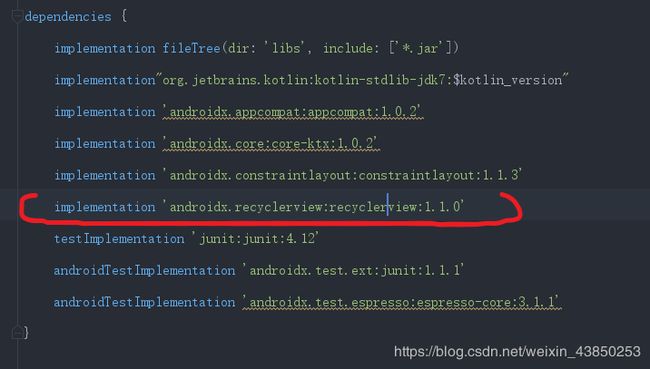 主界面activity_main.xml
<LinearLayout xmlns:android="http://schemas.android.com/apk/res/android"
    xmlns:tools="http://schemas.android.com/tools"
    android:orientation="vertical"
    android:layout_width="match_parent"
    android:layout_height="match_parent"
    android:background="#d8e0e8" >

    <androidx.recyclerview.widget.RecyclerView
        android:id="@+id/recyclerView"
        android:layout_width="match_parent"
        android:layout_height="0dp"
        android:layout_weight="1" />

    <LinearLayout
        android:layout_width="match_parent"
        android:layout_height="wrap_content" >

        <EditText
            android:id="@+id/inputText"
            android:layout_width="0dp"
            android:layout_height="wrap_content"
            android:layout_weight="1"
            android:hint="Type something here"
            android:maxLines="2"
            tools:ignore="HardcodedText" />

        <Button
            android:id="@+id/send"
            android:layout_width="wrap_content"
            android:layout_height="wrap_content"
            android:text="Send"
            tools:ignore="HardcodedText" />

    LinearLayout>

LinearLayout>
Msg.kt
package com.example.helloworld


class Msg(val content: String, val type: Int) {
    companion object {
        const val TYPE_RECEIVED = 0
        const val TYPE_SENT = 1
    }
}
msg_left_item.xml
<FrameLayout xmlns:android="http://schemas.android.com/apk/res/android"
    android:orientation="vertical"
    android:layout_width="match_parent"
    android:layout_height="wrap_content"
    android:padding="10dp" >

    <LinearLayout
        android:layout_width="wrap_content"
        android:layout_height="wrap_content"
        android:layout_gravity="left"
        android:background="@drawable/message_left" >

        <TextView
            android:id="@+id/leftMsg"
            android:layout_width="wrap_content"
            android:layout_height="wrap_content"
            android:layout_gravity="center"
            android:layout_margin="10dp"
            android:textColor="#fff" />

    LinearLayout>

FrameLayout>
mst_right_item.xml
<FrameLayout xmlns:android="http://schemas.android.com/apk/res/android"
    android:orientation="vertical"
    android:layout_width="match_parent"
    android:layout_height="wrap_content"
    android:padding="10dp" >

    <LinearLayout
        android:layout_width="wrap_content"
        android:layout_height="wrap_content"
        android:layout_gravity="right"
        android:background="@drawable/message_right" >

        <TextView
            android:id="@+id/rightMsg"
            android:layout_width="wrap_content"
            android:layout_height="wrap_content"
            android:layout_gravity="center"
            android:layout_margin="10dp"
            android:textColor="#000" />

    LinearLayout>


FrameLayout>
MsgAdapter.kt
package com.example.helloworld

import android.view.LayoutInflater
import android.view.ViewGroup
import androidx.recyclerview.widget.RecyclerView


class MsgAdapter(val msgList: List<Msg>) : RecyclerView.Adapter<MsgViewHolder>() {

    override fun getItemViewType(position: Int): Int {
        val msg = msgList[position]
        return msg.type
    }

    override fun onCreateViewHolder(parent: ViewGroup, viewType: Int) = if (viewType == Msg.TYPE_RECEIVED) {
        val view = LayoutInflater.from(parent.context).inflate(R.layout.msg_left_item, parent, false)
        LeftViewHolder(view)
    } else {
        val view = LayoutInflater.from(parent.context).inflate(R.layout.msg_right_item, parent, false)
        RightViewHolder(view)
    }

    override fun onBindViewHolder(holder: MsgViewHolder, position: Int) {
        val msg = msgList[position]
        when (holder) {
            is LeftViewHolder -> holder.leftMsg.text = msg.content
            is RightViewHolder -> holder.rightMsg.text = msg.content
        }
    }

    override fun getItemCount() = msgList.size

}
MainAcitivity.kt
package com.example.helloworld

import androidx.appcompat.app.AppCompatActivity
import android.os.Bundle
import android.view.View
import androidx.recyclerview.widget.LinearLayoutManager
import kotlinx.android.synthetic.main.activity_main.*

class MainActivity : AppCompatActivity(), View.OnClickListener {

    private val msgList = ArrayList<Msg>()

    private lateinit var adapter: MsgAdapter

    override fun onCreate(savedInstanceState: Bundle?) {
        super.onCreate(savedInstanceState)
        setContentView(R.layout.activity_main)
        initMsg()
        val layoutManager = LinearLayoutManager(this)
        recyclerView.layoutManager = layoutManager
        if (!::adapter.isInitialized) {
            adapter = MsgAdapter(msgList)
        }
        recyclerView.adapter = adapter
        send.setOnClickListener(this)
    }

    override fun onClick(v: View?) {
        when (v) {
            send -> {
                val content = inputText.text.toString()
                if (content.isNotEmpty()) {
                    val msg = Msg(content, Msg.TYPE_SENT)
                    msgList.add(msg)
                    adapter.notifyItemInserted(msgList.size - 1) // 当有新消息时,刷新RecyclerView中的显示
                    recyclerView.scrollToPosition(msgList.size - 1)  // 将
                    //RecyclerView定位到最后一行
                    inputText.setText("") // 清空输入框中的内容
                }
            }
        }
    }

    private fun initMsg() {
        val msg1 = Msg("Hello Andy.", Msg.TYPE_RECEIVED)
        msgList.add(msg1)
        val msg2 = Msg("Hello. How did you do on your database exam?", Msg.TYPE_SENT)
        msgList.add(msg2)
        val msg3 = Msg("Not good!", Msg.TYPE_RECEIVED)
        msgList.add(msg3)
    }

}

