Spring Cloud基础教程:服务注册与发现(Eureka Server)
一、概述
微服务的主旨是将一个原本独立的系统拆分成多个小型的服务,这些小型服务都在各自独立的进程之中运行服务之间通过基于HTTP的RETfu API进行通信协作。
网上有很多的博客讲解SpringCloud基础知识,我本系列的博客就不在讲解,直接进入代码,讲解工程的搭建以及代码的编写。
开发工具使用Intelidea IDE,使用Gradle进行依赖管理。
二、Eureka Server工程创建
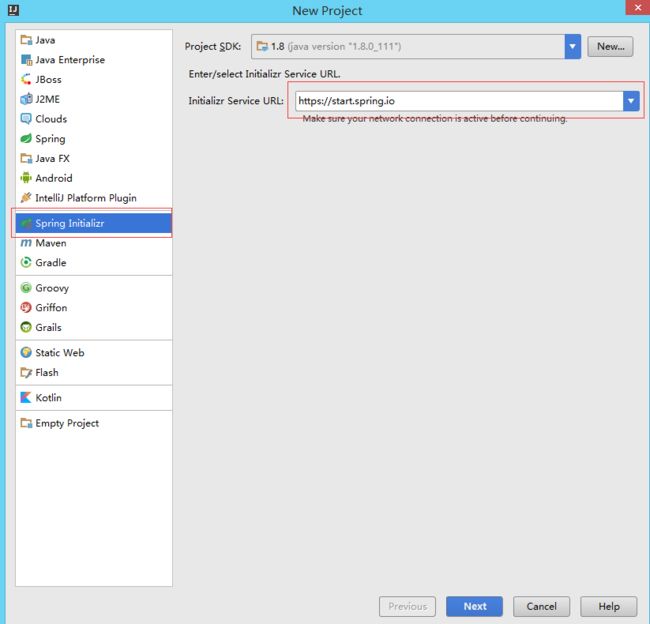
点击File->New->Project
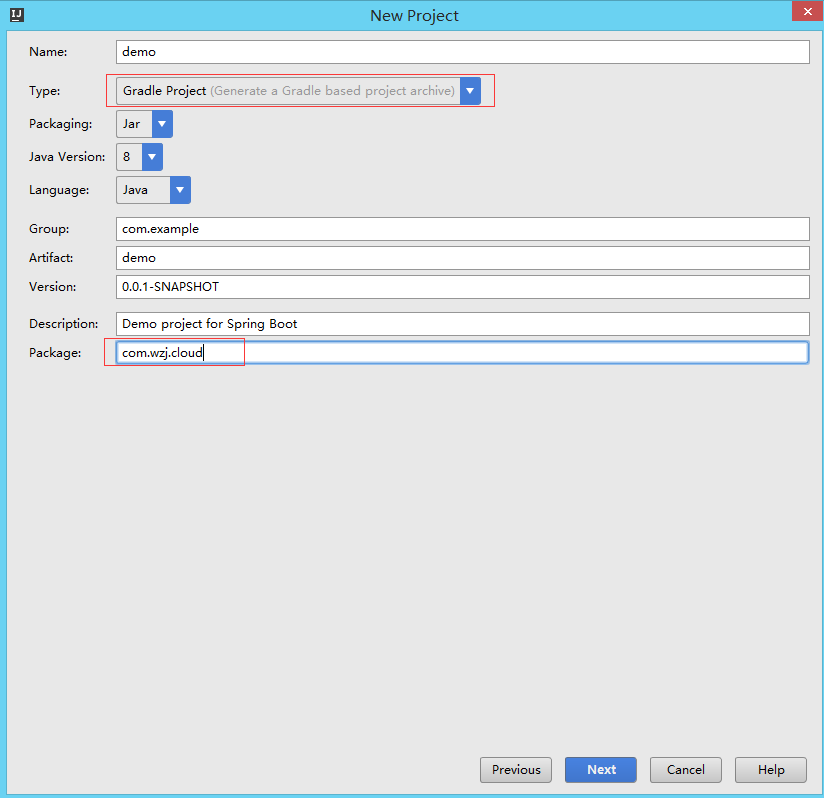
选择Gradle Project,修改包名
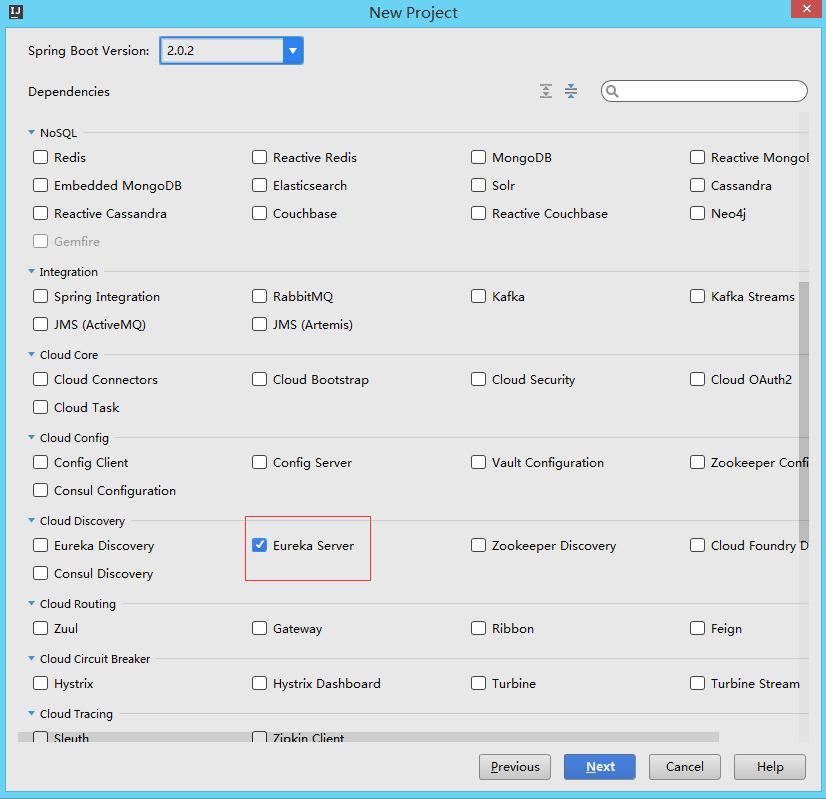
选择Eureka Server
然后选择工程的目录和工程名字,点击ok,工程就创建完成。
三、注解和依赖配置,启动Eureka Server
工程创建完成之后,默认会生成如下依赖
dependencies {
	compile('org.springframework.cloud:spring-cloud-starter-netflix-eureka-server')
	testCompile('org.springframework.boot:spring-boot-starter-test')
}
通过@EnableEurekaServer注解启动一个服务注册中心,添加@EnableEurekaServer注解
@SpringBootApplication
@EnableEurekaServer
public class ServerApplication
{
    public static void main(String[] args)
    {
        SpringApplication.run(ServerApplication.class, args);
    }
}
在默认设置下,该服务注册中心也会将自己作为客户端来尝试注册它自己。
所以我们需要禁用它的客户端注册行为,只需要在application.properties配置文件中增加如下信息:
- server.port指定启动端口号
- spring.application.name指定名称
spring.application.name=eureka-server
server.port=10001

eureka.instance.hostname=localhost
eureka.client.register-with-eureka=false
eureka.client.fetch-registry=false

eureka.client.serviceUrl.defaultZone=http://${eureka.instance.hostname}:${server.port}/eureka/
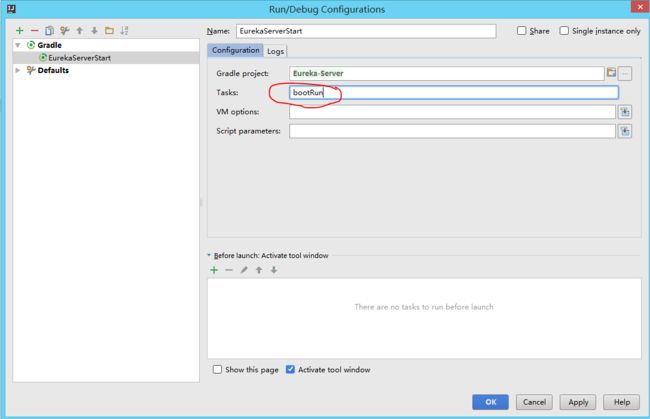
新建Gradle启动任务,启动任务选择bootRun
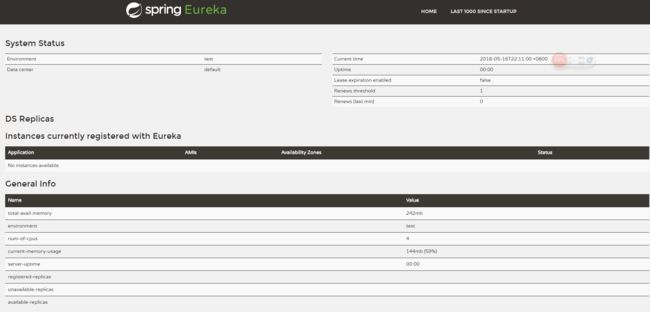
启动工程,浏览器访问http://127.0.0.1:10001/
可以看到Eureka Server已配置好。
四、创建服务消费者(Eureka Client A)
新建Eureka Client工程,创建步骤和上面创建Eureka Server差不多,大概步骤如下:
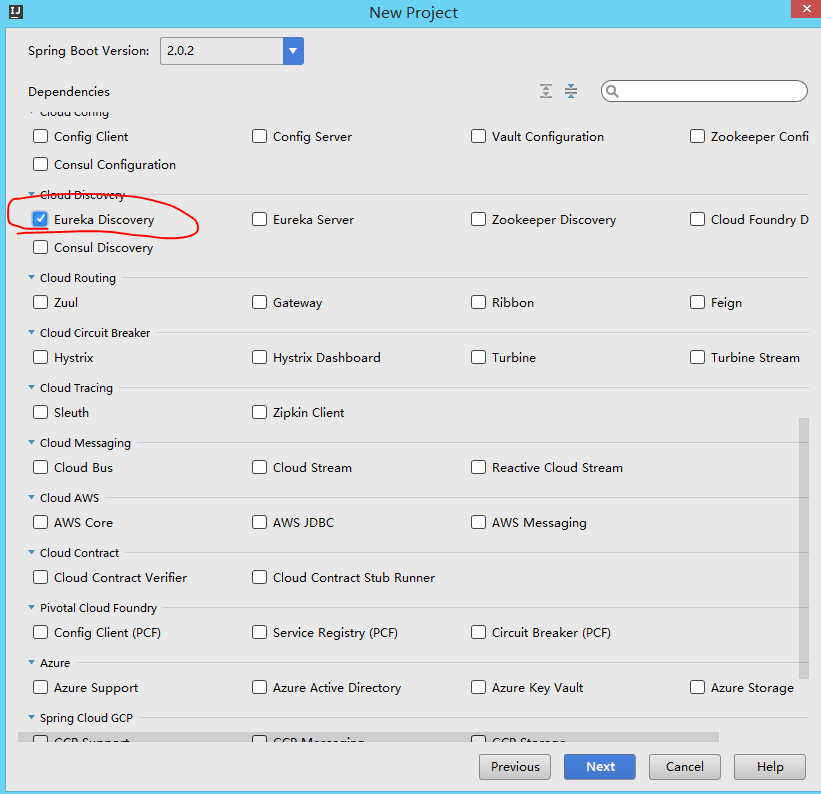
File->New->ProJect->选择Grale Project->选择Eureka Discovery->选择工程路径、填写工程名字(工程名定位Eureka-Client-A)
创建完成之后,添加Gradle依赖
dependencies {
	compile('org.springframework.cloud:spring-cloud-starter-netflix-eureka-client')
	compile('org.springframework.boot:spring-boot-starter-web')
	testCompile('org.springframework.boot:spring-boot-starter-test')
}
添加@EnableEurekaClient 注解,注明该服务是Eureka客户端
@SpringBootApplication
@EnableEurekaClient
public class EurekaClientApplication
{

	public static void main(String[] args) {
		SpringApplication.run(EurekaClientApplication.class, args);
	}
}
import org.springframework.beans.factory.annotation.Autowired;
import org.springframework.cloud.client.discovery.DiscoveryClient;
import org.springframework.web.bind.annotation.GetMapping;
import org.springframework.web.bind.annotation.RestController;

/**
 * Created by wzj on 2018/5/16.
 */
@RestController
public class EurekaClientController
{
    /**
     * 注入依赖
     */
    @Autowired
    private DiscoveryClient discoveryClient;

    @GetMapping("/client")
    public String test()
    {
        String services = "Services: " + discoveryClient.getServices();
        System.out.println(services);
        return services;
    }
}
application.properties配置服务消费者的端口号、服务名和Eureka Server的地址
spring.application.name=eureka-client-a
server.port=10002
eureka.client.serviceUrl.defaultZone=http://localhost:10001/eureka/
启动Eureka-Client-A,访问http://127.0.0.1:10002/client,出现下面,说明客户端已经启动。
![]()
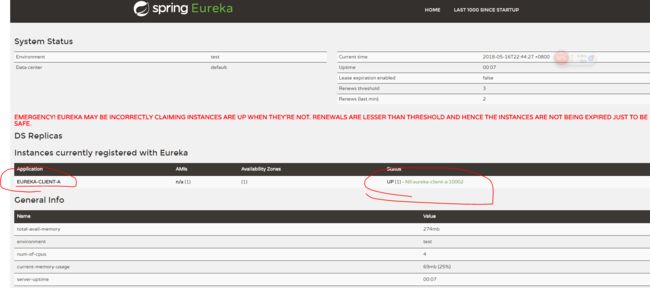
再次访问Eureka-Server,会发现消费者已经注册到注册中心了。
五、创建服务消费者(Eureka Client B)
将步骤四创建的工程,复制一份,application.properties修改为
spring.application.name=eureka-client-b
server.port=10003
eureka.client.serviceUrl.defaultZone=http://localhost:10001/eureka/
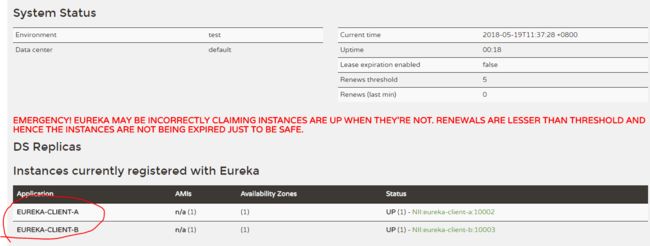
编译启动,访问Eureka-Server会发现,Eureka-Client-B也注册到注册中心了。
源码Github地址:https://github.com/HelloKittyNII/SpringCloud/tree/master/SpringCloudFramework
