Linux网络服务——PXE、kickstart实现无人值守自动化部署操作系统(内含具体操作步骤!)
文章目录
- 一.PXE的原理
- 二.kickstart的原理
- 三.PXE与kickstart的结合使用自动装机
- 3.1配置kickstart图形界面的装机参数
一.PXE的原理
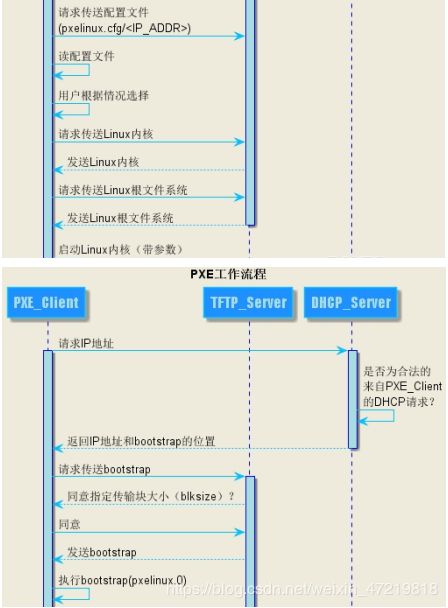
◆ PXE(preboot execute environment,预启动执行环境)是由Intel公司开发的最新技术,工作于Client/Server的网络模式,支持工作站通过网络从远端服务器下载映像,并由支持通过网络启动操作系统,再启动过程中,终端要求服务器分配IP地址(DHCP协议),再用TFTP(trivial file transfer protocol)或MTFTP(multicast trivial file transfer protocol)协议下载一个启动软件包到本机内存中执行,由这个启动软件包完成终端基本软件设置,从而引导预先安装在服务器中的终端操作系统。PXE可以引导多种操作系统,如:Windows95/98/2000/windows2003/windows2008/winXP/win7/win8/linux等。
◆ PXE的工作流程:
二.kickstart的原理
◆ Kickstart是一种无人值守的安装方式。它的工作原理是在安装过程中记录人工干预填写的各种参数,并生成一个名为ks.cfg的文件。如果在自动安装过程中出现要填写参数的情况,安装程序首先会去查找ks.cfg文件,如果找到合适的参数,就采用所找到的参数;如果没有找到合适的参数,便会弹出对话框让安装者手工填写。所以,如果ks.cfg文件涵盖了安装过程中所有需要填写的参数,那么安装者完全可以只告诉安装程序从何处下载ks.cfg文件,然后就去忙自己的事情。等安装完毕,安装程序会根据ks.cfg中的设置重启/关闭系统,并结束安装。
三.PXE与kickstart的结合使用自动装机
在有网络的情况下,安装DHCP软件包,TFTP软件包,syslinux软件包,ftp软件包,kickstart软件包
[root@localhost ~]# yum install dhcp* tftp-server syslinux vsftpd system-config-kickstart -y
查看软件包的安装情况
[root@localhost ~]# rpm -q dhcp
dhcp-4.2.5-77.el7.centos.x86_64
[root@localhost ~]# rpm -q tftp-server
tftp-server-5.2-22.el7.x86_64
[root@localhost ~]# rpm -q syslinux
syslinux-4.05-15.el7.x86_64
[root@localhost ~]# rpm -q vsftpd
vsftpd-3.0.2-25.el7.x86_64
[root@localhost ~]# rpm -q system-config-kickstart
system-config-kickstart-2.9.7-1.el7.noarch
[root@localhost ~]#
修改网卡为仅主机模式,设置静态IP地址
[root@localhost ~]# vim /etc/sysconfig/network-scripts/ifcfg-ens33

TYPE="Ethernet"
PROXY_METHOD="none"
BROWSER_ONLY="no"
BOOTPROTO=static
DEFROUTE="yes"
IPV4_FAILURE_FATAL="no"
IPV6INIT="yes"
IPV6_AUTOCONF="yes"
IPV6_DEFROUTE="yes"
IPV6_FAILURE_FATAL="no"
IPV6_ADDR_GEN_MODE="stable-privacy"
NAME="ens33"
UUID="7042365e-0b74-48e8-81ff-0c2eeb61def2"
DEVICE="ens33"
ONBOOT="yes"
IPADDR=192.168.100.100
NETMASK=255.255.255.0
GATEWAY=192.168.100.1

[root@localhost ~]# systemctl restart network
[root@localhost ~]# ifconfig
ens33: flags=4163  mtu 1500
        inet 192.168.100.100  netmask 255.255.255.0  broadcast 192.168.100.255
        inet6 fe80::b47a:19c8:ef97:42b7  prefixlen 64  scopeid 0x20
        ether 00:0c:29:31:94:e1  txqueuelen 1000  (Ethernet)
        RX packets 114637  bytes 169681992 (161.8 MiB)
        RX errors 0  dropped 0  overruns 0  frame 0
        TX packets 39564  bytes 2402137 (2.2 MiB)
        TX errors 0  dropped 0 overruns 0  carrier 0  collisions 0

......
配置DHCP服务
[root@localhost ~]# cp /usr/share/doc/dhcp-4.2.5/dhcpd.conf.example /etc/dhcp/dhcpd.conf
cp:是否覆盖"/etc/dhcp/dhcpd.conf"? y
[root@localhost ~]# vim /etc/dhcp/dhcpd.conf

subnet 192.168.100.0 netmask 255.255.255.0 {
        range 192.168.100.10 192.168.100.15;
        option routers 192.168.100.100;
        option domain-name-servers 5.5.5.5;
        next-server 192.168.100.100;
        filename "pxelinux.0";
}
[root@localhost ~]# systemctl start dhcpd     //开启服务,验证参数是否正确
配置TFTP服务
1.修改TFTP的主配置文件
[root@localhost ~]# vim /etc/xinetd.d/tftp
# default: off
# description: The tftp server serves files using the trivial file transfer \
#       protocol.  The tftp protocol is often used to boot diskless \
#       workstations, download configuration files to network-aware printers, \
#       and to start the installation process for some operating systems.
service tftp
{
        socket_type             = dgram
        protocol                = udp
        wait                    = yes
        user                    = root
        server                  = /usr/sbin/in.tftpd
        server_args             = -s /var/lib/tftpboot
        disable                 = no
        per_source              = 11
        cps                     = 100 2
        flags                   = IPv4
2.将syslinux服务中pxelinux.0复制到tftp的站点/var/lib/tftpboot
[root@localhost ~]# cp /usr/share/syslinux/pxelinux.0 /var/lib/tftpboot
[root@localhost ~]# ls /var/lib/tftpboot
pxelinux.0
[root@localhost ~]#
配置FTP服务
1.在FTP服务站点/var/ftp下,创建一个名为centos7的目录,且将本机镜像挂载到centos7中
[root@localhost ftp]# ls
centos7  pub
[root@localhost ftp]# mount /dev/sr0 centos7/
mount: /dev/sr0 写保护,将以只读方式挂载
[root@localhost ftp]# df -hT
文件系统       类型      容量  已用  可用 已用% 挂载点
/dev/sda2      xfs        10G  3.6G  6.5G   36% /
devtmpfs       devtmpfs  474M     0  474M    0% /dev
tmpfs          tmpfs     489M     0  489M    0% /dev/shm
tmpfs          tmpfs     489M  7.2M  481M    2% /run
tmpfs          tmpfs     489M     0  489M    0% /sys/fs/cgroup
/dev/sda1      xfs       4.0G  158M  3.9G    4% /boot
/dev/sda5      xfs       4.0G   37M  4.0G    1% /home
tmpfs          tmpfs      98M  4.0K   98M    1% /run/user/42
tmpfs          tmpfs      98M   20K   98M    1% /run/user/0
/dev/sr0       iso9660   4.3G  4.3G     0  100% /var/ftp/centos7
[root@localhost ftp]#

2.将centos7中的镜像文件vmlinuz和initrd.img,放到tftp的站点/var/lib/tftpboot
[root@localhost ftp]# cp centos7/images/pxeboot/vmlinuz /var/lib/tftpboot/
[root@localhost ftp]# cp centos7/images/pxeboot/initrd.img /var/lib/tftpboot/
[root@localhost ftp]# ls /var/lib/tftpboot
initrd.img  pxelinux.0  vmlinuz
[root@localhost ftp]#

3.在tftp服务的站点下,创建一个pxelinux.cfg的目录,且编辑一个default的数据文件
[root@localhost ftp]# cd /var/lib/tftpboot
[root@localhost tftpboot]# ls
initrd.img  pxelinux.0  vmlinuz
[root@localhost tftpboot]# mkdir pxelinux.cfg
[root@localhost tftpboot]# ls
initrd.img  pxelinux.0  pxelinux.cfg  vmlinuz
[root@localhost tftpboot]# cd pxelinux.cfg/
[root@localhost pxelinux.cfg]# vim default


default auto
prompt 1
label auto
        kernel vmlinuz
        append initrd=initrd.img method=ftp://192.168.100.100/centos7
label linux text
        kernel vmlinuz
        append text initrd=initrd.img method=ftp://192.168.100.100/centos7
label linux rescue
        kernel vmlinuz
        append rescue initrd=initrd.img method=ftp://192.168.100.100/centos7
4.启动服务验证参数是否错误
[root@localhost pxelinux.cfg]# systemctl restart dhcpd
[root@localhost pxelinux.cfg]# systemctl start tftp
[root@localhost pxelinux.cfg]# systemctl start vsftpd
[root@localhost pxelinux.cfg]#
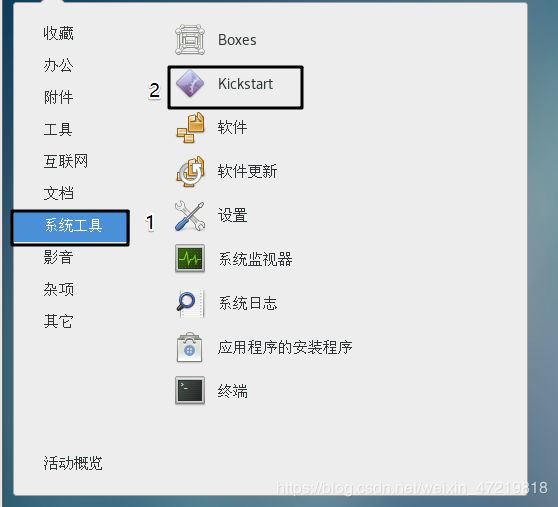
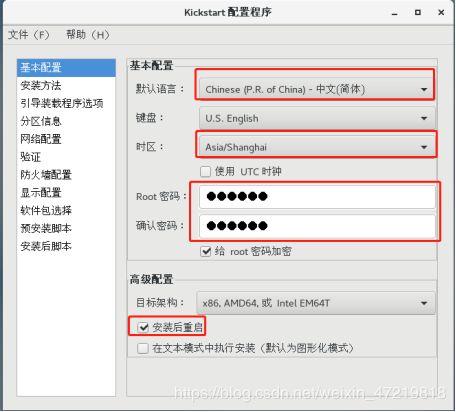
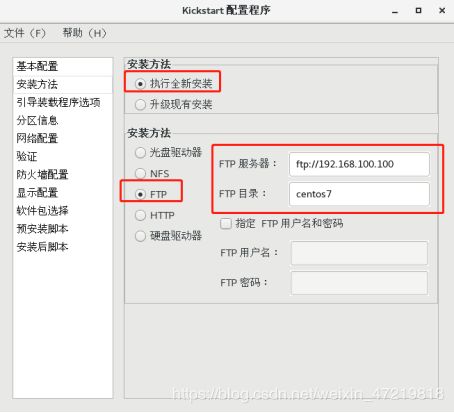
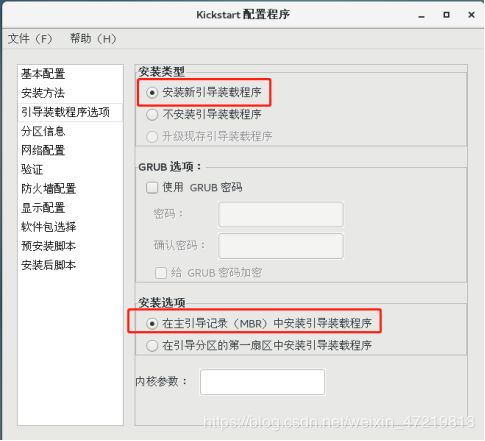
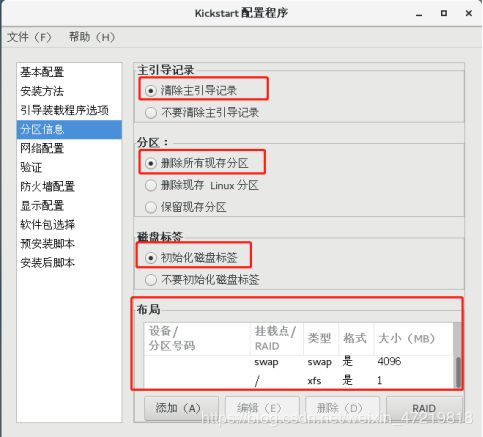
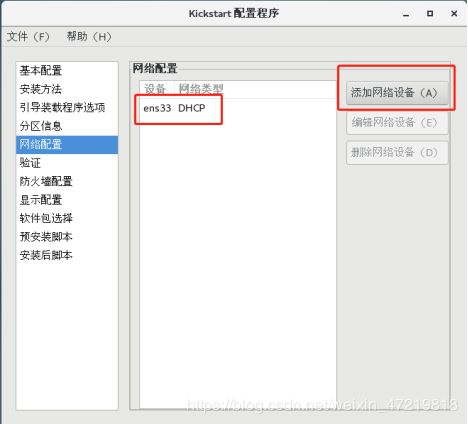
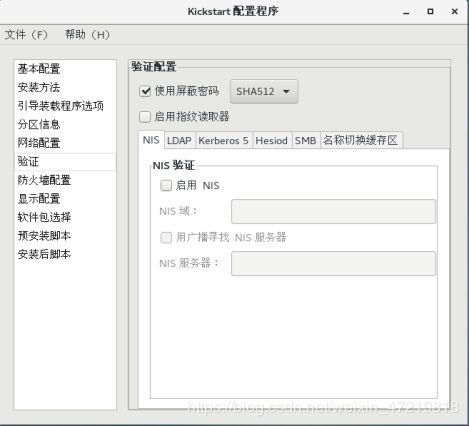
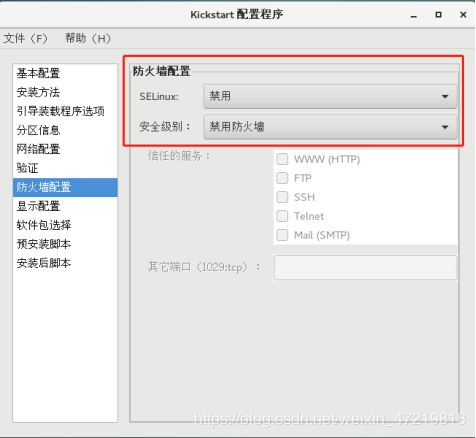
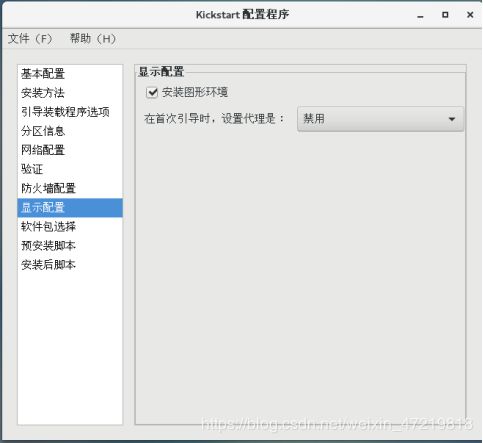
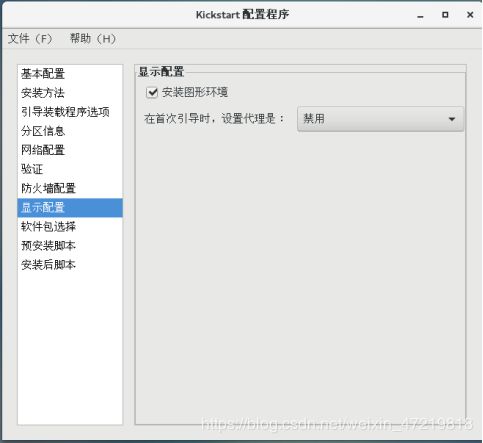
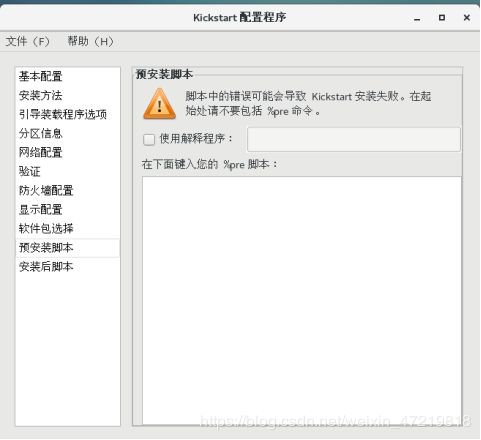
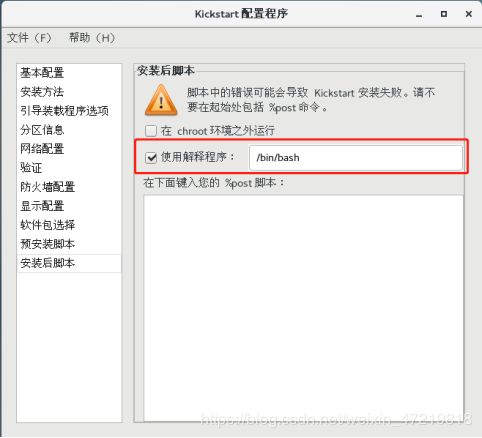
3.1配置kickstart图形界面的装机参数
1.查看文件是否保存
[root@localhost pxelinux.cfg]# ls /var/ftp
centos7  ks.cfg  pub
[root@localhost pxelinux.cfg]#
2.在/var/ftp/ks.cfg中添加软件包参数
[root@localhost ~]# vim anaconda-ks.cfg
[root@localhost ~]# vim /var/ftp/ks.cfg
%packages
@^gnome-desktop-environment
@base
@core
@desktop-debugging
@dial-up
@directory-client
@fonts
@gnome-desktop
@guest-agents
@guest-desktop-agents
@input-methods
@internet-browser
@java-platform
@multimedia
@network-file-system-client
@networkmanager-submodules
@print-client
@x11
chrony
kexec-tools

%end
3.在tftp服务的站点/var/lib/tftpboot/pxelinux.cfg/default上添加参数
[root@localhost ~]# vim /var/lib/tftpboot/pxelinux.cfg/default
default auto
prompt 1
label auto
        kernel vmlinuz
        append initrd=initrd.img method=ftp://192.168.100.100/centos7 ks=ftp://192.168.100.100/ks.cfg
label linux text
        kernel vmlinuz
        append text initrd=initrd.img method=ftp://192.168.100.100/centos7
label linux rescue
        kernel vmlinuz
        append rescue initrd=initrd.img method=ftp://192.168.100.100/centos7
~
开启所有服务,关闭防火墙和增强性功能
[root@localhost ~]# systemctl restart dhcpd
[root@localhost ~]# systemctl restart tftp
[root@localhost ~]# systemctl restart vsftpd
[root@localhost ~]# systemctl stop firewalld
[root@localhost ~]# setenforce 0
[root@localhost ~]#

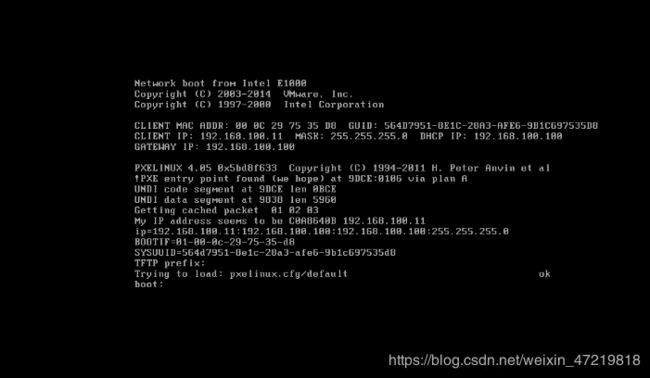
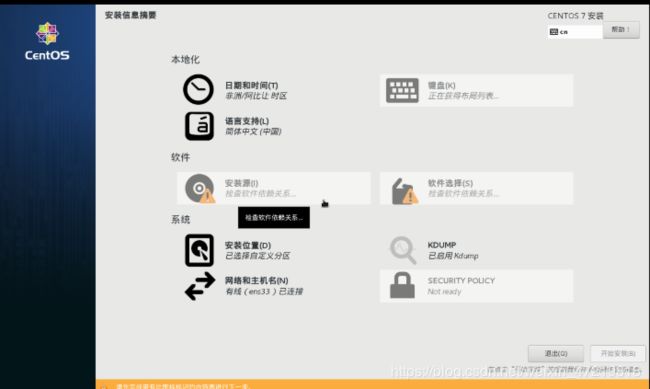
开启虚拟机,自动装机,选择网络模式
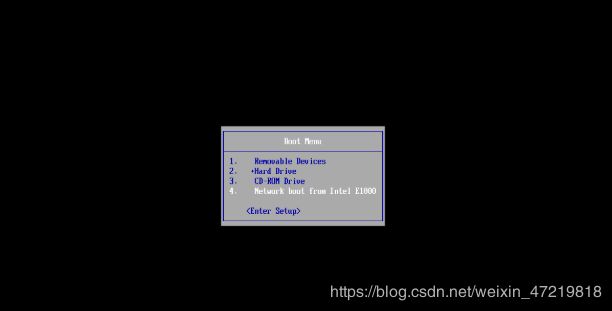
这里要回车,之后就不用再管理了
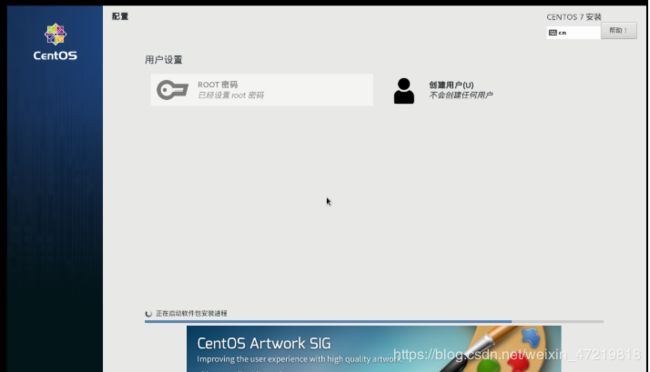
注:测试机的硬件要符合,再kickstart的图形界面的设置的参数,内存和硬盘最好都大一些,以免发生错误。另外,有个人实验环境的不同,测试机可能会卡死,笔者换了三台测试机才成功。
