Linux操作技术文档——LNMP架构及应用部署
LNMP架构及应用部署
一、构建LNMP网站平台
LAMP平台主要包括以下几个组件:
1、Linux操作系统
2、Nginx服务器
3、MySQL数据库服务器
4、PHP/Perl/Python网页编程语言
1、安装Linux操作系统
(略)
2、搭建Nginx服务器
Nginx官网:http://nginx.org/en/,下载地址:http://nginx.org/download/,或者是从GitGub网站查找下载
[root@nginx-1 ~]# vim /etc/yum.repos.d/nginx.repo
[nginx-stable]
name=nginx stable repo
baseurl=http://nginx.org/packages/centos/$releasever/$basearch/
gpgcheck=0
enabled=1
gpgkey=https://nginx.org/keys/nginx_signing.key
module_hotfixes=true
[root@nginx-1 ~]# yum -y install nginx
[root@nginx-1 ~]# systemctl start nginx
[root@nginx-1 ~]# systemctl enable nginx
3、安装PHP解析环境
[root@php ~]# rpm -Uvh https://dl.fedoraproject.org/pub/epel/epel-release-latest-7.noarch.rpm
[root@php ~]# rpm -Uvh https://mirror.webtatic.com/yum/el7/webtatic-release.rpm
[root@php ~]# yum makecache fast
[root@php ~]# yum -y install php72w php72w-cli php72w-common php72w-devel \
> php72w-embedded php72w-gd php72w-mbstring php72w-pdo php72w-xml php72w-fpm \
> php72w-mysqlnd php72w-opcache
[root@php ~]# systemctl start php-fpm
[root@php ~]# systemctl enable php-fpm
4、安装MySQL数据库(mariadb)
[root@mysql ~]# rpm -ivh http://repo.mysql.com/yum/mysql-5.6-community/el/7/x86_64/mysql-community-release-el7-5.noarch.rpm
[root@mysql ~]# yum -y install mysql-community-server
[root@mysql ~]# systemctl start mysqld
[root@mysql ~]# systemctl enable mysqld
[root@mysql ~]# mysql_secure_installation                //修改mysql密码
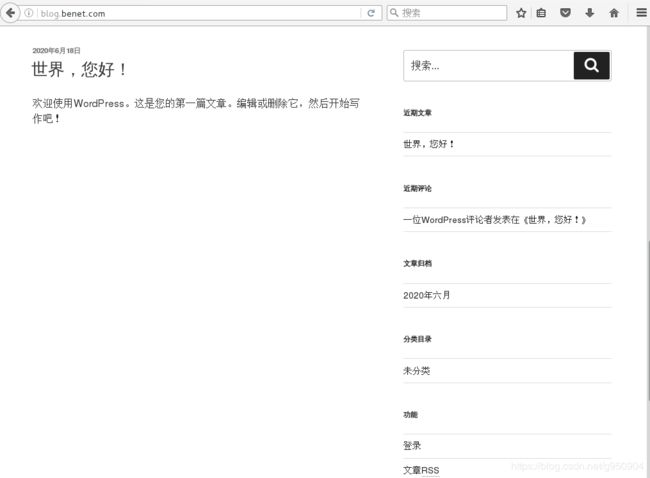
二、在LNMP平台中部署Web应用
[root@http ~]# mkdir /blog
[root@http ~]# cp /media/wordpress-4.9.4-zh_CN.zip /blog/
[root@http ~]# cd /blog/
[root@http blog]# unzip wordpress-4.9.4-zh_CN.zip
[root@http blog]# chmod -R 777 wordpress
[root@http ~]# mysql -uroot -p123456
mysql> create database blog;
Query OK, 1 row affected (0.00 sec)

mysql> grant all on blog.* to lisi@localhost identified by '123.com';
Query OK, 0 rows affected (0.00 sec)

mysql> exit
Bye
[root@http ~]# vim /etc/nginx/nginx.conf
user  root;
......
[root@http ~]# vim /etc/nginx/conf.d/blog.conf
server {
        listen 80;
        server_name blog.benet.com;
        root /blog/wordpress;
        index index.php index.html;

        location ~\.php$ {
                root /blog/wordpress;
                fastcgi_pass 127.0.0.1:9000;
                fastcgi_index index.php;
                fastcgi_param SCRIPT_FILENAME $document_root$fastcgi_script_name;
                include fastcgi_params;
        }
}
[root@http ~]# systemctl reload nginx
三、LNMP架构分离
1、MySQL分离
1、原LNMP主机设置
[root@http ~]# mysqldump -uroot -p --all-databases > `date +%F%H`-mysql-all.sql
Enter password:
[root@http ~]# scp 2020-06-2020-mysql-all.sql [email protected]:/root
[root@http ~]# cd /blog/wordpress/
[root@http wordpress]# grep -R 123.com
wp-config.php:define('DB_PASSWORD', '123.com');
[root@http ~]# vim /blog/wordpress/wp-config.php
/** WordPress数据库的名称 */
define('DB_NAME', 'blog');

/** MySQL数据库用户名 */
define('DB_USER', 'lisi');

/** MySQL数据库密码 */
define('DB_PASSWORD', '123.com');

/** MySQL主机 */
define('DB_HOST', '192.168.1.20');

/** 创建数据表时默认的文字编码 */
define('DB_CHARSET', 'utf8mb4');

/** 数据库整理类型。如不确定请勿更改 */
define('DB_COLLATE', '');
[root@http ~]# cd /zh/
[root@http zh]# grep -R 123.com
system/config/database.php:  'password' => '123.com',
[root@http ~]# vim /zh/system/config/database.php
<?php

$config['charset'] = 'utf8mb4';^M
$config['prefix'] = 'aws_';^M
$config['driver'] = 'MySQLi';^M
$config['master'] = array (
  'charset' => 'utf8mb4',
  'host' => '192.168.1.20',
  'username' => 'wangwu',
  'password' => '123.com',
  'dbname' => 'zh',
);^M
$config['slave'] = false;^M
2、待转移主机设置
[root@mysql ~]# rpm -ivh http://repo.mysql.com/yum/mysql-5.6-community/el/7/x86_64/mysql-community-release-el7-5.noarch.rpm
[root@mysql ~]# yum install mysql-community-server -y
[root@mysql ~]# systemctl start mysqld
[root@mysql ~]# systemctl enable mysqld
[root@mysql ~]# mysql_secure_installation
[root@mysql ~]# mysql -uroot -p < 2020-06-2020-mysql-all.sql
Enter password:
[root@mysql ~]# systemctl restart mysqld
[root@mysql ~]# mysql -uroot -p123456
mysql> grant all on blog.* to lisi@'192.168.1.%' identified by '123.com';
Query OK, 0 rows affected (0.00 sec)

mysql> grant all on zh.* to wangwu@'192.168.1.%' identified by '123.com';
Query OK, 0 rows affected (0.00 sec)

mysql> exit
Bye
2、php分离
1、原LNMP主机设置
[root@http ~]# vim /etc/nginx/conf.d/blog.conf
server {
        listen 80;
        server_name blog.benet.com;
        root /blog/wordpress;
        index index.php index.html;

        location ~\.php$ {
                root /blog/wordpress;
                fastcgi_pass 192.168.1.30:9000;
                fastcgi_index index.php;
                fastcgi_param SCRIPT_FILENAME $document_root$fastcgi_script_name;
                include fastcgi_params;
        }
}
[root@http ~]# vim /etc/nginx/conf.d/zh.conf
server {
        listen 80;
        server_name zh.benet.com;
        root /zh;
        index index.php index.html;

        location ~\.php$ {
                root /zh;
                fastcgi_pass 192.168.1.30:9000;
                fastcgi_index index.php;
                fastcgi_param SCRIPT_FILENAME $document_root$fastcgi_script_name;
                include fastcgi_params;
        }
}
[root@http ~]# systemctl restart nginx
[root@http ~]# scp -rp /blog [email protected]:/
[root@http ~]# scp -rp /zh [email protected]:/
2、待转移主机设置
[root@php ~]# rpm -Uvh https://dl.fedoraproject.org/pub/epel/epel-release-latest-7.noarch.rpm
[root@php ~]# rpm -Uvh https://mirror.webtatic.com/yum/el7/webtatic-release.rpm
[root@php ~]# yum -y install php72w php72w-cli php72w-common php72w-devel php72w-embedded php72w-gd php72w-mbstring php72w-pdo php72w-xml php72w-fpm php72w-mysqlnd php72w-opcache
[root@php ~]# systemctl start php-fpm
[root@php /]# ls
1    blog  dev  home  lib64  mnt  proc  run   srv  tmp  var
bin  boot  etc  lib   media  opt  root  sbin  sys  usr  zh
[root@php ~]# vim /etc/php-fpm.d/www.conf
listen = 192.168.1.30:9000
listen.allowed_clients = 192.168.1.10
[root@php ~]# systemctl restart php-fpm
3、网站分离
1、待转移主机设置
[root@nfs ~]# yum -y install nfs-utils  rpcbind
[root@nfs ~]# mkdir -p /nfs/{blog,zh}
[root@nfs ~]# vim /etc/exports
/nfs/blog       192.168.1.0/24(rw,sync,no_root_squash)
/nfs/zh         192.168.1.0/24(rw,sync,no_root_squash)
[root@nfs ~]# systemctl restart rpcbind
[root@nfs ~]# systemctl restart nfs
2、原LNMP主机设置
[root@http ~]# showmount -e 192.168.1.40
Export list for 192.168.1.40:
/nfs/zh   192.168.1.0/24
/nfs/blog 192.168.1.0/24
[root@http ~]# cd /blog/wordpress/
[root@http wordpress]# cp -rp wp-content/  wp-contentbak
[root@http wordpress]# mount -t nfs 192.168.1.40:/nfs/blog  wp-content
[root@http wordpress]# cp -rp wp-contentbak/*  wp-content/
[root@http wordpress]# vim /etc/fstab
192.168.1.40:/nfs/log  /wordpress/wp-content   nfs     defaults        0 0
四、LNMP优化
1、nginx负载均衡
1、第二台web服务器设置
[root@nginx-web ~]# yum -y install nginx
[root@nginx-web ~]# systemctl start nginx
[root@nginx-web /]# ls
1    blog  dev  home  lib64  mnt  proc  run   srv  tmp  var
bin  boot  etc  lib   media  opt  root  sbin  sys  usr  zh
2、原web服务器主机设置
[root@http ~]# scp -rp /etc/nginx/*  [email protected]:/etc/nginx
[root@http ~]# scp -rp /blog [email protected]:/
[root@http ~]# scp -rp /zh [email protected]:/
3、php服务器设置
[root@php ~]# vim /etc/php-fpm.d/www.conf
listen.allowed_clients = 192.168.1.10,192.168.1.100
[root@php ~]# systemctl restart php-fpm
4、负载均衡服务器设置
[root@nginx-lb1 ~]# yum -y install nginx
[root@nginx-lb1 ~]# cd /etc/nginx/conf.d/
[root@nginx-lb1 conf.d]# mv default.conf default.conf.bak
[root@nginx-lb1 conf.d]# vim /etc/nginx/nginx_params
	proxy_set_header Host $http_host;
	proxy_set_header X-Real-IP $remote_addr;
	proxy_set_header X-Forwarded-For $proxy_add_x_forwarded_for;

	proxy_connect_timeout 30;
	proxy_send_timeout 60;
	proxy_read_timeout 60;

	proxy_buffering on;
	proxy_buffer_size 32k;
	proxy_buffers 4 128k;
[root@nginx-lb1 ~]# vim /etc/nginx/conf.d/backup.conf
upstream webcluster {
        server 192.168.1.10:80;
        server 192.168.1.100:80;
}

server {
        listen 80;
        server_name blog.benet.com;

        location / {
                proxy_pass http://webcluster;
                include nginx_params;
        }
}
server {
        listen 80;
        server_name zh.benet.com;

        location / {
                proxy_pass http://webcluster;
                include nginx_params;
        }
}
[root@nginx-lb1 ~]# systemctl restart nginx
nginx负载均衡后端状态
| 后端状态 | 说明 |
|---|---|
| down | 当前节点服务器不参与负载均衡 |
| backup | 备份服务器 |
| max_fails | 允许请求失败的次数 |
| fails_timeout | 经过max_fails失败后,服务的暂停时间 |
| max_conns | 同一ip最大连接数 |
upstream web_cluster {
        server 192.168.1.10:80 max_fails=2 fails_timeout=10s max_conns=1;
        server 192.168.1.100:80 down;                //一般用于停机维护
}
5、发布内部服务器的ssh和mysql
[root@nginx-lb1 ~]# vim /etc/nginx/nginx.conf
events {
    worker_connections  1024;
}
stream {
        upstream sshweb1 {
                server 192.168.1.10:22;
        }
        upstream mysql {
                server 192.168.1.20:3306;
        }
        server {
                listen 5555;
                proxy_pass sshweb1;
                proxy_connect_timeout 30;
                proxy_timeout 60;
        }
        server {
                listen 7777;
                proxy_pass mysql;
                proxy_connect_timeout 30;
                proxy_timeout 60;
        }
}
http {
......
[root@nginx-lb1 ~]# systemctl restart nginx
2、高可用
1、lb1设置
[root@nginx-lb1 ~]# yum -y install keepalived
[root@nginx-lb1 ~]# vim /etc/keepalived/keepalived.conf
global_defs {
   router_id lb1
}

vrrp_instance VI_1 {
    state MASTER
    interface ens33
    virtual_router_id 51
    priority 100
    advert_int 1
    authentication {
        auth_type PASS
        auth_pass 1111
    }
    virtual_ipaddress {
        192.168.1.254
    }
}
[root@nginx-lb1 ~]# scp -rp /etc/nginx/* [email protected]:/etc/nginx/
[root@nginx-lb1 ~]# systemctl restart keepalived
[root@nginx-lb1 ~]# ip a show dev ens33
2: ens33: <BROADCAST,MULTICAST,UP,LOWER_UP> mtu 1500 qdisc pfifo_fast state UP qlen 1000
    link/ether 00:0c:29:05:bb:6a brd ff:ff:ff:ff:ff:ff
    inet 192.168.1.200/24 brd 192.168.1.255 scope global ens33
       valid_lft forever preferred_lft forever
    inet 192.168.1.254/32 scope global ens33
       valid_lft forever preferred_lft forever
    inet6 fe80::19de:d9a7:568a:f34f/64 scope link
       valid_lft forever preferred_lft forever
2、lb2设置
[root@nginx-lb2 ~]# yum -y install keepalived
[root@nginx-lb2 ~]# vim /etc/keepalived/keepalived.conf
global_defs {
   router_id lb2
}

vrrp_instance VI_1 {
    state BACKUP
    interface ens33
    virtual_router_id 51
    priority 100
    advert_int 1
    authentication {
        auth_type PASS
        auth_pass 1111
    }
    virtual_ipaddress {
        192.168.1.254
    }
}
[root@nginx-lb2 ~]# systemctl restart keepalived
客户端修改hosts文件
[root@nginx-client ~]# vim /etc/hosts
192.168.1.254  blog.benet.com zh.benet.com
3、高可用裂脑
1、检测裂脑脚本
[root@nginx-lb2 ~]# vim split_brain.sh
#!/bin/sh
while true
do
ping -c 2 -W 3 192.168.1.100 &> /dev/null
if [ $? -eq 0 -a `ip add|grep 192.168.1.254|wc -l` -eq 1 ]
  then
    echo "split brain....."
else
    echo "HA is ok"
fi
sleep 5
done
[root@nginx-lb2 ~]# chmod +x split_brain.sh
[root@nginx-lb2 ~]# source split_brain.sh
2、解决因为防火墙出现的裂脑现象
[root@nginx-lb2 ~]# systemctl start firewalld
[root@nginx-lb2 ~]# firewall-cmd --direct --permanent --add-rule ipv4 filter INPUT 0  --destination 224.0.0.18 --protocol vrrp -j ACCEPT
[root@nginx-lb2 ~]# firewall-cmd --reload
3、解决nginx故障造成群集无法工作(监控)
[root@nginx-lb2 ~]# vim /sh/check_nginx_proxy.sh
#!/bin/bash
killall  -0  nginx
if  [ $? -ne 0 ];then
  systemctl stop keepalived
fi
[root@nginx-lb2 ~]# vim /etc/keepalived/keepalived.conf
global_defs {
   router_id lb1
}
vrrp_script check_nginx_proxy {
        script “/sh/check_nginx_proxy.sh”
        interval 2
        weight 5
        }
vrrp_instance VI_1 {
    state MASTER
    interface ens33
    virtual_router_id 51
    priority 100
    advert_int 1
    authentication {
        auth_type PASS
        auth_pass 1111
    }
    virtual_ipaddress {
        192.168.1.254
    }
    track_script {
        check_nginx_proxy
    }
}
[root@nginx-lb2 ~]# systemctl restart keepalived
五、启用ssl加密的安全HTTP传输协议
1、安装openssl
[root@http ~]# rpm -q openssl
openssl-1.0.1e-60.el7.x86_64
[root@http ~]# yum -y install openssl
[root@http ~]# openssl version
OpenSSL 1.0.2k-fips  26 Jan 2017
[root@http ~]# nginx -V
2、 生成证书
[root@http ~]# mkdir -p /etc/nginx/ssl_key
[root@http ~]# cd /etc/nginx/ssl_key
[root@http ssl_key]# openssl genrsa -idea -out server.key 2048
Generating RSA private key, 2048 bit long modulus
...............................................................................+++
.................................................................................................................+++
e is 65537 (0x10001)
Enter pass phrase for server.key:
Verifying - Enter pass phrase for server.key:
[root@http ssl_key]# openssl req -days 3650 -x509 -sha256 -nodes -newkey rsa:2048 -keyout server.key -out server.crt
Generating a 2048 bit RSA private key
.......................................+++
......................................................................+++
writing new private key to 'server.key'
-----
You are about to be asked to enter information that will be incorporated
into your certificate request.
What you are about to enter is what is called a Distinguished Name or a DN.
There are quite a few fields but you can leave some blank
For some fields there will be a default value,
If you enter '.', the field will be left blank.
-----
Country Name (2 letter code) [XX]:
State or Province Name (full name) []:
Locality Name (eg, city) [Default City]:
Organization Name (eg, company) [Default Company Ltd]:
Organizational Unit Name (eg, section) []:
Common Name (eg, your name or your server's hostname) []:
Email Address []:
3、配置https网站
[root@http ~]# vim /etc/nginx/conf.d/blog.conf
server {
        listen 443 ssl;
        server_name blog.benet.com;
        ssl_certificate ssl_key/server.crt;
        ssl_certificate_key ssl_key/server.key;
        root /blog/wordpress;
        index index.php index.html;

        location ~\.php$ {
                root /blog/wordpress;
                fastcgi_pass 192.168.1.30:9000;
                fastcgi_index index.php;
                fastcgi_param SCRIPT_FILENAME $document_root$fastcgi_script_name;
                include fastcgi_params;
        }
}
server {
        listen 80;
        server_name blog.benet.com;
#       rewrite .* https://blog.benet.com;
#       rewrite .* https://$host$request_uri redirect;
#       rewrite .* https://$server_name$request_uri redirect;
        rewrite .* https://$server_name$1 redirect;
}
[root@http ~]# vim /etc/nginx/conf.d/zh.conf
server {
        listen 443 ssl;
        server_name zh.benet.com;
        ssl_certificate ssl_key/server.crt;
        ssl_certificate_key ssl_key/server.key;
        root /zh;
        index index.php index.html;

        location ~\.php$ {
                root /zh;
                fastcgi_pass 192.168.1.30:9000;
                fastcgi_index index.php;
                fastcgi_param SCRIPT_FILENAME $document_root$fastcgi_script_name;
                include fastcgi_params;
        }
}
server {
        listen 80;
        server_name zh.benet.com;
#       rewrite .* https://zh.benet.com;
#       rewrite .* https://$host$request_uri redirect;
#       rewrite .* https://$server_name$request_uri redirect;
        rewrite .* https://$server_name$1 redirect;
}
[root@http ~]# systemctl restart nginx
4、配置负载均衡
1、上传备份服务器和负载均衡服务器
[root@http ~]# scp -rp /etc/nginx/conf.d/ [email protected]:/etc/nginx/
[root@http ~]# scp -rp /etc/nginx/ssl_key/ [email protected]:/etc/nginx/
[root@http ~]# scp -rp /etc/nginx/ssl_key/ [email protected]:/etc/nginx/
[root@http ~]# scp -rp /etc/nginx/ssl_key/ [email protected]:/etc/nginx/
[root@nginx-web /]# systemctl restart nginx
2、负载均衡服务器设置
[root@nginx-lb1 ~]# vim /etc/nginx/conf.d/backup.conf
upstream webcluster {
        server 192.168.1.10:443;
        server 192.168.1.100:443;
}
server {
        listen 443 ssl;
        server_name blog.benet.com;
        ssl_certificate ssl_key/server.crt;
        ssl_certificate_key ssl_key/server.key;

        location / {
                proxy_pass http://webcluster;
                include nginx_params;
        }
}
server {
        listen 443 ssl;
        server_name zh.benet.com;
        ssl_certificate ssl_key/server.crt;
        ssl_certificate_key ssl_key/server.key;

        location / {
                proxy_pass http://webcluster;
                include nginx_params;
        }
}
server {
        listen 80;
        server_name blog.benet.com;
        return 302 https://$server_name$1;
}
server {
        listen 80;
        server_name zh.benet.com;
        return 302 https://$server_name$1;
}
[root@nginx-lb1 ~]# nginx -t
[root@nginx-lb1 ~]# systemctl restart nginx
[root@nginx-lb1 ~]# scp -rp /etc/nginx/conf.d/ [email protected]:/etc/nginx/
[root@nginx-lb2 ~]# nginx -t
nginx: the configuration file /etc/nginx/nginx.conf syntax is ok
nginx: configuration file /etc/nginx/nginx.conf test is successful
[root@nginx-lb2 ~]# systemctl restart nginx