AI医生诊断肺炎
作者|Andre Ye 编译|Flin 来源|towardsdatascience
使用CNN识别胸部X光片中的肺炎
人工智能在现实世界中有多种应用,其中非常重要的一项是在医疗行业中的应用。在本文中,我将提供卷积神经网络如何从胸部X射线诊断肺炎的代码和过程。
导入库
让我们加载一些重要的库:
from keras.preprocessing.image
import ImageDataGenerator, load_img from keras.models
import Sequential from keras.layers
import Conv2D, MaxPooling2D from keras.layers
import Activation, Dropout, Flatten, Dense from keras
import backend as K
import os
import numpy as np
import pandas as np
import matplotlib.pyplot as plt
%matplotlib inline
了解数据
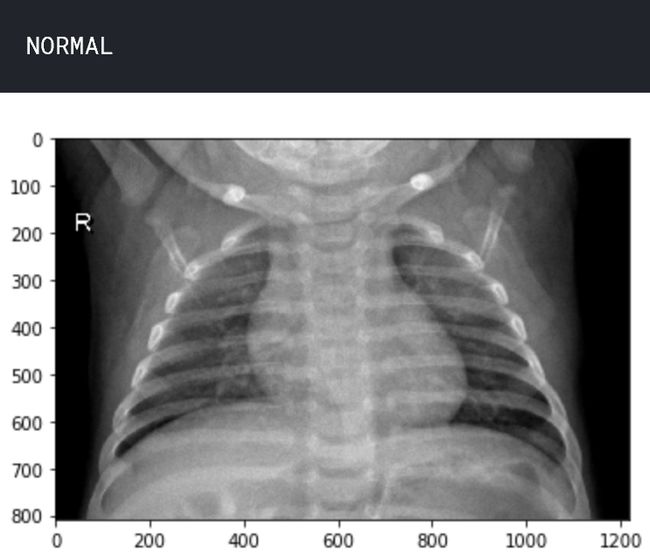
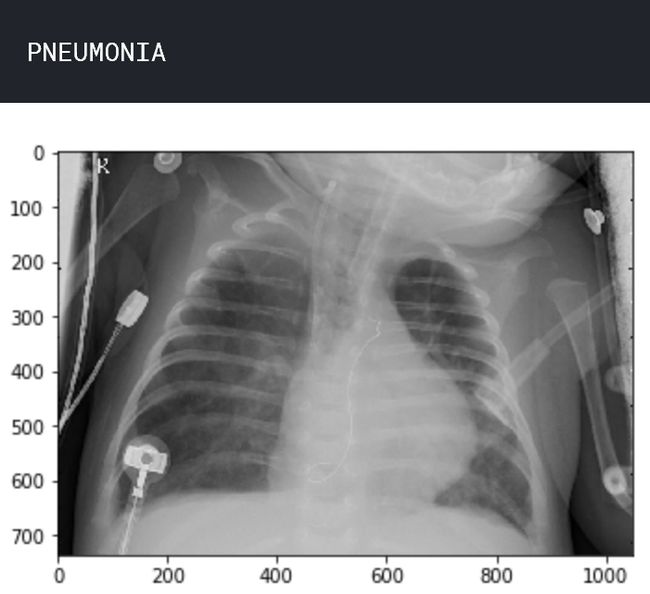
让我们了解数据。查看两个样本图像,一个处于正常状态,另一个处于肺炎状态。
import matplotlib.pyplot as plt
img_name = 'NORMAL2-IM-0588-0001.jpeg'
img_normal = load_img('../input/chest_xray/chest_xray/train/NORMAL/' + img_name)
plt.imshow(img_normal)
plt.show()
img_name = 'person63_bacteria_306.jpeg'
img_pneumonia = load_img('../input/chest_xray/chest_xray/train/PNEUMONIA/ ' + img_name)
print('PNEUMONIA')
plt.imshow(img_pneumonia) plt.show()准备数据以输入模型
设置一些重要的变量,例如图像,epoch等:
img_width, img_height = 150, 150
nb_train_samples = 5217
nb_validation_samples = 17
epochs = 20
batch_size = 16
图像宽度和图像高度均为150像素。将有5217个样本需要训练,17个样本需要验证(稍后我们将通过数据增强添加更多)。验证数据是用于评估训练期间损失函数的数据(与测试数据相反,用于评估训练后的度量)。训练将分为20个epoch,每组16幅图像。
指定图像的目录:
train_data_dir = '../input/chest_xray/chest_xray/train'
validation_data_dir = '../input/chest_xray/chest_xray/val'
test_data_dir = '../input/chest_xray/chest_xray/test'
最后,需要重塑图像:
if K.image_data_format() == 'channels_first':
    input_shape = (3, img_width, img_height)
else:
    input_shape = (img_width, img_height, 3)
因为图像是彩色的,所以每个像素有三个独立的颜色值,因此深度为3。如果图像像MNIST数据集一样是黑白的,那么深度为1。
创建模型
该模型将按照一个标准的CNN公式创建:多次重复卷积层、激活层和池化层,最后是Flatten层和标准全连接层。在最后添加一个dropout层以进一步正则化,然后是另一个全连接层(由两个激活函数包围)。
model = Sequential()
model.add(Conv2D(32, (3, 3), input_shape=input_shape))
model.add(Activation('relu'))
model.add(MaxPooling2D(pool_size=(2, 2)))
model.add(Conv2D(32, (3, 3)))
model.add(Activation('relu'))
model.add(MaxPooling2D(pool_size=(2, 2)))
model.add(Conv2D(64, (3, 3)))
model.add(Activation('relu'))
model.add(MaxPooling2D(pool_size=(2, 2)))
model.add(Flatten())
model.add(Dense(64))
model.add(Activation('relu'))
model.add(Dropout(0.5))
model.add(Dense(1))
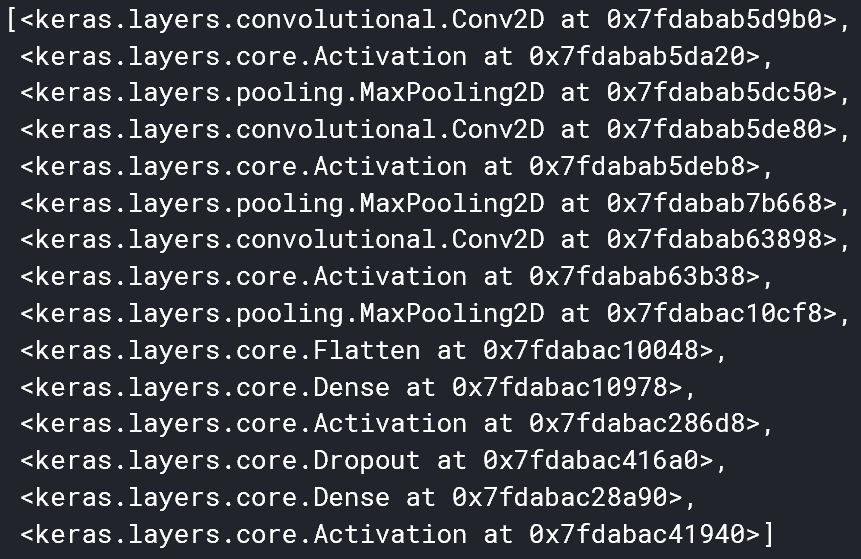
model.add(Activation('sigmoid'))我们可以通过调用model.layers获取有关层的信息。
我们还可以了解model.input和model.output的输入和输出应该是什么。
接下来,我们必须使用损失函数、优化器和度量来编译模型。在这种情况下,选择的损失函数是二元交叉熵(几乎是普遍选择)。选择的优化器是rmsprop,它依赖于图像中非常小的变化,在这种变化下分类工作做的很好。
编译代码如下:
model.compile(loss='binary_crossentropy',
              optimizer='rmsprop',
              metrics=['accuracy'])
数据扩充
只有17张图片需要验证,那么我们将如何获取更多数据?答案:数据扩充。
我们可以使用数据扩充来为我们提供更多用于训练、验证和测试的数据。
train_datagen = ImageDataGenerator(
    rescale=1. / 255,
    shear_range=0.2,
    zoom_range=0.2,
    horizontal_flip=True)
要重新缩放,我们需要测试
test_datagen = ImageDataGenerator(rescale=1. / 255)下面的代码使用flow_from_directory直接将数据生成器应用于训练组目录中的图像。
train_generator = train_datagen.flow_from_directory(
    train_data_dir,
    target_size=(img_width, img_height),
    batch_size=batch_size,
class_mode='binary')以下代码为validation生成代码:
validation_generator = test_datagen.flow_from_directory(
    validation_data_dir,
    target_size=(img_width, img_height),
    batch_size=batch_size,
class_mode='binary')而这个用于test
test_generator = test_datagen.flow_from_directory(
    test_data_dir,
    target_size=(img_width, img_height),
    batch_size=batch_size,
    class_mode='binary')
拟合模型
最后,我们可以拟合模型!将根据生成的数据拟合模型:
model.fit_generator(
    train_generator,
    steps_per_epoch=nb_train_samples // batch_size,
    epochs=epochs,
    validation_data=validation_generator,
    validation_steps=nb_validation_samples // batch_size)
要保存模型的权重:
model.save_weights('first_try.h5')评估模型性能
要评估模型在肺炎分类中的性能,请调用
scores = model.evaluate_generator(test_generator)
print("\n%s: %.2f%%" % (model.metrics_names[1], scores[1]*100))输出为acc: 85.42%。
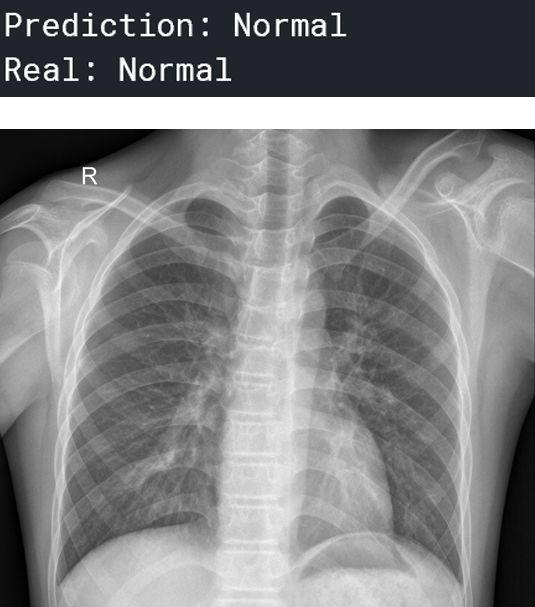
可视化预测
现在,我们可以可视化一些图像和预测。 预测“正常”的人:
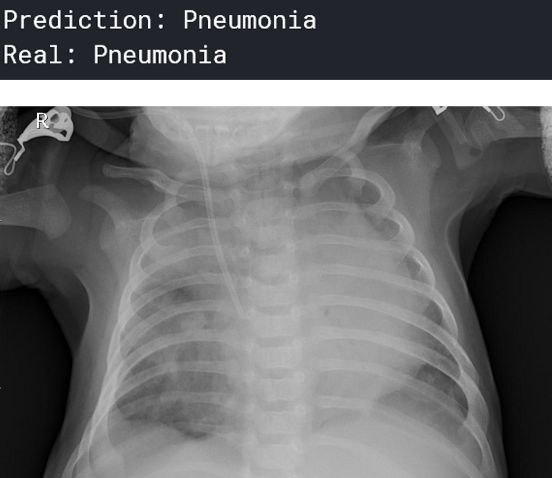
一个预测为“肺炎”的人:
你可以想象这在医疗行业会有多大的帮助——人工智能可以在人类可能无法诊断肺炎的任务中提供很多帮助。
原文链接:https://towardsdatascience.com/doctor-ai-diagnoses-pneumonia-9b073013e226
欢迎关注磐创AI博客站: http://panchuang.net/
sklearn机器学习中文官方文档: http://sklearn123.com/
欢迎关注磐创博客资源汇总站: http://docs.panchuang.net/
