C for Graphic:CommandBuffer血量图
最近618买了个机械师蓝牙游戏鼠标,日常使用几天感觉还行,就把CF安装了,每天玩两把试试身手。
CF每次结束游戏会弹出直播,直播是以主持人上帝视角(可切换人称视角)进行的, 其中有个shader效果很经典,基本上流行的大中型的FPS游戏都有使用:就是角色血量透视展示。
看到标注的红圈没?一个被遮挡的角色,只有一半血,显示效果就是一个高斯模糊外描边和根据血量的身躯填充色。这种shader效果因为其常用性,所以我们就来实现一下。当然实现起来也不难,依次分步骤实现:
1.commandbuffer外描边(或forwardbase透视外描边)
2.commandbuffer填充色(取屏幕rendertexture)
3.在rendertexture基础上做uv的V方向clip裁剪(根据血量0f-1f裁剪)
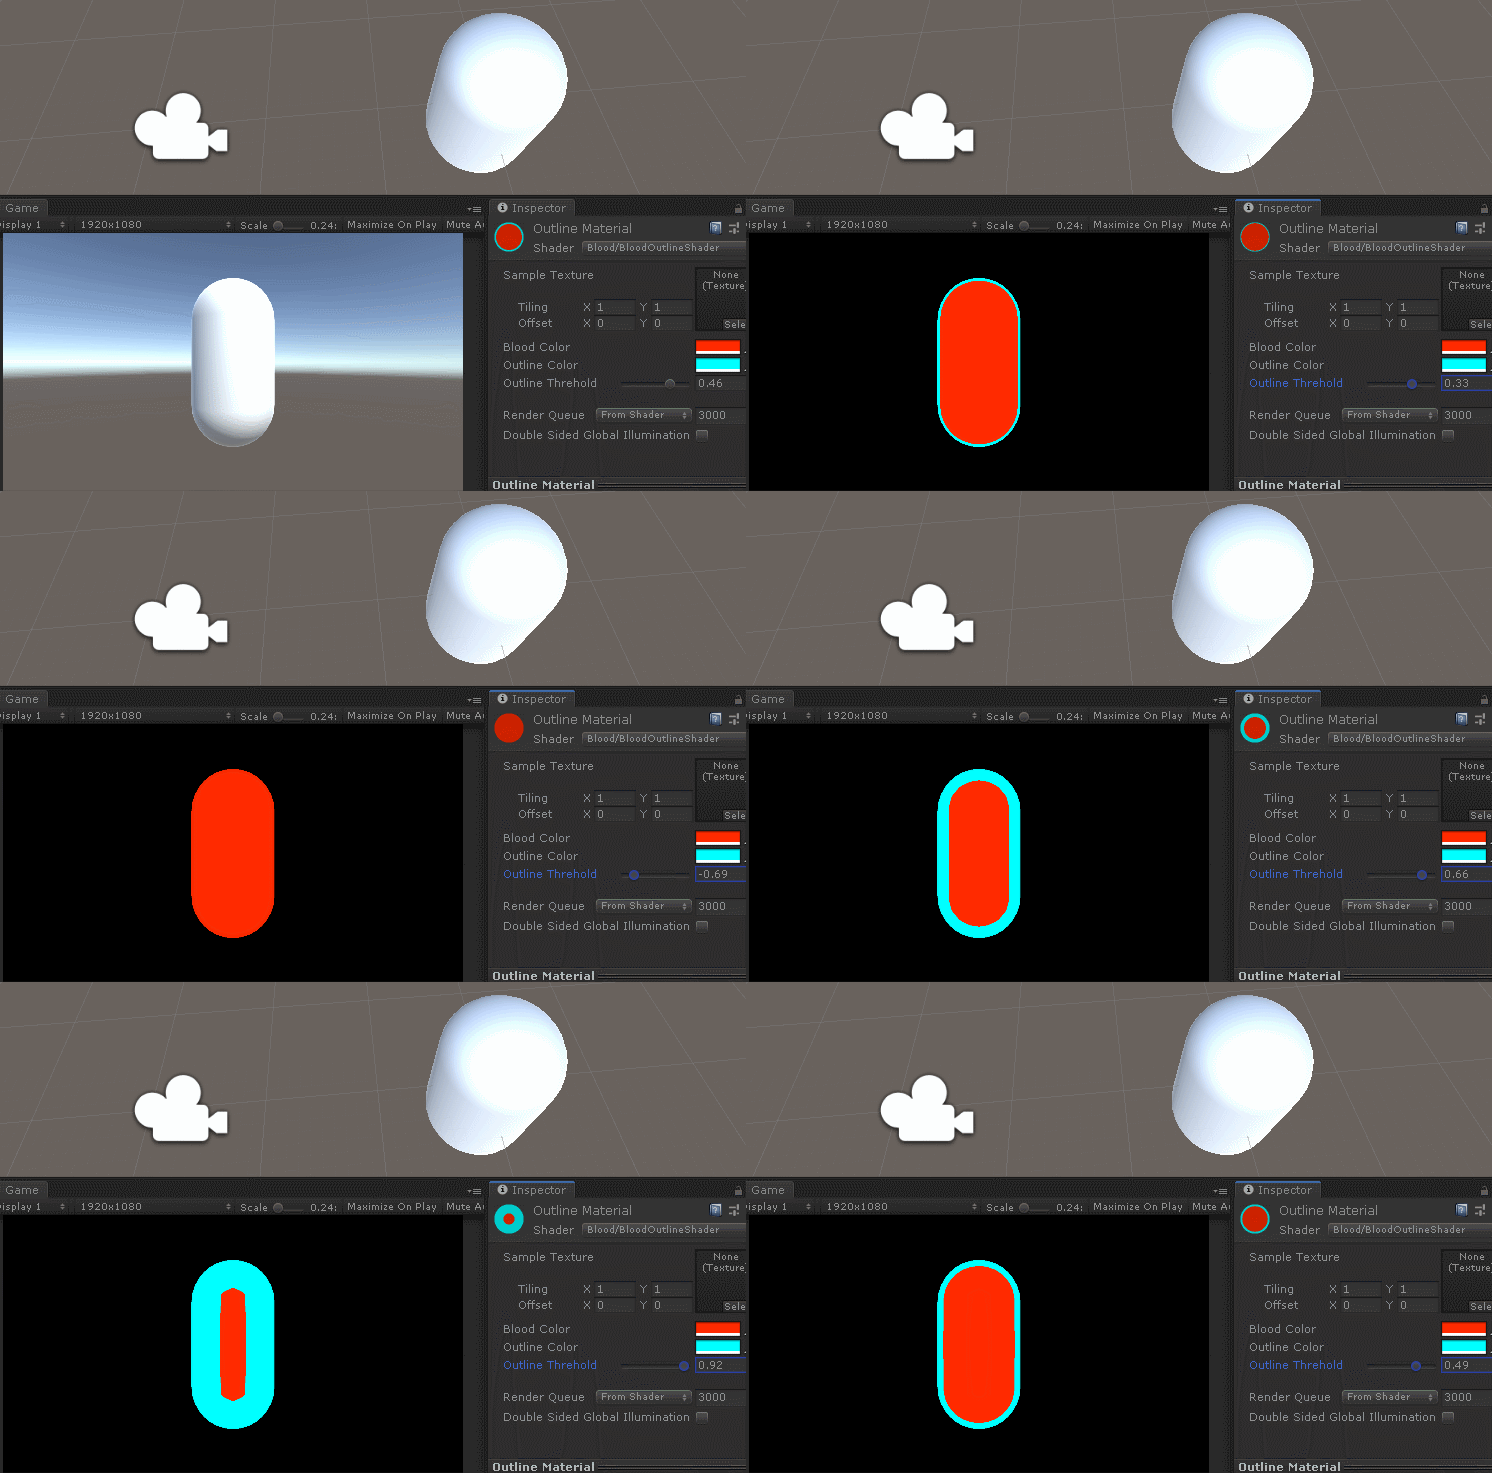
好,既然我们了解实现原理,下面就来实现,这里方便起见我直接把第一步和第二步的效果做在一个shader中:
Shader "Blood/BloodOutlineShader"
{
    Properties
    {
        _SampleTex("Sample Texture",2D) = "white" {}
        _BloodColor("Blood Color",Color) = (1,1,1,1)
        _OutColor("Outline Color",Color) = (1,1,1,1)
        _OutThred("Outline Threhold",Range(-1,1)) = 0
    }
    SubShader
    {
        Tags { "RenderType"="Transparent" "Queue"="Transparent" }
        LOD 100

        Pass
        {
            Blend SrcAlpha OneMinusSrcAlpha
            CGPROGRAM
            #pragma vertex vert
            #pragma fragment frag

            #include "UnityCG.cginc"

            struct appdata
            {
                float4 vertex : POSITION;
            };

            struct v2f
            {
                float4 vertex : SV_POSITION;
            };

            float4 _BloodColor;

            v2f vert (appdata v)
            {
                v2f o;
                o.vertex = UnityObjectToClipPos(v.vertex);
                return o;
            }

            fixed4 frag (v2f i) : SV_Target
            {
                fixed4 col = _BloodColor;
                return col;
            }
            ENDCG
        }

        Pass
        {
            Blend SrcAlpha OneMinusSrcAlpha
            CGPROGRAM
            #pragma vertex vert
            #pragma fragment frag

            #include "UnityCG.cginc"

            struct appdata
            {
                float4 vertex : POSITION;
                float4 normal : NORMAL;
            };

            struct v2f
            {
                float4 vertex : SV_POSITION;
                float3 worldP2V : TEXCOORD0;
                float3 worldNM : TEXCOORD1;
            };

            float4 _OutColor;
            float _OutThred;

            v2f vert (appdata v)
            {
                v2f o;
                o.vertex = UnityObjectToClipPos(v.vertex);
                o.worldP2V = normalize(WorldSpaceViewDir(v.vertex));
                o.worldNM = normalize(UnityObjectToWorldNormal(v.normal));
                return o;
            }

            fixed4 frag (v2f i) : SV_Target
            {
                fixed4 col = _OutColor;
                float wei = saturate(dot(i.worldP2V,i.worldNM));
                wei = step(wei,_OutThred);
                col.a = wei;
                return col;
            }
            ENDCG
        }
    }
}
做个和以前不一样的效果,用step函数(step(a,b)意思就是如果a<=b,返回1,否则返回0)来裁剪渲染,则没有了渐变。
接下来要做的就是给这个shader第一个pass做一个V方向的裁剪,大家想一下怎么做这个V方向的裁剪呢?
我给个思路:我们已经获取了cylinder在屏幕空间的二维rendertexture(称CTex),但是这个CTex上下部还留有很大黑色像素区域,那么我们得获取这个cylinder的“头部”和“脚部”映射的屏幕空间位置A和B,以A和B作为CTex的V方向裁剪端点做裁剪。
关于怎么获取A和B端点,我们有以下做法:
1.通过cylinder的transform下绑定head transform和foot transform,然后通过c#函数映射
2.通过cylinder自身transform映射到屏幕空间,然后在CTex上做上下方向的像素递增扫描,获取AB端点像素
3.直接在CTex上做逐行列的像素扫描获取外接矩形
这里我建议使用第一种,因为第一种效率高,而且本身做游戏的时候,角色身上就需要绑定很多transform(比如角色头部的血条名称等需要一个head transform,角色脚底下的foot transform用来做脚底下的“假阴影”、“选中环”等效果)。
so,我们接下来改造shader,做一个血量显示的效果:
Shader "Blood/BloodOutlineShader"
{
    Properties
    {
        _SampleTex("Sample Texture",2D) = "white" {}
        _BloodColor("Blood Color",Color) = (1,1,1,1)
        _BloodTop("Blood Top V",Range(0,1)) = 0
        _BloodBottom("Blood Bottom V",Range(0,1)) = 0
        _BloodVal("Blood Val V",Range(0,1)) = 0
        _OutColor("Outline Color",Color) = (1,1,1,1)
        _OutThred("Outline Threhold",Range(-1,1)) = 0
    }
    SubShader
    {
        Tags { "RenderType"="Transparent" "Queue"="Transparent" }
        LOD 100

        Pass
        {
            Blend SrcAlpha OneMinusSrcAlpha
            CGPROGRAM
            #pragma vertex vert
            #pragma fragment frag

            #include "UnityCG.cginc"

            struct appdata
            {
                float4 vertex : POSITION;
                float2 uv : TEXCOORD0;
            };

            struct v2f
            {
                float4 vertex : SV_POSITION;
                float2 uv : TEXCOORD0;
            };

            sampler2D _SampleTex;
            float4 _SampleTex_ST;

            float4 _BloodColor;

            float _BloodTop;
            float _BloodBottom;
            float _BloodVal;

            v2f vert (appdata v)
            {
                v2f o;
                o.vertex = UnityObjectToClipPos(v.vertex);
                o.uv = TRANSFORM_TEX(v.uv,_SampleTex);
                return o;
            }

            float mapv(float top,float bottom,float val)
            {
                float v = bottom + (top-bottom)*val;
                return v;
            }

            fixed4 frag (v2f i) : SV_Target
            {
                fixed4 col = _BloodColor;
                //float v = mapv(_BloodTop,_BloodBottom,i.uv.y);
                float v = i.uv.y;
                if(v > _BloodVal)
                {
                    col.a = 0;
                }
                return col;
            }
            ENDCG
        }

        Pass
        {
            Blend SrcAlpha OneMinusSrcAlpha
            CGPROGRAM
            #pragma vertex vert
            #pragma fragment frag

            #include "UnityCG.cginc"

            struct appdata
            {
                float4 vertex : POSITION;
                float4 normal : NORMAL;
            };

            struct v2f
            {
                float4 vertex : SV_POSITION;
                float3 worldP2V : TEXCOORD0;
                float3 worldNM : TEXCOORD1;
            };

            float4 _OutColor;
            float _OutThred;

            v2f vert (appdata v)
            {
                v2f o;
                o.vertex = UnityObjectToClipPos(v.vertex);
                o.worldP2V = normalize(WorldSpaceViewDir(v.vertex));
                o.worldNM = normalize(UnityObjectToWorldNormal(v.normal));
                return o;
            }

            fixed4 frag (v2f i) : SV_Target
            {
                fixed4 col = _OutColor;
                float wei = saturate(dot(i.worldP2V,i.worldNM));
                wei = step(wei,_OutThred);
                col.a = wei;
                return col;
            }
            ENDCG
        }
    }
}
c#代码:
using System.Collections;
using System.Collections.Generic;
using UnityEngine;
using UnityEngine.Rendering;

public class CmdBufferBloodCamera : MonoBehaviour
{
    public GameObject cmdCharacter;
    public Material bloodMat;

    private Transform characterHead;
    private Transform characterFoot;

    private RenderTexture bloodRT = null;
    private CommandBuffer bloodBuffer = null;

    void Start()
    {
        characterHead = cmdCharacter.transform.GetChild(0);
        characterFoot = cmdCharacter.transform.GetChild(1);
    }

    private void OnEnable()
    {
        MeshRenderer render = cmdCharacter.GetComponent();
        if (render != null)
        {
            bloodRT = RenderTexture.GetTemporary(Screen.width, Screen.height, 0, RenderTextureFormat.ARGB32);
            bloodBuffer = new CommandBuffer();
            bloodBuffer.SetRenderTarget(bloodRT);
            bloodBuffer.ClearRenderTarget(true, true, Color.black);
            bloodBuffer.DrawRenderer(render, bloodMat);
            Camera.main.AddCommandBuffer(CameraEvent.AfterImageEffects, bloodBuffer);
        }
    }

    private void OnDisable()
    {
        RenderTexture.ReleaseTemporary(bloodRT);
        bloodRT = null;

        Camera.main.RemoveCommandBuffer(CameraEvent.AfterImageEffects, bloodBuffer);
        bloodBuffer.Clear();
        bloodBuffer = null;
    }

    private void OnRenderImage(RenderTexture source, RenderTexture destination)
    {
        if (bloodBuffer != null)
        {
            Graphics.ExecuteCommandBuffer(bloodBuffer);
        }

        Graphics.Blit(bloodRT, destination);
    }

    private void Update()
    {
        Vector2 headPos = Camera.main.WorldToScreenPoint(characterHead.position);
        Vector2 footPos = Camera.main.WorldToScreenPoint(characterFoot.position);

        bloodMat.SetFloat("_BloodTop", headPos.y / Screen.height);
        bloodMat.SetFloat("_BloodBottom", footPos.y / Screen.height);
    }
}
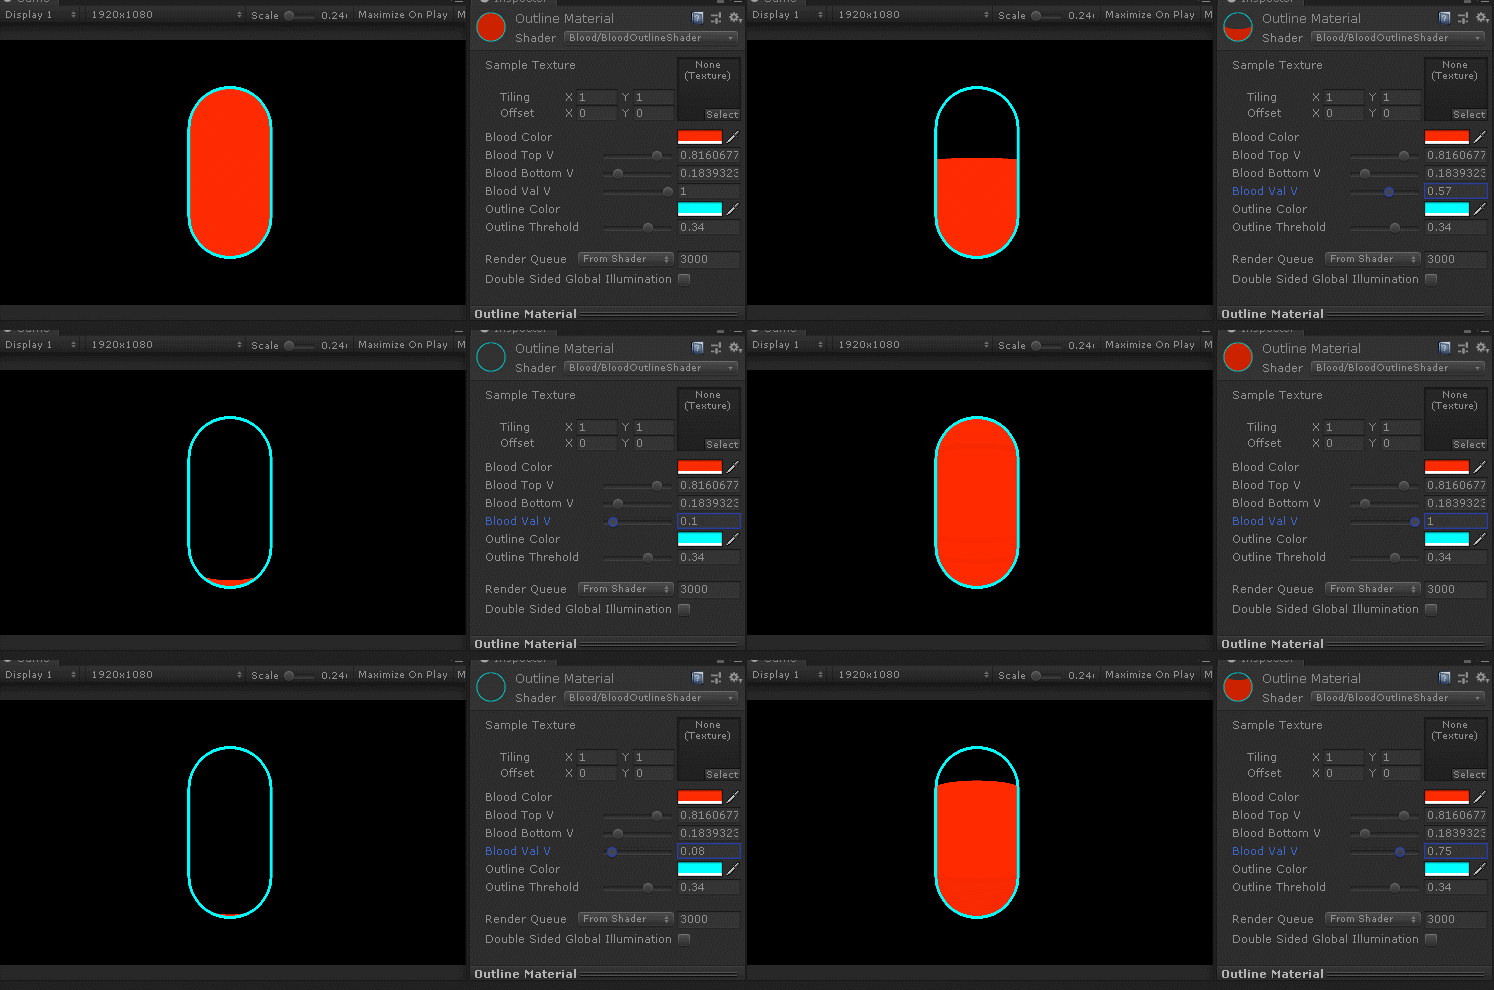
哈哈哈哈,巨尴尬,等我代码写完测试发现,原来不需要映射Head Foot坐标,直接用BloodVal(0-1f)就行了,效果如下:
我的思维犯了个错误,我并不是用1920*1080的rendertexture作为sampler去做裁剪,而是在shader中使用渲染管线光栅化阶段后在屏幕上显示的纹理(pixelbuffer)作为sampler做裁剪,简单来说就是单纯的使用这个2D的cylinder图,所以省去了映射计算,相反更简单了。
最后我们写个混合shader将blood图和原始纹理混合就行了:
Shader "Blood/BloodBlendShader"
{
    Properties
    {
        _SrcTex ("Source Tex", 2D) = "white" {}
        _BloodTex ("Blood Tex", 2D) = "white" {}
    }
    SubShader
    {
        Tags { "RenderType"="Opaque" }
        LOD 100

        Pass
        {
            CGPROGRAM
            #pragma vertex vert
            #pragma fragment frag

            #include "UnityCG.cginc"

            struct appdata
            {
                float4 vertex : POSITION;
                float2 uv : TEXCOORD0;
            };

            struct v2f
            {
                float2 uv : TEXCOORD0;
                float4 vertex : SV_POSITION;
            };

            sampler2D _SrcTex;
            float4 _SrcTex_ST;
            sampler2D _BloodTex;

            v2f vert (appdata v)
            {
                v2f o;
                o.vertex = UnityObjectToClipPos(v.vertex);
                o.uv = TRANSFORM_TEX(v.uv, _SrcTex);
                return o;
            }

            fixed4 blend(float4 scol,float4 bcol)
            {
                fixed4 col = lerp(scol,bcol,bcol.a);
                return col;
            }

            fixed4 frag (v2f i) : SV_Target
            {
                fixed4 scol = tex2D(_SrcTex, i.uv);
                fixed4 bcol = tex2D(_BloodTex,i.uv);
                fixed4 col = blend(scol,bcol);
                return col;
            }
            ENDCG
        }
    }
}
c#改下OnRenderImage就行了:
private void OnRenderImage(RenderTexture source, RenderTexture destination)
    {
        if (bloodBuffer != null)
        {
            Graphics.ExecuteCommandBuffer(bloodBuffer);
        }

        blendMat.SetTexture("_SrcTex", source);
        blendMat.SetTexture("_BloodTex", bloodRT);

        Graphics.Blit(null, destination, blendMat);
    }
效果如下(我顺便加了个blood alpha变量):
当然CF中角色没有被遮挡就不需要显示Blood效果,我们直接在c#中用Invisible和Visible做添加移除Buffer操作就行了:
 private void OnBecameVisible()
    {
        //移除gameobject到camera commandbuffer
    }

    private void OnBecameInvisible()
    {
        //添加gameobject到camera commandbuffer
    }
so,实现原理就是这个样子。


