Swagger/SpringFox和SpringMvc初步整合
首先,还是写一下我的环境:
1、Spring 4.1.6
2、SptingMvc 4.1.6
3、Spring-data-jpa-1.8.0
4、jpa部分使用的hibernate 的那块
5、注意,我这里没有使用Spring boot
6、Restful 我觉得,这个才是我要用swagger的原因
(据说Spring boot是个很好的东西,但是,请恕鄙人的水平还不到那么高,还只是正在看Spring boot 的阶段,就不误导大家了。)
这只是一个大概的环境,毕竟SwaggerFox 要求的没这么严格,如果,你调试不好,可以试试我的Spring版本
一、Maven配置
http://mvnrepository.com/
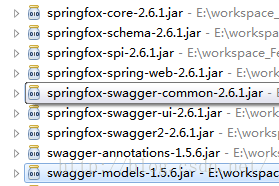
1、直接搜索SpringFox,我写这篇博客的时候,最新版本是2.6.1,理论上,最新的版本都是可以的。
2、在maven中导入SpringFox之后,导入SpringFox-ui,我没有用过原生的Swagger-ui。。
---------------------------------------------------------------------------------------------------------------------------------------------------------------------
这里用maven导入依赖的时候,注意一下,这里下载springfox 的时候,默认也是会连带着把springfox的依赖一块下载下来的,我记得这个就会下载一个3.1版本的spring的包,
我相信大家都是用的自己版本的Spring,所以,注意在配置的时候,解除一下jar包的依赖。这里,我就不具体写流程了,大家可以参考一下其他人的博客
http://blog.csdn.net/cyzero/article/details/8251643 这里给一个供参考
---------------------------------------------------------------------------------------------------------------------------------------------------------------------
还有一中方法是直接导入jar包,我个人是不太推荐这么干的,我记得之前看SpringFox 的依赖,感觉还是有点其他的东西的,不光是对Spring的依赖
二、就是配置了
import org.springframework.context.annotation.Bean;
import org.springframework.context.annotation.Configuration;
import org.springframework.web.servlet.config.annotation.EnableWebMvc;
import org.springframework.web.servlet.config.annotation.ResourceHandlerRegistry;
import org.springframework.web.servlet.config.annotation.WebMvcConfigurerAdapter;

import springfox.documentation.builders.PathSelectors;
import springfox.documentation.builders.RequestHandlerSelectors;
import springfox.documentation.spi.DocumentationType;
import springfox.documentation.spring.web.plugins.Docket;
import springfox.documentation.swagger2.annotations.EnableSwagger2;

@Configuration		//配置注解
@EnableWebMvc		//启用Mvc
@EnableSwagger2		//启用Swagger2,毕竟SpringFox的核心依旧是Swagger
public class SwaggerConfig extends WebMvcConfigurerAdapter{
	@Bean
	public Docket api(){
		return new Docket(DocumentationType.SWAGGER_2)
				.select()						//选择哪些路径和API会生成document
				.apis(RequestHandlerSelectors.any())			//对所有api进行监控
				.paths(PathSelectors.any())				//对所有路径进行监控
				.build();
	}
	@Override		//下边的都是配置映射的,这个,我没办法给你们解释,水平不到.....
	public void addResourceHandlers(ResourceHandlerRegistry registry) {
		registry.addResourceHandler("swagger-ui.html")
				.addResourceLocations("classpath:/META-INF/resources/");
		registry.addResourceHandler("webjars/**")
				.addResourceLocations("classpath:/META-INF/resources/webjars/");
	}

}
提示一下:
上边的这个配置,直接新建一个类就好,名字什么的没必要跟我这个一样。
还有,这个并不会跟web.xml/application.xml/dispatcher-servlet.xml起冲突,放心大胆的用就好。
再者,这个只是最简单的配置,还可以加很多东西,但是,这部分就需要大家自己去继续学习了,我这里只是引个路。
-----------------------------------------------------------------------------------------------
到这里,最小化的Springfox就配置完了,如果你的项目中有controller的话,
启动项目-打开浏览器-输入地址:
http://localhost:8080/project-name/swagger-ui.html#/
(project-name这个不用我解释了吧?)
回车,就能看到最基本的Swagger界面了
这个页面,默认是英文的....有兴趣的话,可以看下springfox-swagger-ui-2.6.1jar这个包,很有意思的一个包,自带翻译
我可以稍微指个路,修改这个jar包中的swagger-ui.html文件,也就是之前在浏览器打开的页面
Swagger UI
//这个自带翻译...............^_^也是6的不行
如果有心呢,就去看看这个jar包,我感觉挺不错的,如果没时间,就直接复制粘贴我的就好了....