小小又开始学习了,这次跟着项目学习着,需要使用一个相关的爬虫,这里使用的是webmagic作为网站的爬虫。
安装
这里使用maven进行安装。
根据maven下载相关的包
            us.codecraft
            webmagic-core
            0.7.3


            us.codecraft
            webmagic-extension
            0.7.3
Hello World
几乎所有的api的学习,都是从hello world开始的,webmagic也不例外,使用的同样也是hello world案例。
以爬取sina博文为例。
复制以下代码
package com.example.demo;

import us.codecraft.webmagic.Page;
import us.codecraft.webmagic.Site;
import us.codecraft.webmagic.Spider;
import us.codecraft.webmagic.processor.PageProcessor;

public class SinaBlogProcessor implements PageProcessor {

  public static final String URL_LIST = "http://blog\\.sina\\.com\\.cn/s/articlelist_1487828712_0_\\d+\\.html";

  public static final String URL_POST = "http://blog\\.sina\\.com\\.cn/s/blog_\\w+\\.html";

  private Site site = Site
          .me()
          .setDomain("blog.sina.com.cn")
          .setSleepTime(3000)
          .setUserAgent(
                  "Mozilla/5.0 (Macintosh; Intel Mac OS X 10_7_2) AppleWebKit/537.31 (KHTML, like Gecko) Chrome/26.0.1410.65 Safari/537.31");

  @Override
  public void process(Page page) {
    //列表页
    if (page.getUrl().regex(URL_LIST).match()) {
      page.addTargetRequests(page.getHtml().xpath("//div[@class=\"articleList\"]").links().regex(URL_POST).all());
      page.addTargetRequests(page.getHtml().links().regex(URL_LIST).all());
      //文章页
    } else {
      page.putField("title", page.getHtml().xpath("//div[@class='articalTitle']/h2"));
      page.putField("content", page.getHtml().xpath("//div[@id='articlebody']//div[@class='articalContent']"));
      page.putField("date",
              page.getHtml().xpath("//div[@id='articlebody']//span[@class='time SG_txtc']").regex("\\((.*)\\)"));
    }
  }

  @Override
  public Site getSite() {
    return site;
  }

  public static void main(String[] args) {
    Spider.create(new SinaBlogProcessor()).addUrl("http://blog.sina.com.cn/s/articlelist_1487828712_0_1.html")
            .run();
  }
}
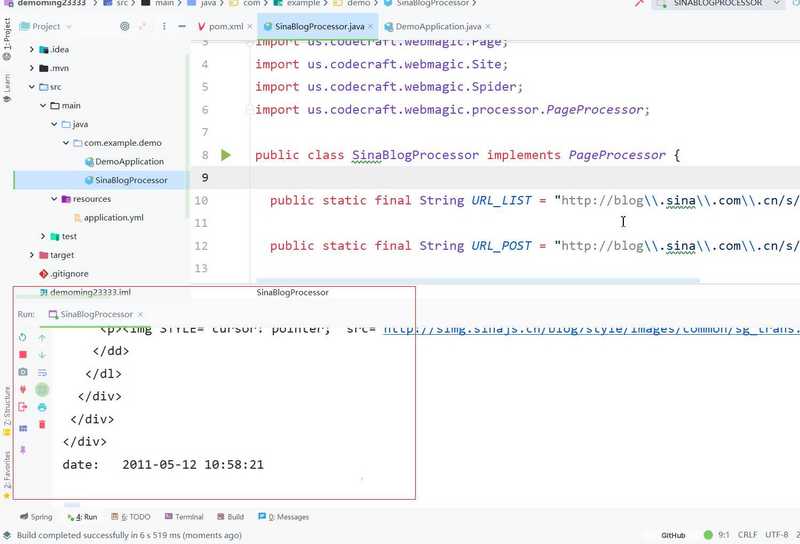
查看相关运行结果
这里就等于说已经运行成功,爬取到了一些数据
PageProcessor
这里用于实现相关的配置。
代码如下
public class GithubRepoPageProcessor implements PageProcessor {

    // 部分一:抓取网站的相关配置,包括编码、抓取间隔、重试次数等
    private Site site = Site.me().setRetryTimes(3).setSleepTime(1000);

    @Override
    // process是定制爬虫逻辑的核心接口,在这里编写抽取逻辑
    public void process(Page page) {
        // 部分二:定义如何抽取页面信息,并保存下来
        page.putField("author", page.getUrl().regex("https://github\\.com/(\\w+)/.*").toString());
        page.putField("name", page.getHtml().xpath("//h1[@class='entry-title public']/strong/a/text()").toString());
        if (page.getResultItems().get("name") == null) {
            //skip this page
            page.setSkip(true);
        }
        page.putField("readme", page.getHtml().xpath("//div[@id='readme']/tidyText()"));

        // 部分三:从页面发现后续的url地址来抓取
        page.addTargetRequests(page.getHtml().links().regex("(https://github\\.com/[\\w\\-]+/[\\w\\-]+)").all());
    }

    @Override
    public Site getSite() {
        return site;
    }

    public static void main(String[] args) {

        Spider.create(new GithubRepoPageProcessor())
                //从"https://github.com/code4craft"开始抓
                .addUrl("https://github.com/code4craft")
                //开启5个线程抓取
                .thread(5)
                //启动爬虫
                .run();
    }
}
抽取元素
这里使用相关的方法抽取元素。
这里使用相关的方法抽取相关的元素
List urls = page.getHtml().css("div.pagination").links().regex(".*/search/\?l=java.*").all();
保存结果
这里保存结果使用Pipeline方法
public static void main(String[] args) {
    Spider.create(new GithubRepoPageProcessor())
            //从"https://github.com/code4craft"开始抓
            .addUrl("https://github.com/code4craft")
            .addPipeline(new JsonFilePipeline("D:\\webmagic\\"))
            //开启5个线程抓取
            .thread(5)
            //启动爬虫
            .run();
}
实际案例
这里以 http://blog.sina.com.cn/flash... 作为例子,在这个例子里,要从最终的博客文章页面,抓取博客的标题,内容,和日期。
列表页
列表页的格式为 http://blog.sina.com.cn/s/art... 这里0和1都是可变的页数。
文章页
文章页的格式是,http://blog.sina.com.cn/s/blo... 这里,最后一段是可变的字符串,为文章的id
进行正则匹配
这里用两个正则进行匹配。
这里用,xpath//div[@class=\"articleList\"] 进行相关的匹配,
所以,可以这样进行匹配
page.addTargetRequests(page.getHtml().xpath("//div[@class=\"articleList\"]").links().regex("http://blog\\.sina\\.com\\.cn/s/blog_\\w+\\.html").all());
page.addTargetRequests(page.getHtml().links().regex("http://blog\\.sina\\.com\\.cn/s/articlelist_1487828712_0_\\d+\\.html").all());
内容的添加
这里再进行一次内容的添加
page.putField("title", page.getHtml().xpath("//div[@class='articalTitle']/h2"));
page.putField("content", page.getHtml().xpath("//div[@id='articlebody']//div[@class='articalContent']"));
page.putField("date",
        page.getHtml().xpath("//div[@id='articlebody']//span[@class='time SG_txtc']").regex("\\((.*)\\)"));
区分列表和目标页
这里,进行区分列表页,和目标页。
//列表页
if (page.getUrl().regex(URL_LIST).match()) {
    page.addTargetRequests(page.getHtml().xpath("//div[@class=\"articleList\"]").links().regex(URL_POST).all());
    page.addTargetRequests(page.getHtml().links().regex(URL_LIST).all());
    //文章页
} else {
    page.putField("title", page.getHtml().xpath("//div[@class='articalTitle']/h2"));
    page.putField("content", page.getHtml().xpath("//div[@id='articlebody']//div[@class='articalContent']"));
    page.putField("date",
            page.getHtml().xpath("//div[@id='articlebody']//span[@class='time SG_txtc']").regex("\\((.*)\\)"));
}
这样就完成了最基本例子的读取。
