vue基础学习
输出值
调用方法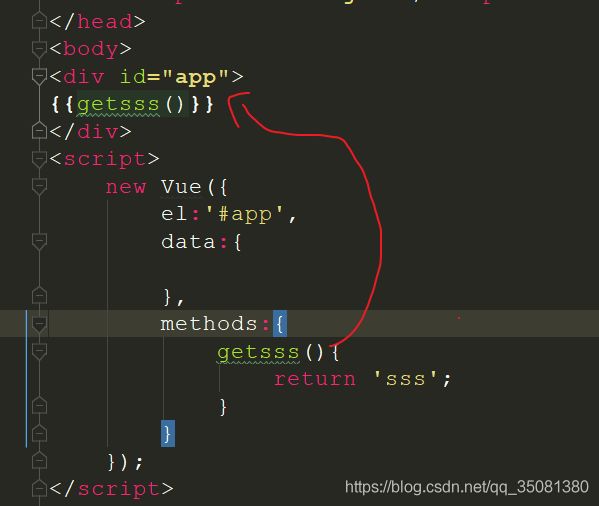
绑定属性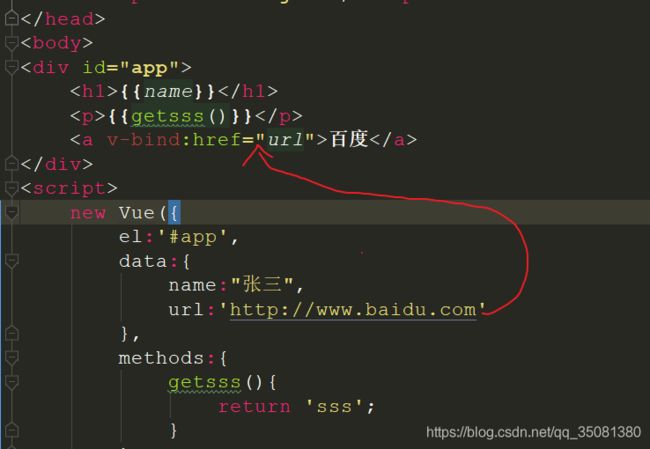
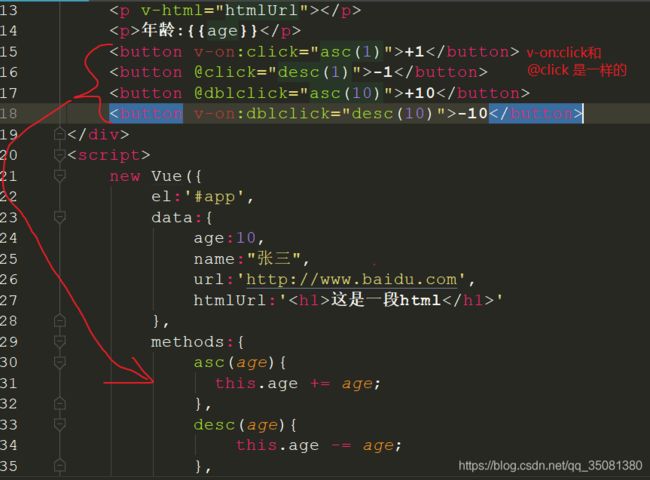
输出html
鼠标单击,双击事件
鼠标移动事件:
事件修饰符的使用
比如我要阻止事件冒泡,
事件只触发一次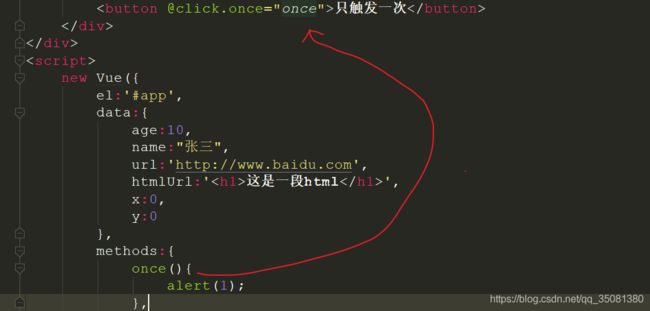
修饰符阻止a链接的默认跳转行为![]()
键盘事件以及按键修饰符的学习
检测到你按键就会被触发

只放按住enter键的时候搜索
还能支持按键的链式操作:alt+enter才触发也可以![]()
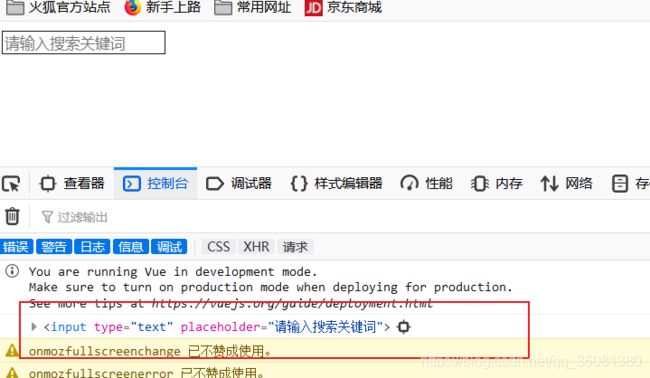
vue中如何查找dom元素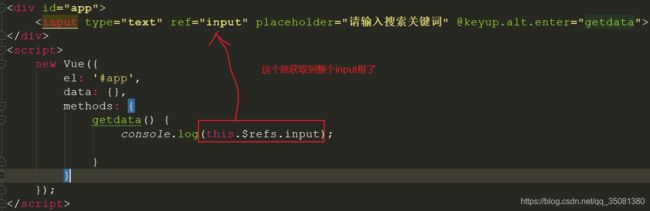
双向数据绑定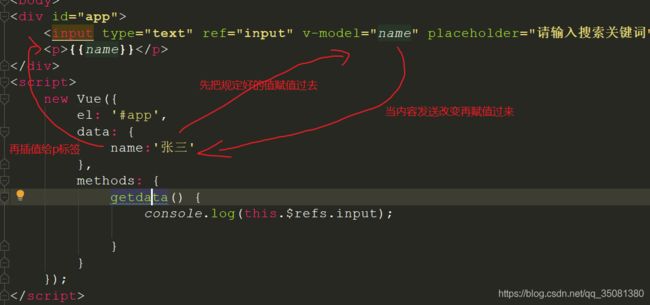
methods 和 Computed 的区别
methods :当页面内容改变时,methods里面所有的方法都会被执行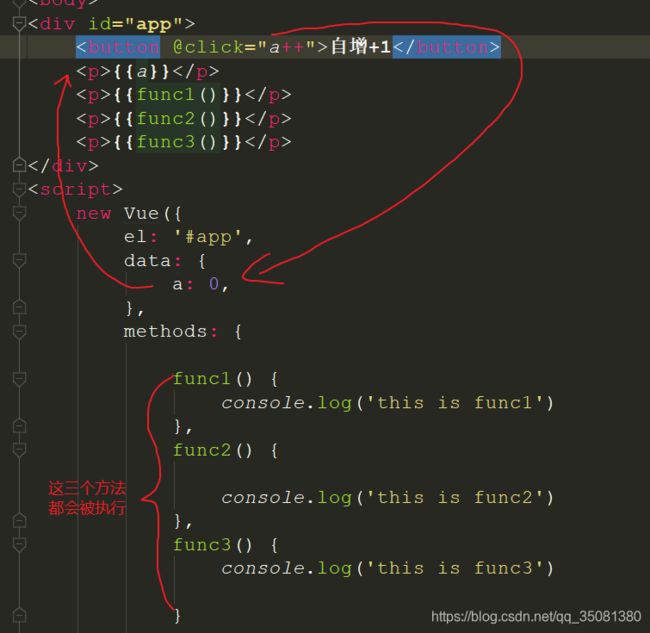
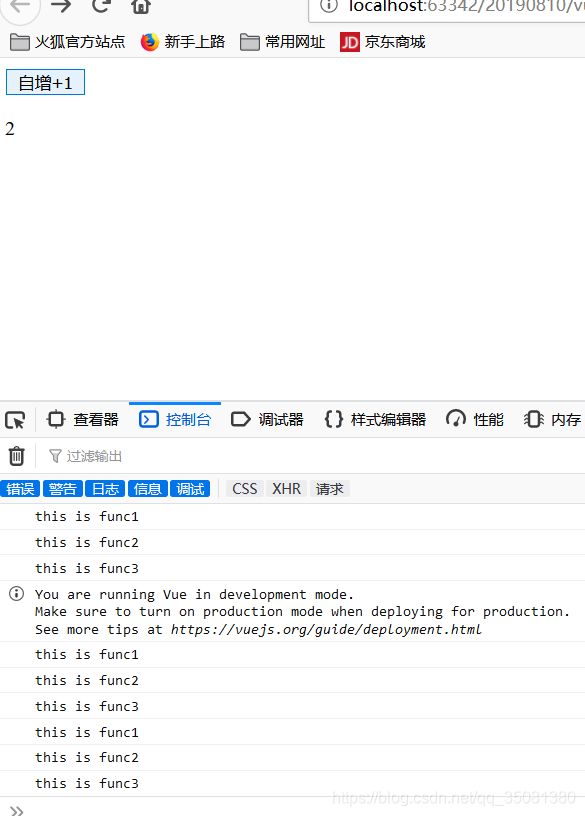
这样是比较消耗性能的
所以用Computed

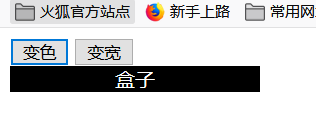
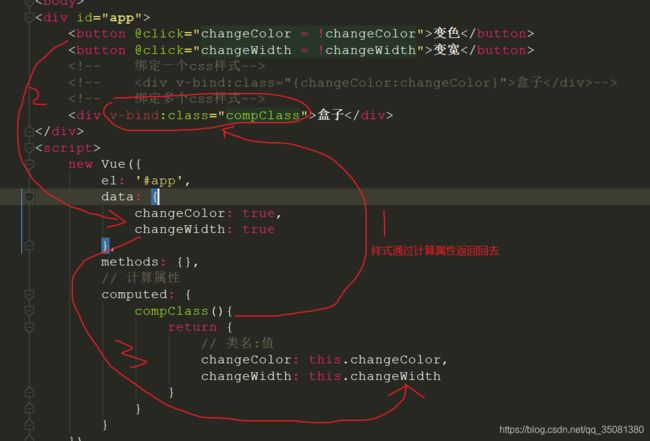
动态绑定样式小案例: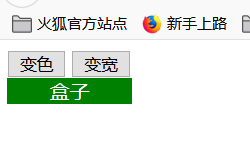
v-if (这个是真的把dom元素给删了)和 v-show(这个是用css属性来控制显示和隐藏)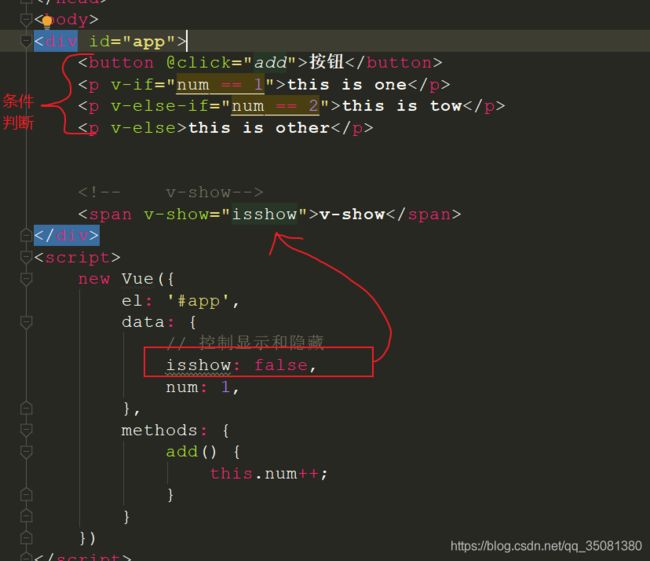
v-for 遍历数组,和对象,还可以嵌套使用
实例化多个vue对象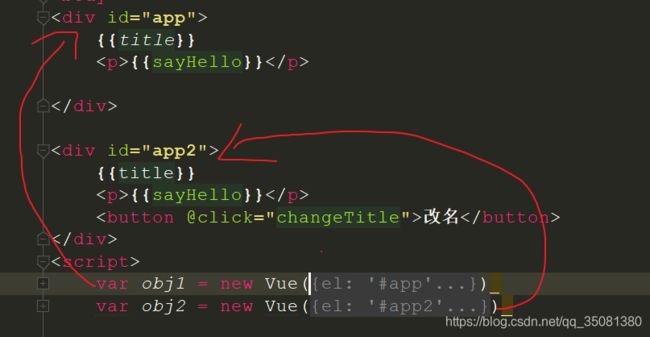
在一个实例化对象中操作另外一个实例化对象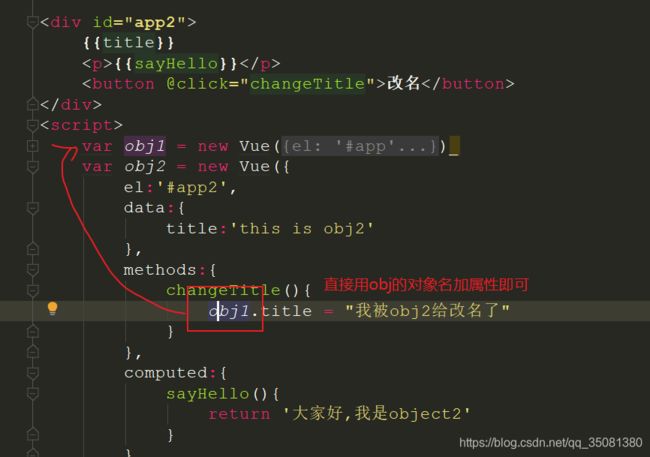
也可以在全局,直接用对象名来操作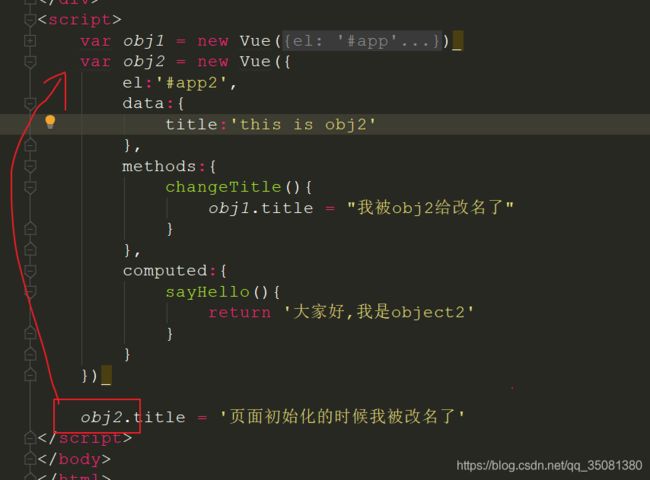
组件的学习,在脚手架中都是使用组件方式(注意:new实例其实也是一个组件)
组件的使用嵌套
这里用小案例练习
父组件向子组件传值:props

接收:
注意知识点:值传递和引用传递
数组,对象都是属于引用传递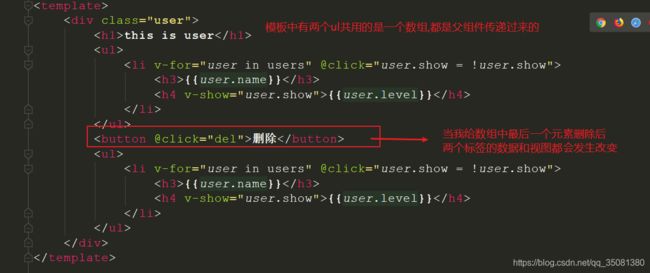
值传递则不会互相影响,这个知识点,在工作中是比较重要的
子组件向父组件传值
先在子组件中注册事件
在调用子组件的地方,绑定一个事件
在父组件中实现一个这个方法即可获取
生命周期(官网说一开始可以不用去了解,随着开发的升级越来越需要了解)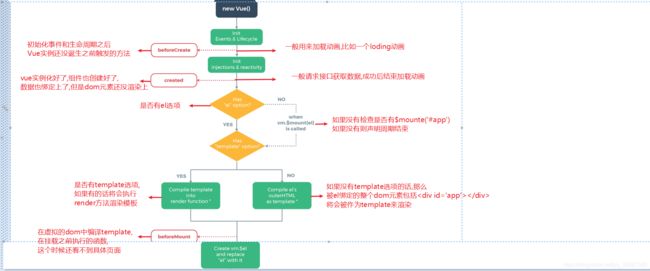

路由学习
npm install vue-router --save-dev
main.js中
//得到路由对象
import VueRoter from 'vue-router'
//加载插件
Vue.use(VueRoter)
//配置路由
const router = new VueRoter({
routes: [
{path: '/', component: Home},
{path: '/helloworld', component: HelloWorld}
],
//把后面那个#号给去掉
mode:'history'
})
//在实例中引入
/* eslint-disable no-new */
new Vue({
el: '#app',
router,
components: {App},
template: '
-
/
-
helloworld
http请求的学习
npm install vue-resource --save-dev
//页面渲染之前请求数据
created() {
    this.$http.get('http://jsonplaceholder.typicode.com/users')
        .then((data)=>{
            const {status,body} = data;
            if(status === 200){
                this.users = body;
            }
        })
}
vue-router之 tag 和 redirect
tag:修改router-link的渲染后的标签类型 tag="div" 此时页面router-link就会被渲染成一个 div标签
redirect: 当用户输入一个不存在的路由额时候,跳转到指定路由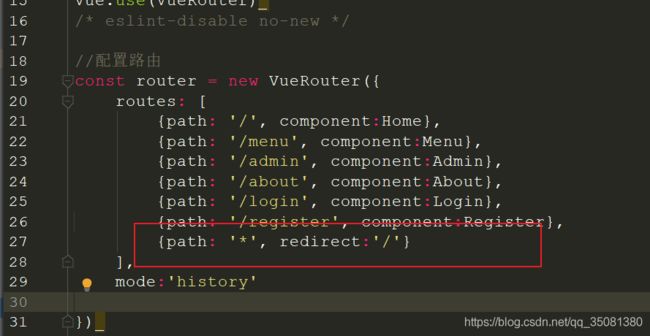
路由中的name属性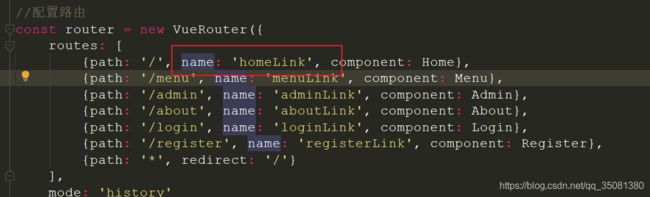

路由跳转
// 跳转到上一次浏览的页面
this.$router.go(-1);

// 跳转到指定地址
this.$router.replace('/menu')

// 跳转到指定路由下
this.$router.replace({name:'menuLink'})

// 常用的通过push跳转
this.$router.push({name:'menuLink'})
二级路由和三级路由,默认指定路由
redirect: '/about/contact':是指跳转到该路由后默认指定的下一级的路由
//配置路由
const router = new VueRouter({
    routes: [
        {path: '/', name: 'homeLink', component: Home},
        {path: '/menu', name: 'menuLink', component: Menu},
        {path: '/admin', name: 'adminLink', component: Admin},
        {
            path: '/about', name: 'aboutLink', redirect: '/about/contact', component: About, children: [
                {
                    path: '/about/contact', name: 'contactLink', redirect: '/about/contact/phone',component: Contact, children: [
                        {path: '/about/contact/phone', name: 'phoneLink', component: Phone},
                        {path: '/about/contact/personname', name: 'PersonNameLink', component: PersonName}
                    ]
                },
                {path: '/about/history', name: 'historyLink', component: History},
                {path: '/about/guide', name: 'guideLink', component: Guide},
                {path: '/about/delivery', name: 'deliveryLink', component: Delivery},
            ]
        },
        {path: '/login', name: 'loginLink', component: Login},
        {path: '/register', name: 'registerLink', component: Register},
        {path: '*', redirect: '/'}
    ],
    mode: 'history'

})
路由守卫知识点
全局守卫
router.beforeEach((to,fr om,next)=>{
    // alert('你还没登录,请先登录')
    if(to.path == '/login' || to.path =='/register'){
        next();
    }else{
        alert('你还没登录,请先登录')
        next('/login')
    }
})
后置钩子
//全局后置钩子
router.afterEach((to,from)=>{
    alert('进入之前先弹出我')
})
路由独享beforeEnter
{path: '/admin', name: 'adminLink', component: Admin,beforeEnter:(to,form,next)=>{
            alert('非登录,禁止访问');
    }},
组件内守卫,在需要守卫的路由,弄好
//组件内实现的路由防卫
beforeRouteEnter:(to,from,next)=>{

    next(vm => {
        alert('hello'+vm.name);
    })
},
//离开时的函数
beforeRouteLeave:(to,from,next)=>{
    if(confirm('确定要离开吗?')==true){
        next()
    }else{
        //禁止跳转了
        next(false)
    }
}
路由抽离到单独的一个文件中,和路由复用知识点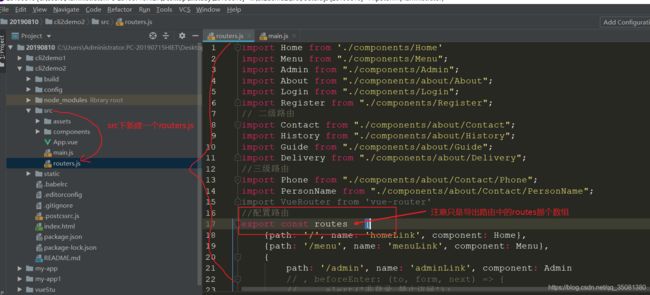
在main.js中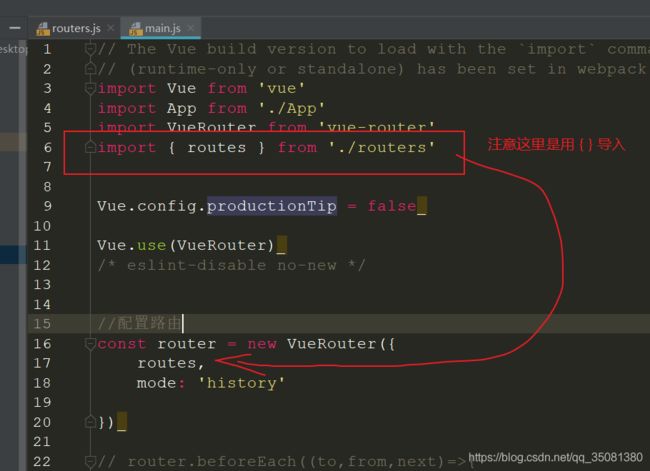
多组件的复用
使用:name后面跟上名字就可以了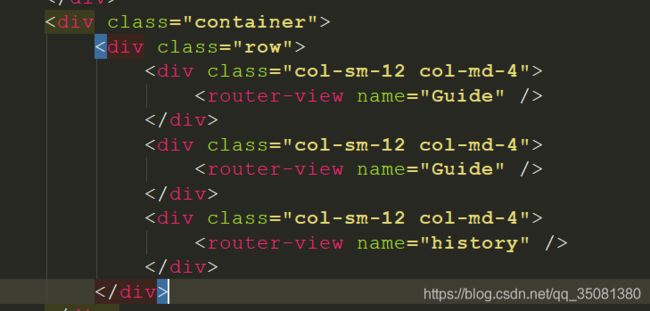
路由的滚动行为控制学习
在路由里写一个滚动行为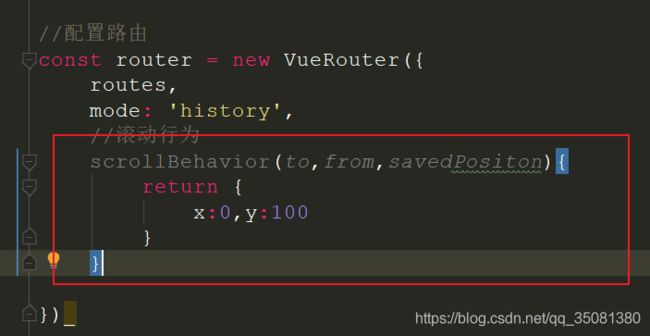
可以看到切换到该路由之后页面直接被定位到某个位置
可以指定跳转到页面中某个元素的位置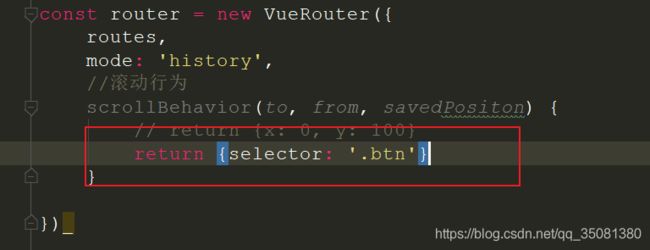
浏览器触发前进和后退按钮的时候,保存当前滚轮的位置