探索取代ViewPager的ViewPager2
文章目录
- 前言
- ViewPager2 和 ViewPager 的区别
- ViewPager2 新增功能
- 深入了解ViewPager2
- 实现ViewPager2
- 关于DiffUtil
- 使用FragmentStateAdapter实现ViewPager2
持续更新中…
前言
早在2019年2月7日Google就发布了ViewPager2,经常查阅官方文档的大佬肯定第一时间就发现了这个部件,奈何一直都是开发版本需要一步步进行完成,经过开发期的Alpha、Beta、RC三个阶段版本之后终于在2020年11月20日Google发布了ViewPager2正式版取代ViewPager,从此再也不用因为ViewPager各种难题而发愁了。
ViewPager2 和 ViewPager 的区别
- ViewPager2 API最大的变化是它现在使用RecyclerView。
- 使用 ViewPager2 需要迁移到 AndroidX,因为android.support库中不支持ViewPager2。
- FragmentStateAdapter 替换 FragmentStatePagerAdapter
- RecyclerView.Adapter 替代 PagerAdapter
- registerOnPageChangeCallback 替换 addPageChangeListener
ViewPager2 新增功能
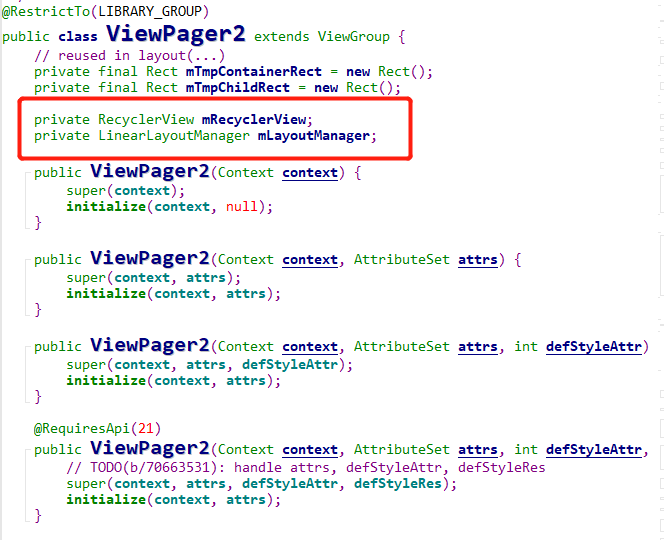
查看源码可以看到ViewPager2是基于RecyclerView构建的,既然是通过RecyclerView构建,那么就可以在Adapter类中将RecyclerView.Adapter与ViewPager2一起使用。关于RecyclerView的强大之处就不用我说了,基本上都知道,不知道的自己去查阅相关资料。
关于为什么使用ViewPager2而不是继续使用ViewPager的原因,请看下面的ViewPager2变化。
-
ViewPager2 基于 RecyclerView
-
支持RTL布局,国内一般适配的很少,到目前为止我还没有见过,可谁知道产品的想法呢。
-
改善数据更改通知
-
支持使用代码滚动ViewPager2
-
引入了MarginPageTransformer 以提供在页面之间创建空间的功能。
-
引入CompositePageTransformer 来组合多个Page Transformer。
-
getCurrentItem() 和 getCurrentItem() 方法的隐式使用
-
由于RecyclerView包含ViewPager2的一部分,因此支持DiffUtil
-
引入ItemDecorator可以对行进行操作,和RecyclerView一致
深入了解ViewPager2
在查阅ViewPager2源码的时候我发现该类被final修饰,那么就说明这个类是无法被继承扩展。所以我比较好奇,就开始比较ViewPager2和ViewPager的源码, 发现ViewPager有将近3000行代码,而ViewPager2只有1500行,因为它基于RecyclerView,因此ViewPager2隐式使用RecyclerView意味着与RecyclerView没有太大的区别。
在ViewPager2 中的Constructor 方法中,有一个称为initialize() 的方法。
Google开发人员对RecyclerView 进行了少许修改,以利用可访问性,滚动控件以及初始化的LinearLayoutManager,并通过修改后的LinearLayoutManager 在禁用用户滚动时调整可访问性。毕竟,应该将LayoutManager 对象设置为RecyclerView。
在viewPager 中定义的setOrientation() 方法。ViewPager2具有垂直和水平支持,默认设置为水平。
你可能已经在RecyclerView中使用PagerSnapHelper。PagerSnapHelper可以帮助实现与ViewPager类似的行为,因此PagerSnapHelper附加到ViewPager2中的RecyclerView。
实现ViewPager2
-
在build.gradle中导入ViewPager2的依赖,当前最新版本为1.0.0,使用时请到 https://developer.android.google.cn/jetpack/androidx/releases/viewpager2?hl=zh_cn#androidx-deps 查看最新版本
-
同步build.gradle之后项目中已经有了ViewPager2,现在可以到xml中使用ViewPager2了。
- 初始化数据源。
ArrayList mList = new ArrayList<>();
    for (int i = 0; i < 10; i++) {
      mList.add(String.valueOf(i));
    }
- 创建一个ViewPager2需要使用到的Adapter,这个Adapter是RecyclerView.Adapter;
public class DemoAdapter extends RecyclerView.Adapter {

  private ArrayList mList;
  private Context mContext;

  private int[] colors = {0xFFDC143C,0xFFFF1493,0xFFFF00FF,0xFF4B0082,0xFF0000FF,
  0xFF1E90FF,0xFF00CED1,0xFF7FFFAA,0xFF228B22,0xFFFFFF00};

  public DemoAdapter(ArrayList list) {
    mList = list;
  }

  @NonNull @Override public ViewHolder onCreateViewHolder(@NonNull ViewGroup parent, int viewType) {
    mContext = parent.getContext();
    View inflate = LayoutInflater.from(parent.getContext()).inflate(R.layout.adapter_demo_item, parent, false);
    return new ViewHolder(inflate);
  }

  @Override public void onBindViewHolder(@NonNull ViewHolder holder, int position) {
    holder.mTextView.setText(
        String.format(
            mContext.getResources().getString(R.string.adapter_demo_content)
            ,position));
    holder.mTextView.setBackgroundColor(colors[position]);
  }

  @Override public int getItemCount() {
    return mList.size();
  }

  class ViewHolder extends RecyclerView.ViewHolder {
    private TextView mTextView;
    ViewHolder(@NonNull View itemView) {
      super(itemView);
      mTextView = itemView.findViewById(R.id.adapter_demo_tv);
    }
  }
}
- 为ViewPager2设置Adapter
//ViewPager2设置Adapter
    DemoAdapter mAdapter = new DemoAdapter(mList);
    mVpDemo.setAdapter(mAdapter);
关于DiffUtil
使用过DiffUtil都知道它的好处,没有用使用过也没有关系,听我给你说说。
- 可以通过计算判断两个列表之间的差异进行局部刷新,而平时使用的notifyDataSetChanged();是一个无脑刷新的操作,会刷新整个列表,对性能和视觉上并不是很友好。
- 使用差分进化算法计算更新的最小系数。
需要注意的是,如果你的列表数据量较大,建议在后台线程执行这个操作,DiffResult在主线程中执行。
如果启用了移动检测,则需要花费额外的O(N ^ 2)时间,其中N是已添加和已删除项目的总数。如果您的列表已经按相同的约束排序(例如,为帖子列表创建的时间戳),则可以禁用移动检测以提高性能。
关于DiffUtil具体使用方法自行百度查阅资料。
使用FragmentStateAdapter实现ViewPager2
- FragmentVP2Activity.xml
<LinearLayout xmlns:android="http://schemas.android.com/apk/res/android"
    xmlns:app="http://schemas.android.com/apk/res-auto"
    xmlns:tools="http://schemas.android.com/tools"
    android:layout_width="match_parent"
    android:layout_height="match_parent"
    android:orientation="vertical"
    tools:context=".FragmentVP2Activity"
    >

  <androidx.appcompat.widget.AppCompatButton
      android:onClick="addFragmentOnClick"
      android:text="@string/add_fragment"
      android:layout_width="wrap_content"
      android:layout_height="wrap_content"/>
  <androidx.appcompat.widget.AppCompatButton
      android:onClick="removeFragmentOnClick"
      android:text="@string/remove_fragment"
      android:layout_width="wrap_content"
      android:layout_height="wrap_content"/>
  <androidx.appcompat.widget.AppCompatButton
      android:onClick="setOrientationOnClick"
      android:text="@string/demo_orientation"
      android:layout_width="wrap_content"
      android:layout_height="wrap_content"/>

  <androidx.viewpager2.widget.ViewPager2
      android:id="@+id/vp2_fragment"
      android:layout_width="match_parent"
      android:layout_height="match_parent"/>

LinearLayout >
- 创建一个Adapter设置到ViewPager2,这个Adapter是FragmentStateAdapter;
public class DemoFragmentAdapter extends FragmentStateAdapter {

  private List<Fragment> mFragmentList;

  DemoFragmentAdapter(@NonNull FragmentActivity fragmentActivity) {
    super(fragmentActivity);
    mFragmentList = new ArrayList<>();
  }

  public DemoFragmentAdapter(@NonNull Fragment fragment) {
    super(fragment);
    mFragmentList = new ArrayList<>();
  }

  public DemoFragmentAdapter(@NonNull FragmentManager fragmentManager, @NonNull Lifecycle lifecycle) {
    super(fragmentManager, lifecycle);
    mFragmentList = new ArrayList<>();
  }

  //添加一个Fragment
  void addFragment(Fragment fragment){
    mFragmentList.add(fragment);
    notifyDataSetChanged();
  }
  //删除一个Fragment
  void removeFragment(){
    if (mFragmentList.size() > 0 ){
      mFragmentList.remove(mFragmentList.size() - 1);
      notifyDataSetChanged();
    }
  }

  @NonNull @Override public Fragment createFragment(int position) {
    return mFragmentList.get(position);
  }

  @Override public int getItemCount() {
    return mFragmentList.size();
  }
}
设置Adapter
DemoFragmentAdapter mAdapter = new DemoFragmentAdapter(this);
    fragment_vp2.setAdapter(mAdapter);
- 创建Activity点击事件,这里为方便测试动态添加Fragment,删除Fragment,切换ViewPager2方向。
//设置方向 ViewPager2 独有
  public void setOrientationOnClick(View v){
    if (fragment_vp2.getOrientation() == ViewPager2.ORIENTATION_HORIZONTAL){
      fragment_vp2.setOrientation(ViewPager2.ORIENTATION_VERTICAL);
    }else {
      fragment_vp2.setOrientation(ViewPager2.ORIENTATION_HORIZONTAL);
    }
  }

    //添加一个fragment
  public void addFragmentOnClick(View v){
    mAdapter.addFragment(new DemoFragment());
  }

  //删除一个fragment
  public void removeFragmentOnClick(View v){
    mAdapter.removeFragment();
  }
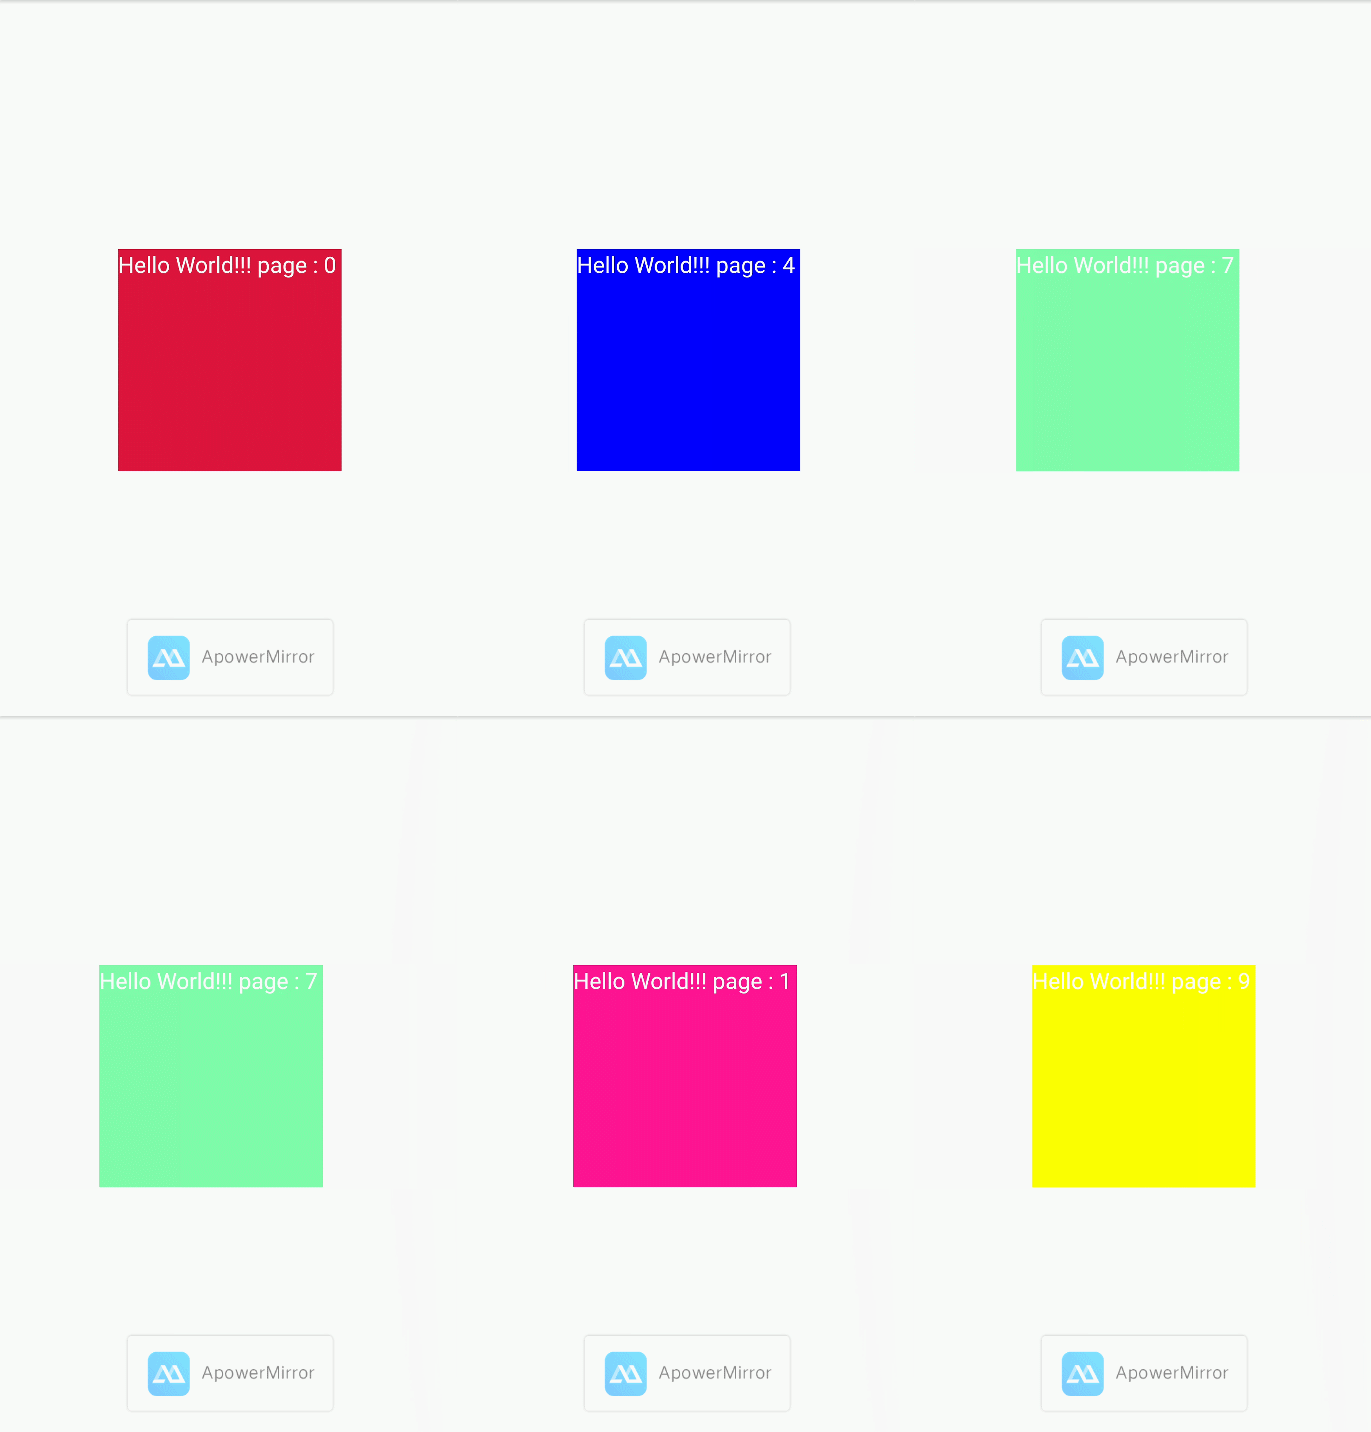
- 在ViewPager2中添加Fragment已经实现了,下面是已实现的效果。

