MT8735A android8.1制作OTA升级包
(1)8.1中OTA包涉及到的selinux权限
全部都是在device/mediatek/sepolicy/bsp/non_plat/recovery.te文件中需要添加
# hw++
allow recovery graphics_config_prop:file read;
allow recovery graphics_config_prop:file open;
allow recovery kmsg_device:chr_file write;
allow recovery kmsg_device:chr_file open;
allow recovery sysfs_power_supply:dir search;
allow recovery sysfs_power_supply:file read;
allow recovery sysfs_therm:dir search;
allow recovery sysfs_therm:file read;
allow recovery graphics_config_prop:file getattr;
allow recovery sysfs_power_supply:file open;
allow recovery sysfs_therm:file open;
allow recovery sysfs_power_supply:file getattr;
allow recovery sysfs_therm:file getattr;
在修改完selinux权限后,再制作OTA升级包,否则会导致初始版本和OTA升级包版本不同
(2)升级包的制作 记得改版本号echo "ro.product.version=8.1.0.0"
整包:在制作完一次版本后,make
make otapackage // 使用 out/target/project/xxxx/ 下的 full_xxx.zip
差分包:make
make otapackage // 烧录 该步骤之后的image
cp out/target/project/xxxx/obj/PACKAGING/target_xxxx/full_xxx.zip V1.zip 将压缩包复制出来以改名便于差分包命令的执行
修改后make
make otapackage
cp out/target/project/xxxx/obj/PACKAGING/target_xxxx/full_xxx.zip V2.zip 同上
制作差分包:运行以下脚本命令
./build/tools/releasetools/ota_from_target_files
--block -s ./device/mediatek/build/releasetools/mt_ota_from_target_files
-i V1.zip V2.zip update.zip//使用生成的 update.zip
注意:ota_from_target_files工具和mt_ota_from_target_files可能不在上述路径下,使用该命令时要查找下,(因为即使路径下没有工具文件一样不会报错)
但生成的update.zip可能会有问题,全包和差分包中都要有scatter.txt文件
执行命令
./build/tools/releasetools/ota_from_target_files --block -s ./vendor/mediatek/proprietary/scripts/releasetools/mt_ota_from_target_files.py -i V1.zip V2.zip update.zip
在使用adb给差分包本地升级时,
如果把升级包(update.zip) push 到data分区目,/data/update.zip.
adb shell 下执行:system/bin/uncrypt /data/update.zip /cache/recovery/block.map
adb shell :echo "--update_package=@/cache/recovery/block.map" > /cache/recovery/command
adb reboot recovery
如果把升级包(update.zip) push 到分区,/cache/recovery/update.zip.
adb shell下:echo "--updata_pacakge=/cache/recovery/update.zip" >/cache/recovery/command
adb reboot recovery
system/bin/uncrypt 是用来绕过data加密用的,若使用cache来放ota包,则不需要该过程 command 使用。
更新失败的几种情况
1. selinux权限没有去除干净
检验方法:先用adb统一将selinux设置成permissive模式
Getenforce :查看当前selinux模式状态
Setenforce 0 :设置成permissive模式
Setenforce 1 :设置成enforcing模式
或者在驱动中修改
System/core/init/init.cpp
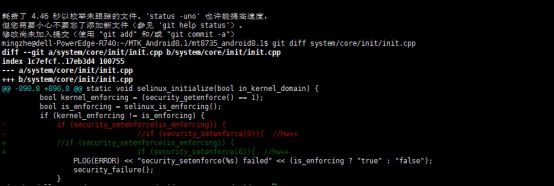
屏蔽掉selinux后,如果升级成功,则是selinux权限限制了升级,要对相应限制做修改
开机抓log,重新执行升级失败的过程,将出现的关键字avc找出来添加相应权限,
规则为例
avc: denied { getattr } for pid=199 comm="recovery" path="/sys/devices/virtual/thermal/thermal_zone4/temp" dev="sysfs" ino=14273 scontext=u:r:recovery:s0 tcontext=u:object_r:sysfs_therm:s0 tclass=file permissive=0
在recovery下加allow recovery sysfs_therm file getattr
(有一条 avc: denied { create } for pid=1 comm="init" name="cgroup.procs" scontext=u:r:init:s0 tcontext=u:object_r:rootfs:s0 tclass=file permissive=0)无法被关闭,,一般不是这一条权限影响,而且也无法关闭,如果强制修改会引起编译错误,原因是您加的权限过大, 和google内置的neverallow冲突,为了防止ODM/OEM厂商随意添加sepolicy导致selilnux形同虚设,google在aosp code里内置
了一系列的neverallow规则,检测到冲突就会build fail,简单的说就是不能允许init去给rootfs创建新文件。
您可以通过删掉对应的neverallow来build pass,不过这样cts会fail。)
2. 初始版本和OTA升级包不对应,
在修改完权限和版本后,再去执行make otapackage ,烧录之后的image,如果涉及到GMS版本,
还要先执行脚本./vendor/mediatek/proprietary/scripts/sign-image/sign_image.sh
后再执行make otapackage 烧录之后的image,并将此时版本保留为初始版本