微服务之Sprint Boot2—一切从简单开始
微服务之Sprint Boot2—一切从简单开始
- 介绍
- 测试
- 总结
介绍
介绍
使用Spring Boot是快乐并且简单的,不需要繁琐的配置就能够完成一套非常强大的应用。
实现
使用STS,可以去官方万展下载最新版。网站地址为https://spring.io/tools。关于详细下载及安装方式可以参考我的另一篇博客
[Spring Boot开发利器之STS(Spring Tool Suite 4)下载与安装]。
Spring Tools | 4是基于Eclipse开发的专门为Spring开发使用的工具包。
新建工程,选择Spring Starter Project,如下图:

单击”Create new Spring Starter Project”按钮,输入工程信息,如下图:

输入工程名:对应的Name。
打包方式:对应的Packaging,可以选择JAR或者WAR的方式。
输入组织名:对应的Group。
输入描述:对应的Description。
输入包名:对应的Package。
单击”Next”按钮,然后选择Spring Web和MySQL Driver,如下图:

单击完成按钮后开始创建工程,创建完成后,pom.xml中会自动加入以下代码:
	<parent>
		<groupId>org.springframework.bootgroupId>
		<artifactId>spring-boot-starter-parentartifactId>
		<version>2.3.1.RELEASEversion>
		<relativePath/>
	parent>
进入DemoApplication.java,可以看到自动生成代码如下:
package com.wongoing;

import org.springframework.boot.SpringApplication;
import org.springframework.boot.autoconfigure.SpringBootApplication;

@SpringBootApplication
public class DemoApplication {

	public static void main(String[] args) {
		SpringApplication.run(DemoApplication.class, args);
	}

}
编辑以上代码,实现一个简单的控制器功能,代码如下:
package com.wongoing;

import org.springframework.boot.SpringApplication;
import org.springframework.boot.autoconfigure.SpringBootApplication;
import org.springframework.web.bind.annotation.RequestMapping;
import org.springframework.web.bind.annotation.RestController;

@RestController
@SpringBootApplication
public class DemoApplication {

	@RequestMapping("/")
	public String home() {
		return "欢迎使用Spring Boot!";
	}

	public static void main(String[] args) {
		SpringApplication.run(DemoApplication.class, args);
	}
}
@RestController相当于@Controller和@ResponseBody的结合,是Spring Boot基于Spring MVC的基础上进行了改进,将@Controller与@ResponseBody进行合并形成的一个新的注解。
@EnableAutoConfiguration作用:
- 从classpath中搜索所有META-INF/spring.factories配置文件,然后将其中的org.springframework.boot.autoconfigure.EnableAutoConfiguration key对应的配置项加载到Spring容器。
- 只有spring.boot.enableautoconfiguration为true(默认为true)时,才启用自动配置。
- @EnableAutoConfiguration还可以进行排除,排除方式有2种,一是根据class来排除其内部实现的关键点有:
(1) ImportSelector,该接口的方法的返回值都会被纳入Spring容器管理中。
(2) SpringFactoriesLoader,该类可以从classpath中搜索所有META-INF/spring.factories配置文件,并读取配置。
测试
配置完成后,可以使用main函数的方式或者Spring Boot App的方式启动应用,启动完成后可以看到如下输出:
  .   ____          _            __ _ _
 /\\ / ___'_ __ _ _(_)_ __  __ _ \ \ \ \
( ( )\___ | '_ | '_| | '_ \/ _` | \ \ \ \
 \\/  ___)| |_)| | | | | || (_| |  ) ) ) )
  '  |____| .__|_| |_|_| |_\__, | / / / /
 =========|_|==============|___/=/_/_/_/
 :: Spring Boot ::        (v2.3.1.RELEASE)

2020-07-13 13:23:21.092  INFO 11620 --- [           main] com.wongoing.DemoApplication             : Starting DemoApplication on zhenglibing-pc with PID 11620 (E:\sts-workspace\demo\target\classes started by zheng in E:\sts-workspace\demo)
2020-07-13 13:23:21.094  INFO 11620 --- [           main] com.wongoing.DemoApplication             : No active profile set, falling back to default profiles: default
2020-07-13 13:23:21.759  INFO 11620 --- [           main] o.s.b.w.embedded.tomcat.TomcatWebServer  : Tomcat initialized with port(s): 8080 (http)
2020-07-13 13:23:21.767  INFO 11620 --- [           main] o.apache.catalina.core.StandardService   : Starting service [Tomcat]
2020-07-13 13:23:21.767  INFO 11620 --- [           main] org.apache.catalina.core.StandardEngine  : Starting Servlet engine: [Apache Tomcat/9.0.36]
2020-07-13 13:23:21.833  INFO 11620 --- [           main] o.a.c.c.C.[Tomcat].[localhost].[/]       : Initializing Spring embedded WebApplicationContext
2020-07-13 13:23:21.833  INFO 11620 --- [           main] w.s.c.ServletWebServerApplicationContext : Root WebApplicationContext: initialization completed in 693 ms
2020-07-13 13:23:21.965  INFO 11620 --- [           main] o.s.s.concurrent.ThreadPoolTaskExecutor  : Initializing ExecutorService 'applicationTaskExecutor'
2020-07-13 13:23:22.088  INFO 11620 --- [           main] o.s.b.w.embedded.tomcat.TomcatWebServer  : Tomcat started on port(s): 8080 (http) with context path ''
2020-07-13 13:23:22.095  INFO 11620 --- [           main] com.wongoing.DemoApplication             : Started DemoApplication in 1.256 seconds (JVM running for 2.195)
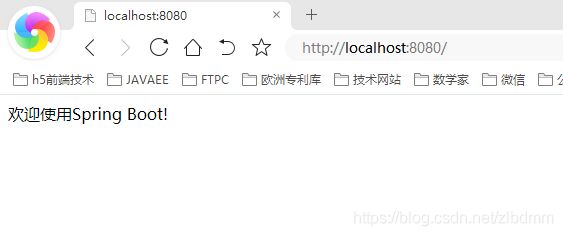
输入http://localhost:8080,可以看到输入相应的提示信息,如下图所示:
工程创建时,STS会为应用自动生成基于JUnit的单元测试。原内容如下:
package com.wongoing;

import org.junit.jupiter.api.Test;
import org.springframework.boot.test.context.SpringBootTest;

@SpringBootTest
class DemoApplicationTests {

	@Test
	void contextLoads() {
	}

}
修改单元测试代码,对刚刚上面实现的控制器进行单元测试,修改后的代码如下:
package com.wongoing;

import org.junit.jupiter.api.Assertions;
import org.junit.jupiter.api.Test;
import org.springframework.beans.factory.annotation.Autowired;
import org.springframework.boot.test.context.SpringBootTest;
import org.springframework.boot.test.context.SpringBootTest.WebEnvironment;
import org.springframework.boot.test.web.client.TestRestTemplate;
import org.springframework.http.HttpStatus;
import org.springframework.http.ResponseEntity;

@SpringBootTest(classes = DemoApplication.class, webEnvironment = WebEnvironment.RANDOM_PORT)
class DemoApplicationTests {

	@Autowired
	private TestRestTemplate restTemplate;

	@Test
	void contextLoads() {
	}

	@Test
	public void testHome() {
		String url = "/";
		ResponseEntity<String> entity = this.restTemplate.getForEntity(url, String.class);
		Assertions.assertEquals(entity.getStatusCode(), HttpStatus.OK);
		Assertions.assertEquals(entity.getBody(), "欢迎使用Spring Boot!");
	}
}
@SpringBootTest指定Spring Boot程序的测试引导入口。
TestRestTemplate是用于测试REST接口的模板类。
运行单元测试,测试上面构建的Web地址,可以看到输出的测试结果与期望的接口相同,如下图:

这样,一个Web应用从构建到单元测试就完成了,可见,构建一个Spring Web MVC的应用就是如此简单。
再来看看生成的依赖:
只需要再pom.xml中加入相应的启动器就可以,而这些都已经由STS在构建工程的过程中为我们完成了。
<project xmlns="http://maven.apache.org/POM/4.0.0" xmlns:xsi="http://www.w3.org/2001/XMLSchema-instance"
	xsi:schemaLocation="http://maven.apache.org/POM/4.0.0 https://maven.apache.org/xsd/maven-4.0.0.xsd">
	<modelVersion>4.0.0modelVersion>
	<parent>
		<groupId>org.springframework.bootgroupId>
		<artifactId>spring-boot-starter-parentartifactId>
		<version>2.3.1.RELEASEversion>
		<relativePath/>
	parent>
	<groupId>wongoinggroupId>
	<artifactId>springdemo3artifactId>
	<version>0.0.1-SNAPSHOTversion>
	<name>demoname>
	<description>Demo project for Spring Bootdescription>

	<properties>
		<java.version>1.8java.version>
	properties>

	<dependencies>
		<dependency>
			<groupId>org.springframework.bootgroupId>
			<artifactId>spring-boot-starter-webartifactId>
		dependency>

		<dependency>
			<groupId>mysqlgroupId>
			<artifactId>mysql-connector-javaartifactId>
			<scope>runtimescope>
		dependency>

		<dependency>
		    <groupId>junitgroupId>
		    <artifactId>junitartifactId>
		    <version>4.13version>
		    <scope>testscope>
		dependency>

		<dependency>
			<groupId>org.springframework.bootgroupId>
			<artifactId>spring-boot-starter-testartifactId>
			<scope>testscope>
			<exclusions>
				<exclusion>
					<groupId>org.junit.vintagegroupId>
					<artifactId>junit-vintage-engineartifactId>
				exclusion>
			exclusions>
		dependency>
	dependencies>

	<build>
		<plugins>
			<plugin>
				<groupId>org.springframework.bootgroupId>
				<artifactId>spring-boot-maven-pluginartifactId>
			plugin>
		plugins>
	build>

project>
总结
正如标题所说,一切从简单开始,时代的发展已经进入AI时代,所以开发也应该提速,能够智能化实现的部分就完全智能化。