Ubuntu 18.04 LTS 如何搭建Web服务器
Ubuntu 18.04 LTS 如何搭建Web服务器
- 操作流程
- 1.安装前更新系统存储库
- 2.安装apache2
- 3.安装php
- 4.安装mysql
- 5.配置apache web服务器
- 6.在apache中配置虚拟主机
- 参考文献
操作流程
1.安装前更新系统存储库
sudo apt update
2.安装apache2
sudo apt install apache2
查看是否安装完成
apache2 -version
root@iZuf63gpxv4kgzve2n8mkqZ:~# apache2 -v
Server version: Apache/2.4.29 (Ubuntu)
Server built:   2019-04-03T13:22:37
3.安装php
sudo apt install php
php -version
root@iZuf63gpxv4kgzve2n8mkqZ:~# php -version
PHP 7.2.17-0ubuntu0.18.04.1 (cli) (built: Apr 18 2019 14:12:38) ( NTS )
Copyright (c) 1997-2018 The PHP Group
Zend Engine v3.2.0, Copyright (c) 1998-2018 Zend Technologies
    with Zend OPcache v7.2.17-0ubuntu0.18.04.1, Copyright (c) 1999-2018, by Zend Technologies
sudo apt-get install libapache2-mod-php
root@iZuf63gpxv4kgzve2n8mkqZ:/# apt-get install libapache2-mod-php
Reading package lists... Done
Building dependency tree
Reading state information... Done
The following packages were automatically installed and are no longer required:
  libopts25 sntp
Use 'apt autoremove' to remove them.
The following NEW packages will be installed:
  libapache2-mod-php
0 upgraded, 1 newly installed, 0 to remove and 44 not upgraded.
Need to get 3,212 B of archives.
After this operation, 16.4 kB of additional disk space will be used.
Get:1 http://mirrors.cloud.aliyuncs.com/ubuntu bionic/main amd64 libapache2-mod-php all 1:7.2+60ubuntu1 [3,212 B]
Fetched 3,212 B in 0s (141 kB/s)
Selecting previously unselected package libapache2-mod-php.
(Reading database ... 109861 files and directories currently installed.)
Preparing to unpack .../libapache2-mod-php_1%3a7.2+60ubuntu1_all.deb ...
Unpacking libapache2-mod-php (1:7.2+60ubuntu1) ...
Setting up libapache2-mod-php (1:7.2+60ubuntu1) ...
4.安装mysql
sudo apt-get install mysql-server mysql-client
sudo apt-get install mysql-server mysql-client
update-alternatives: using /etc/mysql/mysql.cnf to provide /etc/mysql/my.cnf (my.cnf) in auto mode
Renaming removed key_buffer and myisam-recover options (if present)
Created symlink /etc/systemd/system/multi-user.target.wants/mysql.service → /lib/systemd/system/mysql.service.
Setting up mysql-server (5.7.27-0ubuntu0.18.04.1) ...
Processing triggers for ureadahead (0.100.0-21) ...
Processing triggers for systemd (237-3ubuntu10.23) ...
sudo apt-get install php-mysql 链接php和mysql
root@iZuf63gpxv4kgzve2n8mkqZ:/# apt-get install php-mysql
Get:1 http://mirrors.cloud.aliyuncs.com/ubuntu bionic-updates/main amd64 php7.2-mysql amd64 7.2.19-0ubuntu0.18.04.2 [117 kB]
Get:2 http://mirrors.cloud.aliyuncs.com/ubuntu bionic/main amd64 php-mysql all 1:7.2+60ubuntu1 [2,004 B]
Fetched 119 kB in 0s (5,674 kB/s)
Selecting previously unselected package php7.2-mysql.
(Reading database ... 110325 files and directories currently installed.)
Preparing to unpack .../php7.2-mysql_7.2.19-0ubuntu0.18.04.2_amd64.deb ...
Unpacking php7.2-mysql (7.2.19-0ubuntu0.18.04.2) ...
Selecting previously unselected package php-mysql.
Preparing to unpack .../php-mysql_1%3a7.2+60ubuntu1_all.deb ...
Unpacking php-mysql (1:7.2+60ubuntu1) ...
Setting up php7.2-mysql (7.2.19-0ubuntu0.18.04.2) ...

Creating config file /etc/php/7.2/mods-available/mysqlnd.ini with new version

Creating config file /etc/php/7.2/mods-available/mysqli.ini with new version

Creating config file /etc/php/7.2/mods-available/pdo_mysql.ini with new version
Processing triggers for libapache2-mod-php7.2 (7.2.19-0ubuntu0.18.04.2) ...
Setting up php-mysql (1:7.2+60ubuntu1) ...
sudo apt-get install mysql-workbench
5.配置apache web服务器
1.查看apache是否运行
sudo systemctl status apache2
root@iZuf63gpxv4kgzve2n8mkqZ:/# systemctl status apache2
● apache2.service - The Apache HTTP Server
   Loaded: loaded (/lib/systemd/system/apache2.service; enabled; vendor preset: enabled)
  Drop-In: /lib/systemd/system/apache2.service.d
           └─apache2-systemd.conf
   Active: active (running) since Wed 2019-05-15 11:11:28 CST; 57s ago
 Main PID: 2215 (apache2)
    Tasks: 55 (limit: 2325)
   CGroup: /system.slice/apache2.service
           ├─2215 /usr/sbin/apache2 -k start
           ├─2217 /usr/sbin/apache2 -k start
           └─2218 /usr/sbin/apache2 -k start

May 15 11:11:28 iZuf63gpxv4kgzve2n8mkqZ systemd[1]: Starting The Apache HTTP Server...
May 15 11:11:28 iZuf63gpxv4kgzve2n8mkqZ apachectl[2204]: AH00558: apache2: Could not reliably determine the server's fully qualified domain na
May 15 11:11:28 iZuf63gpxv4kgzve2n8mkqZ systemd[1]: Started The Apache HTTP Server.
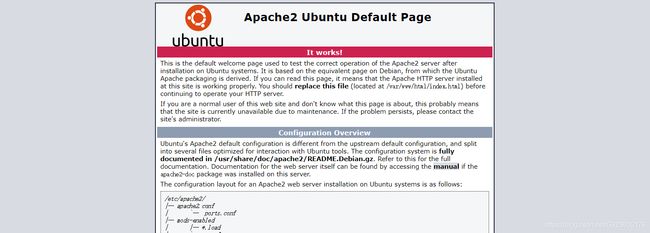
2.验证Apache是否正常运行并侦听您的IP地址
hostname -i
root@iZuf63gpxv4kgzve2n8mkqZ:/# hostname -i
172.19.190.107
root@iZuf63gpxv4kgzve2n8mkqZ:/# curl http://172.19.190.107

<!DOCTYPE html PUBLIC "-//W3C//DTD XHTML 1.0 Transitional//EN" "http://www.w3.org/TR/xhtml1/DTD/xhtml1-transitional.dtd">
<html xmlns="http://www.w3.org/1999/xhtml">
  <!--
    Modified from the Debian original for Ubuntu
    Last updated: 2016-11-16
    See: https://launchpad.net/bugs/1288690
  -->
  <head>
    <meta http-equiv="Content-Type" content="text/html; charset=UTF-8" />
    <title>Apache2 Ubuntu Default Page: It works</title>
    <style type="text/css" media="screen">
  * {
    margin: 0px 0px 0px 0px;
    padding: 0px 0px 0px 0px;
  }
6.在apache中配置虚拟主机
1.设置域名
sudo mkdir -p /var/www/ddaystudy.cn/html
新建一个index.html页面,方便后边测试打开
2.Apache需要一个虚拟主机文件来提供服务器的内容。 已经创建了用于此目的的默认配置文件,但我们将为自定义配置创建一个新配置文件。在 /etc/apache2/sites-available 目录下新建 ddaystudy.cn.conf 文件。
输入域名的以下自定义配置详细信息:
<VirtualHost *:80>
	ServerAdmin admin@ddaystudy.cn
	ServerName ddaystudy.cn
	ServerAlias www.ddaystudy.cn
	DocumentRoot /var/www/ddaystudy.cn/html
	ErrorLog ${APACHE_LOG_DIR}/error.log
	CustomLog ${APACHE_LOG_DIR}/access.log combined
</VirtualHost>
3.启用域配置文件
sudo a2ensite ddaystudy.cn.conf
root@iZuf63gpxv4kgzve2n8mkqZ:/etc/apache2/sites-available# sudo a2ensite ddaystudy.cn.conf
Enabling site ddaystudy.cn.
To activate the new configuration, you need to run:
  systemctl reload apache2
禁用原始配置文件
sudo systemctl restart apache2
root@iZuf63gpxv4kgzve2n8mkqZ:/etc/apache2/sites-available# sudo systemctl restart apache2
4.测试错误
sudo apache2ctl configtest
错误提示:
root@iZuf63gpxv4kgzve2n8mkqZ:/etc/apache2/sites-available# sudo apache2ctl configtest
AH00558: apache2: Could not reliably determine the server's fully qualified domain name, using 172.19.190.107                      . Set the 'ServerName' directive globally to suppress this message
Syntax OK
解决错误:
echo “ServerName ddaystudy.cn” | sudo tee /etc/apache2/conf-available/servername.conf
root@iZuf63gpxv4kgzve2n8mkqZ:/etc/apache2/sites-available# echo "ServerName ddaystudy.cn" | sudo tee /etc/apache2/conf-available/servername.conf
ServerName ddaystudy.cn
sudo a2enconf servername
root@iZuf63gpxv4kgzve2n8mkqZ:/etc/apache2/sites-available# sudo a2enconf servername
Enabling conf servername.
To activate the new configuration, you need to run:
  systemctl reload apache2
再次检查,正确提示:
root@iZuf63gpxv4kgzve2n8mkqZ:~# sudo apache2ctl configtest
Syntax OK
5.解决中文乱码
修改charset.conf的AddDefaultCharset UTF-8,把AddDefaultCharset UTF-8前面的#去掉即可。
root@iZuf63gpxv4kgzve2n8mkqZ:/etc/apache2/conf-available# vi charset.conf
# Read the documentation before enabling AddDefaultCharset.
# In general, it is only a good idea if you know that all your files
# have this encoding. It will override any encoding given in the files
# in meta http-equiv or xml encoding tags.

AddDefaultCharset UTF-8

# vim: syntax=apache ts=4 sw=4 sts=4 sr noet
参考文献
Linux社区:https://www.linuxidc.com/Linux/2018-11/155507.htm
