UITextField(限制文字输入,调整光标,内容,占位文字显示的位置,以及基本使用)
#import "ViewController.h"
#import "CustomTextfield.h"
@interfaceViewController ()<UITextFieldDelegate>
@end
@implementation ViewController
- (void)viewDidLoad {
[superviewDidLoad];
//文本框,可以显示数据,可以与用户交互,只能显示一行数据
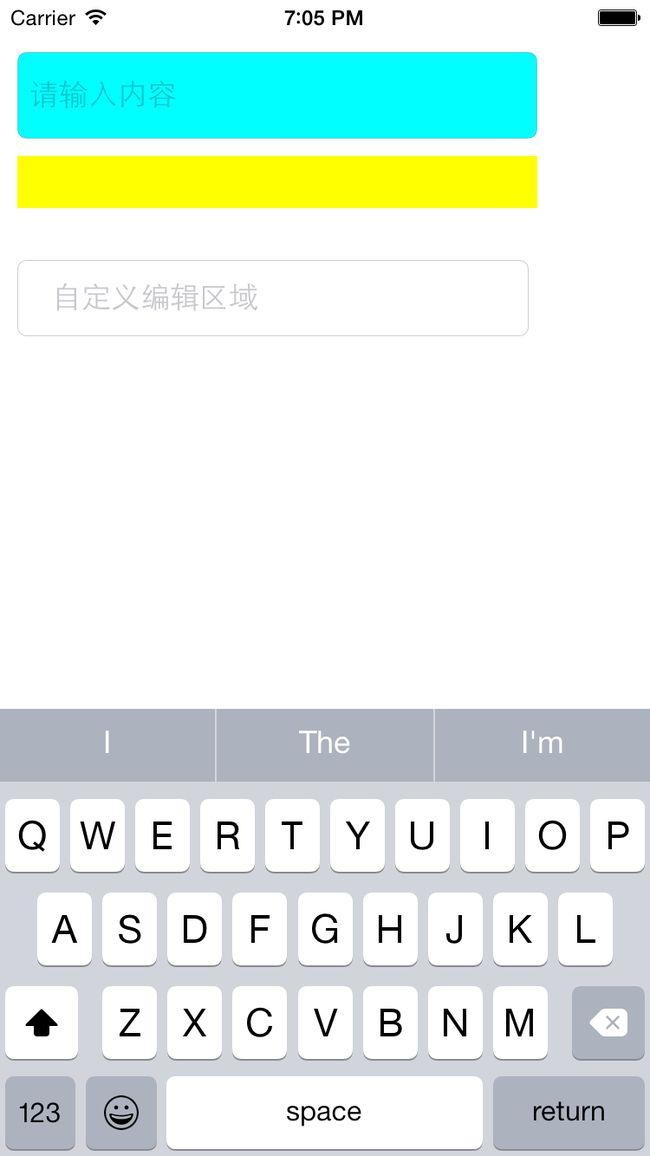
UITextField *textField = [[UITextFieldalloc]initWithFrame:CGRectMake(10,30,300,50)];
//设置边框的样式
textField.borderStyle =UITextBorderStyleRoundedRect;
//背景颜色
textField.backgroundColor = [UIColorcyanColor];
//知识点2:设置暗文输入(密码),表示输入之后就会隐藏你输入的数字。
textField.secureTextEntry =YES;
//知识点1:设置清除文本的按钮 (输入时,出现清除按钮),即显示在文本框的右侧小圆圈叉叉。
textField.clearButtonMode =UITextFieldViewModeWhileEditing;
//知识点3:成为第一响应者(会自动弹出键盘),即进入界面,键盘自动弹出。成为第一响应者,其实就是开始编辑.会触发UITextFieldTextDidBeginEditingNotification
[textField becomeFirstResponder];
//placeholder设置提示文字
textField.placeholder =@"请输入内容";
//设置键盘样式(纯数字键盘)
// textField.keyboardType =UIKeyboardTypeNumberPad;
textField.keyboardType =UIKeyboardTypeDefault;//默认为英文键盘
//设置键盘右侧按钮的样式,将会覆盖之前的return按钮
textField.returnKeyType =UIReturnKeyGo;
textField.clearsOnInsertion=YES;//设置为YES。那么再一次输入内容的时候,会清楚之前的内容,显示最新的内容。
//设置delegate为视图控制器对象.通过代理方法实现一些需要处理的操作。
textField.delegate =self;
textField.tag =100;
[self.viewaddSubview:textField];
UIView *view=[[UIViewalloc]initWithFrame:CGRectMake(0,0,40,40)];
view.backgroundColor=[UIColorredColor];
//textField.inputView=view;//自定义输入视图之后,那么就不会有键盘的显示了。自定义什么界面就显示什么样的界面,可以自定义需要的键盘。
textField.inputAccessoryView=view;//创建附属的view,视图位于键盘之上,随键盘的高度变化而变化
UILabel *label = [[UILabelalloc]initWithFrame:CGRectMake(10,90,300,30)];
label.backgroundColor = [UIColoryellowColor];
label.tag =101;
label.text=@"显示内容";
[self.viewaddSubview:label];
CustomTextfield *customTextField=[[CustomTextfieldalloc]initWithFrame:CGRectMake(10,150,self.view.frame.size.width-80,44)];
customTextField.placeholder=@"自定义编辑区域";
customTextField.borderStyle=UITextBorderStyleRoundedRect;
customTextField.tag=1001;
customTextField.clearsOnBeginEditing=YES;//设置为YES当用点触文本字段时,字段内容会被清除,再另外一次开始编辑的时候,之前的内容会自动清除。
customTextField.adjustsFontSizeToFitWidth =YES;//设置为YES时文本会自动缩小以适应文本窗口大小。默认是保持原来大小,而让长文本滚动
[self.view addSubview:customTextField];
}
#pragma mark - UITextFieldDelegate
//当开始编辑文字时,(键盘弹出时),触发此方法
- (void)textFieldDidBeginEditing:(UITextField *)textField{
NSLog(@"begin editing!");
}
//结束编辑时,(键盘收回时),触发此方法。把UITextField中的文本内容给label。
- (void)textFieldDidEndEditing:(UITextField *)textField{
NSLog(@"end editing!");
UILabel *label = (UILabel *)[self.viewviewWithTag:101];
//text 属性取到用户输入的内容
label.text = textField.text;
}
//点击键盘右侧的按钮时,触发此方法
- (BOOL)textFieldShouldReturn:(UITextField *)textField{
//收键盘(取消第一响应者)
//[textField resignFirstResponder];
[textFieldendEditing:YES];//结束编辑,(取消第一响应者)
NSLog(@"右侧按钮被点击!");
returnYES;
}
//当用户手指触摸到self.view时,会触发此方法
- (void)touchesBegan:(NSSet *)touches withEvent:(UIEvent *)event{
//收键盘
UITextField *field = (UITextField *)[self.viewviewWithTag:100];
CustomTextfield *textField=(CustomTextfield *)[self.viewviewWithTag:1001];
[textField resignFirstResponder];
[field resignFirstResponder];
}
- (BOOL)textField:(UITextField*)textField shouldChangeCharactersInRange:(NSRange)range replacementString:(NSString *)string{
//当用户使用自动更正功能,把输入的文字修改为推荐的文字时,就会调用这个方法。
//这对于想要加入撤销选项的应用程序特别有用
//可以跟踪字段内所做的最后一次修改,也可以对所有编辑做日志记录,用作审计用途。
//要防止文字被改变可以返回NO
//这个方法的参数中有一个NSRange对象,指明了被改变文字的位置,建议修改的文本也在其中
returnYES;
}
- (BOOL)textFieldShouldClear:(UITextField *)textField{
//返回一个BOOL值指明是否允许根据用户请求清除内容
//可以设置在特定条件下才允许清除内容
returnYES;
}
/*
通知
UITextField派生自UIControl,所以UIControl类中的通知系统在文本字段中也可以使用。除了UIControl类的标准事件,你还可以使用下列UITextField类特有的事件
UITextFieldTextDidBeginEditingNotification
UITextFieldTextDidChangeNotification
UITextFieldTextDidEndEditingNotification
当文本字段退出编辑模式时触发。通知的object属性存储了最终文本。因为文本字段要使用键盘输入文字,所以下面这些事件发生时,也会发送动作通知
UIKeyboardWillShowNotification 键盘显示之前发送
UIKeyboardDidShowNotification 键盘显示之后发送
UIKeyboardWillHideNotification 键盘隐藏之前发送
UIKeyboardDidHideNotification 键盘隐藏之后发送
*/
@end
#import
@interface CustomTextfield :UITextField
@end
#import "CustomTextfield.h"
@implementation CustomTextfield
// 重写绘制行为
// 除了UITextField对象的风格选项,你还可以定制化UITextField对象,为他添加许多不同的重写方法,来改变文本字段的显示行为。这些方法都会返回一个CGRect结构,制定了文本字段每个部件的边界范围。如果你创见了一个自定义的UITextField类,你可以重写这些方法,这样就可以改变一个或多个边界。一定不要直接调用 fan广发;它们都是被iPhone运行库调用的回调函数下面举个例子:
/*
// drawing and positioning overrides
- (CGRect)borderRectForBounds:(CGRect)bounds; 指定矩形边界
- (CGRect)textRectForBounds:(CGRect)bounds; 指定显示文本的边界
- (CGRect)placeholderRectForBounds:(CGRect)bounds; 指定站位文本的边界
- (CGRect)editingRectForBounds:(CGRect)bounds; 指定编辑中文本的边界
- (CGRect)clearButtonRectForBounds:(CGRect)bounds; 指定显示清除按钮的边界
- (CGRect)leftViewRectForBounds:(CGRect)bounds; 指定显示左附着视图的边界
- (CGRect)rightViewRectForBounds:(CGRect)bounds; 指定显示右附着视图的边界
*/
//设置默认文字的显示区域
-(CGRect)placeholderRectForBounds:(CGRect)bounds{
returnCGRectMake(20,0,bounds.size.width ,bounds.size.height);
}
//设置文本显示的区域
-(CGRect)textRectForBounds:(CGRect)bounds{
returnCGRectMake(20,0,bounds.size.width ,bounds.size.height);
}
//编辑区域,即光标的位置
-(CGRect)editingRectForBounds:(CGRect)bounds{
returnCGRectMake(20,0,bounds.size.width ,bounds.size.height);
}
@end


基本视图 带附属视图的UITextField
二:UITextField单行文本内容限制文字输入
实现代码如下:
@interface ZYJEditNickNameViewController ()
UIButton *saveButton;
BOOL isMeetWords;
UIActivityIndicatorView *indicatorView;
UITextField *textFiled;
}
@end
@implementation ZYJEditNickNameViewController
- (void)viewDidLoad {
[super viewDidLoad];
self.title=@"编辑昵称";
self.view.backgroundColor=[UIColor system235GrayColor];
isMeetWords=YES;
textFiled=[[UITextField alloc]initWithFrame:CGRectMake(10, 20,self.view.frame.size.width-20,45)];
textFiled.delegate=self;
textFiled.font = [UIFont systemFontOfSize:14.f];
textFiled.returnKeyType=UIReturnKeyDefault;
textFiled.clearButtonMode=UITextFieldViewModeWhileEditing;
[textFiled becomeFirstResponder];
textFiled.layer.borderWidth=0.5;
textFiled.layer.borderColor=[UIColor system178GrayColor].CGColor;
[self.view addSubview:textFiled];
//UITextField注册观察者.实时监听textfield内容的变化,并作出相应的改变.
[[NSNotificationCenter defaultCenter]addObserver:self selector:@selector(textFiledDidChange) name:UITextFieldTextDidChangeNotification object:nil];
saveButton=[UIButton buttonWithType:UIButtonTypeCustom]; saveButton.frame=CGRectMake(CGRectGetMinX(textFiled.frame),CGRectGetMaxY(textFiled.frame)+15,CGRectGetWidth(textFiled.frame),
CGRectGetHeight(textFiled.frame));
saveButton.backgroundColor=[UIColor systemZuiyoujiRedColor];
[saveButton setTitle:@"保存" forState:UIControlStateNormal];
[saveButton setTintColor:[UIColor whiteColor]];
[saveButton handleControlEvent:UIControlEventTouchUpInside withBlock:^{
[textFiled resignFirstResponder];
}];
[self.view addSubview:saveButton];
// Do any additional setup after loading the view.
}
#pragma -----UITextViewDelegate-----------
-(BOOL)textField:(UITextField *)textField shouldChangeCharactersInRange:(NSRange)range replacementString:(NSString *)string{
if ([string isEqualToString:@"\n"])
{
NSLog(@"%@",string);
[textField resignFirstResponder];
return NO;
}
NSString *new = [textField.text stringByReplacingCharactersInRange:range withString:string];
NSInteger res = 10-[new length];
if(res >=0){
return YES;//可以替换文本.及就文本内容被新文本替换
}
else{
if (isMeetWords==YES) {//第一次进行提醒
alert(@"亲: 用户昵称请填写在10个字以内哦!谢谢!");
isMeetWords=NO;
}
if ( [new length]>=10) {//如果超过10就取前面10个字段
textFiled.text = [new substringToIndex:10];
}
return NO;//不能够进行替换文本
}
return YES;
}
-(void)textFiledDidChange{
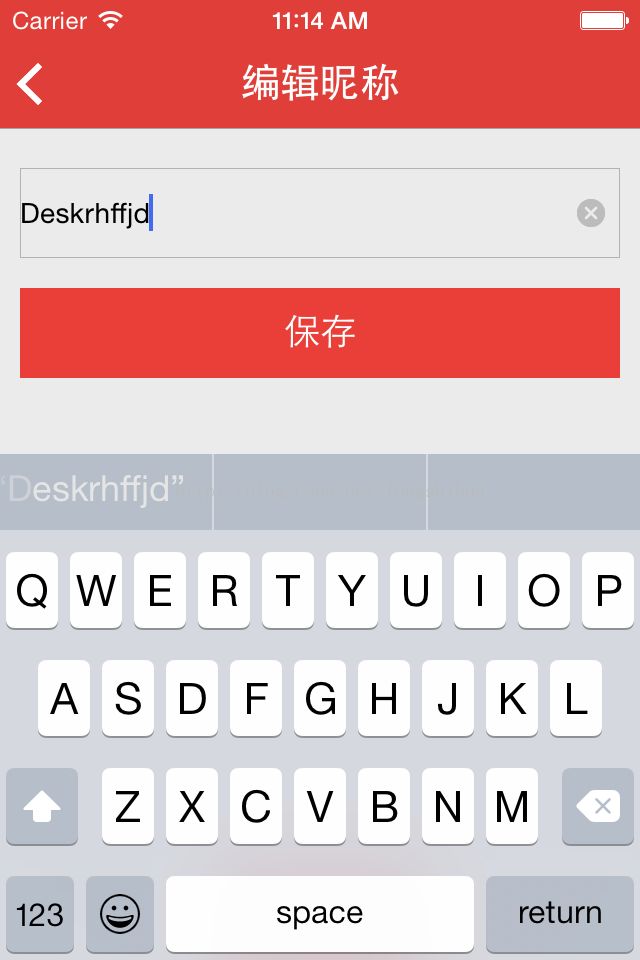
if (textFiled.text.length>0) {//有文字保存按钮显示红色
saveButton.enabled=YES;
saveButton.backgroundColor=[UIColor systemZuiyoujiRedColor];
}else{
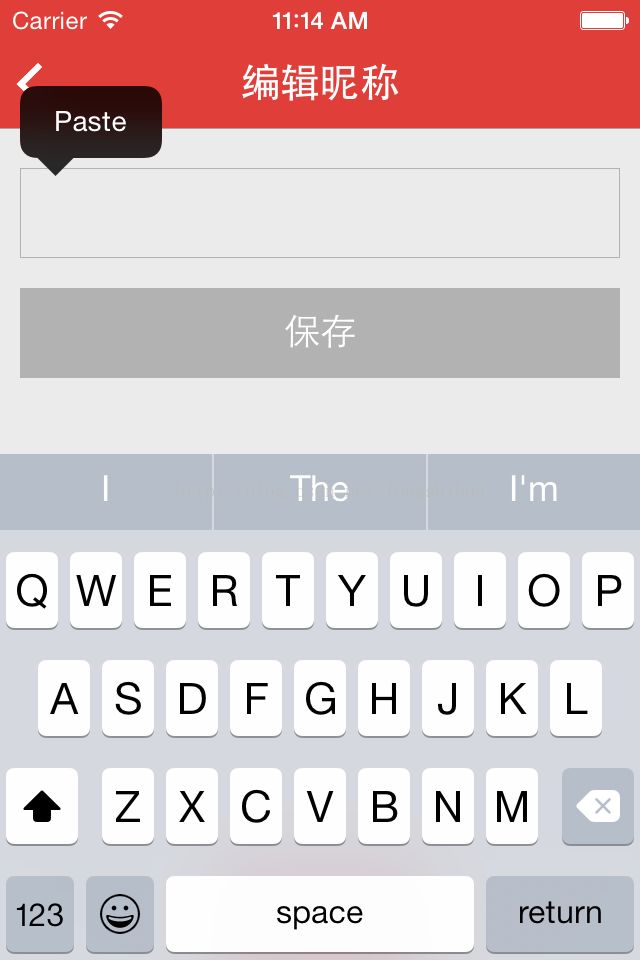
saveButton.enabled=NO;//无文字保存按钮显示灰色不可点击
saveButton.backgroundColor=[UIColor system178GrayColor];
}
}
-(void)touchesBegan:(NSSet *)touches withEvent:(UIEvent *)event{
[textFiled resignFirstResponder];
}
注:如果是多行文本输入限制文字数量,那么使用UITextView,只要去掉监听者,在原有的基础上把UITextField变为UITextView再实现一个代理方法即可.
- (void)textViewDidChange:(UITextView *)textView
{
if (textView.text.length>0) {
saveButton.enabled=YES;
saveButton.backgroundColor=[UIColor systemZuiyoujiRedColor];
}else{
saveButton.enabled=NO;
saveButton.backgroundColor=[UIColor system178GrayColor];
}
}
部分效果图:
图一:有文字时候的效果 图二:无文字时候的效果
改变光标颜色
textField.tintColor = UIColor.red设置默认文字属性(字体、颜色)
let attributes: [NSAttributedStringKey : Any] = [NSAttributedStringKey.foregroundColor: UIColor.black,
NSAttributedStringKey.font: UIFont(name: "Menlo", size: 17.0) ?? UIFont.systemFont(ofSize: 17.0) ]

        textField.attributedPlaceholder = NSAttributedString(string: "Placeholder Text", attributes: attributes)
