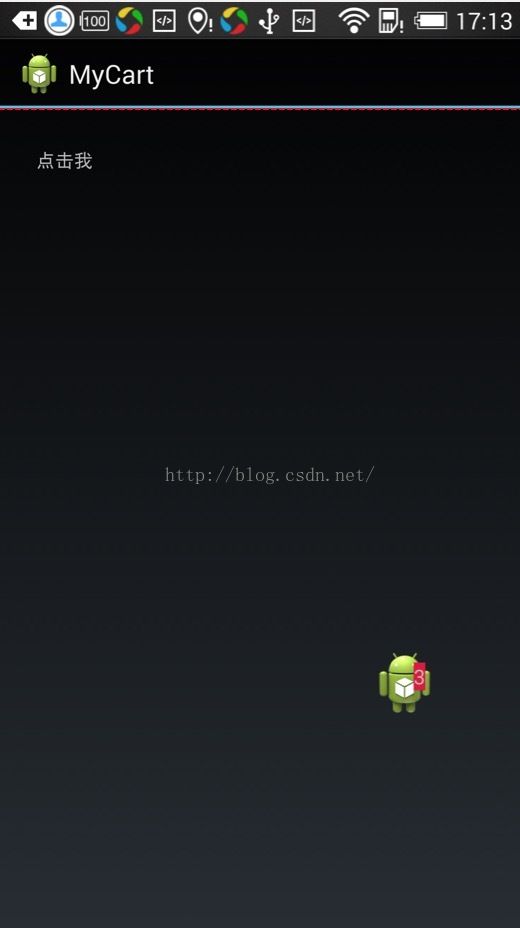
android可拖动的购物车效果(含点击放入购物车动画代码)
由于项目需要,做了一个可以移动的购物车控件,已经点击添加到购物车的动画效果.动画效果在列表中也是可以使用的(请无视我丑陋的UI...)
一.可以拖动的购物车
1.主要是通过WindowManager添加和删除自定义的LiearLayout实现,显示和隐藏购物车.
我这里使用的是FIRST_APPLICATION_WINDOW (应用程序窗口),就是在程序里某个activity启动的时候可以显示出
来,跳转到application里其他activity不会主动消失,但是点击home回到桌面不会在桌面上显示
那么有人会问,为什么不用TYPE_APPLICATION(普通应用功能程序窗口),因为有时候点击过快,购物车还没显示,我
就跳到了下个界面,或者返回到了上个界面,这时候就会报错(Caused by: android.view.WindowManager$BadTokenException: Unable to add window -- token android.app.LocalActivityManager$LocalActivityRecord@45a58ee0 is not valid; is your activity running?)
其实WindowManager还可以实现很多功能,比如listview某一项的拖动重新排序,桌面的悬浮窗等功能.
2.然后是加入了拖动功能,无非就是重写了onTouchEvent. MotionEvent.ACTION_UP的时候改变windowmanagerParams的x和y坐标同时调用WindowManager.updateViewLayout
3.加入点击效果,MotionEvent.ACTION_UP的时候和Down的时候的X,Y坐标比较,如果都小于5(我这边设置的是5,有需要的可以自己改)则调用一个回调函数
public class DragView extends LinearLayout {

	private float mTouchX;
	private float mTouchY;
	private float x;
	private float y;
	private int startX;
	private int startY;
	private int imgId = R.drawable.ic_launcher;
	private int screenWidth;
	private int screenHeight;
	boolean isShow = false;
	private OnClickListener mClickListener;

	private WindowManager windowManager;

	private WindowManager.LayoutParams windowManagerParams = new WindowManager.LayoutParams();
	private ImageView iv;
	private TextView tv;
	private LinearLayout ly;
	SharedPreferences sharedPreferences;
	Editor editor;

	public WindowManager.LayoutParams getWindowManagerParams() {
		return windowManagerParams;
	}

	public DragView(Context context, AttributeSet attrs) {
		super(context, attrs);
	}

	public DragView(Context c) {
		super(c);
		sharedPreferences = c.getSharedPreferences("APPSET",
				Context.MODE_PRIVATE);
		editor = sharedPreferences.edit();
		initView(c);
	}

	@Override
	protected void onDraw(Canvas canvas) {
		// TODO Auto-generated method stub
		super.onDraw(canvas);
	}

	// 初始化窗体
	public void initView(Context c) {
		windowManager = (WindowManager) c
				.getSystemService(Context.WINDOW_SERVICE);
		DisplayMetrics dm = getResources().getDisplayMetrics();
		screenWidth = dm.widthPixels;
		screenHeight = dm.heightPixels;
		View v = LayoutInflater.from(c).inflate(R.layout.dragview, null);
		iv = (ImageView) v.findViewById(R.id.iv);
		tv = (TextView) v.findViewById(R.id.tv_drag);
		ly = (LinearLayout) v.findViewById(R.id.ly_drag);
		this.addView(v);
		windowManagerParams.type = android.view.WindowManager.LayoutParams.FIRST_APPLICATION_WINDOW;
		windowManagerParams.format = PixelFormat.RGBA_8888; // 背景透明
		windowManagerParams.flags = android.view.WindowManager.LayoutParams.FLAG_NOT_TOUCH_MODAL
				| android.view.WindowManager.LayoutParams.FLAG_NOT_FOCUSABLE;
		// 调整悬浮窗口至左上角,便于调整坐标
		windowManagerParams.gravity = Gravity.LEFT | Gravity.TOP;
		// 以屏幕左上角为原点,设置x、y初始值
		int x = screenWidth - v.getMeasuredWidth();
		int y = screenHeight >> 1;
		/**
		 * 初始化之前保存的位置
		 */
		if (sharedPreferences.getInt("x", -1) != -1) {
			x = sharedPreferences.getInt("x", -1);
		}
		if (sharedPreferences.getInt("y", -1) != -1) {
			y = sharedPreferences.getInt("y", -1);
		}
		windowManagerParams.x = x;
		windowManagerParams.y = y;
		// 设置悬浮窗口长宽数据
		windowManagerParams.width = LayoutParams.WRAP_CONTENT;
		windowManagerParams.height = LayoutParams.WRAP_CONTENT;

	}

	public ImageView getImageView() {
		return iv;
	}

	public void setCount(String i) {
		if (TextUtils.isEmpty(i) || "0".equals(i)) {
			ly.setVisibility(View.GONE);
		} else {
			ly.setVisibility(View.VISIBLE);
			tv.setText(i + "");
		}
	}

	public void setImgResource(int id) {
		imgId = id;
		iv.setImageResource(id);
	}

	@Override
	public boolean onTouchEvent(MotionEvent event) {
		Rect frame = new Rect();
		getWindowVisibleDisplayFrame(frame);
		int statusBarHeight = frame.top;
		// 获取相对屏幕的坐标,即以屏幕左上角为原点
		x = event.getRawX();
		y = event.getRawY() - statusBarHeight; // statusBarHeight是系统状态栏的高度
		Log.i("tag", "currX" + x + "====currY" + y);
		switch (event.getAction()) {
		case MotionEvent.ACTION_DOWN: // 捕获手指触摸按下动作
			// 获取相对View的坐标,即以此View左上角为原点
			mTouchX = event.getX();
			mTouchY = event.getY();
			startX = (int) x;
			startY = (int) y;
			Log.i("tag", "startX" + mTouchX + "====startY" + mTouchY);
			break;
		case MotionEvent.ACTION_MOVE: // 捕获手指触摸移动动作
			updateViewPosition();
			break;
		case MotionEvent.ACTION_UP: // 捕获手指触摸离开动作
			updateViewPosition();
			mTouchX = mTouchY = 0;
			if (Math.abs(x - startX) < 5 && Math.abs(y - startY) < 5) {
				// 如果的纵坐标和横坐标都<5,则为点击事件
				if (mClickListener != null) {
					mClickListener.onClick(this);
				}
			}
			break;
		}
		return super.onTouchEvent(event);
	}

	// 隐藏该窗体
	public void hide() {
		if (isShow) {
			windowManager.removeView(this);
			isShow = false;
		}

	}

	// 显示该窗体
	public void show() {
		if (isShow == false) {
			windowManager.addView(this, windowManagerParams);
			isShow = true;
		}

	}

	public void showAtLocation(int[] location) {
		show();
		windowManagerParams.x = location[0];
		windowManagerParams.y = location[1];
		windowManager.updateViewLayout(this, windowManagerParams); // 刷新显示
	}

	@Override
	public void setOnClickListener(OnClickListener l) {
		this.mClickListener = l;
	}

	private void updateViewPosition() {
		// 更新浮动窗口位置参数
		windowManagerParams.x = (int) (x - mTouchX);
		windowManagerParams.y = (int) (y - mTouchY);
		editor.putInt("x", (int) (x - mTouchX));
		editor.putInt("y", (int) (y - mTouchY));
		editor.commit();
		windowManager.updateViewLayout(this, windowManagerParams); // 刷新显示
	}
}
二.动画效果
1.其实就是一个组合动画,获取到点击的View然后通过view.getLocationOnScreen获取到view的x,y坐标作为其实坐标,然后把原本的view放大一点,然后渐渐缩小,结束坐标为购物车的x,y,本来还想加入旋转效果的,感觉不是很好看,就注释掉了
2.这里要注意了,我移动的view并不是这个view本身,而是另一个view,也是跟购物车一样也是一个windowmanager添加了一个自定义linearlayout(我这里直接使用了购物车那个自定义view)
第一次写博客,有任何错误的地方,请大家多多包涵,也欢迎大家多多指导
最后奉上下载地址 点击打开链接
