使用Itext生成生成定制化的水印pdf并下载
参考文档:
- 官方文档是最好的参考文档:https://developers.itextpdf.com/content/itext-7-jump-start-tutorial/installing-itext-7
本人是idea maven环境搭建的项目,首先需要在你的项目当中加入一下的依赖:
            com.itextpdf
            kernel
            7.0.4


            com.itextpdf
            io
            7.0.4


            com.itextpdf
            layout
            7.0.4


            com.itextpdf
            forms
            7.0.4


            com.itextpdf
            pdfa
            7.0.4


            com.itextpdf
            pdftest
            7.0.4


            org.slf4j
            slf4j-log4j12
            1.7.18
下面废话不多说 我们直接上代码:
生成pdf文件的接口。
public void getPrinter() throws Exception{
        LOG.info("开始打印");
        //前端获取的参数
        String  title = getPara("title");
       //定义所要 打印内容的主体
        String info = title+"--------";

        // 所定义的工具类
        Watermark ww = null;
         // 定义所要下载文件的名称
        String fileName =null;
        try {
        //创建对象的时候初始化水印内容
            ww = new Watermark("Sulliven");
        } catch (IOException e) {
            e.printStackTrace();
        } catch (DocumentException e) {
            e.printStackTrace();
        }
        // 定义 所产生文件的路径
        String destPath=null;
        try {
        // 获取当前请求对象的request
            HttpServletRequest request = getRequest();
            String s = request.getContextPath().replaceAll("/", "");

            destPath = request.getSession()
                       .getServletContext()
                       .getRealPath("")
                       .toString();
        //调用工具方法 产生文件 并返回文件的名称以供下载
            fileName =  ww.creatPDF(info,destPath);
        } catch (Exception e) {
            e.printStackTrace();
        }

        LOG.info("文件地址"+destPath+"download"+File.separator+fileName);
        //创建生成目标文件的对象
        File file = new File(destPath+"download"+File.separator+fileName);
        if(file.exists()){//判断文件是否存在 存在返回文件名称以供下载;不存在返回失败状态
           //要导出的数据文件
            String path=destPath+"download"+File.separator+fileName;
            System.out.println("yes "+path);
            setAttr("fileName",fileName);
            this.setAttr("state", "0");
            this.renderJson();
            return;
        }else{
            System.out.println("no ");
            this.setAttr("state", "FAILED");
            this.renderJson();
            return ;
        }

    }
下面是产生目标文件的方法:
注意:首先在你的webapps路径之下建立download 文件夹,当然你也可也是其他文件夹
在里面创建一个.txt 文件,你可以什么都不写,因为tomcat在部署的时候,是不会部署你文件当中的空文件夹的,为了防止生成文件的时候路径找不到,所以还是创建的好;当然这只是我个人的做法,如果有更好的做法欢迎分享。
package com.aa.sys.mvc.common.utils;
/**
 * @author 蕤
 * @description 水印
 * @Date 2019/9/2 17:35
 **/

import com.itextpdf.text.*;
import com.itextpdf.text.pdf.*;
import com.jfinal.core.JFinal;

import java.io.File;
import java.io.FileOutputStream;
import java.io.IOException;
import java.util.Calendar;
import java.util.Random;

/**
 *@className Watermark
 *@Date2019/9/2 17:35
 *@created by Sulliven
 */
//可以继承PdfPageEventHelper复用onEndPage方法,当然 我这里是没有重写,可以不继承
public class Watermark extends PdfPageEventHelper {

    //定义水印格式,防止中文乱码
    BaseFont bfChinese = BaseFont.createFont("STSong-Light","UniGB-UCS2-H",BaseFont.NOT_EMBEDDED);
   //用定义的格式 定义水印字体大小
    Font FONT = new Font(bfChinese, 15, Font.BOLD, new GrayColor(0.95f));
    private String waterCont;//水印内容
    public Watermark() throws IOException, DocumentException {

    }


    //带参数的构造方法
    public Watermark(String waterCont) throws IOException, DocumentException {
        System.out.println(waterCont);
        this.waterCont = waterCont;
    }
    //添加水印的方法
    public void onEndPage(PdfWriter writer, Document document,String waterCont) {

        System.out.println(this.waterCont);
        for(int j=700;j>=400;j-=100){
            for( int i  = 150; i<=450; i+=100) {
                //showTextAligned,方法参数可以去看官网的解释
                //其中 i j是水印坐标
                ColumnText.showTextAligned(writer.getDirectContentUnder(),
                        Element.ALIGN_CENTER,
                        new Phrase(waterCont, FONT),
                        i,
                        j,
                        35);
            }
        }
    }

   //主方法
    public String  creatPDF(String contentString path) throws Exception, DocumentException {

        // 对路径进行拼接添加
        String destPath = path+"download"+File.separator;
        //定义随机数的文件名称
        String random = String.valueOf(new Random().nextInt(899999) + 100000);
        //拼接文件名称
        String file = destPath+"xlcx"+random+".pdf";
        // 1.新建document对象
        Document document = new Document();
        // 2.建立一个书写器(Writer)与document对象关联,
        //通过书写器(Writer)可以将文档写入到磁盘中。
        // 创建 PdfWriter 对象 第一个参数是对文档对象的引用,
        //第二个参数是文件的实际名称,在该名称中还会给出其输出路径。
        PdfWriter writer = PdfWriter
                            .getInstance(document, new FileOutputStream(file));

        // 3.打开文档
        document.open();
        //定义正文中文字体,解决中文不能显示问题
        BaseFont bfChinese = BaseFont.createFont("STSong-Light","UniGB-UCS2-H",BaseFont.NOT_EMBEDDED);
        Font blueFont = new Font(bfChinese);
        //创建标题之上的空格
        Paragraph chapterTitle1 = new Paragraph("", blueFont);
        Paragraph space = new Paragraph("  ", blueFont);
        chapterTitle1.add(space);


        //绿色字体
        //Font greenFont = new Font(bfChinese);
        //greenFont.setColor(BaseColor.GREEN);


        //创建标题
        //定义标题字体
        Font blueFont2 = new Font(bfChinese, 20, Font.BOLD);
        Paragraph chapterTitle = new Paragraph("打印demo", blueFont2);
        chapterTitle.setAlignment(Element.ALIGN_CENTER);
        chapterTitle.setSpacingBefore(40);
        chapterTitle1.add(chapterTitle);

        //设置段落
        Paragraph sectionContent = new Paragraph(content, blueFont);
        //设置段段落居中
        //sectionContent.setAlignment(Element.ALIGN_CENTER);

        //设置左右缩进
        sectionContent.setIndentationLeft(47);
        sectionContent.setIndentationRight(47);
        //设置首行缩进
        sectionContent.setFirstLineIndent(23);
        //设置间距
        //段前段后间距
        sectionContent.setSpacingAfter(25);
        sectionContent.setSpacingBefore(25);
        //行间距
        sectionContent.setLeading(40);
        //添加内容
        chapterTitle1.add(sectionContent);


        //设置格式
        Paragraph zhengming = new Paragraph("author:Sulliven", blueFont);
        zhengming.setIndentationLeft(47);
        zhengming.setIndentationRight(47);
        zhengming.setLeading(40);
        chapterTitle1.add(zhengming);

        //设置空格
        Paragraph space1 = new Paragraph(" ", blueFont);
        space1.setIndentationLeft(47);
        space1.setIndentationRight(47);
        space1.setAlignment(Element.ALIGN_RIGHT);
        space1.setLeading(40);
        chapterTitle1.add(space1);

        Paragraph space2 = new Paragraph(" ", blueFont);
        space2.setIndentationLeft(47);
        space2.setIndentationRight(47);
        space2.setAlignment(Element.ALIGN_RIGHT);
        space2.setLeading(40);
        chapterTitle1.add(space2);


        //设置落款 右对齐
        Paragraph luokuan = new Paragraph("author:Sulliven", blueFont);
        luokuan.setIndentationLeft(47);
        luokuan.setIndentationRight(47);
        luokuan.setAlignment(Element.ALIGN_RIGHT);
        luokuan.setLeading(40);
        chapterTitle1.add(luokuan);


        //设置时间
        Calendar cal = Calendar.getInstance();
        String time = cal.get(cal.YEAR)+"/"+(cal.get(cal.MONTH)+1)+"/"+cal.get(cal.DATE);
        //设置对齐 家空格强制与上文对齐。哈哈 没找到合适的方法。欢迎指正
        Paragraph timePage = new Paragraph(time+"                    ", blueFont);
        sectionContent.setIndentationLeft(47);
        sectionContent.setIndentationRight(47);
        timePage.setAlignment(Element.ALIGN_RIGHT);
        timePage.setLeading(40);
        chapterTitle1.add(timePage);

        //设置文件创建时间,该内容是文件的属性
        document.addCreationDate();

        //将章节添加到文章中
        document.add(chapterTitle1);

        //创建水印
        Watermark ww = new Watermark();
        ww.onEndPage(writer,document,waterMark);
        // 5.关闭文档
        document.close();
        String fileName= "demo"+random+".pdf";
        return fileName;
    }

}
下载接口:
注:我这里是因为前端用的是a标签直接打开下载的方式,并且生成的内容是由前端传递过来的,所以分为生成文件、下载两部分来做了。之后我会将,在请求过程当中遇到的问题做一下分享,我们先来看下载接口:
 public void downLoad() throws Exception {
        //获取传递过来的 文件名
        String  fileName = getPara("fileName");
        HttpServletResponse response = getResponse();
        HttpServletRequest request = getRequest();
        boolean boo = false;
        String  destPath = request.getSession().getServletContext().getRealPath("").toString();
        //再次判断问价是否存在
        String filePath = destPath+"download"+File.separator+fileName;
        File f = new File(filePath);
        if (!f.exists()) {
            response.sendError(404, "File not found!");
            return;
        }
        BufferedInputStream br = new BufferedInputStream(new FileInputStream(f));
        byte[] buf = new byte[102400];
        int len = 0;
        response.reset(); // 非常重要
        if (boo) { // 在线打开(预览)
           //产生预览的文件url
            URL u = new URL("file:///" + filePath);
            response.setContentType(u.openConnection().getContentType());
            response.setHeader("Content-Disposition", "inline; filename=" + f.getName());
        } else {
          //下载 设置响应头
            response.setContentType("application/x-msdownload");
            response.setHeader("Content-Disposition", "attachment; filename=" + f.getName());
        }
        OutputStream out = response.getOutputStream();
        while ((len = br.read(buf)) > 0)
            out.write(buf, 0, len);
        br.close();
        out.close();
        renderNull();
    }
以上就是一个完整的从生成文件到文件下载的过程。
下面我们来看一下在请求过程当中产生的问题:
1、直接用ajax一次调用,后端生成文件和下载代码是在一个接口里面:
$.ajax({
                url:contextPath+"/getPrinter",
                type:'post',
                async:true,
                data:'aa',
                success:function () {
                   layer.close(index);
                }
            });
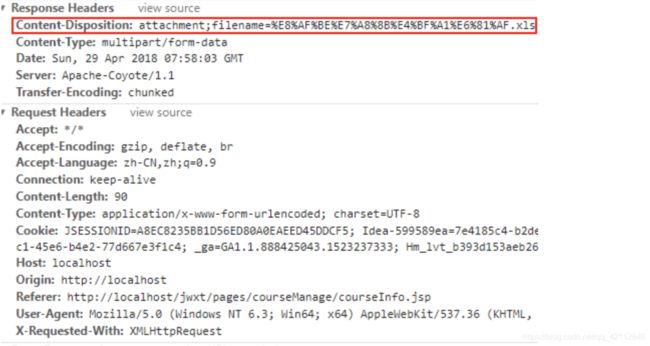
响应头正确,而且数据也传递到了后台:
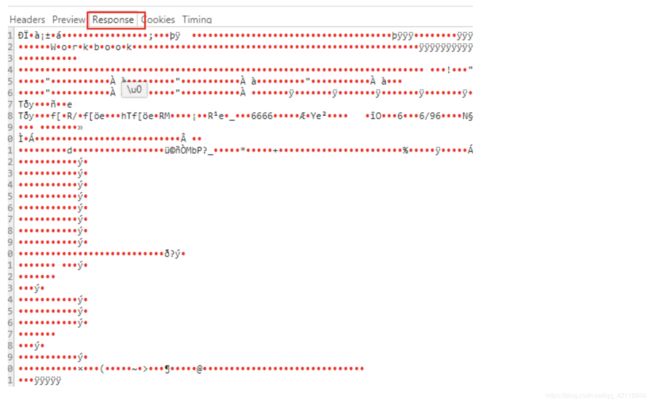
在看response:
解释: 即使ajax请求到一个controller在跳转到下载的controller上也不能下载,百度了一下总结下原因:发现原来jQuery的ajax回调已经把response的数据傻瓜式的以字符串的方式解析.
所以我这里是分成两个接口去写的:
步骤:1 ajax 方式生成问价返回文件名。
2 用得到文件名 window.location.href=contextPath+"/getPrinter?fileName="+aaa,以这种相当于a标签直接打开下载的方式、取下载文件。
以上就是我对于itext 下载文件 和其中遇到的一些问题的总结,欢迎指正。

