iOS9下代码创建约束
iOS9下代码创建约束,不是把重点放在约束上,而是把重点放在约束所涉及到的属性上,这些属性为UIView为的anchor属性,包括为:
widthAnchor,heightAnchortopAnchor,bottomAnchorleftAnchor,rightAnchor,leadingAnchor,trailingAnchorcenterXAnchor,centerYAnchorfirstBaselineAnchor,lastBaselineAnchor
NSLayoutConstraint实例方法,每种形式有三种,如果忽略constant,则其值为0,如果忽略multiplier,则其值为1:
constraint(equalTo:)constraint(greaterThanOrEqualTo:)constraint(lessThanOrEqualTo:)constraint(equalTo:constant:)constraint(greaterThanOrEqualTo:constant:)constraint(lessThanOrEqualTo:constant:)constraint(equalTo:multiplier:)constraint(greaterThanOrEqualTo:multiplier:)constraint(lessThanOrEqualTo:multiplier:)constraint(equalTo:multiplier:constant:)constraint(greaterThanOrEqualTo:multiplier:constant:)constraint(lessThanOrEqualTo:multiplier:constant:)constraint(equalToConstant:)constraint(greaterThanOrEqualToConstant:)constraint(lessThanOrEqualToConstant:)
本文内容来自Easier Auto Layout: Coding Constraints in iOS 9
VFL的介绍与用法可以参考:
- Auto Layout Visual Format Language Tutorial
创建约束
The
NSLayoutAnchorclass is a factory class for creatingNSLayoutConstraintobjects using a fluent API.
NSLayoutAnchor是用来创建NSLayoutConstraint对象的工厂类。相对于原来创建约束的方法更简便。
// 使用NSLayoutConstraint创建约束
NSLayoutConstraint(item: subview,
                   attribute: .Leading,
                   relatedBy: .Equal,
                   toItem: view,
                   attribute: .LeadingMargin,
                   multiplier: 1.0,
                   constant: 0.0).active = true

NSLayoutConstraint(item: subview,
                   attribute: .Trailing,
                   relatedBy: .Equal,
                   toItem: view,
                   attribute: .TrailingMargin,
                   multiplier: 1.0,
                   constant: 0.0).active = true


// 使用Layout Anchors来创建约束
let margins = view.layoutMarginsGuide

subview.leadingAnchor.constraintEqualToAnchor(margins.leadingAnchor).active = true
subview.trailingAnchor.constraintEqualToAnchor(margins.trailingAnchor).active = true
NSLayoutAnchor有三个子类:
- NSLayoutXAxisAnchor
- NSLayoutYAxisAnchor
- NSLayoutDimension
例如,如下创建的约束:
// 1
bookTextView.translatesAutoresizingMaskIntoConstraints = false
// 2
bookTextView.leadingAnchor.constraintEqualToAnchor(
                view.leadingAnchor).active = true
bookTextView.trailingAnchor.constraintEqualToAnchor(
                view.trailingAnchor).active = true
bookTextView.bottomAnchor.constraintEqualToAnchor(
                view.bottomAnchor,
                constant: -20).active = true
// 3
bookTextView.heightAnchor.constraintEqualToAnchor(
                view.heightAnchor,
active设置为true,表示其马上生效。
View Layout Margins
所有的view都有一个layoutMarginsGuide属性。相对于View Layout Margins创建的约束,在其view的边缘会留下一些空白的距离。
// 1
avatarView.translatesAutoresizingMaskIntoConstraints = false
// 2
avatarView.topAnchor.constraintEqualToAnchor(
                view.topAnchor).active = true
// 3
avatarView.leadingAnchor.constraintEqualToAnchor(
                view.layoutMarginsGuide.leadingAnchor).active = true
avatarView.trailingAnchor.constraintEqualToAnchor(
                view.layoutMarginsGuide.trailingAnchor).active = true
// 4
avatarView.heightAnchor.constraintEqualToConstant(200).active = true
View Controller Layout Guides
同view一样,view controller 都有一个top和bottom的layout guide。
上图中,avatarView在状态栏的底部,但如果还有其他的透明的bars,例如导航栏和底部的tab bar,那么上面的avatarView,就会被遮挡住。
所以当给view controller的view的subviews,添加约束时,要约束到view controller的top guide的 bottom和bottom guide的top anchor
avatarView.topAnchor.constraintEqualToAnchor(
       topLayoutGuide.bottomAnchor).active = true


bookTextView.bottomAnchor.constraintEqualToAnchor(
             bottomLayoutGuide.topAnchor,
             constant: -20).active = true
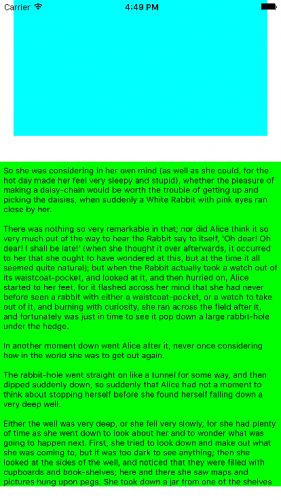
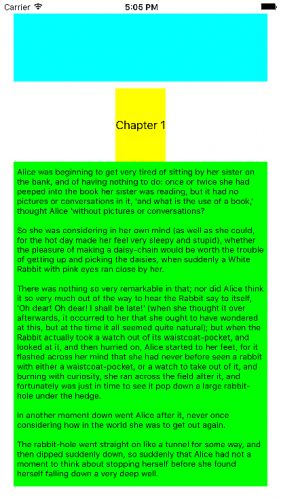
效果如下:
Readable Content Guide
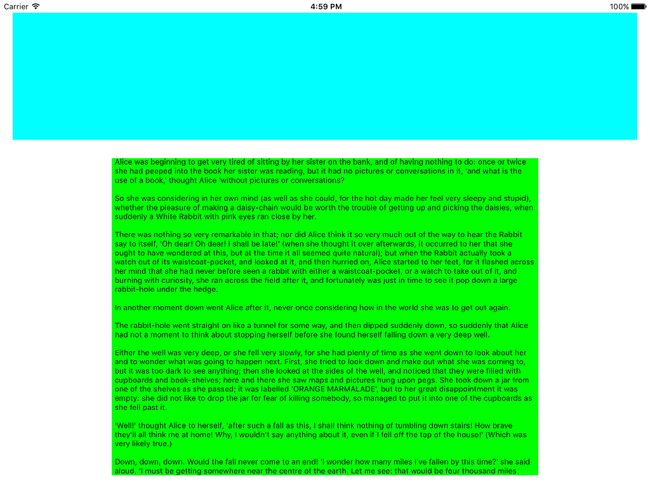
上图中绿色的bookTextView,当前左右边缘对齐到屏幕的边缘,这样在iPad上显示时,非常不便于阅读。
使用 readable content guides,会根据size class来调整大小,这样会在边缘添加空白的距离,来跟适合阅读。
bookTextView.leadingAnchor.constraintEqualToAnchor(
             view.readableContentGuide.leadingAnchor).active = true
bookTextView.trailingAnchor.constraintEqualToAnchor(
             view.readableContentGuide.trailingAnchor).active = true
在iPad横屏下,显示如下:
Intrinsic Content Size
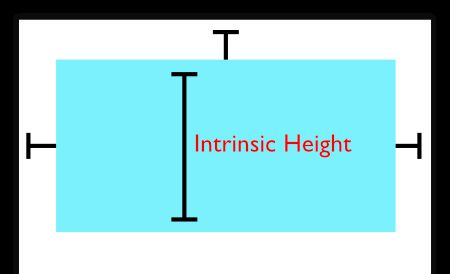
所有的view都有一个intrinsic content size, 如果设置了content size,就不用创建width 和 height 约束。
UILabel的Intrinsic Content Size由font和text决定
UIView默认的Intrinsic Content Size是UIViewNoIntrinsicMetric,表示的是没有大小。
设置AvatarView的UIViewNoIntrinsicMetric
override func intrinsicContentSize() -> CGSize {
  return CGSize(width: UIViewNoIntrinsicMetric, height: 100)
}
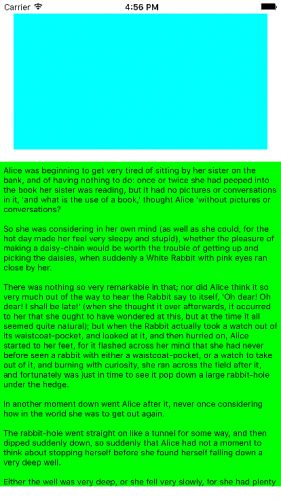
其效果就如下:
注意:如果想要在app运行时改变 intrinsic content size,可以调用invalidateIntrinsicContentSize()方法来更新
优先级
可能会出现如下的情况,chapterLabel被拉伸了,而我们希望的是avatarView被拉伸,如下:
通过设置ContentHuggingPriority和ContentCompressionResistancePriority来解决
setContentHuggingPriority(_:forAxis:) takes a priority and an axis to determine how much a view wants to stretch. A high priority means that a view wants to stay the same size. A low priority allows the view to stretch.高优先级表示view想要保持其原来的size,低优先级则允许view拉伸
setContentCompressionResistancePriority(_:forAxis:) also takes a priority and an axis. This method determines how much a view wants to shrink. A high priority means that a view tries not to shrink and a low priority means that the view can squish.高优先级表示view尽量不被压缩,低优先级表示view会被压缩
优先级大小在1到1000之间,1000是最高的,标准的优先值如下:
UILayoutPriorityRequired = 1000
UILayoutPriorityDefaultHigh = 750
UILayoutPriorityDefaultLow = 250
给chapterLabel设置优先级:
chapterLabel.setContentHuggingPriority(
                  UILayoutPriorityRequired,
                  forAxis: .Vertical)
chapterLabel.setContentCompressionResistancePriority(
                  UILayoutPriorityRequired,
                  forAxis: .Vertical)
这样保证chapterLabel其不会被拉伸和压缩
激活约束数组
上面的例子中,都是一个一个的激活约束,在设置好约束后,一起激活它们,这种方式会高效
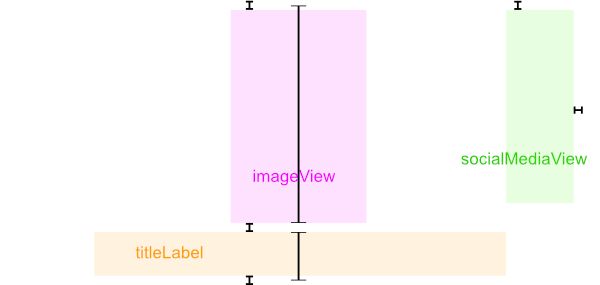
如下的约束:
// 1
let labelBottom =
      titleLabel.bottomAnchor.constraint(equalTo: bottomAnchor)
let labelCenterX = titleLabel.centerXAnchor.constraint(
      equalTo: centerXAnchor)

// 2
let imageViewTop =
      imageView.topAnchor.constraint(equalTo: topAnchor)
let imageViewBottom =
      imageView.bottomAnchor.constraint(
        equalTo: titleLabel.topAnchor)
let imageViewCenterX =
      imageView.centerXAnchor.constraint(
        equalTo: centerXAnchor)

// 3
let socialMediaTrailing =
      socialMediaView.trailingAnchor.constraint(equalTo: trailingAnchor)
let socialMediaTop = socialMediaView.topAnchor.constraint(equalTo: topAnchor)

//一起激活约束
NSLayoutConstraint.activate([
            imageViewTop, imageViewBottom, imageViewCenterX,
            labelBottom, labelCenterX,
            socialMediaTrailing, socialMediaTop])
由于imageView和titleLabel都有intrinsic size,所以需要设置优先级:
imageView.setContentCompressionResistancePriority(
            UILayoutPriorityDefaultLow,
            for: .vertical)
imageView.setContentCompressionResistancePriority(
            UILayoutPriorityDefaultLow,
            for: .horizontal)
Constraint Activation and Deactivation
根据不同的size class来active约束,即根据size class应用不同的约束
在traitCollectionDidChange(_:)方法中,捕捉trait collection的变化
override func traitCollectionDidChange(previousTraitCollection: UITraitCollection?) {
  super.traitCollectionDidChange(previousTraitCollection)

  // 1
  if traitCollection.horizontalSizeClass == .Regular {
    // 2 激活和取消激活约束
    NSLayoutConstraint.deactivateConstraints(compactConstraints)
    NSLayoutConstraint.activateConstraints(regularConstraints)
    // 3
    socialMediaView.axis = .Horizontal
  } else {
    // 4 激活和取消激活约束
    NSLayoutConstraint.deactivateConstraints(regularConstraints)
    NSLayoutConstraint.activateConstraints(compactConstraints)
    socialMediaView.axis = .Vertical
  }
}
traitCollectionDidChange(_:)方法会捕获trait collection的改变
还有一个小问题是,由于image的intrinsic content size的影响,水平时image并没有左对齐,但其实imageview是左对齐的
更新Constraint
约束更新周期
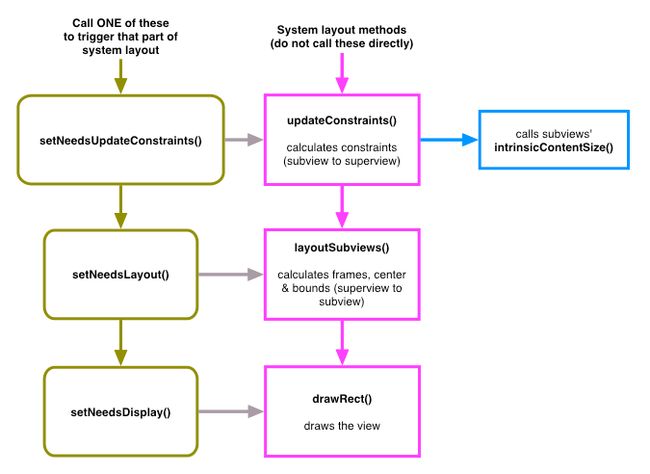
上面的图展示了view是如何被绘制的,可覆写更新view或约束的三个方法:
- 所有的约束在
updateConstraints()中被计算。This is where all priorities, compression resistance, hugging and intrinsic content size all come together in one complex algorithm.可以重写此方法来改变约束。 - view在
layoutSubviews()做布局。 If you need to access the correct view frame, you can override this. - 在
draw(_:)方法中,view被绘制
当size class发生变更时,view的布局更新是自动的,但你也可以调用左侧列出的setNeeds...() 方法触发布局
如下:
override func updateConstraints() {
  super.updateConstraints()
  // 1 计算比率
  var aspectRatio: CGFloat = 1
  if let image = image {
    aspectRatio = image.size.width / image.size.height
  }
  // 2 添加比率约束
  aspectRatioConstraint?.active = false
  aspectRatioConstraint =
        imageView.widthAnchor.constraintEqualToAnchor(
            imageView.heightAnchor,
            multiplier: aspectRatio)
  aspectRatioConstraint?.active = true
}
而且还需要在image发生变更时,需要一种方式来调用 updateConstraints()方法,但此方法不可直接调用,需要调用setNeedsUpdateConstraints()方法,它会在下一个运行循环中调用updateConstraints()方法
var image: UIImage? {
  didSet {
    imageView.image = image
    setNeedsUpdateConstraints()
  }
}
手工布局view
如果想获取到view的frame,唯一安全的做法是在 layoutSubviews() 中来获取
override func layoutSubviews() {
  super.layoutSubviews()
  if bounds.height < socialMediaView.bounds.height {
    socialMediaView.alpha = 0
  } else {
    socialMediaView.alpha = 1
  }
  if imageView.bounds.height < 30 {
    imageView.alpha = 0
  } else {
    imageView.alpha = 1
  }
}
