linux系统rpm安装mysql5.7.30详细步骤
linux系统rpm安装mysql5.7.30
- 1、解压文件
- 2、依次安装
- 3、启动mysql
- 4、查看临时密码
1、解压文件
tar -xvf mysql-5.7.30-1.el7.x86_64.rpm-bundle.tar
解压后会有下列包
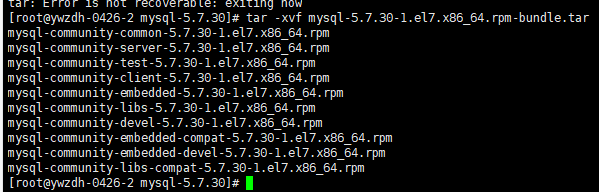
解压后生的多个rpm包,我们不会用到这么多,只会用到其中的四个,依次执行下面命令
rpm -ivh mysql-community-common-5.7.30-1.el7.x86_64.rpm
rpm -ivh mysql-community-libs-5.7.30-1.el7.x86_64.rpm
rpm -ivh mysql-community-client-5.7.30-1.el7.x86_64.rpm
rpm -ivh mysql-community-server-5.7.30-1.el7.x86_64.rpm
2、依次安装
在执行第二条时出现下面的报错
[root@localhost mysql-5.7.30]# rpm -ivh mysql-community-libs-5.7.30-1.el7.x86_64.rpm
warning: mysql-community-libs-5.7.30-1.el7.x86_64.rpm: Header V3 DSA/SHA1 Signature, key ID 5072e1f5: NOKEY
error: Failed dependencies:
	mysql-community-common(x86-64) >= 5.7.9 is needed by mysql-community-libs-5.7.30-1.el7.x86_64
	mariadb-libs is obsoleted by mysql-community-libs-5.7.30-1.el7.x86_64
错误原因,组件冲突
解决办法,卸载相关组件
[root@localhost mysql-5.7.30]# rpm -qa | grep postfix
postfix-2.10.1-7.el7.x86_64
[root@localhost mysql-5.7.30]# rpm -qa | grep mariadb
mariadb-libs-5.5.60-1.el7_5.x86_64
[root@localhost mysql-5.7.30]# rpm -ev postfix-2.10.1-7.el7.x86_64
Preparing packages...
postfix-2:2.10.1-7.el7.x86_64
[root@localhost mysql-5.7.30]# rpm -ev mariadb-libs-5.5.60-1.el7_5.x86_64
Preparing packages...
mariadb-libs-1:5.5.60-1.el7_5.x86_64
[root@localhost mysql-5.7.30]#
解决完上面的问题后,
再次执行上面四条命令即可
3、启动mysql
 查看mysql是否启动
	service mysqld status

	# 启动mysql
	service mysqld start

	# 停止mysql
	service mysqld stop

	# 重启mysql
	service mysqld restart
4、查看临时密码
grep password /var/log/mysqld.log
[root@localhost mysql-5.7.30]# service mysqld status
Redirecting to /bin/systemctl status mysqld.service
● mysqld.service - MySQL Server
   Loaded: loaded (/usr/lib/systemd/system/mysqld.service; enabled; vendor preset: disabled)
   Active: inactive (dead)
     Docs: man:mysqld(8)
           http://dev.mysql.com/doc/refman/en/using-systemd.html
[root@localhost mysql-5.7.30]# service mysqld start
Redirecting to /bin/systemctl start mysqld.service
[root@localhost mysql-5.7.30]# service mysqld stop
Redirecting to /bin/systemctl stop mysqld.service
[root@localhost mysql-5.7.30]# service mysqld restart
Redirecting to /bin/systemctl restart mysqld.service
[root@localhost mysql-5.7.30]# grep password /var/log/mysqld.log
2020-05-11T09:57:19.498626Z 1 [Note] A temporary password is generated for root@localhost: Pw?ua>nVl31t
2020-05-11T09:57:39.540579Z 0 [Note] Shutting down plugin 'validate_password'
2020-05-11T09:57:41.255835Z 0 [Note] Shutting down plugin 'sha256_password'
2020-05-11T09:57:41.255841Z 0 [Note] Shutting down plugin 'mysql_native_password'
[root@localhost mysql-5.7.30]# mysql -p
Enter password:
Welcome to the MySQL monitor.  Commands end with ; or \g.
Your MySQL connection id is 2
Server version: 5.7.30

Copyright (c) 2000, 2020, Oracle and/or its affiliates. All rights reserved.

Oracle is a registered trademark of Oracle Corporation and/or its
affiliates. Other names may be trademarks of their respective
owners.

Type 'help;' or '\h' for help. Type '\c' to clear the current input statement.

mysql>
MySQL5.7授权用户远程访问
grant all privileges on *.* to 'root'@'%' identified by 'oa123456' with grant option;
flush privileges;
exit;
注意:
上面的命令原型如下:
grant all privileges on *.* to 'username'@'%' identified by 'password' with grant option;
命令中的“%”相当于授权任意主机。
#查看授权情况
mysql> select host,user from user;
+-----------+---------------+
| host      | user          |
+-----------+---------------+
| localhost | mysql.session |
| localhost | mysql.sys     |
| localhost | root          |
+-----------+---------------+
3 rows in set (0.00 sec)


mysql> grant all privileges on *.* to 'root'@'%' identified by 'my_password' with grant opt
tion;
Query OK, 0 rows affected, 1 warning (0.00 sec)

mysql> flush privileges;
Query OK, 0 rows affected (0.00 sec)

mysql> select host,user from user;
+-----------+---------------+
| host      | user          |
+-----------+---------------+
| %         | root          |
| localhost | mysql.session |
| localhost | mysql.sys     |
| localhost | root          |
+-----------+---------------+
4 rows in set (0.00 sec)