Nginx+uwsgi部署Django项目
上篇文章,记录了我使用了Apache部署django项目,然而现在的主流是使用Nginx+uwsgi来部署,这里记录了nginx部署的过程,并趟了一些小坑。
环境
Ubuntu 18.04
Anaconda python3.5
Django == 2.2.1
安装
sudo apt-get install python-dev nginx
sudo pip install uwsgi --upgrade
Djnago项目
在这里,我写了一个简单的django项目:在页面打印Hello world
django-admin startproject nginx_test
cd nginx_test
python manage.py startapp hw
hw/views.py
from django.shortcuts import render
from django.http import HttpResponse
# Create your views here.
def index(request):
    return HttpResponse('Hello World!')
nginx_test/setting.py
INSTALLED_APPS = [
    'django.contrib.admin',
    'django.contrib.auth',
    'django.contrib.contenttypes',
    'django.contrib.sessions',
    'django.contrib.messages',
    'django.contrib.staticfiles',
    'hw', #加入hw app
]
......
ALLOWED_HOSTS = ['*']
nginx_test/urls.py
from django.contrib import admin
from django.urls import path
from hw import views as hw.views

urlpatterns = [
    path('admin/', admin.site.urls),
    path('',hw.views.index),  #配置url
]
测试django项目
python manage.py runserver
打开浏览器输入127.0.0.1:8000

测试uwsgi
uwsgi --http :8000 --chdir /home/liusijia/disk/liusijia/Study/Django/nginx_test --module nginx_test.wsgi
注意:这里module写的是nginx_test.wsgi,我最开始写成nginx_test/wsgi.py,那么你打开127.0.0.1:8000时,将会显示Internal Server Error。
成功显示:

ctrl+c关掉
写uwsi配置文件uwsi.ini
写在项目目录下即可
[uwsgi] #必须写哦

http = 127.0.0.1:8001  #修改到8001端口,这里你随意,我是为了方便和8000端口看出区别
chdir=/home/liusijia/disk/liusijia/Study/Django/apache_test
module=apache_test.wsgi
保存到uwsi.ini文件。
uwsgi uwsgi.ini
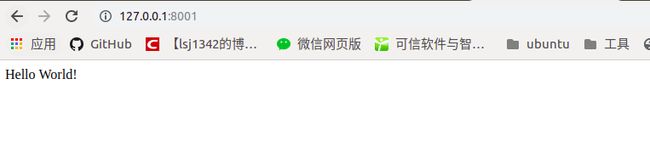
再次启动,浏览器打开127.0.0.1:8001
配置Nginx
在项目目录下创建test.conf
upstream django_test {
server 127.0.0.1:8001; # for a web port socket (we'll use this first)
}
# configuration of the server

server {
# the port your site will be served on
listen      8000;
# the domain name it will serve for
server_name 10.112.207.210 # substitute your machine's IP address or FQDN
charset     utf-8;

# max upload size
client_max_body_size 75M;   # adjust to taste


# Finally, send all non-media requests to the Django server.
location / {
    uwsgi_pass  django_test;
    include     /etc/nginx/uwsgi_params;
}
}
sudo ln -s /home/liusijia/disk/liusijia/Study/Django/nginx_test/test.conf /etc/nginx/sites-enabled
这里的路径要写全,不然会找不到test.conf
sudo nginx -t #测试配置语法问题

重启nginx
service nginx restart
启动uwsgi
uwsgi uwsgi.ini
注意,坑来了,你会发现你输入你的IP地址,怎么也看不到你想要显示的Hello World!,而你输入127.0.0.1:8001(uwsgi.ini配置的地址),是可以看到的。
解决办法:
vim uwsgi.ini
将http修改成socket,uwsgi是通过socket与nginx进行通信,而在使用http字段是,意味这浏览器和uwsgi之间的通信,即浏览器可直接打开。改为socket后,你会发现浏览器并不能打开127.0.0.1:8001了,而输入我们的IP地址+端口号,会显示出我们的网页内容。
