Spring Cloud Eureka(服务注册与发现)
说明,这里使用的开发工具是 eclipse, 创建两个 maven 项目,一个做 server,一个做 client
1. 创建 server
1.1 修改 pom.xml 文件
基础配置:设置 utf-8 编码,设置 jdk 版本号
        UTF-8
        UTF-8
        1.8
首先加入
	org.springframework.boot
	spring-boot-starter-parent
	2.0.0.M3
这时会报一个 build error, 加入 spring-milestone 就可以解决
			spring-milestones
			Spring Milestones
			https://repo.spring.io/milestone

				false


			spring-milestones
			Spring Milestones
			https://repo.spring.io/milestone

				false
加入 Eureka Server 依赖
    org.springframework.cloud
    spring-cloud-starter-eureka-server
此时会报如下错误
Project build error: 'dependencies.dependency.version' for org.springframework.cloud:spring-cloud-starter-eureka-server:jar is missing.加入下面的配置即可
				org.springframework.cloud
				spring-cloud-dependencies
				Finchley.M2
				pom
				import
注意:这里的版本如何选的不合适会报错
1.2 添加配置文件 application.properties(英文有待提高)
#registration center port
server.port=9998
spring.application.name=eureka-server
#the hostname of this registration center instance
eureka.instance.hostname:localhost
#specify the location of the service registry
eureka.client.service-url.defaultZone=http://localhost:9998/eureka/
#whether to register yourself with the service registry
eureka.client.register-with-eureka=false
#whether to retrieve the service
eureka.client.fetch-registry=false
1.3 创建启动类
package com.ahav;

import org.springframework.boot.SpringApplication;
import org.springframework.boot.autoconfigure.SpringBootApplication;
import org.springframework.cloud.netflix.eureka.server.EnableEurekaServer;

@EnableEurekaServer
@SpringBootApplication
public class EurekaServerApplication {

	public static void main(String[] args){
		SpringApplication.run(EurekaServerApplication.class, args);
	}
}
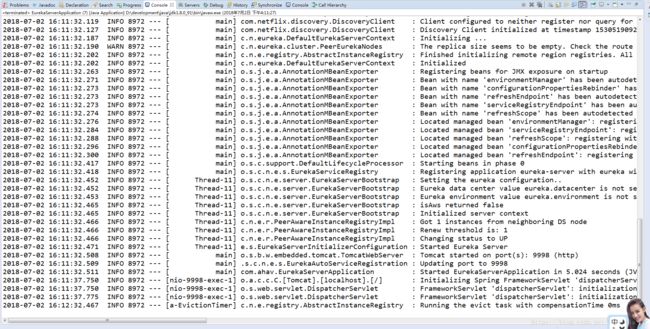
启动成功:
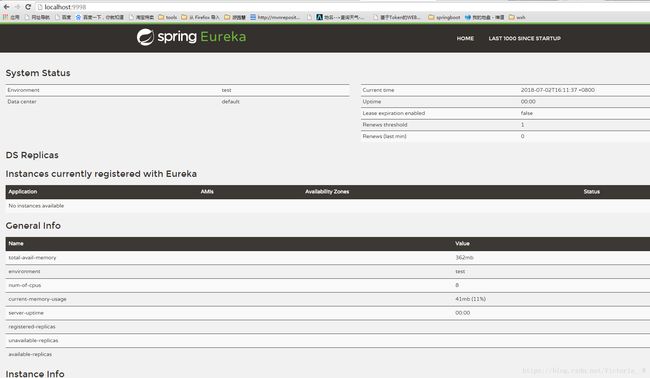
1.4 浏览器打开
http://localhost:9998更简洁的 pom.xml (修改了版本)
  4.0.0
  com.ahav
  boxEurekaServer
  0.0.1-SNAPSHOT
  eurekaserver


	  	org.springframework.boot
		spring-boot-starter-parent
		2.0.3.RELEASE


            UTF-8
            UTF-8
            1.8


            org.springframework.cloud
            spring-cloud-starter-netflix-eureka-server


		    org.springframework.boot
		    spring-boot-starter-security


				org.springframework.cloud
				spring-cloud-dependencies
				Finchley.RELEASE
				pom
				import
#使用这个更简洁的版本在加入安全验证的时候配置文件时需要在前面再加上一级 spring , 如下
spring.security.user.name=admin
spring.security.user.password=123456

这是与标题3中使用的区别
客户端修改之后仍然会找不到注册中心,因为 springcloud 2.0 以上的 security 默认启用 csrf 检测。
解决办法是在 Eureka Server 端添加一个配置类关闭 csrf 检测功能。

@EnableWebSecurity
public class SecurityConfig extends WebSecurityConfigurerAdapter {
    @Override
    protected void configure(HttpSecurity http) throws Exception {
        http.csrf().disable();
        super.configure(http);
    }
}
2. 创建client
2.1 设置基础配置信息:编码、jdk版本等,加入
2.2 加入 spring-milestones 解决 2.1 引起的错误
2.3 加入 Eureka client 的依赖
            org.springframework.cloud
            spring-cloud-starter-eureka
加入上面的依赖后悔报错,解决方法是加入下面内容:
			org.springframework.cloud
			spring-cloud-dependencies
			Finchley.M2
			pom
			import
2.4 添加配置文件 application.properties
server.port=9997
spring.application.name=user-service
eureka.client.register-with-eureka=true
eureka.client.service-url.defaultZone = http://localhost:9998/eureka/
#Heartbeat check
eureka.instance.lease-renewal-interval-in-seconds=30
eureka.instance.lease-expiration-duration-in-seconds=90
eureka.client.register-with-eureka 默认为true,表示在服务启动时服务提供者会通过 REST 请求将自己注册到 Eureka Server (服务注册中心)上;设置为 false 则不会注册到 Eureka Server。
下面两句是心跳检测机制,这里使用的是默认值;
eureka.instance.lease-renewal-interval-in-seconds 表示 client 给 server 发送心跳的频率。如果Server 没有收到 client 的心跳,当前微服务会被剔除,就接收不到流量了。如果当前微服务实现了HealthCheckCallback,并决定让自己unavailable的话,该服务也不会接收到流量。
eureka.instance.lease-expiration-duration-in-seconds 表示 Eureka Server 从上一次检测到心跳之后至检测到下一次心跳的超时时间,如果90秒没有检测到下一次心跳,Eureka Server 会移除这个微服务。这个值如果太大可能将流量转发过去的时候这个微服务已经被剔除了;如果太小可能因为网络不稳定等因素而误被移除掉。至少要大于上 eureka.instance.lease-renewal-interval-in-seconds 的值。
2.5 创建启动类
package com.ahav;

import org.springframework.boot.SpringApplication;
import org.springframework.boot.autoconfigure.SpringBootApplication;
import org.springframework.cloud.netflix.eureka.EnableEurekaClient;

@SpringBootApplication
@EnableEurekaClient
public class UserApplication {

	public static void main(String[] args){
		SpringApplication.run(UserApplication.class, args);
	}
}
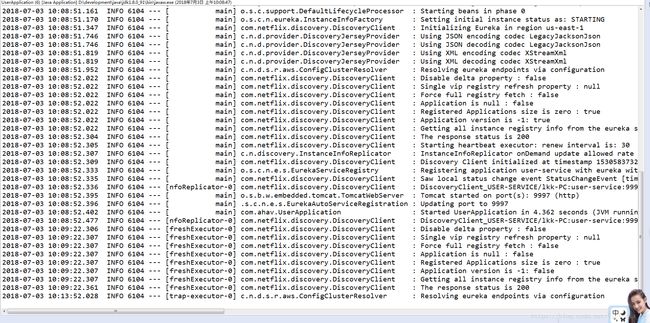
启动结果:
2.6 浏览器查看 Eureka Server 可以看到微服务注册成功
到这里,简单的注册与发现的最基本的框架就搭好了。
2.3步骤中改为如下版本必须主动引入 web 依赖,否则 Spring 一些常用注解引用不了
    org.springframework.cloud
    spring-cloud-starter-netflix-eureka-client


			org.springframework.cloud
			spring-cloud-dependencies
			Finchley.RELEASE
			pom
			import
    org.springframework.boot
    spring-boot-starter-web
3. 安全验证
到目前为止,服务注册中心的页面是可以公开访问的,可以加入安全验证使得访问更安全
3.1 首先在 Eureka Server 的 pom.xml 文件加入安全验证的依赖
    org.springframework.boot
    spring-boot-starter-security
3.2 然后在 application.properties 文件中加入登录需要的用户名、密码
security.user.name=admin
security.user.password=123456
3.3 重新启动 Eureka Server 再打开浏览器,需要登录成功才能打开服务注册中心页面。
3.4 此时可以正常访问服务注册中心,但是启动服务提供者的程序会报错
这是因为服务提供者没有通过安全检测。
3.5 修改Eureka Client的 application.properties
server.port=9997
spring.application.name=user-service
eureka.client.register-with-eureka=true
eureka.client.service-url.defaultZone=http://${security.user.name}:${security.user.password}@localhost:9998/eureka/
#Heartbeat check
eureka.instance.lease-renewal-interval-in-seconds=30
eureka.instance.lease-expiration-duration-in-seconds=90
security.user.name=admin
security.user.password=123456${security.user.name}:${security.user.password}@localhost:9998/eureka/
#Heartbeat check
eureka.instance.lease-renewal-interval-in-seconds=30
eureka.instance.lease-expiration-duration-in-seconds=90
security.user.name=admin
security.user.password=123456
4. application.properties 一些其他配置信息。
5. Eureka 高可用


