实验:搭建LAMP+memcache

环境规划:
准备三台虚拟机
192.168.50.136: web
192.168.50.140: mysql
192.168.50.142: memcached
首先对三台虚拟机进行如下操作:
①关闭防火墙,②且同步时间,③卸载mariadb-libs和postfix;


web服务器设置
在192.168.50.136
安装软件httpd,mysql 和 php模块
因本机httpd已安装过所以直接安装mysql和php
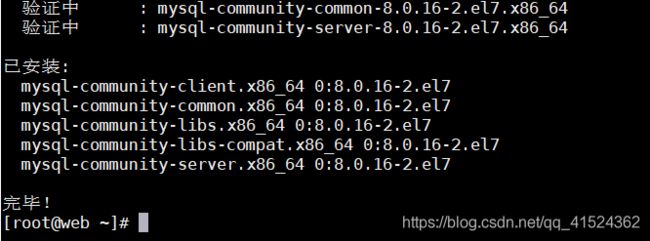
下载mysql安装包 wget https://dev.mysql.com/get/Downloads/MySQL-8.0/mysql-8.0.17-1.el8.x86_64.rpm-bundle.tar

接着安装php模块

安装完成后重启服务

在mysql机上192.168.50.140,创建一个用户

在返回web机上192.168.50.136
测试httpd功能,php链接功能,和mysql
测试httpd
		vim /var/www/html/index.html
		test1
vim /var/www/html/index.php
测试web和mysql的连通性
	vim  /var/www/html/mysql.php
	Success!!";
	else echo "Fail!!";
	mysql_close();
	?>
memcache服务配置
192.168.50.142
首先安装libevent和memcached
安装编译器
![]()
编译安装
执行
	 make
     make install
	make
    make install
测试web和memcached的连通性(返回到web机上 192.168.50.136)
		vim /var/www/html/memcache.php
		connect('192.168.50.142', 11211) or die ("Could not connect");
		$version = $memcache->getVersion();
		echo "Server's version: ".$version."
";
		$tmp_object = new stdClass;
		$tmp_object->str_attr = 'test';
		$tmp_object->int_attr = 123;
		$memcache->set('key', $tmp_object, false, 10) or die ("Failed to save data at
		the server");
		echo "Store data in the cache (data will expire in 10 seconds)
";
		$get_result = $memcache->get('key');
		echo "Data from the cache:
";
		var_dump($get_result);
		?>
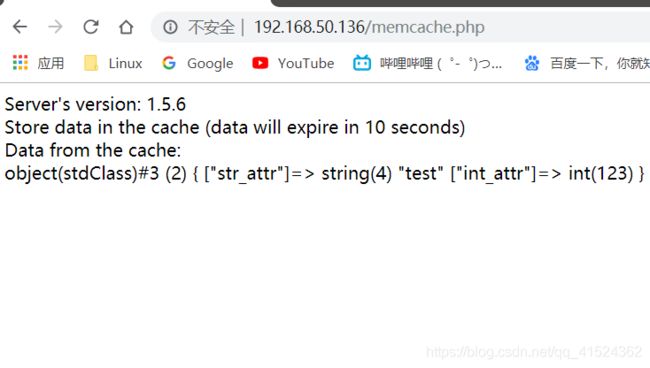
测试结果

配置session,将session的存储方式改为memcache
vim /etc.php.ini 修改配置文件
修改session.save_handler = memcache
和 session.save_path = “tcp://192.168.50.136:11211?persistent=1&weight=1&timeout=1&retry_interval=15”

测试memcache的可用性
vim /var/www/html/session.php
  ";
	echo "now_time:".time()."
";
	echo "session_id:".session_id()."
";
	?>
测试结果

在mysql机上 192.168.50.140
创建数据库
创建表:
create database testab1;
use testab1;
create table test1(id int not null auto_increment,name varchar(20) default
null,primary key(id)) engine=innodb auto_increment=1 default charset=utf8;
插入数据:
insert into test1(name) values ('tom1'),('tom2'),('tom3'),('tom4'),('tom5');
select * from test1;

用户授权:
grant select on testab1.* to 'memcache'@'%';
在web机上192.168.50.136
测试memcache是否缓存数据库成功
	vim /var/www/html/test.php

	connect($memcachehost,$memcacheport) or die ("Could not 											connect");$query="select * from test1 limit 10";
	$key=md5($query);
	if(!$memcache->get($key))
	{
	$conn=mysql_connect("192.168.50.140","memcache","Howie1.com");
	mysql_select_db(test1);
	$result=mysql_query($query);
	while ($row=mysql_fetch_assoc($result))
	{
	$arr[]=$row;
	}
	$f = 'mysql';
	$memcache->add($key,serialize($arr),0,30);
	$data = $arr ;
	}
	else{
	$f = 'memcache';
	$data_mem=$memcache->get($key);
	$data = unserialize($data_mem);
	}
	echo $f;
	echo "
";
	echo "$key";
	echo "
";
	//print_r($data);
	foreach($data as $a)
	{
	echo "number is $a[id]";echo "
";
	echo "name is $a[name]";echo "
";
	}
	?>
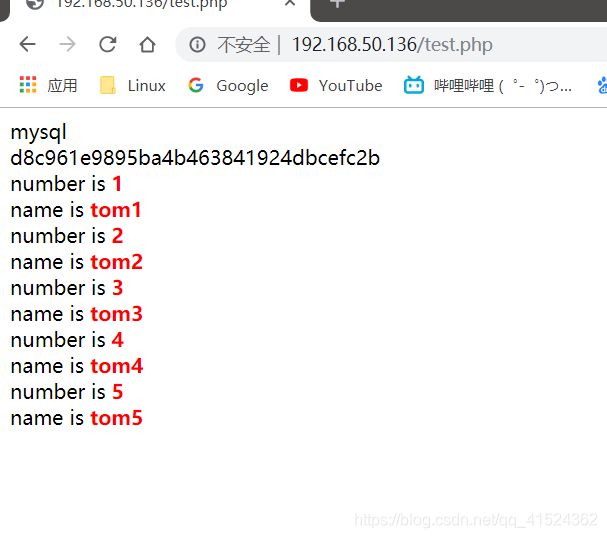
测试结果
当用户第一次访问时memcache中没有缓存数据,则直接访问数据库

第二次访问时,是memcache已经有个缓存数据,所以直接从memcache取出数据


