Jenkins的Pipeline流水线
| 主机名 | IP地址 | 备注 |
|---|---|---|
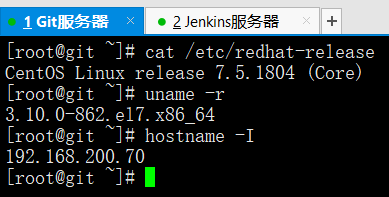
| Git | 192.168.200.70 | Git服务器 |
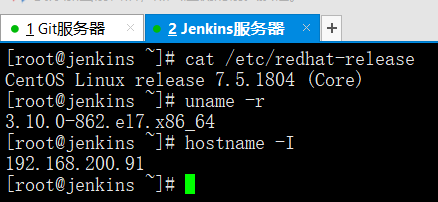
| Jenkins | 192.168.200.91 | Jenkins服务器 |
cat /etc/redhat-release
uname -r
systemctl stop firewalld
systemctl disable firewalld
systemctl stop NetworkManager
systemctl disable NetworkManager
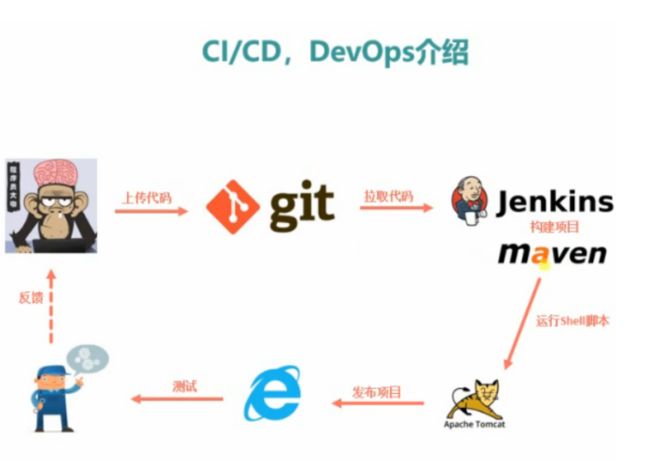
Pipeline流水线介绍
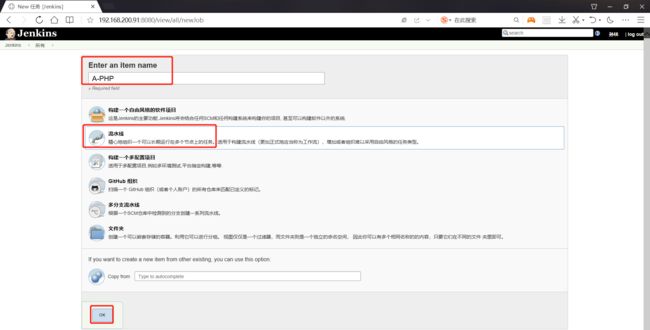
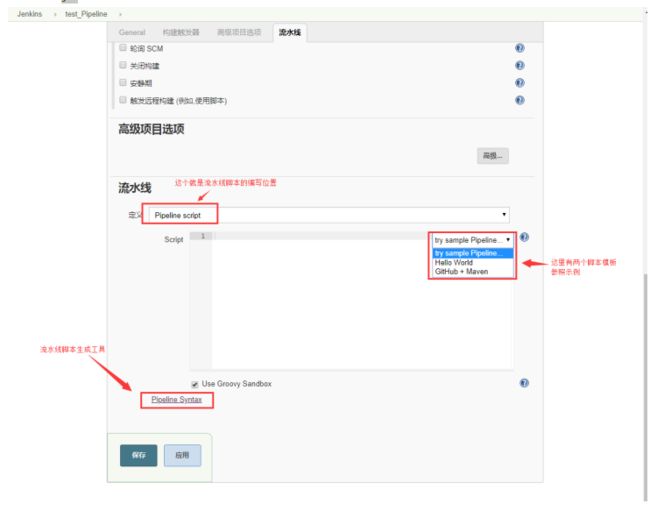
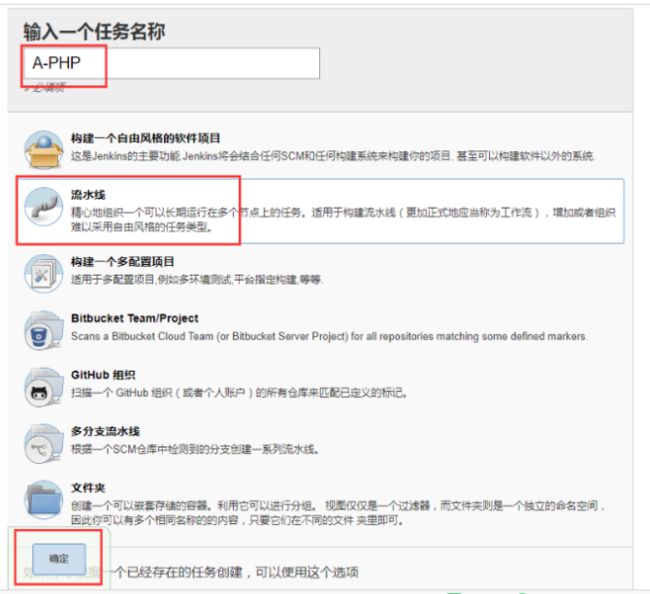
创建一个基于Pipeline流水线的项目
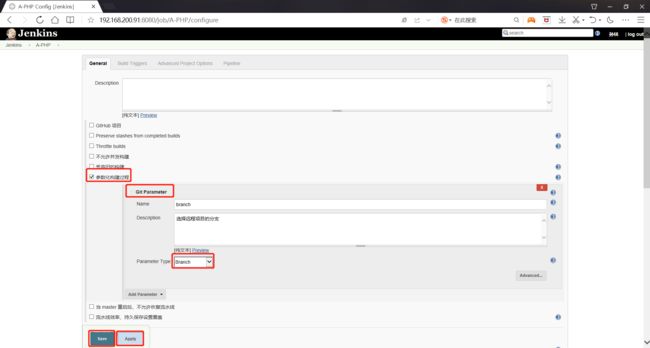
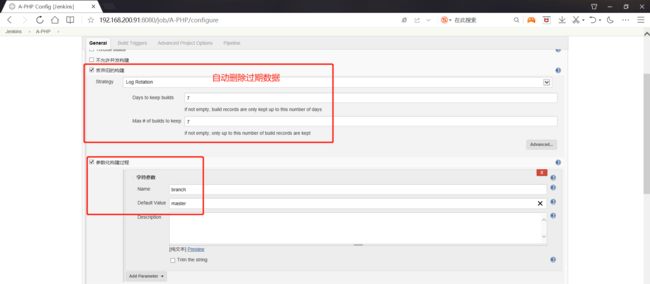
添加项目Git参数化构建
Git Parameter插件不支持流水线,版本过低
Pipeline脚本语法架构介绍
#Pipeline脚本语法架构node ('slave节点名') { #被操控的节点服务器def 变量 #def可以进行变量声明stage('阶段名A'){ #流水线阶段一执行步骤A执行步骤B执行步骤C}stage('阶段名B'){ #流水线阶段二执行步骤A执行步骤B执行步骤C}stage('阶段名C'){ #流水线阶段三执行步骤A执行步骤B执行步骤C}}
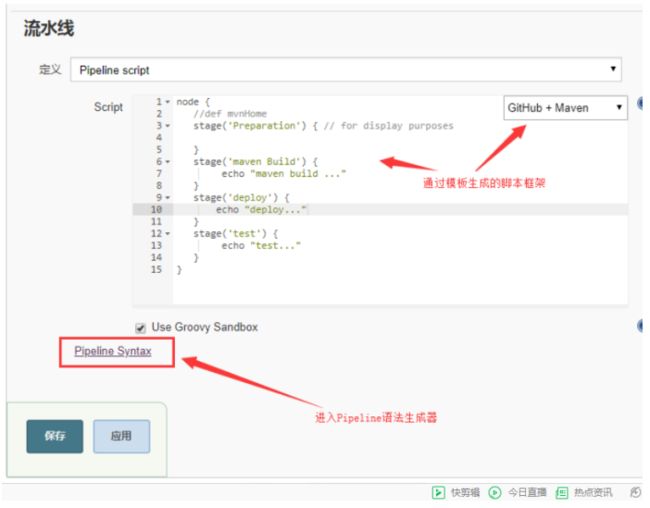
流水线模板脚本
node {def mvnHomestage('Preparation') { // for display purposes// Get some code from a GitHub repositorygit 'https://github.com/jglick/simple-maven-project-with-tests.git'// Get the Maven tool.// ** NOTE: This 'M3' Maven tool must be configured// ** in the global configuration.mvnHome = tool 'M3'}stage('Build') {// Run the maven buildif (isUnix()) {sh "'${mvnHome}/bin/mvn' -Dmaven.test.failure.ignore clean package"} else {bat(/"${mvnHome}\bin\mvn" -Dmaven.test.failure.ignore clean package/)}}stage('Results') {junit '**/target/surefire-reports/TEST-*.xml'archive 'target/*.jar'}}
node {//def mvnHomestage('checkout') { // for display purposescheckout([$class: 'GitSCM', branches: [[name: '${branch}']],doGenerateSubmoduleConfigurations: false,extensions: [], submoduleCfg: [],userRemoteConfigs: [[credentialsId: '9f98962f-1a82-4da1-8a0f-bc906e92d998',url: '[email protected]:/home/git/repos/app.git']]])}stage('maven Build') {echo "maven build ..."}stage('deploy') {echo "deploy..."}stage('test') {echo "test..."}}
利用Pipeline Syntax,编写Pipeline Script并构建
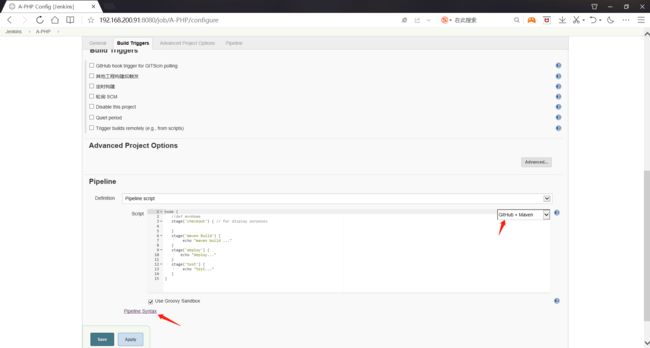
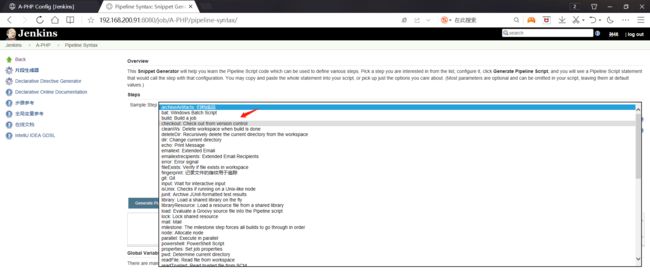
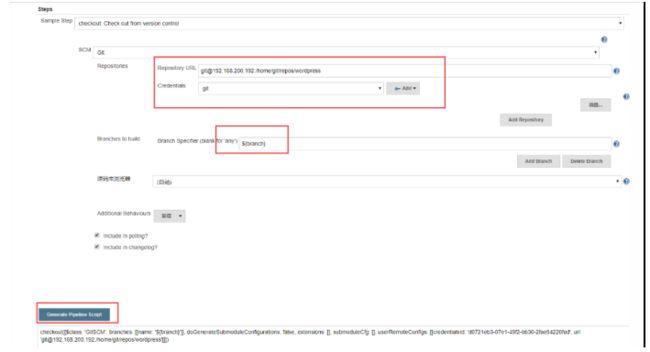
(1)进入Pipeline Syntax
node {//def mvnHomestage('checkout') { // for display purposes}stage('maven Build') {echo "maven build ..."}stage('deploy') {echo "deploy..."}stage('test') {echo "test..."}}
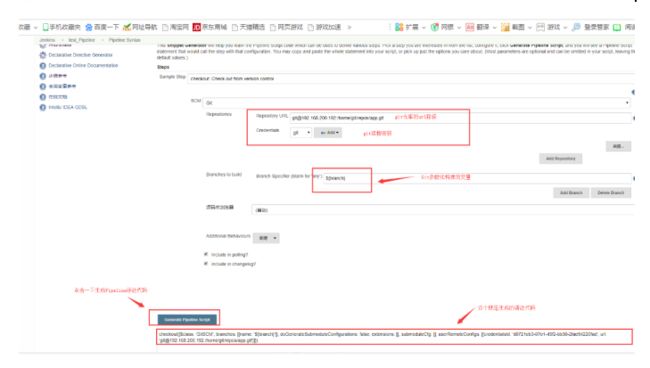
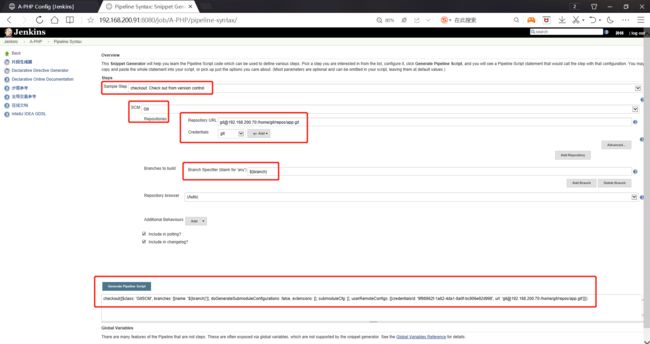
(2)通过脚本代码生成器,生成Pipeline脚本代码
(3)将生成的代码复制到流水线脚本相应步骤的stage函数里
checkout([$class: 'GitSCM', branches: [[name: '${branch}']], doGenerateSubmoduleConfigurations: false, extensions: [], submoduleCfg: [], userRemoteConfigs: [[credentialsId: '9f98962f-1a82-4da1-8a0f-bc906e92d998', url: '[email protected]:/home/git/repos/app.git']]])
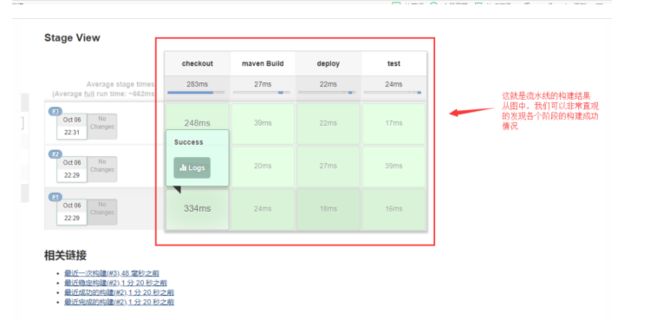
(4)开始构建Pipeline项目
(5)在Jenkins本地服务器查看拉取结果
cd /var/lib/jenkins/workspace
ls
从远程仓库下载Pipeline Script,并构建
(1)在Git服务器上创建一个存放Pipeline脚本的仓库
su - git
cd /home/git/repos/
pwd
ls
mkdir jenkinsfile #创建存放Pipeline脚本的仓库
cd jenkinsfile/
git --bare init #初始化仓库
(2)在jenkins服务器上,往远程仓库提交一个Pipeline脚本。
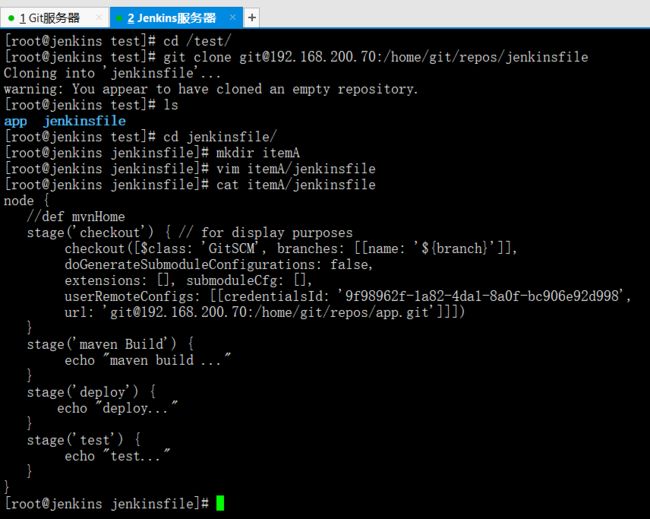
mkdir /test
cd /test
git clone [email protected]:/home/git/repos/jenkinsfile
ls
cd jenkinsfile/
mkdir itemA
vim itemA/jenkinsfile
cat itemA/jenkinsfile
node {//def mvnHomestage('checkout') { // for display purposescheckout([$class: 'GitSCM', branches: [[name: '${branch}']],doGenerateSubmoduleConfigurations: false,extensions: [], submoduleCfg: [],userRemoteConfigs: [[credentialsId: '9f98962f-1a82-4da1-8a0f-bc906e92d998',url: '[email protected]:/home/git/repos/app.git']]])}stage('maven Build') {echo "maven build ..."}stage('deploy') {echo "deploy..."}stage('test') {echo "test..."}}
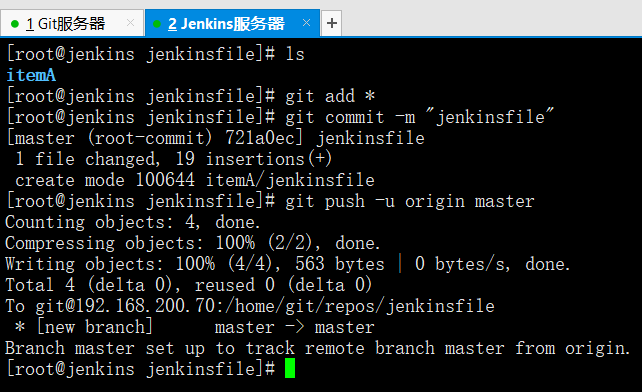
将脚本推送到远程仓库的master分支
git add *
git commit -m "jenkinsfile"
git push -u origin master
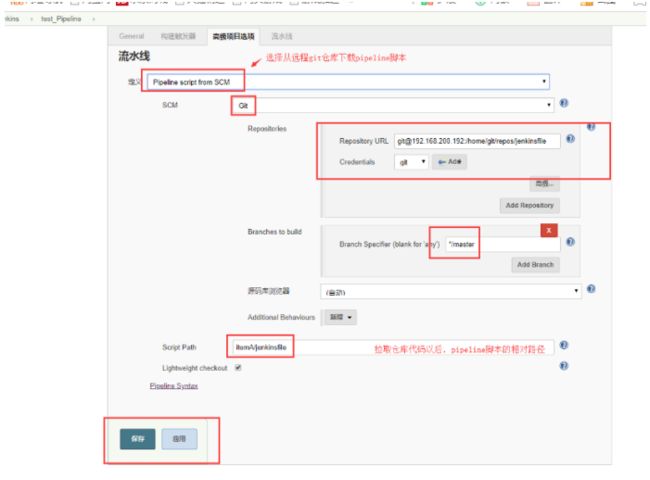
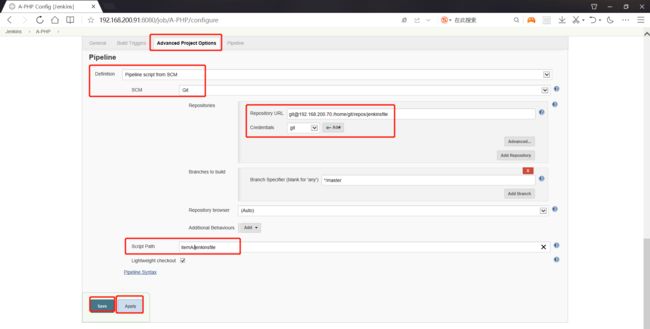
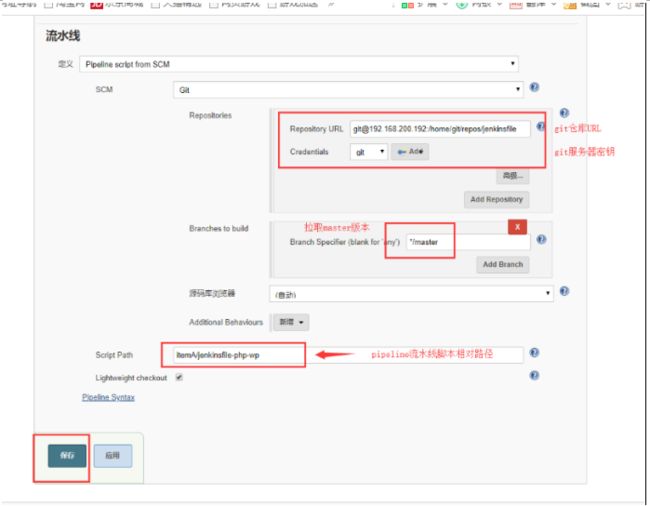
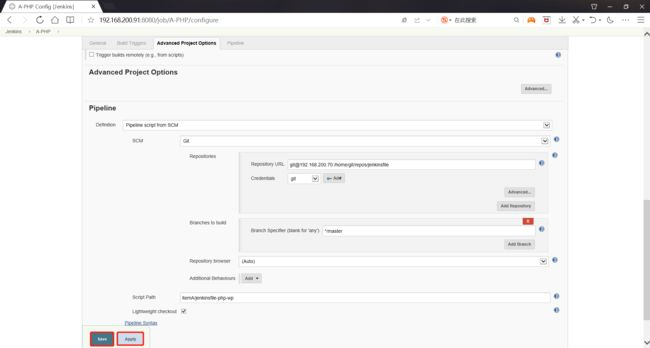
(3)利用远程仓库里的Pipeline脚本,进行流水线的构建
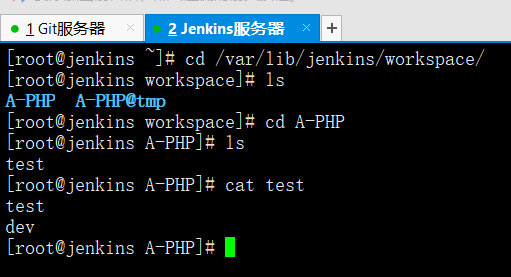
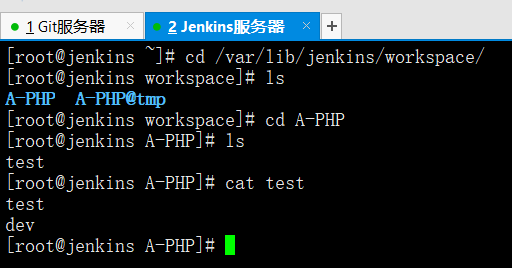
(4)在jenkins服务器上查询拉取代码结果(之前清空过jenkins下的workspace工作目录)
cd /var/lib/jenkins/workspace/
ls
cd A-PHP
项目案例一:Jenkins+Pipeline+Git+PHP博客项目流水线自动发布
| 主机名 | IP地址 | 备注 |
|---|---|---|
| Git | 192.168.200.70 | Git服务器 |
| Jenkins | 192.168.200.91 | Jenkins服务器 |
| Web | 192.168.200.101 | Web服务器 |
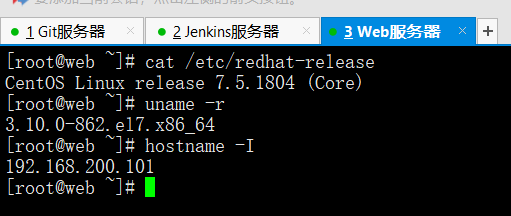
所有服务器进行如下操作
cat /etc/redhat-release
uname -r
systemctl stop firewalld
systemctl disable firewalld
systemctl stop NetworkManager
systemctl disable NetworkManager
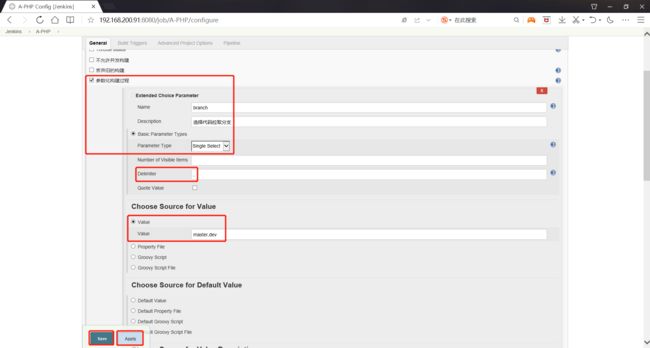
创建一个Pipeline流水线项目并进行参数化构建
由于我们仍旧打算将pipeline脚本放在远程Git仓库里,因此我们需要从远程Git仓库拉取Pipeline脚本,所以,参数化构建不支持Git的参数化。我们只能使用字符结构的参数化构建。
下载用于自动化发布的PHP源码wordpress源码包,并上传远程git仓库
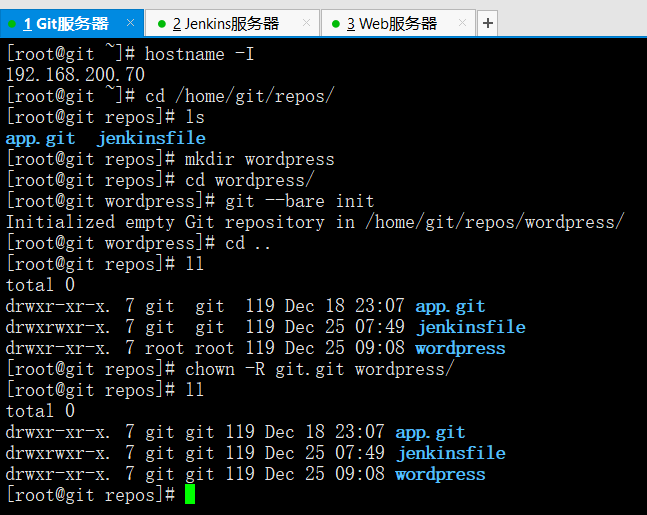
在Git服务器上创建用于存放源码的Git仓库
hostname -I
cd /home/git/repos/
ls
mkdir wordpress
cd wordpress/
git --bare init
cd ..
ll
chown -R git.git wordpress
在jenkins服务器上,克隆创建好的远程Git仓库
mkdir /php-app
cd /php-app
git clone [email protected]:/home/git/repos/wordpress
ls
在jenkins服务器上,下载wordpres源代码
链接:https://pan.baidu.com/s/1hGyd1xFuL0oPBsFeROuUYQ
提取码:tmgk --->wordpress百度云下载地址wget https://cn.wordpress.org/wordpress-4.9.4-zh_CN.tar.gz
cd /php-app/wordpress/
ls
tar xf wordpress-4.9.4-zh_CN.tar.gz
ls
mv wordpress-4.9.4-zh_CN.tar.gz /tmp/
ls
mv wordpress/* .
rm -rf wordpress/
ls
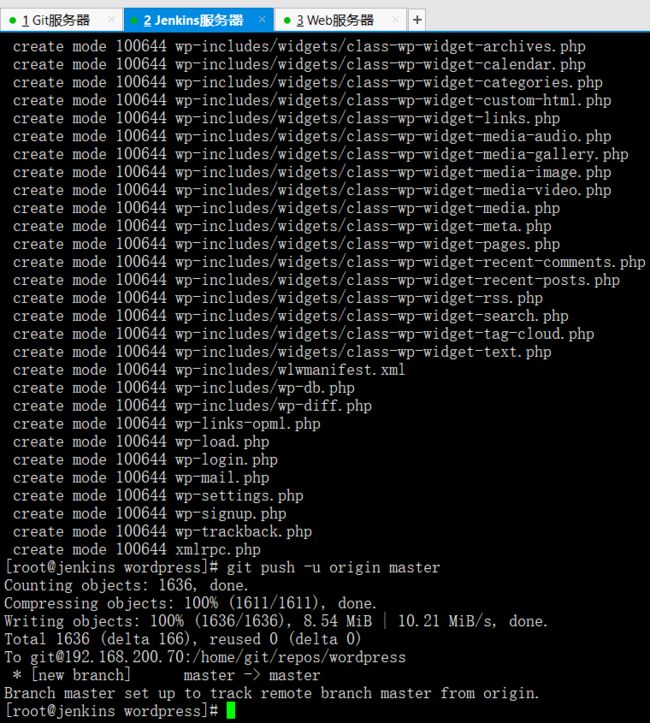
在jenkins上提交代码到远程Git仓库
git add *
git commit -m "第一次提交"
git push -u origin master
设置分布式构建Web服务器的slave管理节点
我们计划利用分布式构建的方式,启动pipeline的流水线项目发布
slave管理节点就设置为需要用于发布项目的Web服务器
添加用于连接slave代理节点的SSH证书(上文已经设置过了)
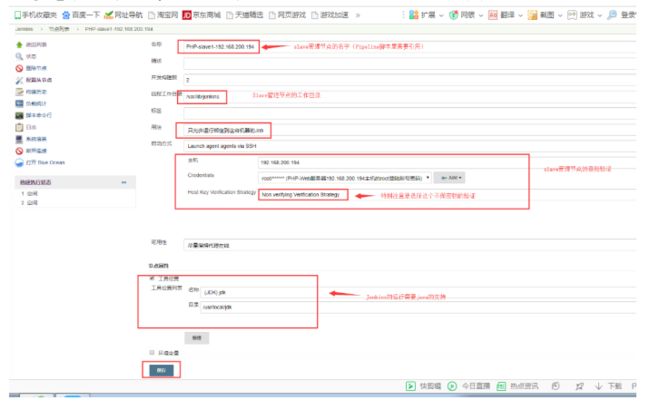
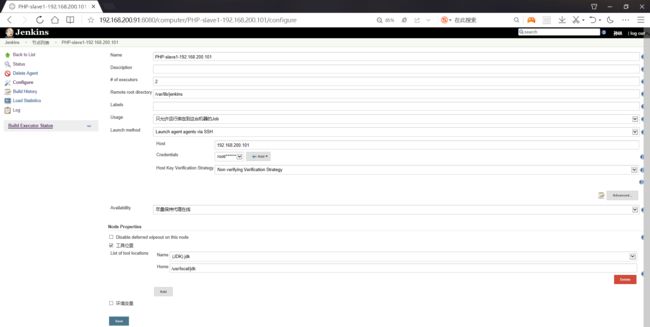
添加并设置Web服务器的slave管理从节点
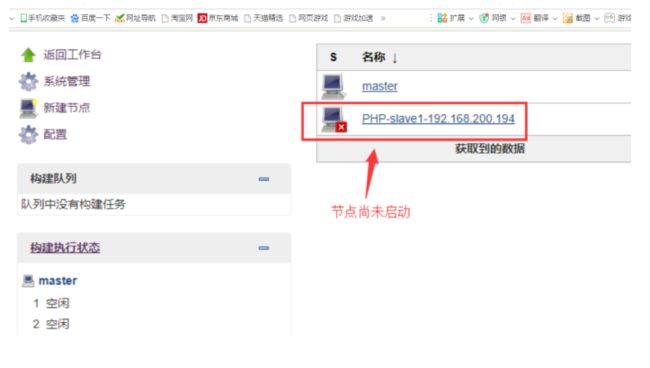
Web服务器slave从节点安装java环境,并启动jenkins的slave管理节点
链接:https://pan.baidu.com/s/1EXO2hSetnkapR29ojJIGTg
提取码:ixgn --->jdk百度云下载地址
解压安装jdk
tar xf jdk-8u60-linux-x64.tar.gz -C /usr/local/
cd /usr/local
mv jdk1.8.0_60/ jdk
/usr/local/jdk/bin/java -version
配置java环境
sed -i.org '$a export JAVA_HOME=/usr/local/jdk/' /etc/profile
sed -i.org '$a export PATH=$PATH:$JAVA_HOME/bin' /etc/profile
sed -i.org '$a export CLASSPATH=.$CLASSPATH:$JAVA_HOME/lib:$JAVA_HOME/lib/tools.jar' /etc/profiletail -3 /etc/profile
source /etc/profile
java -version
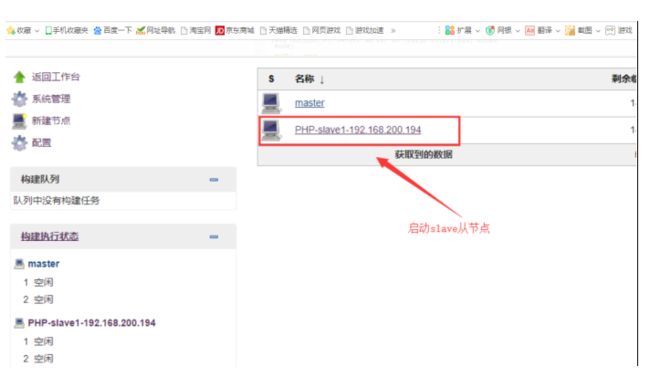
重新启动Slave从节点
Web服务器安装LNMP环境,并手动拉取代码模拟访问
yum -y install epel-release
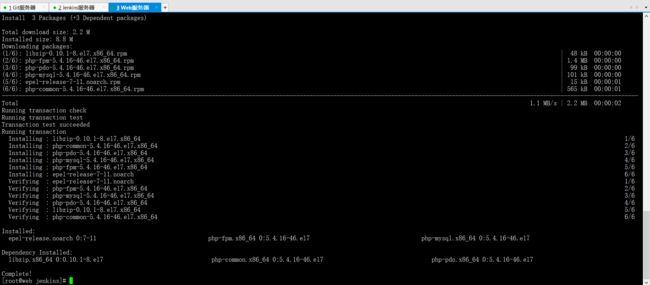
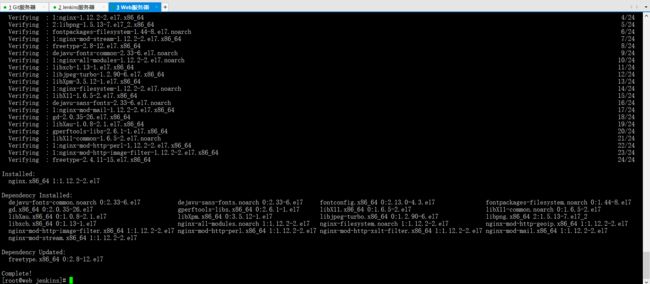
yum -y install nginx php-fpm php-mysql
修改nginx配置文件
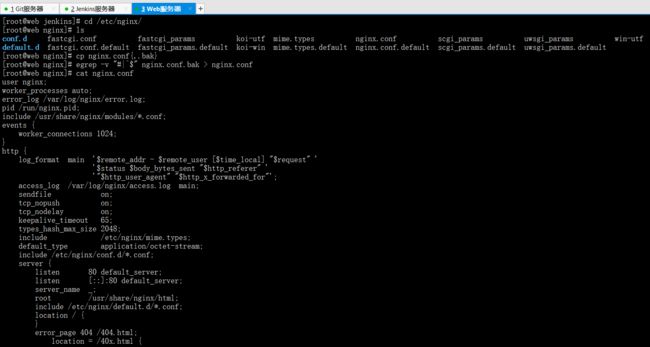
cd /etc/nginx/
ls
cp nginx.conf{,.bak}
egrep -v "#|^$" nginx.conf.bak > nginx.conf
cat nginx.conf
user nginx;worker_processes auto;error_log /var/log/nginx/error.log;pid /run/nginx.pid;include /usr/share/nginx/modules/*.conf;events {worker_connections 1024;}http {log_format main '$remote_addr - $remote_user [$time_local] "$request" ''$status $body_bytes_sent "$http_referer" ''"$http_user_agent" "$http_x_forwarded_for"';access_log /var/log/nginx/access.log main;sendfile on;tcp_nopush on;tcp_nodelay on;keepalive_timeout 65;types_hash_max_size 2048;include /etc/nginx/mime.types;default_type application/octet-stream;include /etc/nginx/conf.d/*.conf; #include了一个配置文件目录server {listen 80 default_server; #默认的server配置(如果用IP访问就进入这个server)listen [::]:80 default_server;server_name _;root /usr/share/nginx/html; #默认的网页目录include /etc/nginx/default.d/*.conf;location / {}error_page 404 /404.html;location = /40x.html {}error_page 500 502 503 504 /50x.html;location = /50x.html {}}}
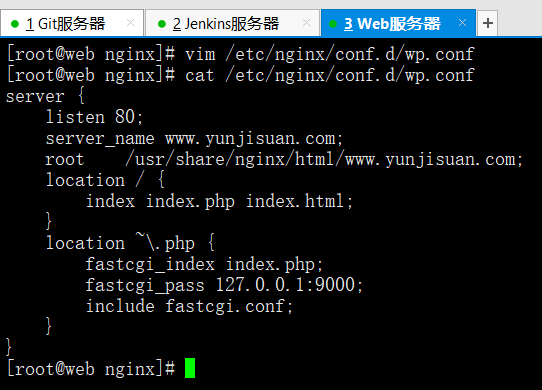
由于默认的配置文件include了/etc/nginx/conf.d/*.conf因此我们增加一个server配置文件即可
vim /etc/nginx/conf.d/wp.conf
cat /etc/nginx/conf.d/wp.conf
server {listen 80;server_name www.yunjisuan.com;root /usr/share/nginx/html/www.yunjisuan.com;location / {index index.php index.html;}location ~\.php {fastcgi_index index.php;fastcgi_pass 127.0.0.1:9000;include fastcgi.conf;}}
创建网页目录
cd /usr/share/nginx/html/
ls
mkdir www.yunjisuan.com
cd www.yunjisuan.com
ls
克隆Git仓库代码到本地网页目录
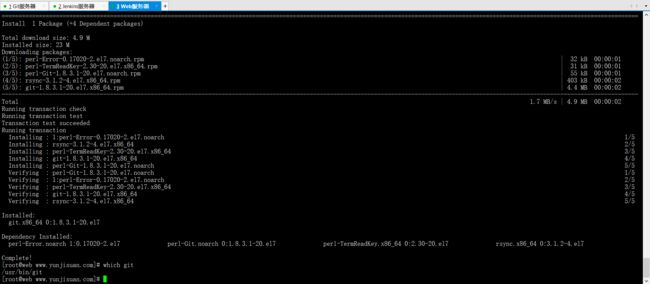
yum -y install git
git init
git clone [email protected]:/home/git/repos/wordpress
ls
mv wordpress/* .
ls
rm -rf wordpress/
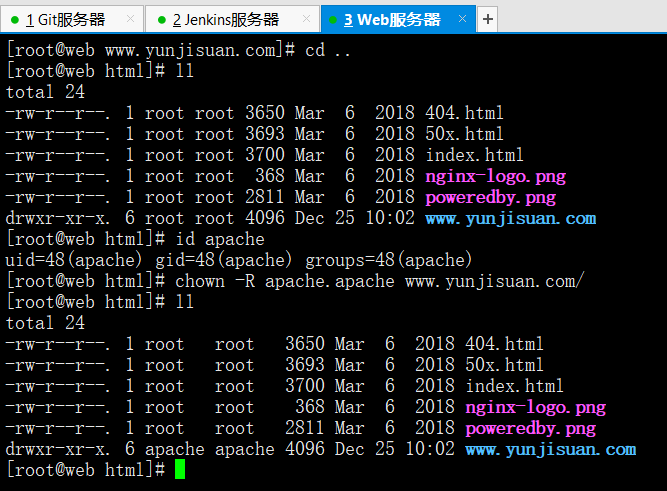
将网页目录权限授权给apache程序用户
cd ..
ll
id apache
chown -R apache.apache /usr/share/nginx/html/www.yunjisuan.com
启动nginx服务和php-fpm服务
systemctl start nginx
systemctl start php-fpm
ss -antup | egrep "80|9000"
systemctl enable nginx
systemctl enable php-fpm
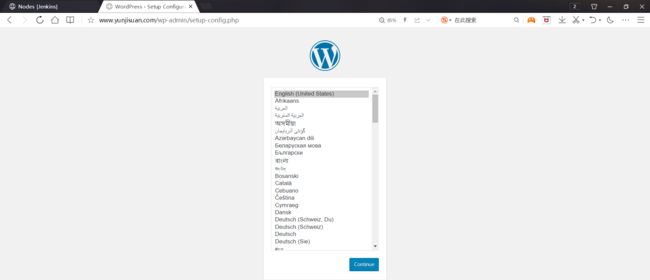
做好宿主机的域名映射后,浏览器访问测试
在远程Git仓库中创建一个用于构建的Pipeline脚本
在jenkins服务器上进行如下操作
rm -rf /test
mkdir /test
cd /test
git clone [email protected]:/home/git/repos/jenkinsfile
ls
cd jenkinsfile/
ls
ls itemA/
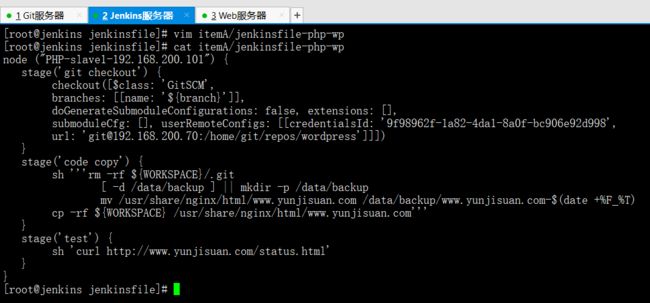
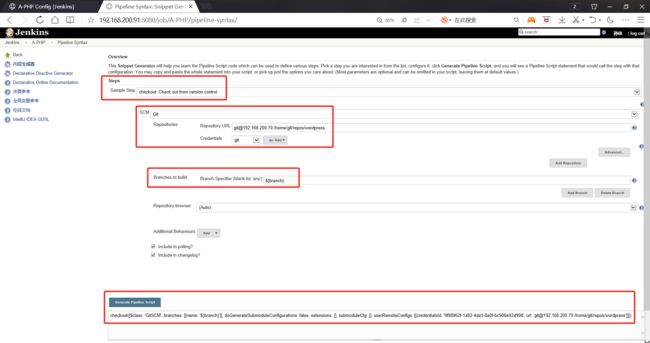
通过流水线脚本生成器生成如下脚本内容
vim itemA/jenkinsfile-php-wp
cat itemA/jenkinsfile-php-wp
node ("PHP-slave1-192.168.200.101") {stage('git checkout') {checkout([$class: 'GitSCM',branches: [[name: '${branch}']],doGenerateSubmoduleConfigurations: false, extensions: [],submoduleCfg: [], userRemoteConfigs: [[credentialsId: '9f98962f-1a82-4da1-8a0f-bc906e92d998',url: '[email protected]:/home/git/repos/wordpress']]])}stage('code copy') {sh '''rm -rf ${WORKSPACE}/.git[ -d /data/backup ] || mkdir -p /data/backupmv /usr/share/nginx/html/www.yunjisuan.com /data/backup/www.yunjisuan.com-$(date +%F_%T)cp -rf ${WORKSPACE} /usr/share/nginx/html/www.yunjisuan.com'''}stage('test') {sh 'curl http://www.yunjisuan.com/status.html'}}
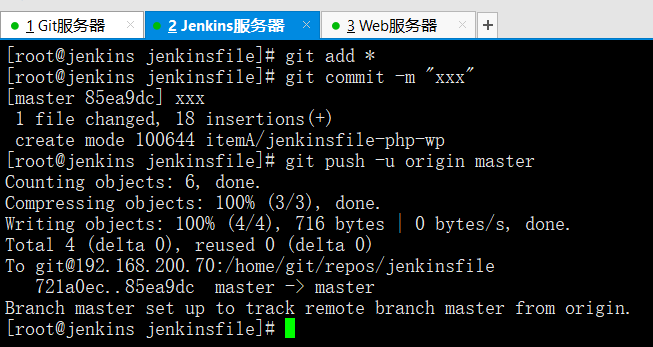
推送到Git远程仓库
git add *
git commit -m "xxx"
git push -u origin master
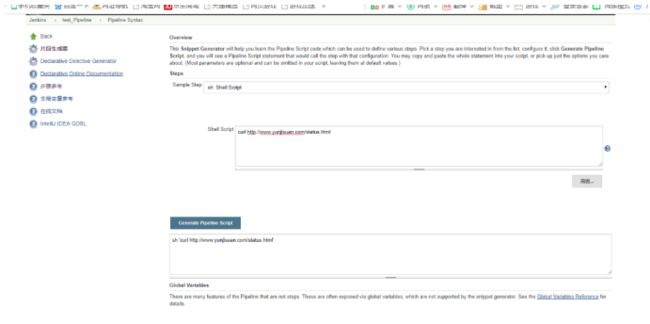
通过流水线脚本生成器生成的阶段代码示例(这里只生成了url部分,具体内容自定义)

在Web服务器上PHP项目代码里增加Pipeline验证用的测试页面
在项目代码里加入一个健康检查测试页面,并推送到远程Git仓库
cd /var/lib/jenkins
git clone [email protected]:/home/git/repos/wordpress
ls
cd wordpress/
ls
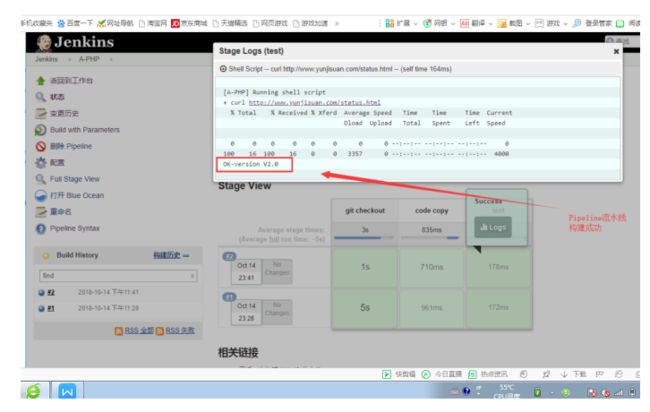
echo "OK-version V2.0" >> status.html
将测试用页面提交到远程Git仓库
git add *
git commit -m "version V2.0"
git config --global user.email "112340"
git config --global user.name "Mr.sun"
git push -u origin master
在web服务器做域名映射(因为要进行curl验证)
echo "`hostname -I` www.yunjisuan.com" >> /etc/hostscat /etc/hosts
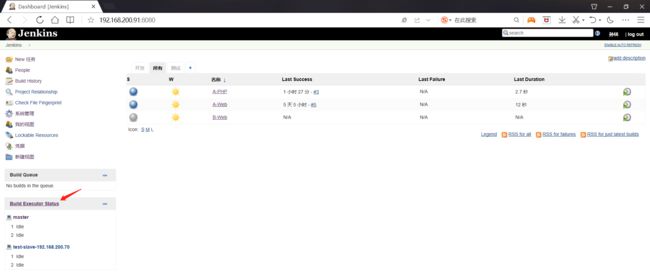
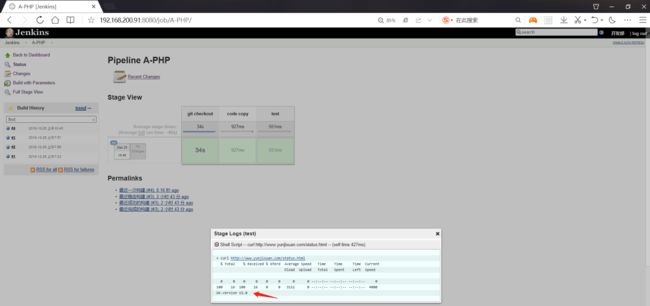
浏览器访问jenkins进行PHP项目流水线发布构建
![]()
流水线项目发布多节点需要注意的事项
所需要修改的部分如下
脚本需要在流水线脚本写出多节点,比如
node ("PHP-slave1-192.168.200.101") {stage('git checkout') {checkout([$class: 'GitSCM',branches: [[name: '${branch}']],doGenerateSubmoduleConfigurations: false, extensions: [],submoduleCfg: [], userRemoteConfigs: [[credentialsId: '9f98962f-1a82-4da1-8a0f-bc906e92d998',url: '[email protected]:/home/git/repos/wordpress']]])}stage('code copy') {sh '''rm -rf ${WORKSPACE}/.git[ -d /data/backup ] || mkdir -p /data/backupmv /usr/share/nginx/html/www.yunjisuan.com /data/backup/www.yunjisuan.com-$(date +%F_%T)cp -rf ${WORKSPACE} /usr/share/nginx/html/www.yunjisuan.com'''}stage('test 200.101-php') {sh 'curl http://www.yunjisuan.com/status.html'}}node ("PHP-slave1-192.168.200.xxx") {stage('git checkout') {checkout([$class: 'GitSCM',branches: [[name: '${branch}']],doGenerateSubmoduleConfigurations: false, extensions: [],submoduleCfg: [], userRemoteConfigs: [[credentialsId: '9f98962f-1a82-4da1-8a0f-bc906e92d998',url: '[email protected]:/home/git/repos/wordpress']]])}stage('code copy') {sh '''rm -rf ${WORKSPACE}/.git[ -d /data/backup ] || mkdir -p /data/backupmv /usr/share/nginx/html/www.yunjisuan.com /data/backup/www.yunjisuan.com-$(date +%F_%T)cp -rf ${WORKSPACE} /usr/share/nginx/html/www.yunjisuan.com'''}stage('test' 200.xxx-php) {sh 'curl http://www.yunjisuan.com/status.html'}}
假如是克隆的机器需要把hosts文件里的映射修改一下
在浏览器进入jenkins主用户来添加新节点信息(有几点节点就添加几个)
所有的修改都完事以后,在进行构建测试就可以了
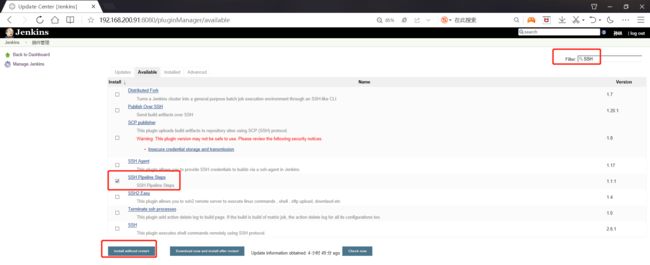
让ssh支持流水线,需要安装插件SSH Pipeline Steps
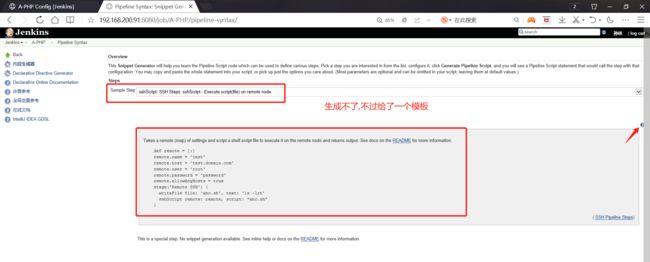
以ssh方式分发流水线脚本模板详解
def remote = [:] #定义变量不需要改remote.name = 'test' #远程主机的名字remote.host = 'test.domain.com' #远程主机的IPremote.user = 'root' #远程主机的用户remote.password = 'password' #远程主机的密码remote.allowAnyHosts = true #照着超就可以stage('Remote SSH') { #阶段名称writeFile file: 'abc.sh', text: 'ls -lrt' #把后面的命令,让如abc.sh脚本里sshScript remote: remote, script: "abc.sh" #把脚本分发自定义的主机}
以ssh方式分发流水线脚本语法样式
node ("PHP-slave1-192.168.200.101") {def remote = [:]remote.name = 'test'remote.user = 'root'remote.allowAnyHosts = truestage('git checkout') {sh `echo "`hostname -I`"`checkout([$class: 'GitSCM',branches: [[name: '${branch}']],doGenerateSubmoduleConfigurations: false, extensions: [],submoduleCfg: [], userRemoteConfigs: [[credentialsId: '9f98962f-1a82-4da1-8a0f-bc906e92d998',url: '[email protected]:/home/git/repos/wordpress']]])}stage('SSH 200.xxx') {remote.host = '192.168.200.xxx'remote.password = 'linyaonie'writeFile file: 'ssh01.sh', text:'echo "`hostname -I`"'sshScript remote:remote, script: "ssh01.sh"}stage('SSH 200.xxx') {remote.host = '192.168.200.xxx'remote.password = 'linyaonie'writeFile file: 'ssh02.sh', text:```echo "`hostname -I`"echo "`hostname -I`"echo "`hostname -I`"``` --->这里需要注意要定格写sshScript remote:remote, script: "ssh02.sh"}}
重新把新修过的内容添加到远程仓库并构建测试在查看logs日志的结果
git add *
git commit -m "测试SSH"
git push -u origin master
