《Mastering Opencv读书笔记》第一章 实现图像卡通效果
这本书和配套代码网上都有得下载。
要实现书中的效果,只要三步:1.使用拉普拉斯算子提取轮廓 2.使用双边滤波器对图像进行平滑 3.根据第一步得到的轮廓模版图,将第二步的结果拷贝过去【填充轮廓图中全白的部分】

由于我的笔记本摄像头坏了,故我的程序读取的是手机拍摄的视频。
下面给出我整理的两段代码:
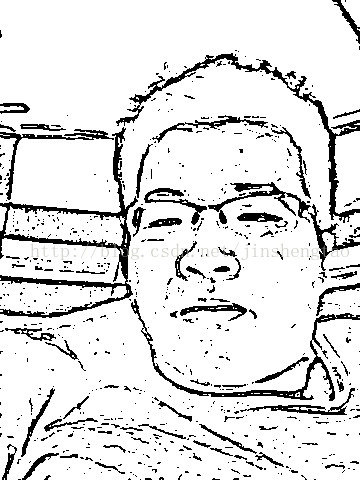
1.边缘提取:
// GetMySketch.cpp : 定义控制台应用程序的入口点。
//

#include "stdafx.h"
#include
#include
#include
#include
using namespace std;
using namespace cv;

int _tmain(int argc, _TCHAR* argv[])
{
	VideoCapture m_caputre("test2.avi");
	Mat m_frame,gray,edges,masks;
	const int MEDIAN_BLUR_FILTER_SIZE = 7;
	const int LAPLACIAN_FILTER_SIZE = 5;
	const int EDGES_THRESHOLD = 80;

	while (true)
	{
		m_caputre>>m_frame;
		if (m_frame.empty()) {
			std::cerr << "ERROR: Couldn't grab a video frame." <<
				std::endl;
			exit(1);
		}

		cvtColor(m_frame,gray,CV_BGR2GRAY);

		medianBlur(gray,gray,MEDIAN_BLUR_FILTER_SIZE);

		Laplacian(gray, edges, CV_8U, LAPLACIAN_FILTER_SIZE);

		threshold(edges, masks, EDGES_THRESHOLD, 255, THRESH_BINARY_INV);

		// Display the processed image onto the screen.
		imshow("keep smile :)", masks);
		char keypress = cv::waitKey(20); // Need this to see anything!
		if (keypress==27)
		{
			break;
		}
	}
	return 0;
}
2.最终卡通效果:
// ColorPainting_Cartoon.cpp : 定义控制台应用程序的入口点。
//

#include "stdafx.h"
#include
#include
#include
#include
using namespace std;
using namespace cv;

int _tmain(int argc, _TCHAR* argv[])
{
	VideoCapture m_capture("test2.avi");
	Mat m_frame,smallImg,tmp,bigImg,gray,edges,masks,dst;
	int repetitions = 7; // Repetitions for strong cartoon effect.
	const int MEDIAN_BLUR_FILTER_SIZE = 7;
	const int LAPLACIAN_FILTER_SIZE = 5;
	const int EDGES_THRESHOLD = 80;

	m_capture>>m_frame;
	Size size = m_frame.size();
	Size smallSize;
	smallSize.width = size.width/2;
	smallSize.height = size.height/2;
	smallImg = Mat(smallSize, CV_8UC3);
	tmp = Mat(smallSize, CV_8UC3);
	dst= Mat(size,CV_8UC3);

	while (true)
	{
		m_capture>>m_frame;
		if (m_frame.empty()) {
			std::cerr << "ERROR: Couldn't grab a video frame." <<
				std::endl;
			exit(1);
		}

		cvtColor(m_frame,gray,CV_BGR2GRAY);

		medianBlur(gray,gray,MEDIAN_BLUR_FILTER_SIZE);

		Laplacian(gray, edges, CV_8U, LAPLACIAN_FILTER_SIZE);

		threshold(edges, masks, EDGES_THRESHOLD, 255, THRESH_BINARY_INV);

		resize(m_frame, smallImg, smallSize, 0,0, INTER_LINEAR);

for (int i=0; i 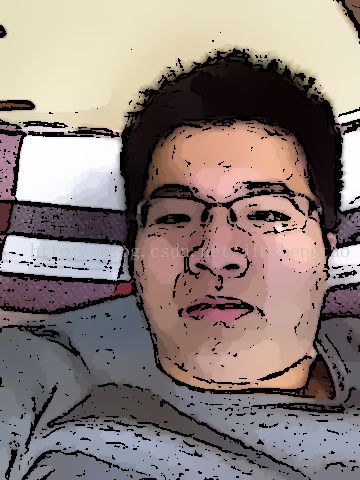
第一章很简单,后面的肤色模型很水,就没去弄。下一篇,为实现如何将上述代码移植到android平台上。