asp.net core 2.1 连接mysql 使用操作数据库 code first 和Dbfirst
一 .环境配置及项目创建,
1.创建netcore Mvc项目
2.安装好以下Nuget包:
MySql.Data.EntityFrameworkCore
MySql.Data

准备迁移的安装工具包 efcore 工具包

或者使用NuGet Console 控制台添加
3、安装Nuget包
Install-package Microsoft.EntityFrameworkCore
Install-package Microsoft.EntityFrameworkCore.SqlServer (此是使用mysql 连接的工具包此处用不到)
Install-package MySql.Data.EntityFrameworkCore
Install-package MySql.Data
二 . 相关代码及配置上下文
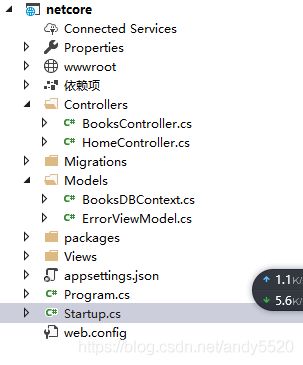
1.文件目录结构如下:
2 .先创建models里添加上下文BooksDBContext.cs
 public class BooksDBContext : DbContext
    {
        public DbSet Books { get; set; }
        public BooksDBContext(DbContextOptions options ):base(options)
        {

        }

        //protected override void OnConfiguring(DbContextOptionsBuilder optionsBuilder)
        //{
        //    optionsBuilder.UseMySQL(@"Server=localhost;database=book;uid=root;pwd=123;SslMode=None");
        //    base.OnConfiguring(optionsBuilder);
        //}
    }
    [Table("books")]
    public class Books {

        public int Id { get; set; }
        public string Name { get; set; }
        public decimal  Price { get; set; }
        public string Author { get; set; }


    }
3.配置文件 appsettings.json 中添加mysql 连接数据库字符串
"ConnectionStrings": { "MysqlConnection": "Data Source=localhost;Database=book;User ID=root;Password=123;pooling=true;CharSet=utf8;port=3306;sslmode=none" }

4. Startup.cs 启动文件中 代码
    public void ConfigureServices(IServiceCollection services)
        {
            services.Configure(options =>
            {
                // This lambda determines whether user consent for non-essential cookies is needed for a given request.
                options.CheckConsentNeeded = context => true;
                options.MinimumSameSitePolicy = SameSiteMode.None;

            });

            var connection = Configuration.GetConnectionString("MysqlConnection");
            services.AddDbContext(options => options.UseMySQL(connection));
            services.AddMvc();

            services.AddMvc().SetCompatibilityVersion(CompatibilityVersion.Version_2_1);


        }
5.添加books控制器
  public BooksDBContext _BooksDBContext;

        public BooksController(BooksDBContext booksDBContext)
        {
            _BooksDBContext = booksDBContext;
        }
        public IActionResult Index()
        {
            //var books = _BooksDBContext.Books.ToList();
            var book = new Books()
            {
                Name = "zhangsan1",

                Price = 24,
                Author="sanmao",

            };
            _BooksDBContext.Books.Add(book);
            _BooksDBContext.SaveChanges();
                //User user = new User() { Name = "Herry", CreateTime = DateTime.Now };
                //context.User.Add(user);
            return View();
        }
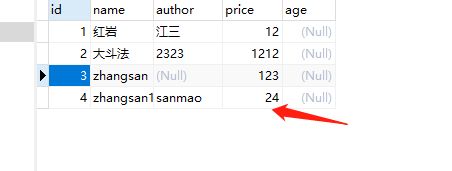
执行之后查看数据
以上是针对数据库中已存在表和库的操作 所以不需要迁移和创建目录 Migrations
如果 不存在表库需要创建的话 必须执行以下的命令 dotnet ef migrations add InitialCreate 进行迁移之后
相关迁移及执行命令:
// 第一步codefirst 添加MySql.Data.EntityFrameworkCore NuGet包
// 迁移就是已有的数据库就不需要迁移也就没有Migrations文件夹
//Enable - Migrations 启用迁移
//Add - Migration 为挂起的Model变化添加迁移脚本
//Update - Database 将挂起的迁移更新到数据库
// mysql 的迁移好像原来的上面迁移命令不能用 只能使用下面的netcore cli 命令执行
//Get - Migrations 获取已经应用的迁移
// 想迁移文件夹创建的话就安装 Microsoft.EntityFrameworkCore 专门迁移 不然命令无效
// 已有的没文件夹想创建库对应文件夹迁移
// Cmd 项目文件夹下dotnet ef migrations add InitialCreate 已有的会更新不会删除
// dotnet ef migrations remove 删除迁移,并确保正确重置快照
//在命令窗口中,输入以下命令以创建数据库并在其中创建表。(在配置文件中修改库名称之后会自动创建新库和表)
//console
//复制
//dotnet ef database update