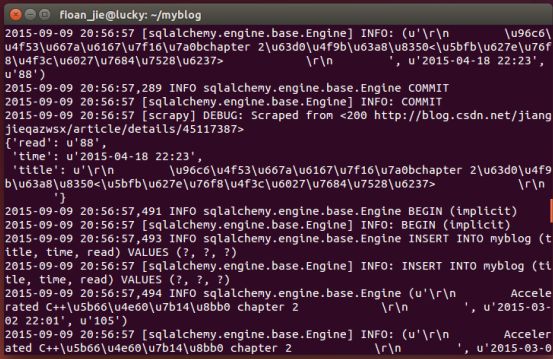
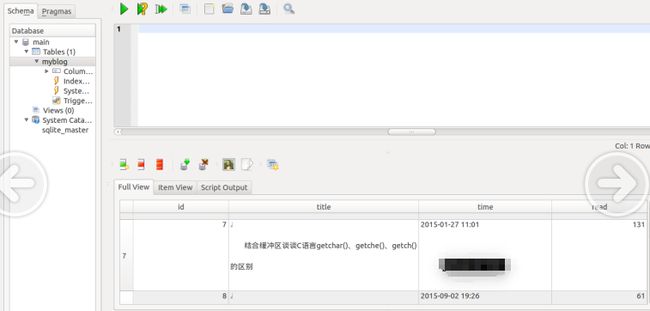
scrapy爬取博客文章
锦瑟无端五十弦,一弦一柱思华年。庄生晓梦迷蝴蝶,望帝春心托杜鹃。
沧海月明珠有泪,蓝田日暖玉生烟。此情可待成追忆,只是当时已惘然。
--李商隐《锦瑟》
编译环境:linux
编译器:ipython+vim
使用模块:scrapy+sqlalchemy
在我的上一篇博文使用Scrapy建立一个网站抓取器简单的总结了scrapy框架和数据库sqlalchemy的使用,接下来,通过爬取自己的博客文章来实践一下:
目的:本文中我们将建立一个从http://blog.csdn.net/jiangjieqazwsx博客页上抓取博文标题,发表时间,阅读人数信息,并将数据按我们的要求存储于数据库中。
一、建立一下scrapy项目:
在终端里输入以下命令:
$ scray startproject myblog二、定义爬虫内容
$cd myblog/myblog$vim items.py进入我们的item文件,定义需要获取的内容字段,类似于类实体:
# -*- coding: utf-8 -*-

# Define here the models for your scraped items
#
# See documentation in:
# http://doc.scrapy.org/en/latest/topics/items.html

import scrapy


class MyblogItem(scrapy.Item):
    # define the fields for your item here like:
    # name = scrapy.Field()
    title = scrapy.Field() #文章题目
    time = scrapy.Field()  #发表时间
    read = scrapy.Field()  #阅读人数
三、开始爬虫
进入spiders文件,在这里面创建一个myblogspider.py文件,在这个.py里面,我们需要定义解析式来获得我们想要的数据:
from scrapy.spiders import CrawlSpider, Rule
from scrapy.selector import Selector
from scrapy.linkextractors import LinkExtractor
from myblog.items import MyblogItem

class MyblogSpider(CrawlSpider):
    name = 'spider'        #定义爬虫名字
    allowed_domain = ['blog.csdn.net']
    start_urls = ['http://blog.csdn.net/jiangjieqazwsx']     #爬虫开始的链接

    rules = [
        Rule(LinkExtractor(allow=r'/jiangjieqazwsx/article/list/\d+')),
        Rule(LinkExtractor(allow=r'/jiangjieqazwsx/article/details/\d+'), callback="parse_item"),
    ]

    def parse_item(self, response):
        sel = Selector(response)
        item = MyblogItem()

        item['title'] = sel.xpath('//*[@class="link_title"]/a/text()').extract()[0]

#        item['title'] = sel.xpath('//*[@class="link_title"]/a/text()').extract()[0].encode('utf-8')
        item['time'] = sel.xpath('//*[@class="link_postdate"]/text()').extract()[0]
        item['read'] = sel.xpath('//*[@class="link_view"]/text()').re(r'\d+')[0]

        return item
代码解说:
我主要讲一下怎样来写URL的抓取规则,我们先借助谷歌浏览器的开发者功能,看网页的源码:
在rules里面,定义了URL的抓取规则,符合allow正则表达的链接都会加入到Scheduler(调度程序里面),我们可以对博客的页码,按右键-->审查元素,可以找到解析页码的规则:
Rule(LinkExtractor(allow=r'/jiangjieqazwsx/article/list/\d+')),Rule在没有调用callback函数的情况下,默认是跟进此链接。每篇文章的链接,如“人群密度检测论文笔记”这篇文章的链接为
http://blog.csdn.net/jiangjieqazwsx/article/details/46933551,只有details后面的数字不同,所示,对文章链接的提取可采用下面的正则表达式,因为我们要抓取链接里面的内容,所以我们加入callback属性,将Response交给parse_item函数来处理。
Rule(LinkExtractor(allow=r'/jiangjieqazwsx/article/details/\d+'), callback="parse_item")题目对应的审查元素为下:
所以我们的解析式为:
item['title'] = sel.xpath('//*[@class="link_title"]/a/text()').extract()[0]发表时间和阅读人数的审查元素为:
所示对应的解析式为:
item['time'] = sel.xpath('//*[@class="link_postdate"]/text()').extract()[0]
item['read'] = sel.xpath('//*[@class="link_view"]/text()').re(r'\d+')[0]
####题 外话 #####
item['title'] = sel.xpath('//*[@class="link_title"]/a/text()').extract()这条语句显示的是unicode的字符串,如果想显示中文,可以改成下面这种形式:
item['title'] = sel.xpath('//*[@class="link_title"]/a/text()').extract()[0].encode('utf-8')四:存储数据
爬虫写好后,我们就要来存储我们的数据了,我们使用的数据库是sqlalchemy。
我们在myblog目录下建立一个model.py的文件,我们将要使用Sqlalchemy作为ORM框架建立数据库模型。
首先,你们需要定义一个直接连接到数据库的方法,代码如下所示:
from sqlalchemy import create_engine, Column, Integer, String
from sqlalchemy.ext.declarative import declarative_base
DeclarativeBase = declarative_base()

def db_connect():
#    return create_engine('sqlite:///./sqlalchemy.db?charset=utf-8',echo = True)

    return create_engine('sqlite:///./sqlalchemy.db',echo = True)  #定义一个指向sqlalchemy.db数据库的引擎

def create_myblog_table(engine):
    DeclarativeBase.metadata.create_all(engine)      #创建数据库

class MyBlog(DeclarativeBase):
    __tablename__ = 'myblog'     #表的名字

    id = Column(Integer, primary_key = True)
    title = Column('title', String(800))
    time = Column('time', String(200))
    read = Column('read', String(200))
五.管道管理
我们已经建立了来抓取和解析HTML的抓取器,并且已经设置了保存这些数据的数据库。现在我们需要通过一个管道来将两者连接起来。
打开pipelines.py并引入Sqlalchemy的sessionmaker功能 ,用来绑定数据库。
# -*- coding: utf-8 -*-

# Define your item pipelines here
#
# Don't forget to add your pipeline to the ITEM_PIPELINES setting
# See: http://doc.scrapy.org/en/latest/topics/item-pipeline.html
from sqlalchemy.orm import sessionmaker
from model import MyBlog, db_connect, create_myblog_table


class MyblogPipeline(object):
    def __init__(self):
        engine = db_connect()
        create_myblog_table(engine)
        self.Session = sessionmaker(bind = engine)

    def process_item(self, item, spider):
        session = self.Session()
        myblog=MyBlog(**item)
        session.add(myblog)#添加数据
        session.commit()#保存修改
        return item
接下来,我们需要向setings.py中添加一个变量来告诉抓取器在处理数据时到哪里找到我们的管道。
在settings.py加入另外一个变量,ITEM_PIPELINES:
ITEM_PIPELINES = {
    'myblog.pipelines.MyblogPipeline':300
}
六:配置文件
为了防止在爬虫的时候被CSDN吃掉,增加一些随机延迟,浏览器代理等在settings.py里面:
DOWNLOAD_DELAY = 2
USER_AGENT = 'Mozilla/5.0 (X11; Linux x86_64; rv:7.0.1) Gecko/20100101 Firefox/7.7'
COOKIES_ENABLED = True
到此为止,抓取博客文章信息的爬虫就已经完成了。在命令行中执行:
$scrapy crawl spider就可以爬虫了。
相关代码已经上传到github


