【Android】- 搭建服务器进行前后端的交互
Web服务端和客户端的交互,Okhttp请求的方式,包括get 和 post ,请求图片,服务器的搭建。
1.下载tomcat和Eclipse
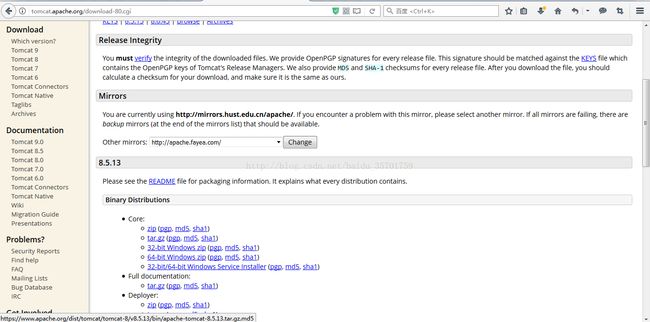
下载tomcat地址:http://tomcat.apache.org/download-80.cgi
找到相应的版本进行下载,并进行环境的搭配
2.下载struts框架,进行管理
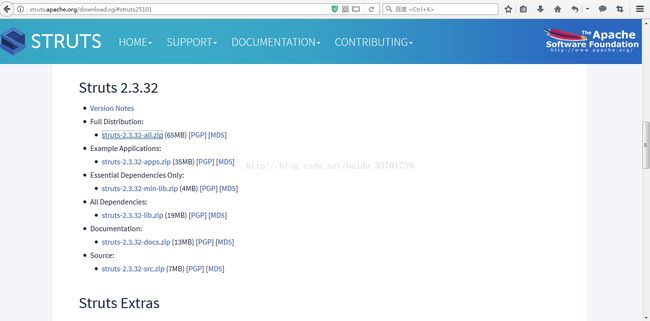
下载地址:http://struts.apache.org/download.cgi#struts25101
找到最新版本进行下载:
3.Eclipse新建web项目,引入struts
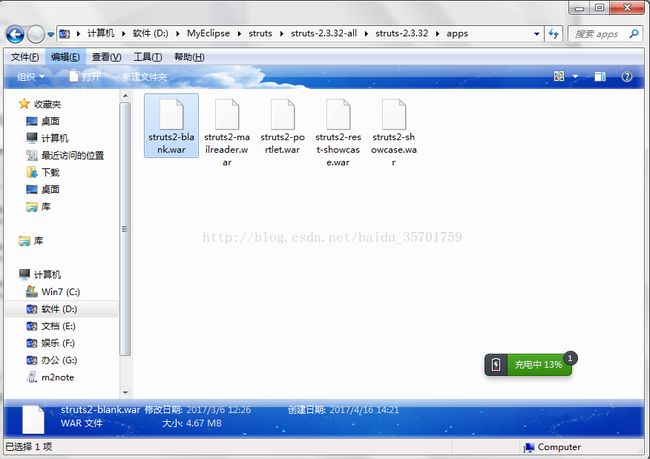
3.1 把我们刚才下载好的struts解压找到apps目录下的struts2-blank.war包并进行解压
解压完成后进入到WEB-INF的lib文件夹下的jar文件全部拷贝到MyEclipse项目中的WEB-INF中的lib文件夹下
3.2 进入到struts下的WEB-INF中找到classes文件夹下的struts.xml拷贝到项目中的src下
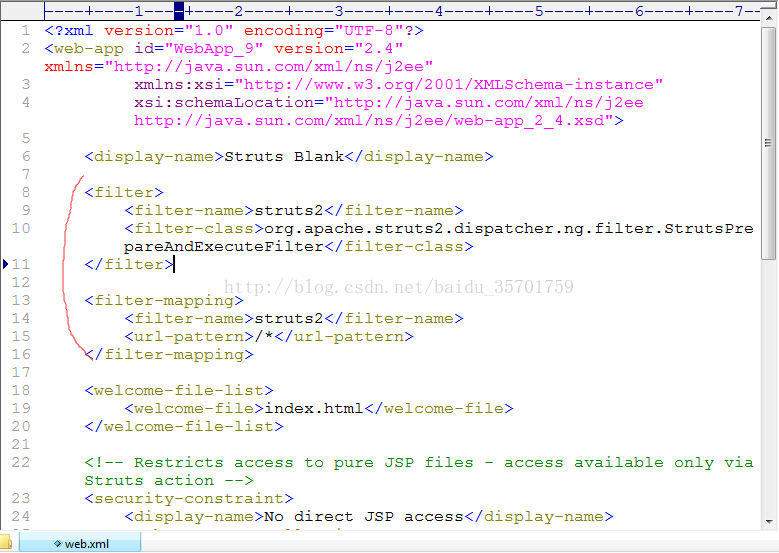
3.3 进入到struts下的WEB-INF中找到web.xml文件打开把其中的两个filter标签内容拷贝到项目中的web.xml中
3.4 拷贝完成后进入到刚才我们拷贝的struts.xml
修改第一个constant标签的值value 为true
删除package标签下的所以标签,保存完成。
3.5 开启服务
右键Tomcat v8.5 Server 点击Add And Remove选择新建的项目Add到Configured中,点击Finish
图中的OkHttp即为我新建的项目的名称,完成之后开启服务。
观察控制台,若控制台出现以下所示,即为开启成功。
4.编写服务端代码
新建一个UserAction继承ActionSupport,模拟用户的登陆
public class UserAction extends ActionSupport{
/**
* 模拟用户登陆
*/
private String name;
private String pwd;
public String login(){
System.out.println("name:"+name +"/pwd:"+pwd);
return null;
}
public String getName() {
return name;
}
public void setName(String name) {
this.name = name;
}
public String getPwd() {
return pwd;
}
public void setPwd(String pwd) {
this.pwd = pwd;
}
}
如何在浏览器中去输入地址,访问的login方法呢?
打开struts.xml,在package标签下添加
class中为相应的类名
在浏览器中写入name为login的路径,就会找到这个类class下的这个方法method
重启服务,在浏览器下输入:http://192.168.0.101:8080/OkHttp/login?name=hxl&pwd=123456
http://192.168.0.101:8080为协议和端口号,端口号默认为8080,协议可以输入ifconfig查看,
OkHttp为项目的名称,login为name路径。
5.在Android客户端进行Get操作
private String url = "http://192.168.0.101:8080/OkHttp/";
private OkHttpClient okHttpClient;
//1.创建OkhttpClient对象
okHttpClient = new OkHttpClient();
//2.构建request对象
Request request = new Request.Builder()
        .get()
        .url(url+"login?name=zp&pwd=12345678")
        .build();
//3.获得call对象
Call call = okHttpClient.newCall(request);
//4.异步执行
call.enqueue(new Callback() {
    @Override
    public void onFailure(Call call, IOException e) {
        Log.e("onFailure", "onFailure: "+"fail");
    }

    @Override
    public void onResponse(Call call, Response response) throws IOException {
        if (response.isSuccessful()){
            String string = response.body().string();
            Log.e("onResponse", "onResponse: "+string );
        }

    }
});
在服务端UserAction类中添加以下内容,客户端请求时,服务端可以返回内容
public String login() throws IOException{ System.out.println("name:"+name +"/pwd:"+pwd); //和客户端进行交互,用户请求时返回的字段 HttpServletResponse response = ServletActionContext.getResponse(); PrintWriter writer = response.getWriter(); writer.write("login success"); writer.flush(); return null; }
6.在Android客户端进行POST操作
//1.创建OkhttpClient对象
okHttpClient = new OkHttpClient();
//2.构造FormBody对象,并添加相应字段FormBody formBody = new FormBody.Builder() .add( "name", "hxl") .add( "pwd", "123456") .build();Request request = new Request.Builder() .post(formBody) .url( url+ "login") .build();Call call = okHttpClient.newCall(request);call.enqueue( new Callback() { @Override public void onFailure(Call call, IOException e) { Log. e( "onFailure", "onFailure: "+ "fail"); } @Override public void onResponse(Call call, Response response) throws IOException { if (response.isSuccessful()){ } }});
7.在Android客户端进行Post String操作
客户端代码:
okHttpClient = new OkHttpClient();
RequestBody requestBody = RequestBody.create(MediaType.parse("text/plain;chaset=utf-8"), "{name:hxl,pwd:123456}");
Request request = new Request.Builder()
        .url(url+"postString")
        .post(requestBody)
        .build();
Call call = okHttpClient.newCall(request);
call.enqueue(new Callback() {
    @Override
    public void onFailure(Call call, IOException e) {
        Log.e("onFailure", "onFailure: "+"fail");
    }

    @Override
    public void onResponse(Call call, Response response) throws IOException {
        if (response.isSuccessful()){

        }
    }
});
服务端:在UserAction类中新建方法
postString(),并在struts.xml进行配置:
代码:public String postString() throws IOException{
HttpServletRequest request = ServletActionContext.getRequest();
ServletInputStream is = request.getInputStream();
StringBuffer buffer = new StringBuffer();
int len = 0;
byte[] buf = new byte[1024];
//将内容循环读取到byte中
while((len = is.read(buf))!=-1){
buffer.append(new String(buf,0,len));
}
System.out.println(buffer.toString().trim());
return null;
}
8.在Android客户端进行文件上传操作
Android客户端:
okHttpClient = new OkHttpClient();String dir = Environment. getExternalStorageDirectory().getAbsolutePath() + File. separator + "Pictures"+File. separator+ "Screenshots";File file = new File(dir, "S70416-11283044.jpg"); if (!file.exists()){ return;}RequestBody requestBody = RequestBody. create(MediaType. parse( "application/octet-stream"),file);Request request = new Request.Builder() .url( url+ "postFile") .post(requestBody) .build();Call call = okHttpClient.newCall(request);call.enqueue( new Callback() { @Override public void onFailure(Call call, IOException e) { } @Override public void onResponse(Call call, Response response) throws IOException { if (response.isSuccessful()){ } }});服务端:
public String postFile() throws IOException{
HttpServletRequest request = ServletActionContext.getRequest();
ServletInputStream is = request.getInputStream();
//dir为tomcat部署下的wtpwebapps文件夹,files为新建的文件夹,图片会保存到files文件夹下
String dir = ServletActionContext.getServletContext().getRealPath("files");
File file = new File(dir,"photo.jpg");
FileOutputStream fos = new FileOutputStream(file);
int len = 0;
byte[] buf = new byte[1024];
//将内容循环读取到byte中
while((len = is.read(buf))!=-1){
fos.write(buf, 0, len);
}
System.out.println(fos.toString());
fos.flush();
fos.close();
return null;
}
若以上上传图片出现错误:
com.opensymphony.xwork2.config.ConfigurationException:No result defined for action com.okhttp.action.UserAction
and result input at com.opensymphony.xwork2.DefaultActionInvocation.executeResult...
解决办法:
在struts.xml中添加:
当文件上传大于2M时会出现以上异常,*号表示文件的大小的限制


