Vue-slot(插槽)
Vue-slot(插槽)
官方文档
1.什么是插槽slot?
官方给的定义是:
Vue 实现了一套内容分发的 API,这套 API 的设计灵感源自 Web Components 规范草案,将
元素作为承载分发内容的出口。
我自己的理解是:
Vue插槽就好比电脑主板上的插槽一样,生产的时候我们并不把所有的器件都固定死,而是想让它具有一定的灵活性,可以根据实际情况进行相应的替换,比如内存条,显卡等等,同时他们还需要插对位置,对号入座。
而Vue中的插槽亦是如此,为了使我们封装的组件更加的灵活,在使用组件的时候,我们可以向组件传递一些数据,从而修改它相应位置要显示的内容,还可以操作组件的内部封装的一些数据。
2. slot的基本用法
基本用法:
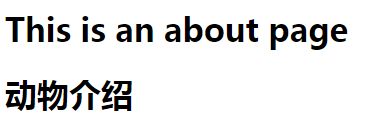
首先有1个页面About.vue,1个组件slot.vue,我们要在about页面中使用这个组件。
slot.vue:
<div>
  <h1>动物介绍</h1>
</div>
about.vue:
<div class="about">
  <h1>This is an about page</h1>
	<MySlot></MySlot>
</div>
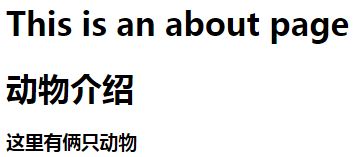
如果我们现在,在MySlot标签中想要添加一些内容
<div class="about">
  <h1>This is an about page</h1>
	<MySlot>这里有俩只动物</MySlot>
</div>
如果在组件中加上slot
<div>
        <h1>动物介绍</h1>
        <slot></slot>
    </div>
这样就显示出来了,不管我们写什么,它都会默认显示到slot中,这就是默认插槽。
3. 具名插槽
如果我们想要写入多条,对应显示到不同的位置上,我们就用到了具名插槽。
需要注意的是,多个slot需要用到template
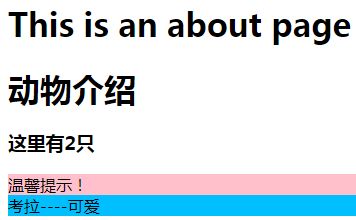
slot.vue:
<div>
  <h1>动物介绍</h1>
  <h3>
  	// 名字为num
    <slot name="num"></slot>
  </h3>
  <div style="background-color: pink">
    // 名字为tip
    <slot name="tip"></slot>
  </div>
</div>
about.vue:
<div class="about">
        <h1>This is an about page</h1>
        <MySlot>
            <template #num>这里有2只</template>
            <template #tip>温馨提示!</template>
        </MySlot>
</div>
具名插槽,实际上就是对号入座。
4. 作用域插槽
所谓作用域插槽,我的个人理解就是,在定义slot的时候,可以为slot绑定一些数据,而在父级页面中使用组件的时候,我们可以拿到组件中对应slot绑定的数据。
在组件中先绑定一条数据。
slot.vue:
<div>
        <h1>动物介绍</h1>
        <h3>
            <slot name="num"></slot>
        </h3>
        <div style="background-color: pink">
            <slot name="tip"></slot>
        </div>
        <div style="background-color: deepskyblue">
            <slot name="detail">{{animal1.name}}----{{animal1.feature}}</slot>
        </div>
    </div>


//  data
 	animal1: {
   name: '考拉',
   feature: '可爱'
 },
   animal2: {
   name: '鹦鹉',
   feature: '傻'
 }
如果我们想要在使用组件的时候,想要显示组件内部的鹦鹉,就需要作用域插槽了。
首先,我们需要将想要暴露给父级的数据绑定到slot上
slot.vue:
<div>
        <h1>动物介绍</h1>
        <h3>
            <slot name="num"></slot>
        </h3>
        <div style="background-color: pink">
            <slot name="tip"></slot>
        </div>
        <div style="background-color: deepskyblue">
            <slot name="detail" :another="animal2">{{animal1.name}}----{{animal1.feature}}</slot>
        </div>
    </div>


//  data
 animal1: {
                name: '考拉',
                feature: '可爱'
            },
            animal2: {
                name: '鹦鹉',
                feature: '傻'
            }
其中animal2是数据,another是对外暴露的数据别名。注意,可以暴露多条数据( 绑定多条数据)。
about.vue:
<div class="about">
        <h1>This is an about page</h1>
        <MySlot>
            <template #num>这里有2只</template>
            <template #tip>温馨提示!</template>
            <template #detail="data">{{data.another.name}}-----{{data.another.feature}}</template>
        </MySlot>
    </div>
首先在父级页面中,使用组件的地方先要获取到slot对外暴露的数据,由于数据可能不止一条,所以获取的方式是通过一个对象来接收他暴露的所有数据,所以这里data是接收的所有的数据,another是具体要用到的数据。
这样一来,数据就打通了,这就是作用域插槽的使用。
5. 解构插槽Prop
上边说了,slot可以对外暴露不止一条数据,所以我们接受的时候用的是一个对象,结合ES6语法的解构取值,可以在获取数据的时候直接将需要的数据解构出来,就形成了解构插槽Prop。
所以在上边的作用域插槽例子中,about.vue可以修改如下;
about.vue:
<div class="about">
        <h1>This is an about page</h1>
        <MySlot>
            <template #num>这里有2只</template>
            <template #tip>温馨提示!</template>
            <template #detail="{another}">{{another.name}}-----{{another.feature}}</template>
        </MySlot>
    </div>
以上就是Vue Slot的基本使用,更多细节可以参考官方文档。


