CentOS 7.6版本服务器部署JavaWeb应用环境及安装流程完整版包含(NGINX、PostgreSQL、Java)
CentOS 7.6版本服务器部署JavaWeb部署应用环境及安装流程包含(NGINX、PostgreSQL、Java),该记录主要是为了方便以后查看部署运行环境而记录。
一、安装PostgreSQL
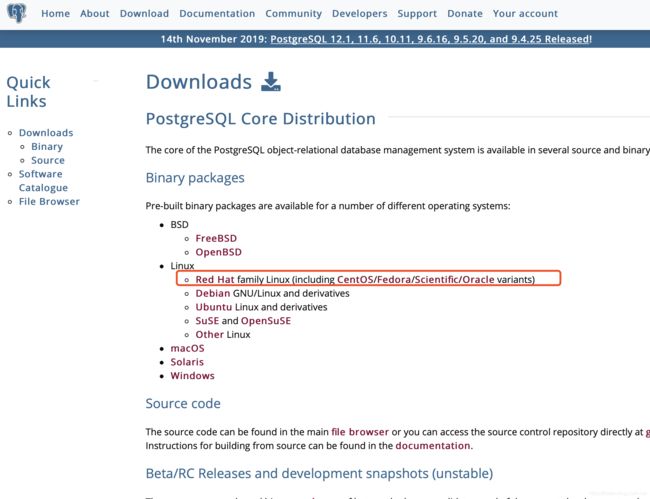
1/ 进入PostgreSQL官网下载页面https://www.postgresql.org/download/
2/选择Red Hat family Linux (including CentOS/Fedora/Scientific/Oracle variants)版本,选择适合自己的版本按提示进行相关下载安装等操作。
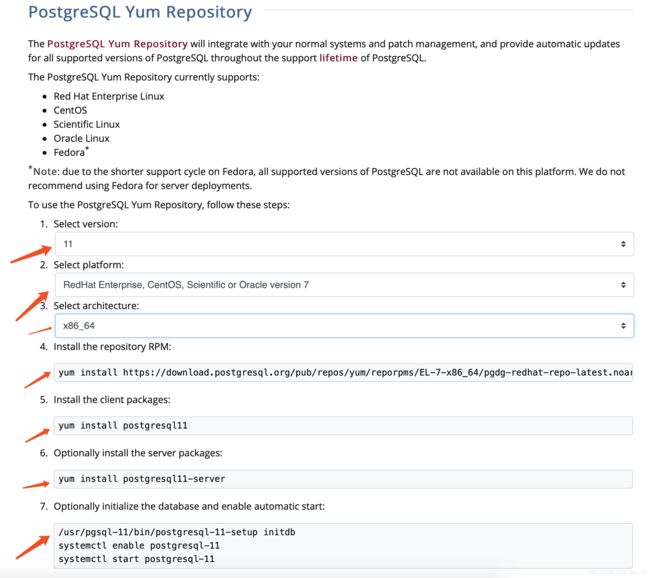
3/安装流程及执行代码
1、Install the repository RPM:
yum install https://download.postgresql.org/pub/repos/yum/reporpms/EL-7-x86_64/pgdg-redhat-repo-latest.noarch.rpm2、Install the client packages:
yum install postgresql113、Optionally install the server packages:
yum install postgresql11-server4、Optionally initialize the database and enable automatic start:
/usr/pgsql-11/bin/postgresql-11-setup initdb

systemctl enable postgresql-11

systemctl start postgresql-11
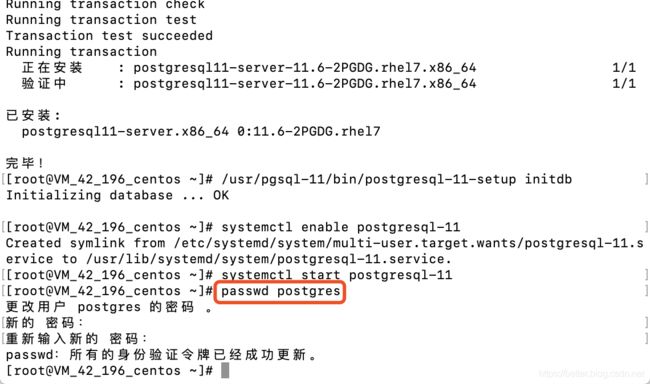
这步初始化数据库命令会在 /var/lib/pgsql 目录下创建名称为11文件夹,11为数据库版本,如果安装的是其他版本,对应的是其版本号(9.4、9.5);这里如果已经有对应版本的文件夹了,初始化这一步会报错,需要你自行去删除对应的文件夹,再去初始化。
5、修改postgres用户的linux登陆的账号密码
passwd postgres默认会创建一个名为postgres的linux登录用户,这里进行密码修改(注意,这里修改的是linux登陆的账号密码,不是数据库的)
6、开启远程访问
打开postgresql.conf文件进行修改,去掉#,localhost改为*
修改后按下esc退出插入编辑模式,并输入:wq保存退出
vim /var/lib/pgsql/11/data/postgresql.conf打开pg_hba.conf文件进行修改,127.0.0.1/32改为0.0.0.0/0,ident改为md5
输入a进入插入编辑模式,对该文件进行编辑。修改后如下,按下esc退出插入编辑模式,并输入:wq保存退出
vim /var/lib/pgsql/11/data/pg_hba.conf7、重新启动服务
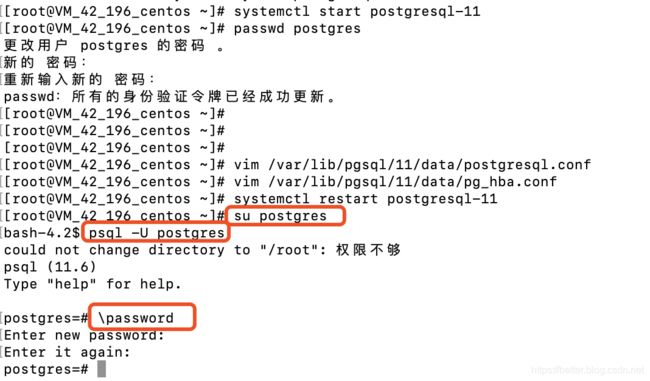
systemctl restart postgresql-118、切换到postgres账号,并修改数据库用户postgres的密码
su postgres

psql -U postgres

\password
9、客户端测试登录
云端安全组记得放行端口,不然链接不了。
二、安装NGINX
1/安装前的环境准备
1、安装gcc gcc-c++
安装 nginx 需要先将官网下载的源码进行编译,编译依赖 gcc 环境,如果没有 gcc 环境,则需要安装
yum install gcc-c++2、安装PCRE pcre-devel库
PCRE(Perl Compatible Regular Expressions) 是一个Perl库,包括 perl 兼容的正则表达式库。nginx 的 http 模块使用 pcre 来解析正则表达式,所以需要在 linux 上安装 pcre 库,pcre-devel 是使用 pcre 开发的一个二次开发库。nginx也需要此库。
yum install -y pcre pcre-devel3、安装zlib库
zlib 库提供了很多种压缩和解压缩的方式, nginx 使用 zlib 对 http 包的内容进行 gzip ,所以需要在 Centos 上安装 zlib 库。
yum install -y zlib zlib-devel4、安装OpenSSL库
OpenSSL 是一个强大的安全套接字层密码库,囊括主要的密码算法、常用的密钥和证书封装管理功能及 SSL 协议,并提供丰富的应用程序供测试或其它目的使用。
nginx 不仅支持 http 协议,还支持 https(即在ssl协议上传输http),所以需要在 Centos 安装 OpenSSL 库。yum install -y openssl openssl-devel
2/配置及编译安装
1、查看官网(http://nginx.org)最新稳定版NGINX,并使用
wget命令下载,把命令中的版本号换成最新的就行。wget -c https://nginx.org/download/nginx-1.16.1.tar.gz2、解压安装包
tar -zxvf nginx-1.16.1.tar.gz3、配置NGINX
跳入目录中
cd nginx-1.16.1执行配置命令
./configure --user=nobody --group=nobody --prefix=/usr/local/nginx --with-http_stub_status_module --with-http_gzip_static_module --with-http_realip_module --with-http_sub_module --with-http_ssl_module4、编译安装
make

make install
5、查找安装路径
whereis nginx6、启动NGINX
//启动
/usr/local/nginx/sbin/nginx

//停止
/usr/local/nginx/sbin/nginx -s stop

//重启
/usr/local/nginx/sbin/nginx -s reload

//测试配置文件是否正常
/usr/local/nginx/sbin/nginx -t

//强制关闭
pkill nginx

//查询nginx进程
ps aux|grep nginx
3/NGINX配置反向代理
1、打开nginx.conf配置
vim /usr/local/nginx/conf/nginx.conf2、找到proxy模块,去掉#,取消注释,并改为自己的HTTP地址。修改后按下esc退出插入编辑模式,并输入:wq保存退出
3、执行重启命令,让配置生效
/usr/local/nginx/sbin/nginx -s reload
4/NGINX配置SSL证书,即HTTPS
1、云端免费申请一个SSL证书,腾讯云、阿里云都可以 。
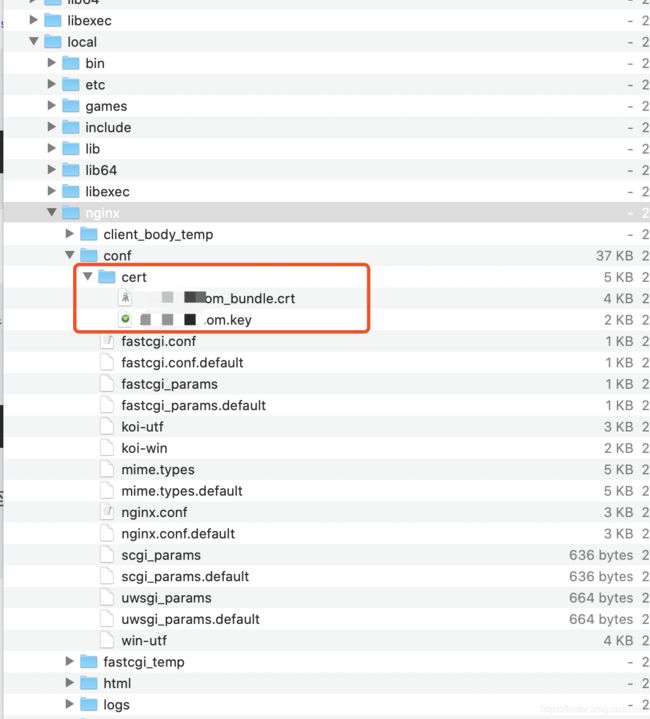
2、创建cert文件夹,存放证书
mkdir /usr/local/nginx/conf/cert3、通过FTP工具或者其他远程连接工具把证书文件上传至cert目录中
4、修改 Nginx 根目录下的
conf/nginx.conf文件vim /usr/local/nginx/conf/nginx.conf附阿里云、腾讯云官方NGINX配置SSL证书文档,具体内容可查看文档配置
腾讯云:https://cloud.tencent.com/document/product/400/35244
阿里云:https://help.aliyun.com/document_detail/98728.html
完整的
nginx.conf文件内容如下#user nobody; worker_processes 1; #error_log logs/error.log; #error_log logs/error.log notice; #error_log logs/error.log info; #pid logs/nginx.pid; events { worker_connections 1024; } http { include mime.types; default_type application/octet-stream; #log_format main '$remote_addr - $remote_user [$time_local] "$request" ' # '$status $body_bytes_sent "$http_referer" ' # '"$http_user_agent" "$http_x_forwarded_for"'; #access_log logs/access.log main; sendfile on; #tcp_nopush on; #keepalive_timeout 0; keepalive_timeout 65; gzip on; server { listen 80; server_name tnafcs.com; #把http的域名请求转成https rewrite ^(.*)$ https://$host$1 permanent; #charset koi8-r; #access_log logs/host.access.log main; location / { root /www/static; index index.html index.htm; } #error_page 404 /404.html; # redirect server error pages to the static page /50x.html # error_page 500 502 503 504 /50x.html; location = /50x.html { root html; } # proxy the PHP scripts to Apache listening on 127.0.0.1:80 # location /api/ { proxy_pass http://127.0.0.1:9999; } # pass the PHP scripts to FastCGI server listening on 127.0.0.1:9000 # #location ~ \.php$ { # root html; # fastcgi_pass 127.0.0.1:9000; # fastcgi_index index.php; # fastcgi_param SCRIPT_FILENAME /scripts$fastcgi_script_name; # include fastcgi_params; #} # deny access to .htaccess files, if Apache's document root # concurs with nginx's one # #location ~ /\.ht { # deny all; #} } # another virtual host using mix of IP-, name-, and port-based configuration # #server { # listen 8000; # listen somename:8080; # server_name somename alias another.alias; # location / { # root html; # index index.html index.htm; # } #} # HTTPS server # server { #SSL 访问端口号为 443 listen 443 ssl; #填写绑定证书的域名 server_name tnafcs.com; #启用 SSL 功能 ssl on; #证书文件名称 ssl_certificate cert/1_ tnafcs.com_bundle.crt; #私钥文件名称 ssl_certificate_key cert/2_ tnafcs.com.key; ssl_session_cache shared:SSL:1m; ssl_session_timeout 5m; #请按照以下协议配置 ssl_protocols TLSv1 TLSv1.1 TLSv1.2; #请按照以下套件配置,配置加密套件,写法遵循 openssl 标准。 ssl_ciphers ECDHE-RSA-AES128-GCM-SHA256:HIGH:!aNULL:!MD5:!RC4:!DHE; ssl_prefer_server_ciphers on; location / { #网站主页路径。此路径仅供参考,具体请您按照实际目录操作。 root /www/static; index index.html index.htm; } # 配置反向代理,重定向到API接口 location /api/ { proxy_pass http://127.0.0.1:9999; } } }6、修改完成,重启 Nginx
/usr/local/nginx/sbin/nginx -s reload
三、安装Java环境
1、检测有没有安装Java环境
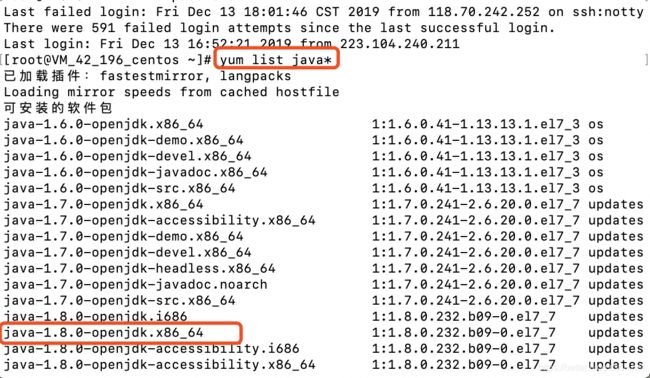
java2、查看yum源的java包
yum list java*3、安装java1.8 jdk版本
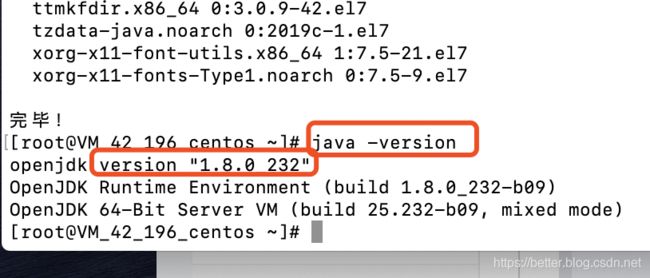
yum -y install java-1.8.0-openjdk4、查看版本,检测是否安装成功
java -version
最后,整个基本的JavaWeb项目运行环境就安装配置完成了,感谢你耐心看完。
参考文献:
https://www.jianshu.com/p/b4a759c2208f
https://www.cnblogs.com/jackyzm/p/9600738.html
https://www.cnblogs.com/kaid/p/7640723.html
https://help.aliyun.com/document_detail/98728.html
https://help.aliyun.com/document_detail/98728.html
https://zixuephp.net/article-406.html
