【IMX6UL开发板试用体验】OpenWRT有线网络的配置
在前面编译完成后,就可以烧写测试启动了。 但是启动后发现了一些问题。本次我们说明一下如何使用OpenWrt中的wired LAN。
网卡驱动问题
本身板子有两个网口,其中一个没有变压器转换器,另外一个在Uboot中使用是没有问题的,可以正常的tftp下载kernel与dtb,但是在Linux,OpenWRT启动后,如果配置网络IP地址就会出现不停的up与down的情况
udhcpc (v1.20.2) started
fec 2188000.ethernet eth0: Freescale FEC PHY driver [Generic PHY] (mii_bus:phy_addr=2188000.ethernet:00, irq=-1)
IPv6: ADDRCONF(NETDEV_UP): eth0: link is not ready
Sending discover...
Sending discover...
libphy: 2188000.ethernet:00 - Link is Up - 100/Full
IPv6: ADDRCONF(NETDEV_CHANGE): eth0: link becomes ready
libphy: 2188000.ethernet:00 - Link is Down
Sending discover...
libphy: 2188000.ethernet:00 - Link is Up - 100/Full
libphy: 2188000.ethernet:00 - Link is Down
libphy: 2188000.ethernet:00 - Link is Up - 100/Full
开始一直以为是这个OpenWRT的问题,以为是OpenWRT中还有其他的程序在控制eth0网卡, 于是看了下OpenWRT的文档, 主要是OpenWRT中的network configuration wiki页面(https://wiki.openwrt.org/doc/uci/network),以及initd的network脚本(/etc/init.d/network),确定是内核网卡驱动的问题。
为了简单处理,这里使用USB有线网卡作为有线网卡来示范。
添加USB网卡
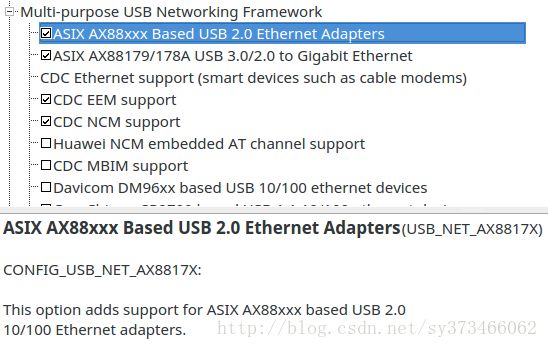
身边有一个廉价的USB网卡,AX8XX系列的,这个网卡需要驱动支持,因此在内核中配置起来即可:
然后需要保存,因为我们使用的是External kernel directory的方式来指定内核source code的,所以并不需要去做其他的处理。然后再一次编译即可。编译完成后更新zImage即可。
启动后我们可以验证这个选项builtin了:
root@OpenWrt:/# zcat /proc/config.gz | grep AX8
CONFIG_USB_NET_AX8817X=y
CONFIG_USB_NET_AX88179_178A=y
# CONFIG_CHARGER_MAX8903 is not set
CONFIG_SABRESD_MAX8903=y
然后插上USB网卡,就会创建另外一个Network Interface eth1:
[ 3.121909] asix 1-1.1:1.0 eth1: register 'asix' at usb-ci_hdrc.1-1.1, ASIX AX88772 USB 2.0 Ethernet, 00:0e:c6:f0:23:d3
配置wired
OpenWRT的配置文件都是集中在/etc/config下面,例如wired network,那么是里面的network。其默认就有一些内容,默认的内容配置的是eth0 interface,静态的IP(192.168.1.1),作为bridge方式。我们这里面是将USB网卡eth1链接到上一级的路由器上面的,所以需要使用dhcp来获取ip地址,因此更改后的配置如下:
root@OpenWrt:/# cat /etc/config/network
config interface 'loopback'
option ifname 'lo'
option proto 'static'
option ipaddr '127.0.0.1'
option netmask '255.0.0.0'
config interface 'lan'
option ifname 'eth1'
option proto 'dhcp'
option ipaddr '192.168.1.120'
option netmask '255.255.255.0'
option ip6assign '60'
option type 'bridge'
后面的ipaddr其实是不会起作用的。
根据OpenWRT的Wiki页面的信息,我们知道这个dhcpc使用的是busybox里面的udhcpc,因此如果无法获取地址那么需要确定busybox里面是否配置上了这个util:
| Protocol | Description | Program |
|---|---|---|
static |
Static configuration with fixed address and netmask | ip/ifconfig |
dhcp |
Address and netmask are assigned by DHCP | udhcpc (Busybox) |
配置完成后,我们可以使用下面命令来重启network:
/etc/init.d/network restart
对于配置,也可以使用uci命令来配置管理。
使用LuCI查看与配置
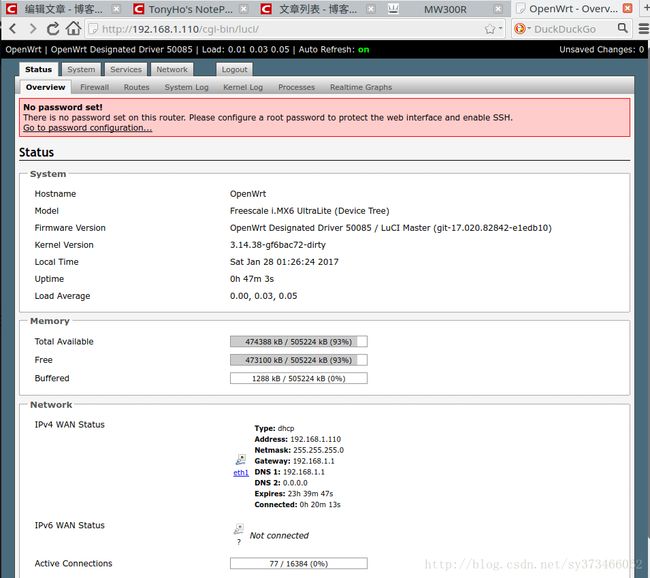
配置完成后,我们访问我们的路由器了:
默认是没有密码的,直接点击Login即可进入。
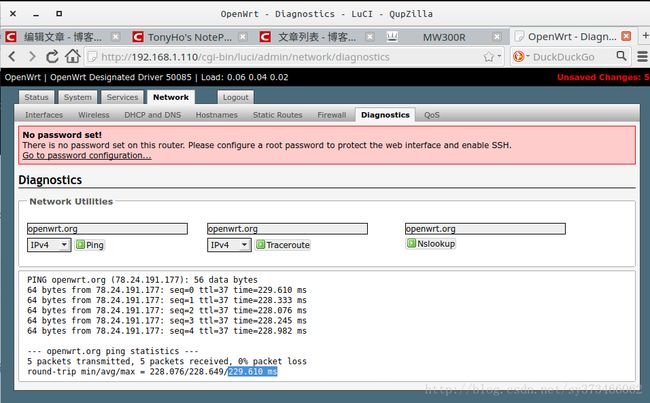
然后我们可以测试一下网络是否联通了:
这里面是用ping来测试的。
至此,路由器本身是可以访问Internet了。接下来还需要完成无线中继器与AP的功能。


