一:rsync简介:
rsync是一个强大的数据同步工具,它具有cp,scp的大部分功能,并在此基础上进行扩展,它可以自动比较两个文件的差异实现同步功能。它还可以实现异地同步,对实现目录同步非常方便。
二:rsync的工作模式:
shell模式,也称为本地模式
远程shell模式,可以利用ssh协议承载其远程传输过程;
列表模式,仅列出源中的内容,-nv
服务模式,此时rsync工作为守护进程,能接收客户端的数据同步请求
三:rsync可用命令选项:
-a:归档保留原文件的属性
-p:保留原文件的权限
-t:保留文件的时间戳
-l:保留文件的符号链接
-g:保留文件的数组
-o:保留文件的属主
-D:保留设备文件
-n:同步测试不执行
-v:详细输出模式
-q:静默模式
-c:开启校验功能
-r:递归复制
-e ssh:使用ssh作为传输承载
-z:压缩后传输
--progress:显示进度条
--stats:显示如何执行压缩和传输
注意:rsync命令中,如果原路径是目录,且给复制路径时末尾有/,则会复制目录中的内容,而非目录本身,如果末尾没有/,则会同步目录本身及目录中的所有文件;目标路径末尾是否有/无关紧要;
四:rsync的服务模式的实现:
由于rsync工作属于瞬时进程,因此要有xinetd代为监听,我们就要安装xinetd并开启
设定rsync服务器端 A 主机(172.16.249.220):yum -y install xinetd,chkconfig rsync on
为rsync提供配置文件 /etc/rsyncd.conf
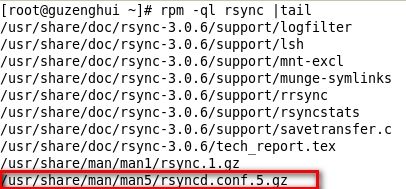
我们可以使用rpm -ql rsync 查看都生了哪些文件
这里有一个实例配置文件 我们可以参考这个文件写如下。
启动服务:service xinetd start 监听与873/tcp
# Global Settings     # 全局模式下
uid = nobody          # 用户身份
gid = nobody
use chroot = no       # 不使用chroot功能
max connections = 10  # 允许最大连接数量
strict modes = yes    # 是否使用严格查询模型
pid file = /var/run/rsyncd.pid # 指出pid文件
log file = /var/log/rsyncd.log # 指出日志文件

# Directory to be synced  #允许同步的目录权限设置
[tools]                   #对外声称同步的名字
path = /data              #允许同步的目录的位置
ignore errors = yes       # 忽略错误继续同步
read only = no
write only = no
hosts allow = 172.16.0.0/16 #允许该网段内的主机同步
hosts deny = * #拒绝所有 先匹配allow
list = false | ture    #是否允许列出文件
uid = root  #使用root同步
gid = root
此时我们可以用B主机172.16.249.218做测试如下:
服务端启用用户认证的功能
我们需要修改配置文如下:
#Directory to be synced
 [tools]
  path = /data
 ignore errors = yes
 read only = no
 write only =no
 hosts allow = 172.16.0.0/16
 hosts deny = *
 list = yes
 uid = root
 gid = root
 auth users = tom
 secrets file = /etc/rsyncd.passwd
注意:我们只需加上最后两行,但是我们在创建/etc/rsyncd.passwd 这个文件后要给以600或者400的权限,否则默认不能使用用户认证功能。
密码文件的格式如下:username:passwd 密码不能超过8位
5.结合inotify实现监控服务器端数据变化。
1.首先下载inotify-tools 工具
2.先用uname -r 查看是内核版本
[root@guzenghui rc.d]# uname -r
2.6.32-431.el6.x86_64
[root@guzenghui rc.d]# ll /proc/sys/fs/inotify/
total 0
-rw-r--r-- 1 root root 0 Aug 25 02:25 max_queued_events
-rw-r--r-- 1 root root 0 Aug 25 02:25 max_user_instances
-rw-r--r-- 1 root root 0 Aug 25 02:25 max_user_watches
显示以上信息表示可以使用inotify工具
6.在客户端上为inotify提供脚本使其监控客户端数据是否发生变化,若是发生变化就通知服务器来同步数据脚本内容如下:
1 #/bin/bash
  2 src=/tmp
  3 des=tools
  4 ip=172.16.249.220
  5
  6 /usr/local/bin/inotifywait -mrq --timefmt '%d/%m/%y/%H:%M' --format '%T%w%f'     -e modify,delete,create,attrib $src | while read file
  7   do
  8      rsync -vzrtopg --delete --progress $src tom@$ip::$des --password-file=/etc/rsyncd.passwd &&echo "$src has been resynced"
  9 done
其中:src表示客户端要同步给服务端的目录,des表示服务器存放同步数据的位置
此时我们就可以在客户端上修改/tmp目录下的内容,就可以看到服务器端同步到数据
我们在测试的不让脚本在后台运行,此时我们就可以清楚的看到数据同步过程。
7.给其权限 chmod +x /etc/rc.d/inotify 将脚本放到/etc/rc.d/inotify下开机自启动.
五:总结
将客户端也保存一份inotify.passwd 这样就不用每次输入密码了,权限也要改成600,内容不能加
用户名只存放密码。


