使用sts搭建ssm项目
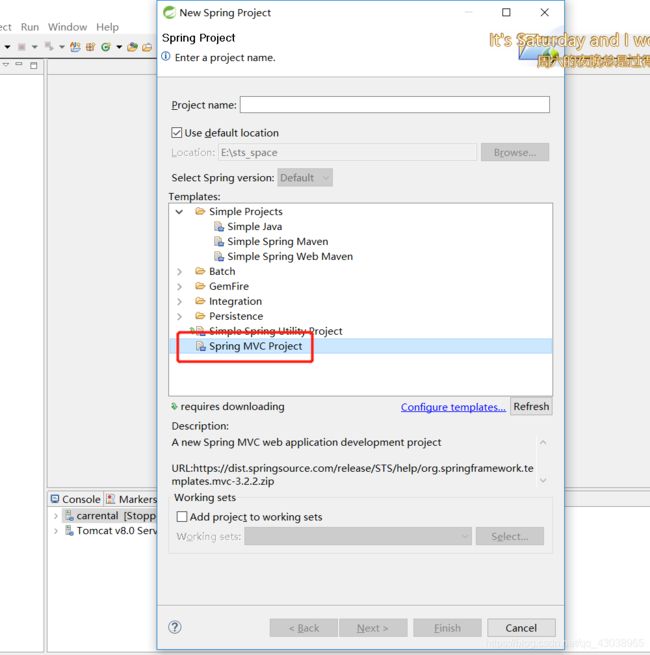
1.右键 new -> SpringProject
templates选择 Spring MVC Project
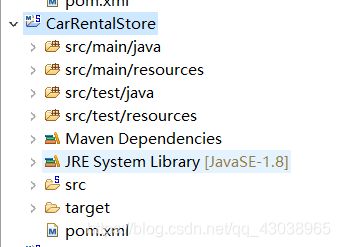
创建完成如下图所示
2.修改pom.xml文件
	4.0.0
	com.my
	rental
	CarRentalStore
	war
	1.0.0-BUILD-SNAPSHOT

		1.8
		4.3.5.RELEASE
		1.6.10
		1.6.6

		5.1.47


			org.mybatis.generator
			mybatis-generator-core
			1.3.5


			mysql
			mysql-connector-java
			${mysql-driver.version}


			commons-dbcp
			commons-dbcp
			1.2.2


			commons-fileupload
			commons-fileupload
			1.3.1


			commons-io
			commons-io
			2.4


			commons-codec
			commons-codec
			1.9


			org.mybatis
			mybatis
			3.4.5


			org.mybatis
			mybatis-spring
			1.3.0


			org.springframework.batch
			spring-batch-infrastructure
			3.0.7.RELEASE


			com.github.pagehelper
			pagehelper
			4.1.6


			com.github.jsqlparser
			jsqlparser
			0.9.5


			org.springframework
			spring-core
			${org.springframework-version}


			org.springframework
			spring-web
			${org.springframework-version}


			org.springframework
			spring-oxm
			${org.springframework-version}


			org.springframework
			spring-tx
			${org.springframework-version}


			org.springframework
			spring-jdbc
			${org.springframework-version}


			org.springframework
			spring-webmvc
			${org.springframework-version}


			org.springframework
			spring-context
			${org.springframework-version}


			org.springframework
			spring-context-support
			${org.springframework-version}


			org.springframework
			spring-aop
			${org.springframework-version}


			org.springframework
			spring-test
			${org.springframework-version}


			com.alibaba
			fastjson
			1.1.41


			org.codehaus.jackson
			jackson-mapper-asl
			1.9.13


			com.fasterxml.jackson.core
			jackson-core
			2.8.0


			com.fasterxml.jackson.core
			jackson-databind
			2.8.0


			org.aspectj
			aspectjrt
			${org.aspectj-version}


			org.slf4j
			slf4j-api
			${org.slf4j-version}


			org.slf4j
			jcl-over-slf4j
			${org.slf4j-version}
			runtime


			org.slf4j
			slf4j-log4j12
			${org.slf4j-version}
			runtime


			log4j
			log4j
			1.2.15


					javax.mail
					mail


					javax.jms
					jms


					com.sun.jdmk
					jmxtools


					com.sun.jmx
					jmxri


			runtime


			javax.inject
			javax.inject
			1


			javax.servlet
			servlet-api
			3.0-alpha-1
			provided


			javax.servlet.jsp
			jsp-api
			2.2
			provided


			javax.servlet
			jstl
			1.2


			junit
			junit
			4.7
			test


        io.netty
        netty-all
        4.1.6.Final


				maven-eclipse-plugin
				2.9


						org.springframework.ide.eclipse.core.springnature


						org.springframework.ide.eclipse.core.springbuilder

					true
					true


				org.apache.maven.plugins
				maven-compiler-plugin
				2.5.1

					1.8
					1.8
					-Xlint:all
					true
					true


				org.codehaus.mojo
				exec-maven-plugin
				1.2.1

					org.test.int1.Main


				org.mybatis.generator
				mybatis-generator-maven-plugin
				1.3.5


						mysql
						mysql-connector-java
						${mysql-driver.version}


					${basedir}/src/main/resources/generatorConfig.xml
					true
3.修改spring以及springMVC的配置文件
servlet-context.xml
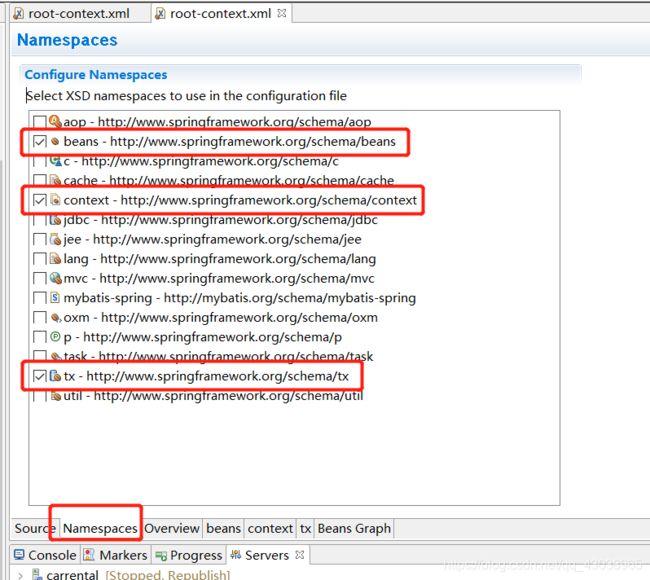
root-context.xml
在这个配置文件的Namespace中勾选如下选项
							dialect=mysql
							reasonable=true
4.添加配置文件
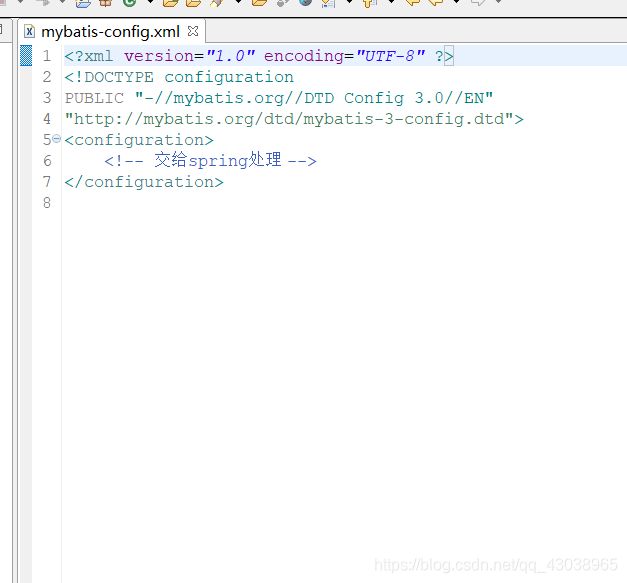
mybatis-config.xml (关于mybatis,这个配置文件内容为空,因为关于mybatis的配置已经交给spring管理)
jdbc.properties (关于数据库连接)
jdbc.driverClassName=com.mysql.jdbc.Driver
jdbc.url=jdbc:mysql://127.0.0.1:3306/cartest?useUnicode=true&characterEncoding=utf8
jdbc.username=root
jdbc.password=root
maxActive=50
maxIdle=20
maxWait=60000
generatorConfig.xml(关于反向生成)
5.反向生成
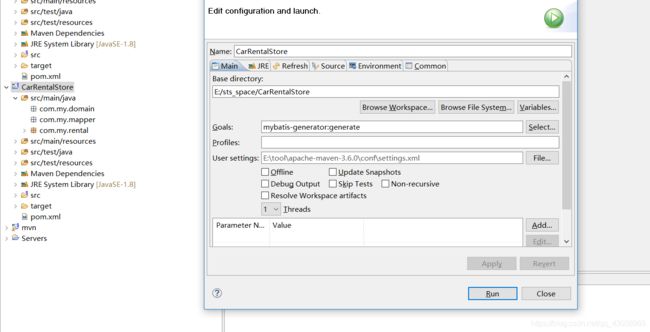
选中项目,右键 run as --> maven
goals :mybatis-generator:generate
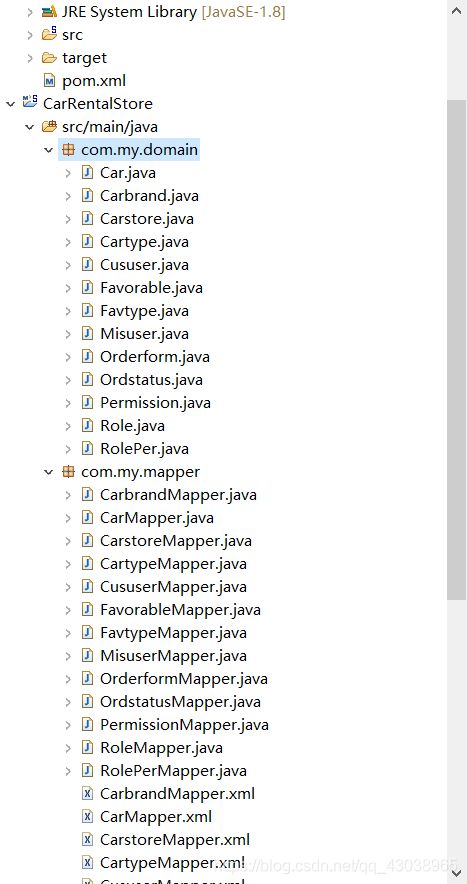
运行之后,生成的实体类及mapper如下图
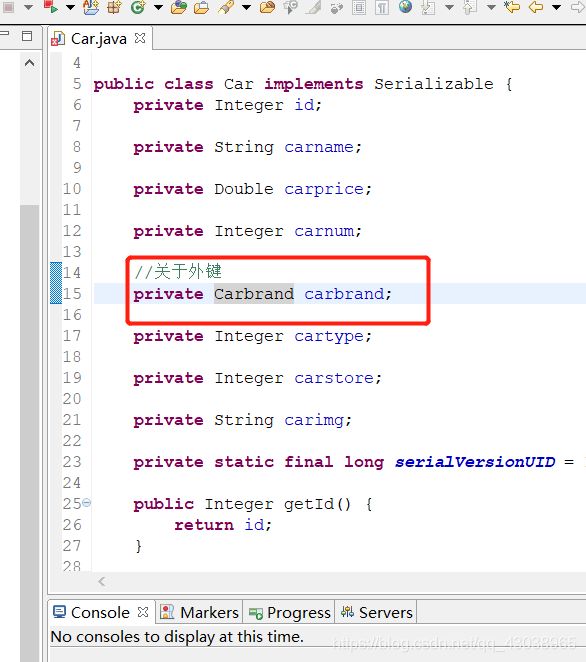
6.修改实体类中关于外键的类型
数据库设计中,外键设置的是int类型,在java类中,外键字段要改成对象类型
7.修改mapper.xml中的相关外键配置
举出其中一个例子,注意相关外键的转换,以及外键表中的外键
id, favType, favCar, favPrice
delete from favorable
where id = #{id,jdbcType=INTEGER}
insert into favorable (id, favType, favCar,
favPrice)
values (#{id,jdbcType=INTEGER}, #{favtype.id,jdbcType=INTEGER}, #{favcar.id,jdbcType=INTEGER},
#{favprice,jdbcType=DOUBLE})
insert into favorable
id,
favType,
favCar,
favPrice,
#{id,jdbcType=INTEGER},
#{favtype.id,jdbcType=INTEGER},
#{favcar.id,jdbcType=INTEGER},
#{favprice.id,jdbcType=DOUBLE},
update favorable
favType = #{favtype.id,jdbcType=INTEGER},
favCar = #{favcar.id,jdbcType=INTEGER},
favPrice = #{favprice,jdbcType=DOUBLE},
where id = #{id,jdbcType=INTEGER}
update favorable
set favType = #{favtype.id,jdbcType=INTEGER},
favCar = #{favcar.id,jdbcType=INTEGER},
favPrice = #{favprice,jdbcType=DOUBLE}
where id = #{id,jdbcType=INTEGER}
8.在mapper.java中添加自定义方法以及注释,在mapper.xml中添加对应sql
package com.my.mapper;

import java.util.List;

import org.springframework.stereotype.Repository;

import com.my.domain.Car;

//@Repository注解的作用:被作为持久层操作(数据库)的bean来使用

@Repository("CarMapper")
public interface CarMapper {

    //自定义方法,在mapper.xml中要有相对应的sql
	List findAll();

    int deleteByPrimaryKey(Integer id);

    int insert(Car record);

    int insertSelective(Car record);

    Car selectByPrimaryKey(Integer id);

    int updateByPrimaryKeySelective(Car record);

    int updateByPrimaryKey(Car record);
}
9.编写service
package com.my.service;

import java.util.List;

import org.springframework.beans.factory.annotation.Autowired;
import org.springframework.beans.factory.annotation.Qualifier;
import org.springframework.stereotype.Service;
import org.springframework.transaction.annotation.Propagation;
import org.springframework.transaction.annotation.Transactional;

import com.my.domain.Car;
import com.my.mapper.CarMapper;

//@Service的作用:业务逻辑层注解,这个注解只是标注该类处于业务逻辑层
@Service("CarService")
public class CarService {

	/*
	 * @Autowired顾名思义,就是自动装配,其作用是为了消除代码Java
	 *           代码里面的getter/setter与bean属性中的property。
	 *           当然,getter看个人需求,如果私有属性需要对外提供的话,应当予以保留。
	 *
	 *  简单来说:@Autowired 自动装配
	 *           @Qualifier("") 按名称装配
	 */
	@Autowired@Qualifier("CarMapper")
	private CarMapper carMapper;

    //@Transactional表示事物
	@Transactional(readOnly=true,propagation=Propagation.REQUIRED)
	public List findAll(){
		return this.carMapper.findAll();
	}

	public CarMapper getCarMapper() {
		return carMapper;
	}

	public void setCarMapper(CarMapper carMapper) {
		this.carMapper = carMapper;
	}

}
9.编写 controller
package com.my.controller;

import java.util.List;

import org.springframework.beans.factory.annotation.Autowired;
import org.springframework.beans.factory.annotation.Qualifier;
import org.springframework.stereotype.Controller;
import org.springframework.ui.Model;
import org.springframework.web.bind.annotation.RequestMapping;

import com.my.domain.Car;
import com.my.service.CarService;

/*
 * @Controller : spring-mvc的注解,具有将请求进行转发,重定向的功能。
 * @RequestMapping: 一个用来处理请求地址映射的注解,可用于类或者方法上。用于类上,表示类中的所有响应请求的方法都是以该地址作为父路径。
 */
@Controller("CarController")
@RequestMapping("/car")
public class CarController {

	@Autowired@Qualifier("CarService")
	private CarService carService;
	@RequestMapping("findAll")
	public String findAll(Model model){
		List carList = this.carService.findAll();
		model.addAttribute("carList", carList);

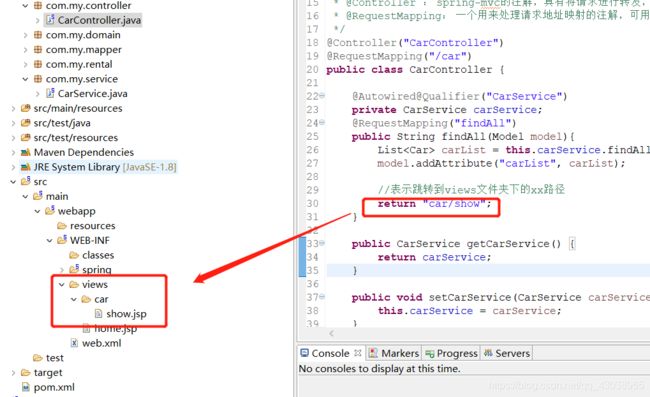
		//表示跳转到views文件夹下的xx路径
		return "car/show";
	}

	public CarService getCarService() {
		return carService;
	}

	public void setCarService(CarService carService) {
		this.carService = carService;
	}

}
10.编写jsp页面
<%@ page language="java" contentType="text/html; charset=UTF-8"
    pageEncoding="UTF-8"%>
    <%@ taglib prefix="c" uri="http://java.sun.com/jsp/jstl/core" %>


Insert title here


	${car.carname }------${car.carprice }

	${car.carnum }------${car.carimg }

	${car.carbrand.brandname }------${car.cartype.typename }

	${car.carstore.storename }------${car.carstore.storetel }

	${car.carstore.storelocation }------${car.carstore.storebushour }
11.启动服务,在浏览器输入:http://localhost:8080/rental/car/findAll
完成一个简易的ssm小项目
