- MongoDB复杂查询 聚合框架
巴里巴气
MongoDB知识记录mongodb数据库
前言前面已经对MongoDB基础的增删改查进行了分享,在增删改方面基本已经够用了,但是查询方面是远远不够的,find方法只能传入一些查询条件。涉及到稍微复杂点的查询就无法实现了,如分组、排序、映射(起别名)等这些操作的时候就没有办法实现。所以我接下来给同志们分享专一用于MongoDB复杂查询的框架-----聚合框架注意:文档和JSON对象基本上是一个意思,我会在解释的时候说是JSON对象,便于理解
- Filter快速入门 Java web
撰卢
java前端hivespringboot
文章目录Filter快速入门登录演示Filter快速入门定义Filter:定义一个类,是实现Filter接口,并重写所有方法配置Filter:Filter类上加上==@WebFilter==注解,配置拦截资源的路径。引导类加上==@ServletComponentScan==开启Servlet组件支持(也就是在springboot的启动类上面加上这个注释)相关代码importjavax.servl
- linux + 宝塔面板 部署 django网站 启动方式:uwsgi 和gunicorn如何选择 ?
启动方式:uwsgi和gunicorn如何选择?项目uWSGIGunicorn协议uWSGI协议(可用HTTP/socket)HTTP协议启动方式命令或.ini配置文件命令参数或systemd配置兼容框架支持WSGI、uWSGI、FastCGI等仅支持WSGI性能高性能、极可调高性能、默认参数也够用配置复杂度❌比较复杂✅配置简单社区活跃⭐停滞不前,主作者不活跃⭐⭐活跃,现代化持续维护热部署支持✅支
- 养老院管理系统基于SpringBoot的养老院管理系统系统设计与实现(源码+论文+部署讲解等)
博主介绍:✌全网粉丝60W+,csdn特邀作者、Java领域优质创作者、csdn/掘金/哔哩哔哩/知乎/道客/小红书等平台优质作者,计算机毕设实战导师,目前专注于大学生项目实战开发,讲解,毕业答疑辅导,欢迎高校老师/同行前辈交流合作✌技术栈范围:SpringBoot、Vue、SSM、Jsp、HLMT、Nodejs、Python、爬虫、数据可视化、小程序、安卓app、大数据、物联网、机器学习、单片机
- Spring04:Spring MVC
dfraetaem
Springspringmvcjava后端
一、SpringMVC核心解析SpringMVC是基于Java实现MVC模型的轻量级Web框架,其核心优势在于简化Web开发、灵活性强和与Spring生态无缝集成。通过分层设计,它将应用分为:Controller层:处理请求和响应Service层:业务逻辑处理Dao层:数据持久化操作分层架构示例(SpringBoot+MyBatis)1.Dao层(数据访问层)//UserDao.java(接口)@
- 从 Spring Boot 2.x 到 Spring Boot 3.x:全面对比与快速上手指南
超级小忍
SpringBootspringboot后端java
一、前言SpringBoot自诞生以来,凭借其“约定优于配置”的理念、开箱即用的设计和强大的生态支持,迅速成为Java开发领域的主流框架。随着Java语言的持续演进和开发者需求的提升,SpringBoot也在不断升级。SpringBoot3.x是一次重大版本升级,不仅带来了对现代Java特性的全面支持,还对底层架构、依赖管理和性能进行了深度优化。本文将从以下几个方面,详细对比SpringBoot2
- Spring AI + MCP Client 配置与使用详解
超级小忍
SpringAIspring人工智能java
前言随着大模型技术的快速发展,ModelCoordinationProtocol(MCP)逐渐成为连接本地系统和远程AI服务的重要桥梁。SpringAI是Spring官方推出的AI开发框架,支持多种语言模型接口,而MCPClient则是其集成远程推理能力的核心组件之一。本文将详细介绍如何在SpringBoot项目中配置和使用SpringAI的MCPClient,包括环境准备、依赖引入、配置方式、代
- 《网络安全法》在工控领域的实操指南:从责任到应对的全场景解析
黑客思维者
法规解读工业控制系统网络安全法网络空间安全系统安全
目录摘要一、工控系统中《网络安全法》的责任划分:谁来担责?1.法律框架下的责任划分原则2.典型场景的责任判定示例3.关键信息基础设施(CII)的特殊责任二、内部人员操作风险防控:《网络安全法》的人员管理要求1.制度性约束:责任到人与流程标准化2.技术化管控:权限最小化与操作可追溯3.常态化教育:培训考核与意识提升4.实操技术方案三、企业CEO的工控安全责任:《网络安全法》的顶层要求1.法律框架下的
- SpringbootSpringSecurityJWTredis框架搭建demo:多参数登录验证的安全解决方案
SpringbootSpringSecurityJWTredis框架搭建demo:多参数登录验证的安全解决方案去发现同类优质开源项目:https://gitcode.com/项目介绍在当今互联网安全日益重要的背景下,如何构建一个安全、高效的认证授权框架成为了开发者关注的焦点。SpringbootSpringSecurityJWTredis框架搭建demo正是为此而生,它集成了Springboot、
- 能说说MyBatis的工作原理吗?
java1234_小锋
javajava开发语言
大家好,我是锋哥。今天分享关于【能说说MyBatis的工作原理吗?】面试题。希望对大家有帮助;能说说MyBatis的工作原理吗?超硬核AI学习资料,现在永久免费了!MyBatis是一个用于简化数据库操作的持久层框架,它通过SQL映射技术,将Java对象和数据库之间的关系映射起来。MyBatis的工作原理可以从以下几个方面来解析:1.配置文件的加载MyBatis通过加载配置文件来初始化框架。配置文件
- Java List 集合详解:从基础到实战,掌握 Java 列表操作全貌
大葱白菜
java合集java开发语言后端学习个人开发
作为一名Java开发工程师,你一定在项目中频繁使用过List集合。它是Java集合框架中最常用、最灵活的数据结构之一。无论是从数据库查询出的数据,还是前端传递的参数列表,List都是处理这些数据的首选结构。本文将带你全面掌握:List接口的核心方法与特性常见实现类(如ArrayList、LinkedList、Vector、CopyOnWriteArrayList)List的遍历、增删改查、排序、线
- Java 常用 API 详解:掌握核心类库,提升开发效率
大葱白菜
java合集开发语言java后端学习个人开发
作为一名Java开发工程师,你每天都在与各种Java标准库打交道。熟练掌握Java中的常用API是提高代码质量、提升开发效率的关键技能之一。本文将带你全面了解Java开发中最常用的API类和接口,包括:java.lang包中的核心类(如String,Object,Math,System)集合框架(Collection,List,Set,Map)多线程相关类(Thread,Runnable,Exec
- iOS之BLE蓝牙SDK开发个人总结(基础篇)
大灰狼ios
最近一段时间一直在做公司的BLE蓝牙SDK,sdk主要负责外设和手机的连接以及数据通信。过程中遇到了一些比较有价值的问题,现在总结记录下。蓝牙开发使用系统框架#import使用[[CBCentralManageralloc]initWithDelegate:selfqueue:nil]初始化CBCentralManager对象。(设置CBCentralManagerDelegate为self,ni
- 这么简单的从零到一做HTML 网页,你确定不来看看吗?
paid槮
html服务器前端
HTML网页的介绍HTML(HypertextMarkupLanguage,超文本标记语言)是一种用于创建网页的标准标记语言,是一种与Python不同的编程语言。网页文件的扩展名通常为,html或.htm,这两种扩展名都可使用,并不会影响文件内容简单的HTML网页框架每一个HTML网页都包含一个基础框架,其他的内容都是在基础框架内进行扩充的。示例代码:这里是标题在这里填入正文这是一个较为基础的HT
- Java实习模拟面试之创玖科技:前后端交互、数据库、Spring全家桶、性能优化与Linux实战
培风图南以星河揽胜
java面试java面试科技
关键词:JavaScript、JQuery、Ajax、Node.js、MySQL、Oracle、Spring、SpringMVC、SpringBoot、MyBatis、Tomcat、Redis、Nginx、Linux、Git、SAAS系统开发一、面试开场:自我介绍面试官提问:请做个自我介绍,重点突出你的技术栈和项目经验。候选人回答:您好,我是一名计算机科学与技术专业的应届生,具备扎实的Java基础
- Java与机器学习的邂逅:Weka框架入门指南
墨夶
Java学习资料1java机器学习数据挖掘
在这个数据驱动的时代,机器学习已经成为各行业创新和优化的关键技术。而Java,作为一门成熟且广泛应用的编程语言,在企业级应用开发中占据着重要地位。将二者结合起来,利用Java实现机器学习算法,不仅可以充分发挥其强大的生态系统优势,还能为开发者提供一个高效、稳定的开发环境。今天,我们将带您走进Java与机器学习的世界,探索如何使用Weka这一著名的机器学习库来开启您的智能之旅。Weka简介及其优势什
- (C++)list,vector,set,map四种容器的应用——教务管理系统(测试版)(list基础教程)(vector基础教程)(set基础教程)(map基础教程)(STL库教程)
双叶836
STLC++C++基础教学C++项目c++list开发语言数据结构c语言
目录源代码:代码详解:第1步:搭建基础框架和数据结构目标:定义数据结构和全局容器练习任务:第2步:实现学生管理功能(使用map)目标:添加学生和显示学生列表练习任务:第3步:实现课程管理功能(使用vector)目标:添加课程和显示课程列表练习任务:第4步:实现选课功能(使用list)目标:学生选课和退课功能练习任务:主函数:多说一点(重点代码解释):一.list>enrollments;代码详解1
- Python 2和Python 3的区别?
山禾家的猫
Python社区,有这么个怪问题:“学Python到底是学2还是学3?”这个问题就像月经一样每隔断时间就出现在你面前,也成了很多初学者的选择困惑,这个问题的“始作俑者”当然是Python它爹,大家众说纷纭,有说Python2是主流,大公司都在用,你应该学2。也有说Python3才是未来主流,大多数第三方框架已基本支持Python3。个人看法是Python2还会存在很长一段时间(只要那些用Pytho
- 基于Springboot + vue3实现的图书管理系统
程序员南音
经验分享
项目描述本系统包含管理员、读者两个角色。管理员角色:用户管理:管理系统中所有用户的信息,包括添加、删除和修改用户。配置管理:管理系统配置参数,如轮播图的路径等。权限管理:分配和管理不同角色的权限。图书借阅管理:管理图书借阅信息,包括查看、修改、删除和审核借阅记录。轮播图管理:管理轮播图信息,包括新增、查看、修改和删除轮播图。座位信息管理:管理阅览室座位信息,包括新增、查看、修改、删除和查看评论。图
- 基于Springboot + vue3实现的学生选课系统
程序员南音
经验分享
项目描述本系统包含管理员、教师、学生三个角色。管理员角色:用户管理:管理系统中所有用户的信息,包括添加、删除和修改用户。配置管理:管理系统配置参数,如上传图片的路径等。权限管理:分配和管理不同角色的权限。课程信息管理:管理课程信息,包括查看、修改和删除课程信息。学生管理:管理学生信息,包括新增、查看、修改和删除学生信息。轮播图管理:管理轮播图信息,包括新增、查看、修改和删除轮播图。教师管理:管理教
- 接口测试框架3之httprunnerV3入门以及HttpRunner安装详解
吃喝玩乐秀起来
#接口测试接口
这里写目录标题一、HttpRunner简介二、HtttpRunner安装详解1.环境准备2.脚手架生成项目三、幕布登录的演练1.抓包2.脚本生成一、HttpRunner简介参考文案:https://mubu.com/doc/2vXRWPx5i3c密码:hogwarts1.为什么要开发HttpRunner(1).工具多而且杂接口测试工具,性能测试工具(2).学习成本高(3).团队协作难风格迥异,整合
- 算力网异构协同与能效优化驱动工业物联及智慧民生实践
内容概要算力网络作为数字基础设施的核心载体,正通过异构协同架构与能效优化框架的深度融合,构建起支撑工业物联网与智慧民生应用的技术底座。随着边缘计算节点的快速部署与模型压缩技术的突破性发展,工业场景中的设备健康检测与实时故障分析已实现毫秒级响应,典型应用场景包括产线异常识别、设备寿命预测等关键领域。与此同时,数据预处理技术的迭代升级有效缓解了工业传感器数据维度爆炸带来的算力压力,通过特征提取与噪声过
- 新闻资讯|基于springboot的新闻资讯系统设计与实现(附项目源码+论文+数据库)
code.song
springboot数据库后端
私信或留言即免费送开题报告和任务书(可指定任意题目)目录一、摘要二、相关技术三、系统设计四、数据库设计五、核心代码六、论文参考七、源码获取一、摘要传统信息的管理大部分依赖于管理人员的手工登记与管理,然而,随着近些年信息技术的迅猛发展,让许多比较老套的信息管理模式进行了更新迭代,文章信息因为其管理内容繁杂,管理数量繁多导致手工进行处理不能满足广大用户的需求,因此就应运而生出相应的新闻资讯系统。本新闻
- 华为MetaERP实施 业务访谈结果分析和总结的模板或案例参考
anpeng2025
Oracle华为MetaERPOracleERP华为metaerp数据库oracleerp华为MetaERPerp实施erp案例
华为MetaERP实施业务访谈结果分析和总结的模板或案例参考在MetaERP实施中,业务访谈结果的分析和总结需要结合系统特性(如国产化适配、与Oracle的差异)和企业实际业务需求。以下是经过行业实践验证的模板框架和案例参考,帮助Oracle顾问快速落地:一、业务访谈结果分析模板框架1.《业务需求清单模板》(Excel/Notion)需求编号所属模块需求描述需求类型(功能/痛点/特殊场景)优先级(
- C++ | 玩转点云:CloudCompare & PCL原生开发核心指南与示例分享
河工点云智绘WangG
点云深处CloudCompare&PCL开发c++开发语言
还在为点云处理的效率瓶颈和功能限制发愁吗?面对点云处理个性需求,是否让你感到束手束脚?调试困难、性能受限、定制化需求难以满足...本次分享将带你深入核心,走进点云深处,揭秘如何直接运用C++进行CloudCompare&PCL的原生集成开发。掌握核心步骤,规避常见陷阱,并附实用开发示例源码。助你:效率飙升:直达底层,性能最大化!灵活无限:自由定制算法流程,深度集成业务逻辑!掌控全局:彻底理解框架机
- Java集合框架源码解读(1)——ArrayList、LinkedList和Vector
java.util.List接口是JavaCollectionsFramework的一个重要组成部分,List接口的架构图如下:本文将通过剖析List接口的三个实现类——ArrayList、LinkedList和Vector的源码,带你走近List的世界。ArrayListArrayList是List接口可调整数组大小的实现。实现所有可选列表操作,并允许放入包括空值在内的所有元素。每个ArrayL
- springboot注册servlet
hie98894
springbootservlethive
在SpringBoot应用中,虽然SpringMVC已经提供了强大的功能来处理HTTP请求,但在某些情况下,我们可能仍需要直接注册和使用Servlet。本文将详细介绍如何在SpringBoot中注册Servlet。1.什么是Servlet?Servlet是JavaEE中的一种服务器端组件,用于处理HTTP请求和生成响应。Servlet最常见的用途是创建动态Web内容,例如表单处理和数据库查询结果的
- Gin框架路由
TZX_0710
介绍Gin是一个golang的微框架,封装比较优雅,API友好,源码注释比较明确,具有快速灵活,容错方便等特点对于golang而言,web框架的依赖要远比Python,Java之类的要小。自身的net/http足够简单,性能也非常不错借助框架开发,不仅可以省去很多常用的封装带来的时间,也有助于团队的编码风格和形成规范安装1.安装Gingoget-ugithub.com/gin-gonic/gin2
- 大公司生产环境是不是都用jdk 17, 而不能用jdk 18
yzpyzp
javagradle
deepseek回答:大公司生产环境中通常优先选择JDK17而非JDK18,主要原因如下:1.长期支持(LTS)版本是企业首选JDK17是官方长期支持版本(LTS),维护周期长达8年(至2029年),提供持续的安全补丁和稳定性更新45。而JDK18是非LTS版本,仅提供6个月的技术支持,到期后需强制升级,无法满足企业对生产环境长期稳定性的需求46。2.兼容性与生态适配更成熟框架支持
- 解决SpringBoot 连接数据库失败,报错Error querying database.
在SpringBoot项目中,想连接数据库查询数据时,发现页面报出“WhitelabelErrorPageThelastpacketsentsuccessfullytotheserverwas0millisecondsago.Thedriverhasnotreceivedanypacketsfromtheserver…”的错误,大致意思是:在连接数据库时出现意外,导致无法连接。出现上述情况,极大可
- 遍历dom 并且存储(将每一层的DOM元素存在数组中)
换个号韩国红果果
JavaScripthtml
数组从0开始!!
var a=[],i=0;
for(var j=0;j<30;j++){
a[j]=[];//数组里套数组,且第i层存储在第a[i]中
}
function walkDOM(n){
do{
if(n.nodeType!==3)//筛选去除#text类型
a[i].push(n);
//con
- Android+Jquery Mobile学习系列(9)-总结和代码分享
白糖_
JQuery Mobile
目录导航
经过一个多月的边学习边练手,学会了Android基于Web开发的毛皮,其实开发过程中用Android原生API不是很多,更多的是HTML/Javascript/Css。
个人觉得基于WebView的Jquery Mobile开发有以下优点:
1、对于刚从Java Web转型过来的同学非常适合,只要懂得HTML开发就可以上手做事。
2、jquerym
- impala参考资料
dayutianfei
impala
记录一些有用的Impala资料
1. 入门资料
>>官网翻译:
http://my.oschina.net/weiqingbin/blog?catalog=423691
2. 实用进阶
>>代码&架构分析:
Impala/Hive现状分析与前景展望:http
- JAVA 静态变量与非静态变量初始化顺序之新解
周凡杨
java静态非静态顺序
今天和同事争论一问题,关于静态变量与非静态变量的初始化顺序,谁先谁后,最终想整理出来!测试代码:
import java.util.Map;
public class T {
public static T t = new T();
private Map map = new HashMap();
public T(){
System.out.println(&quo
- 跳出iframe返回外层页面
g21121
iframe
在web开发过程中难免要用到iframe,但当连接超时或跳转到公共页面时就会出现超时页面显示在iframe中,这时我们就需要跳出这个iframe到达一个公共页面去。
首先跳转到一个中间页,这个页面用于判断是否在iframe中,在页面加载的过程中调用如下代码:
<script type="text/javascript">
//<!--
function
- JAVA多线程监听JMS、MQ队列
510888780
java多线程
背景:消息队列中有非常多的消息需要处理,并且监听器onMessage()方法中的业务逻辑也相对比较复杂,为了加快队列消息的读取、处理速度。可以通过加快读取速度和加快处理速度来考虑。因此从这两个方面都使用多线程来处理。对于消息处理的业务处理逻辑用线程池来做。对于加快消息监听读取速度可以使用1.使用多个监听器监听一个队列;2.使用一个监听器开启多线程监听。
对于上面提到的方法2使用一个监听器开启多线
- 第一个SpringMvc例子
布衣凌宇
spring mvc
第一步:导入需要的包;
第二步:配置web.xml文件
<?xml version="1.0" encoding="UTF-8"?>
<web-app version="2.5"
xmlns="http://java.sun.com/xml/ns/javaee"
xmlns:xsi=
- 我的spring学习笔记15-容器扩展点之PropertyOverrideConfigurer
aijuans
Spring3
PropertyOverrideConfigurer类似于PropertyPlaceholderConfigurer,但是与后者相比,前者对于bean属性可以有缺省值或者根本没有值。也就是说如果properties文件中没有某个bean属性的内容,那么将使用上下文(配置的xml文件)中相应定义的值。如果properties文件中有bean属性的内容,那么就用properties文件中的值来代替上下
- 通过XSD验证XML
antlove
xmlschemaxsdvalidationSchemaFactory
1. XmlValidation.java
package xml.validation;
import java.io.InputStream;
import javax.xml.XMLConstants;
import javax.xml.transform.stream.StreamSource;
import javax.xml.validation.Schem
- 文本流与字符集
百合不是茶
PrintWrite()的使用字符集名字 别名获取
文本数据的输入输出;
输入;数据流,缓冲流
输出;介绍向文本打印格式化的输出PrintWrite();
package 文本流;
import java.io.FileNotFound
- ibatis模糊查询sqlmap-mapping-**.xml配置
bijian1013
ibatis
正常我们写ibatis的sqlmap-mapping-*.xml文件时,传入的参数都用##标识,如下所示:
<resultMap id="personInfo" class="com.bijian.study.dto.PersonDTO">
<res
- java jvm常用命令工具——jdb命令(The Java Debugger)
bijian1013
javajvmjdb
用来对core文件和正在运行的Java进程进行实时地调试,里面包含了丰富的命令帮助您进行调试,它的功能和Sun studio里面所带的dbx非常相似,但 jdb是专门用来针对Java应用程序的。
现在应该说日常的开发中很少用到JDB了,因为现在的IDE已经帮我们封装好了,如使用ECLI
- 【Spring框架二】Spring常用注解之Component、Repository、Service和Controller注解
bit1129
controller
在Spring常用注解第一步部分【Spring框架一】Spring常用注解之Autowired和Resource注解(http://bit1129.iteye.com/blog/2114084)中介绍了Autowired和Resource两个注解的功能,它们用于将依赖根据名称或者类型进行自动的注入,这简化了在XML中,依赖注入部分的XML的编写,但是UserDao和UserService两个bea
- cxf wsdl2java生成代码super出错,构造函数不匹配
bitray
super
由于过去对于soap协议的cxf接触的不是很多,所以遇到了也是迷糊了一会.后来经过查找资料才得以解决. 初始原因一般是由于jaxws2.2规范和jdk6及以上不兼容导致的.所以要强制降为jaxws2.1进行编译生成.我们需要少量的修改:
我们原来的代码
wsdl2java com.test.xxx -client http://.....
修改后的代
- 动态页面正文部分中文乱码排障一例
ronin47
公司网站一部分动态页面,早先使用apache+resin的架构运行,考虑到高并发访问下的响应性能问题,在前不久逐步开始用nginx替换掉了apache。 不过随后发现了一个问题,随意进入某一有分页的网页,第一页是正常的(因为静态化过了);点“下一页”,出来的页面两边正常,中间部分的标题、关键字等也正常,唯独每个标题下的正文无法正常显示。 因为有做过系统调整,所以第一反应就是新上
- java-54- 调整数组顺序使奇数位于偶数前面
bylijinnan
java
import java.util.Arrays;
import java.util.Random;
import ljn.help.Helper;
public class OddBeforeEven {
/**
* Q 54 调整数组顺序使奇数位于偶数前面
* 输入一个整数数组,调整数组中数字的顺序,使得所有奇数位于数组的前半部分,所有偶数位于数组的后半
- 从100PV到1亿级PV网站架构演变
cfyme
网站架构
一个网站就像一个人,存在一个从小到大的过程。养一个网站和养一个人一样,不同时期需要不同的方法,不同的方法下有共同的原则。本文结合我自已14年网站人的经历记录一些架构演变中的体会。 1:积累是必不可少的
架构师不是一天练成的。
1999年,我作了一个个人主页,在学校内的虚拟空间,参加了一次主页大赛,几个DREAMWEAVER的页面,几个TABLE作布局,一个DB连接,几行PHP的代码嵌入在HTM
- [宇宙时代]宇宙时代的GIS是什么?
comsci
Gis
我们都知道一个事实,在行星内部的时候,因为地理信息的坐标都是相对固定的,所以我们获取一组GIS数据之后,就可以存储到硬盘中,长久使用。。。但是,请注意,这种经验在宇宙时代是不能够被继续使用的
宇宙是一个高维时空
- 详解create database命令
czmmiao
database
完整命令
CREATE DATABASE mynewdb USER SYS IDENTIFIED BY sys_password USER SYSTEM IDENTIFIED BY system_password LOGFILE GROUP 1 ('/u01/logs/my/redo01a.log','/u02/logs/m
- 几句不中听却不得不认可的话
datageek
1、人丑就该多读书。
2、你不快乐是因为:你可以像猪一样懒,却无法像只猪一样懒得心安理得。
3、如果你太在意别人的看法,那么你的生活将变成一件裤衩,别人放什么屁,你都得接着。
4、你的问题主要在于:读书不多而买书太多,读书太少又特爱思考,还他妈话痨。
5、与禽兽搏斗的三种结局:(1)、赢了,比禽兽还禽兽。(2)、输了,禽兽不如。(3)、平了,跟禽兽没两样。结论:选择正确的对手很重要。
6
- 1 14:00 PHP中的“syntax error, unexpected T_PAAMAYIM_NEKUDOTAYIM”错误
dcj3sjt126com
PHP
原文地址:http://www.kafka0102.com/2010/08/281.html
因为需要,今天晚些在本机使用PHP做些测试,PHP脚本依赖了一堆我也不清楚做什么用的库。结果一跑起来,就报出类似下面的错误:“Parse error: syntax error, unexpected T_PAAMAYIM_NEKUDOTAYIM in /home/kafka/test/
- xcode6 Auto layout and size classes
dcj3sjt126com
ios
官方GUI
https://developer.apple.com/library/ios/documentation/UserExperience/Conceptual/AutolayoutPG/Introduction/Introduction.html
iOS中使用自动布局(一)
http://www.cocoachina.com/ind
- 通过PreparedStatement批量执行sql语句【sql语句相同,值不同】
梦见x光
sql事务批量执行
比如说:我有一个List需要添加到数据库中,那么我该如何通过PreparedStatement来操作呢?
public void addCustomerByCommit(Connection conn , List<Customer> customerList)
{
String sql = "inseret into customer(id
- 程序员必知必会----linux常用命令之十【系统相关】
hanqunfeng
Linux常用命令
一.linux快捷键
Ctrl+C : 终止当前命令
Ctrl+S : 暂停屏幕输出
Ctrl+Q : 恢复屏幕输出
Ctrl+U : 删除当前行光标前的所有字符
Ctrl+Z : 挂起当前正在执行的进程
Ctrl+L : 清除终端屏幕,相当于clear
二.终端命令
clear : 清除终端屏幕
reset : 重置视窗,当屏幕编码混乱时使用
time com
- NGINX
IXHONG
nginx
pcre 编译安装 nginx
conf/vhost/test.conf
upstream admin {
server 127.0.0.1:8080;
}
server {
listen 80;
&
- 设计模式--工厂模式
kerryg
设计模式
工厂方式模式分为三种:
1、普通工厂模式:建立一个工厂类,对实现了同一个接口的一些类进行实例的创建。
2、多个工厂方法的模式:就是对普通工厂方法模式的改进,在普通工厂方法模式中,如果传递的字符串出错,则不能正确创建对象,而多个工厂方法模式就是提供多个工厂方法,分别创建对象。
3、静态工厂方法模式:就是将上面的多个工厂方法模式里的方法置为静态,
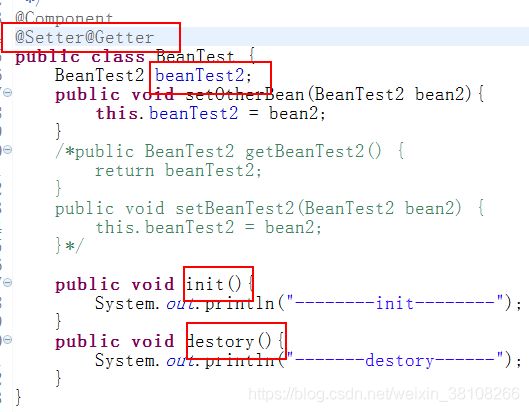
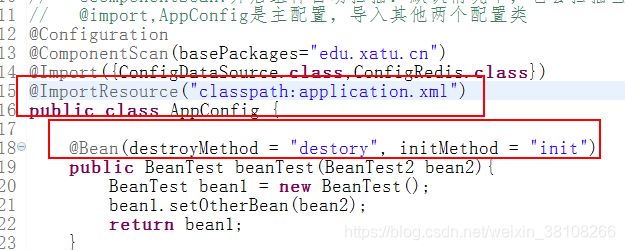
- Spring InitializingBean/init-method和DisposableBean/destroy-method
mx_xiehd
javaspringbeanxml
1.initializingBean/init-method
实现org.springframework.beans.factory.InitializingBean接口允许一个bean在它的所有必须属性被BeanFactory设置后,来执行初始化的工作,InitialzingBean仅仅指定了一个方法。
通常InitializingBean接口的使用是能够被避免的,(不鼓励使用,因为没有必要
- 解决Centos下vim粘贴内容格式混乱问题
qindongliang1922
centosvim
有时候,我们在向vim打开的一个xml,或者任意文件中,拷贝粘贴的代码时,格式莫名其毛的就混乱了,然后自己一个个再重新,把格式排列好,非常耗时,而且很不爽,那么有没有办法避免呢? 答案是肯定的,设置下缩进格式就可以了,非常简单: 在用户的根目录下 直接vi ~/.vimrc文件 然后将set pastetoggle=<F9> 写入这个文件中,保存退出,重新登录,
- netty大并发请求问题
tianzhihehe
netty
多线程并发使用同一个channel
java.nio.BufferOverflowException: null
at java.nio.HeapByteBuffer.put(HeapByteBuffer.java:183) ~[na:1.7.0_60-ea]
at java.nio.ByteBuffer.put(ByteBuffer.java:832) ~[na:1.7.0_60-ea]
- Hadoop NameNode单点问题解决方案之一 AvatarNode
wyz2009107220
NameNode
我们遇到的情况
Hadoop NameNode存在单点问题。这个问题会影响分布式平台24*7运行。先说说我们的情况吧。
我们的团队负责管理一个1200节点的集群(总大小12PB),目前是运行版本为Hadoop 0.20,transaction logs写入一个共享的NFS filer(注:NetApp NFS Filer)。
经常遇到需要中断服务的问题是给hadoop打补丁。 DataNod
