SpringCloud系列(七)config分布式配置中心的使用以及中文乱码解决方式
文章目录
- 了解Config分布式配置中心
- 为什么使用config分布式配置中心
- 简介
- 代码实现
- 中文乱码问题
- 乱码的原因
- 解决方式
- 测试
- 最终解决方式
了解Config分布式配置中心
为什么使用config分布式配置中心
在微服务中,每个功能模块其实都可以拆分成一个单独的服务实例,如果项目够大,必然会有很多服务单元,每个服务单元都有一份配置文件需要维护,这显得不太好维护,而且不方便协作开发。
为了使服务实例的配置文件统一管理化,Spring Cloud Config提供了一套解决方案,建立一个配置服务中心,每个服务单元从config server中获取具体的配置文件,它支持配置服务放在配置服务的内存中(即本地),也支持放在远程Git仓库中。
为了保证系统的稳定,配置服务端config server可以进行集群部署,即使某一个实例,因为某种原因不能提供服务,也还有其他的实例保证服务的继续进行。
简介

- 远程Git仓库:存储配置文件。
- ConfigServer:分布式配置管理中心,用于维护自己的git仓库信息。
- 本地Git仓库:在ConfigServer中,每次客户端请求获取配置信息时,都会从git仓库获取最新的配置到本地,然后本地读取并返回,远程无法获取时,使用本地仓库信息。
从上图可以看出, Config Server 巧妙地通过 git pull 将配置信息存于本地,起到了缓存的作用,即使当 Git 服务端无法访问的时候,依然可以取 Config Server 中的缓存内容进行使用。
代码实现

1)准备1个git仓库
这里使用的是 gitee

创建一个文件夹 properties,新建3个文件分别表示3种环境的配置文件,内容均为自定义,仅做测试用途
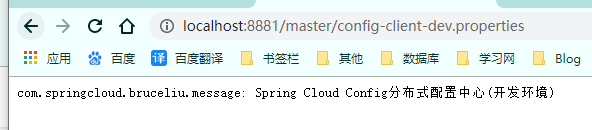
config-client-dev.properties的内容为:假设表示开发环境的配置文件
com.springcloud.bruceliu.message=Spring Cloud Config分布式配置中心(开发环境)
config-client-test.properties的内容为:假设表示测试环境的配置文件
com.springcloud.bruceliu.message=Spring Cloud Config分布式配置中心(测试环境)
config-client-prod.properties的内容为:假设表示生产环境的配置文件
com.springcloud.bruceliu.message=Spring Cloud Config分布式配置中心(生产环境)
2)新建两个工程
- springcloud-config-server-8881:config分布式配置中心-服务端
- springcloud-config-client-8882:客户端,具体的服务单元
3)引入依赖
server端:
<dependency>
    <groupId>org.springframework.cloudgroupId>
    <artifactId>spring-cloud-config-serverartifactId>
dependency>
client端:
<dependency>
    <groupId>org.springframework.cloudgroupId>
    <artifactId>spring-cloud-starter-configartifactId>
dependency>
4)书写配置
server端:application.properties
server.port=8881
spring.application.name=springcloud-config-server

# 配置中心git仓库地址
spring.cloud.config.server.git.uri=对应你的git仓库地址
# 配置中心git仓库路径
spring.cloud.config.server.git.search-paths=properties
# 访问git仓库的用户名(如果Git仓库为公开仓库,可以不填写用户名和密码,如果是私有仓库需要填写)
spring.cloud.config.server.git.username=对应你的github用户名
# 访问git仓库的密码
spring.cloud.config.server.git.password=对应你的github密码
# 配置git仓库的分支
spring.cloud.config.label=master
client端:新建 bootstrap.properties,注意不是 application.properties
server.port=8787
spring.application.name=springcloud-config-client

# 配置git远程仓库的分支
spring.cloud.config.label=master
# 配置服务中心地址(即config-server的地址)
spring.cloud.config.uri=http://localhost:8881/
# 配置环境
# dev为开发环境配置文件
# test为测试环境
# pro为正式环境
spring.cloud.config.profile=test
5)编写启动类
server端:
@SpringBootApplication
@EnableConfigServer     // 开启Spring Cloud Config的功能
public class ConfigServerMain {
    public static void main(String[] args) {
        System.out.println("Spring Cloud Config的服务端启动...8881");
        SpringApplication.run(ConfigServerMain.class, args);
    }
}
client端:
@SpringBootApplication
public class ConfigClientMain {
    public static void main(String[] args) {
        System.out.println("Spring Cloud Config的客户端启动...8882");
        SpringApplication.run(ConfigClientMain.class, args);
    }
}
6)编写客户端控制器
client端:准备一个控制器,用来测试客户端从配置服务中心获取配置文件中的内容
@RestController
public class MessageController {

    @Value("${com.springcloud.test.message}")
    private String message;

    @RequestMapping("/message")
    public String message() {
        System.out.println("从配置服务器拉取配置信息:" + message);
        return message;
    }
}
7)测试
在服务端,我们可以通过3种方式访问配置信息
http://localhost:8881/config-client/testhttp://localhost:8881/master/config-client-test.propertieshttp://localhost:8881/config-client-test.properties
访问 http://localhost:8881/config-client/test

访问 http://localhost:8881/master/config-client-test.properties

访问 http://localhost:8881/config-client-test.properties

测试客户端,访问 http://localhost:8882/message

中文乱码问题
经过之前的测试我们发现,配置中有中文的时候,会出现中文乱码问题,我们如何解决呢?
乱码的原因
spring 默认使用 org.springframework.boot.env.PropertiesPropertySourceLoader 来加载配置,底层是通过调用 Properties 的 load 方法,而load方法输入流的编码是 ISO 8859-1 ,所以会出现中文乱码问题
解决方式
- 自定义属性源加载器,实现 PropertySourceLoader 接口
/**
 *  乱码处理类,转换内置的编码ISO 8859-1 为 UTF-8 转码的工具类
 *  HttpClient工具类
 */
public class CustomPropertySourceLoader implements PropertySourceLoader {

    private static final Logger logger = LoggerFactory.getLogger(CustomPropertySourceLoader.class);

    @Override
    public String[] getFileExtensions() {
        return new String[]{"properties", "xml"};
    }

    @Override
    public List<PropertySource<?>> load(String name, Resource resource) throws IOException {
        Map<String, ?> properties = loadProperties(resource);
        if (properties.isEmpty()) {
            return Collections.emptyList();
        }
        return Collections
                .singletonList(new OriginTrackedMapPropertySource(name, properties));
    }

    private Map<String, ?> loadProperties(Resource resource) {
        Properties properties = new Properties();
        InputStream inputStream = null;
        try {
            inputStream = resource.getInputStream();
            properties.load(new InputStreamReader(inputStream, StandardCharsets.UTF_8));
            inputStream.close();
        } catch (IOException e) {
            logger.error("load inputstream failure...", e);
        } finally {
            if (inputStream != null) {
                try {
                    inputStream.close();
                } catch (IOException e) {
                    logger.error("close IO failure ....", e);
                }
            }
        }
        return (Map) properties;
    }
}
- 在 resources 文件夹下,创建
META-INF文件夹,再创建spring.factories文件
# 修改系统内置的编码
org.springframework.boot.env.PropertySourceLoader=com.fu.springcloud.encode.CustomPropertySourceLoader
测试
分别使用3种方式访问


我们发现,只有使用 http://localhost:8881/config-client/prod 这种方式才不会出现乱码问题
最终解决方式
在server端,application.properties文件中添加以下内容
spring.http.encoding.force=true
spring.http.encoding.charset=UTF-8
spring.http.encoding.enabled=true
server.tomcat.uri-encoding=UTF-8
再次访问,得到如下结果


至此,乱码问题已经完全解决了