Tensorflow objection detection api 物体检测模型 (三) 从识别的物体中抠出特定物体进行保存
在利用官方提供的Tensorflow objection detection api 进行物体检测时,会有很多物体被检测出来并且被框柱,而我的目标是只需要一个类别的物体,那么如何将这个特定的物体抠出来保存呢?下面我就介绍一下实现的方法及代码。
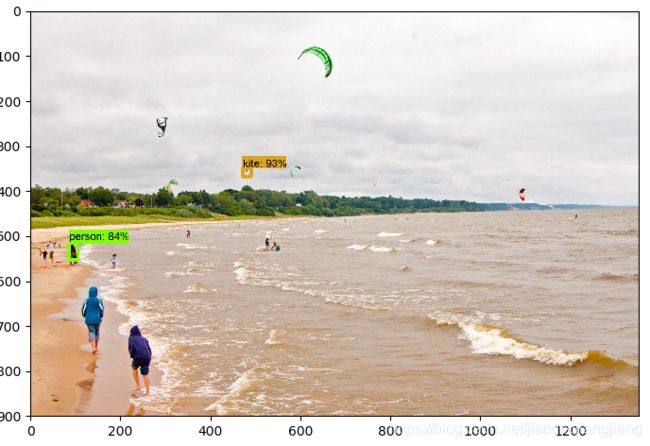
比如下面这张图,被识别的物体有person和kite,我们的目标就是只将识别的人保存下来.。
在做这件事之前,先了解几个参数。
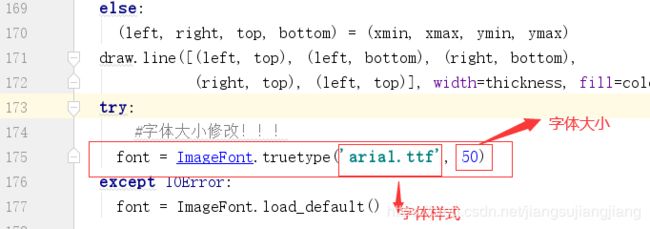
预测框中字体大小的调节:
在\models\research\object_detection\utils\visualization_utils.py脚本中的第174行
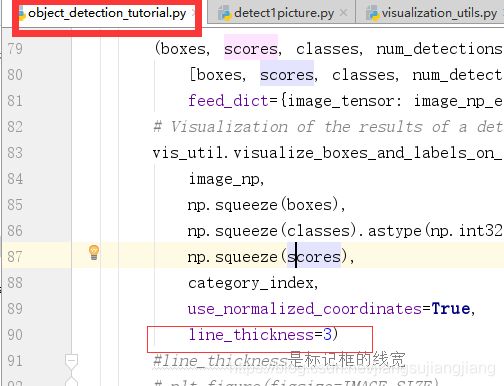
预测框线条大小的调节:
第一个参数: boxes:
官方解释:boxes: [N, max_detections, 4] float32 tensor of detection boxes.
boxes是[N, 4]的二维数字数组,[ymin, xmin, ymax, xmax]坐标采用[0,1]之间的标准化格式,如[3.70723009e-02 2.32388377e-02 8.62021029e-01 3.18440855e-01] 对应被检测到物体的矩形信息。由于是[0,1]之间的标准化格式,所以乘以图片的width和height就可以得到矩形框的实际大小。
print(boxes.shape())#(1, 100, 4)
print(boxes)

#结果如下:
(1, 100, 4)
[[[0.3893192  0.34821513 0.40933684 0.36334053]
  [0.57497    0.06333599 0.6149571  0.07912395]
  [0.67780834 0.07910287 0.83874995 0.12358559]
  [0.08469409 0.4369094  0.17420965 0.4994243 ]
  [0.07829238 0.24870682 0.40474242 0.42367953]
  [0.08469409 0.4369094  0.17420965 0.4994243 ]
  [0.36447126 0.00367826 0.9636777  0.14283133]
  [0.00455514 0.42866302 0.5063168  0.66165733]
  [0.1899012  0.32323682 0.47276065 0.46757388]
  ........................................
  [0.16059408 0.09260845 0.37784013 0.69468033]
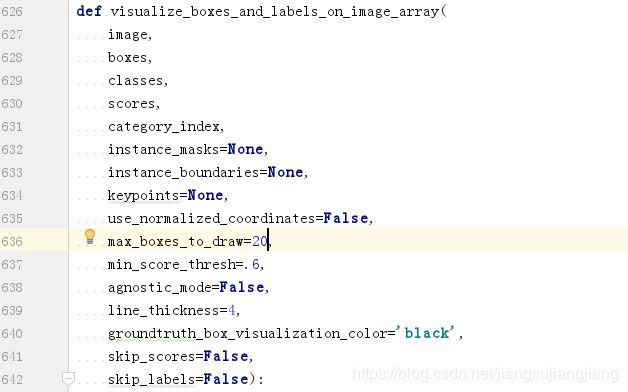
[0.67780834 0.07910287 0.83874995 0.12358559]]]在\models\research\object_detection\utils\visualization_utils.py脚本中的第441行、第321行以及第626行的
def visualize_boxes_and_labels_on_image_array( )函数中定义了在图像上绘制的最大框数max_boxes_to_draw=20;可视化的最小得分阈值min_score_thresh=0.2. 这些参数都可以根据需要修改。
第二个参数:scores
官方解释:[N, max_detections] float32 tensor of detection scores.也就每一个类别的得分,即第一张图中方框上的准确率,准确率越高,说明的识别的月准确。这个参数也是我们后面用来筛选准确率较高的图片并保存!
print(scores.shape)#(1, 100)
print(scores[0])
#结果如下:
(1, 100)
[0.93875515 0.84127855 0.7591658  0.75776994 0.7347159  0.684148
 0.67588985 0.5513825  0.4711365  0.3931518  0.33632508 0.3069961
 0.24474308 0.22087884 0.21740627 0.18724583 0.14487606 0.14073348
 0.12529987 0.11944038 0.11228915 0.1058783  0.10508012 0.10358863
 0.09706254 0.09606966 0.092462   0.09059567 0.08988662 0.08638509
 0.08533025 0.08479927 0.07896947 0.07789769 0.06845413 0.06676606
 0.06601568 0.06585614 0.06556205 0.06328295 0.05976014 0.05837037
 0.05783077 0.05537236 0.05462871 0.0541303  0.05412291 0.05366613
 0.05354046 0.05319369 0.05300185 0.05200623 0.05192403 0.05103641
 0.05066386 0.05059359 0.05018848 0.04931181 0.04908951 0.04885039
 0.04873611 0.04864275 0.04825088 0.04810014 0.04803155 0.04778313
 0.04749673 0.04726799 0.04725489 0.04702064 0.04521427 0.04470251
 0.04422237 0.04305996 0.0427505  0.04247401 0.04238234 0.04224031
 0.04195235 0.04171367 0.04144454 0.04127999 0.04076773 0.04066054
 0.04061816 0.04033176 0.04002104 0.03998641 0.03978477 0.03954526
 0.03952894 0.03924587 0.03909944 0.03906522 0.0390032  0.03876919
 0.03865767 0.03802054 0.0379996  0.03789736]
通过上面两行代码可以得到scores的shape是(1,100),scores[0]是检测的100个物体的每个得分,是按照递减的方式排列的,score[0][0]得分最高,scores[0][99]得分最低!
第三个参数:classes
官方解释:classes: [N, max_detections] int tensor of detection classes. Note that classes are 1-indexed.
print(classes)
print(classes[0])

#结果如下:
[[38.  1.  1. 38.  1.  1. 38. 38. 38.  1. 38.  1. 34. 38. 38.  1. 16.  1.
   1. 16. 38. 38. 38.  1. 38. 16. 38. 38.  1.  1.  1. 20. 38. 20.  1.  1.
  38. 38.  1. 38.  1. 38.  1. 20.  1.  1. 38. 38.  1. 20. 38.  1.  1.  1.
  38. 38.  1. 38. 38. 38. 38. 20. 38.  1. 38. 37.  1. 38. 38. 16. 38. 38.
  38. 38.  1. 38. 38.  1.  1. 38. 38. 38. 20. 38. 20.  1. 38. 38. 38.  1.
  38. 38. 38. 38. 38. 38.  1. 20. 38. 31.]]

[38.  1.  1. 38.  1.  1. 38. 38. 38.  1. 38.  1. 34. 38. 38.  1. 16.  1.
  1. 16. 38. 38. 38.  1. 38. 16. 38. 38.  1.  1.  1. 20. 38. 20.  1.  1.
 38. 38.  1. 38.  1. 38.  1. 20.  1.  1. 38. 38.  1. 20. 38.  1.  1.  1.
 38. 38.  1. 38. 38. 38. 38. 20. 38.  1. 38. 37.  1. 38. 38. 16. 38. 38.
 38. 38.  1. 38. 38.  1.  1. 38. 38. 38. 20. 38. 20.  1. 38. 38. 38.  1.
 38. 38. 38. 38. 38. 38.  1. 20. 38. 31.]
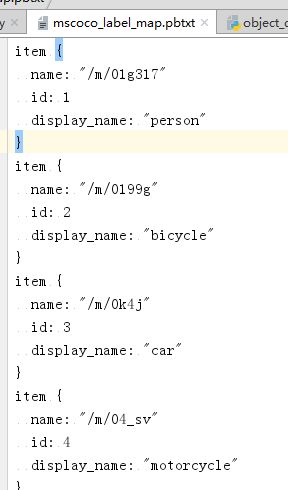
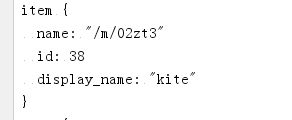
这里面的每一个数字都代表一个id,就是.pbtxt文件里的id,每一个id对应着一个类别。比如我用的是mscoco_label_map.pbtxt,这里面一共是90个类别,每个类别一个id,
你会发现class[0]的第一个数class[0][0]=38,对应的类别是kite,而且你也能发现它是得分最高的scores[0][0]=0.93875515
第二个数class[0][1]=1,对应的类别是person,它对应的scores[0][1]=0.84127855,依次类推。如果修改visualize_boxes_and_labels_on_image_array( )中的max_boxes_to_draw=2,那么只会框出得分最高的两个物体。
我现在贴出来完整的代码(这个代码是根据官方的object_detection_tutorial.py修改以后的,能够识别图片中的物体,并且将特定目标物体保存下来),此时你应该可以明白代码的意思了。
import numpy as np
import os
import six.moves.urllib as urllib
import sys
import tarfile
import tensorflow as tf
import zipfile

from collections import defaultdict
from io import StringIO
from matplotlib import pyplot as plt
from PIL import Image
import cv2

# This is needed since the notebook is stored in the object_detection folder.
sys.path.append("..")

#根据自己的目录做的修改,这样pycharm就不会提示找不到utils包了
from research.object_detection.utils import label_map_util
from research.object_detection.utils import visualization_utils as vis_util


"""设置模型对应的参数"""
PATH_TO_CKPT = r'D:\models\research\object_detection\ssd_mobilenet_v1_coco_11_06_2017\frozen_inference_graph.pb'
PATH_TO_LABELS = r'D:\models\research\object_detection\data\mscoco_label_map.pbtxt'
NUM_CLASSES = 90

"""将训练好的模型载入内存----无需修改"""
# Load a (frozen) Tensorflow model into memory.
detection_graph = tf.Graph()
with detection_graph.as_default():
    od_graph_def = tf.GraphDef()
    with tf.gfile.GFile(PATH_TO_CKPT, 'rb') as fid:
        serialized_graph = fid.read()
        od_graph_def.ParseFromString(serialized_graph)
        tf.import_graph_def(od_graph_def, name='')

"""将标签map载入----无需修改"""
# Loading label map
label_map = label_map_util.load_labelmap(PATH_TO_LABELS)
categories = label_map_util.convert_label_map_to_categories(label_map, max_num_classes=NUM_CLASSES,
                                                            use_display_name=True)
category_index = label_map_util.create_category_index(categories)

# Helper code
def load_image_into_numpy_array(image):
    (im_width, im_height) = image.size
    return np.array(image.getdata()).reshape(
        (im_height, im_width, 3)).astype(np.uint8)


"""测试图片----路径需要修改"""
PATH_TO_TEST_IMAGES_DIR = 'test_images'
TEST_IMAGE_PATHS = [os.path.join(PATH_TO_TEST_IMAGES_DIR, 'image{}.jpg'.format(i)) for i in range(4, 5)]
IMAGE_SIZE = (12, 8)

"""代码运行-----无需修改"""
with detection_graph.as_default():
    with tf.Session(graph=detection_graph) as sess:
        # Definite input and output Tensors for detection_graph
        image_tensor = detection_graph.get_tensor_by_name('image_tensor:0')
        # Each box represents a part of the image where a particular object was detected.
        detection_boxes = detection_graph.get_tensor_by_name('detection_boxes:0')
        # Each score represent how level of confidence for each of the objects.
        # Score is shown on the result image, together with the class label.
        detection_scores = detection_graph.get_tensor_by_name('detection_scores:0')
        detection_classes = detection_graph.get_tensor_by_name('detection_classes:0')
        num_detections = detection_graph.get_tensor_by_name('num_detections:0')
        #定义保存图片的序号,初始化为1
        index=1
        for image_path in TEST_IMAGE_PATHS:
            image = Image.open(image_path)
            # the array based representation of the image will be used later in order to prepare the
            # result image with boxes and labels on it.
            image_np = load_image_into_numpy_array(image)
            # Expand dimensions since the model expects images to have shape: [1, None, None, 3]
            image_np_expanded = np.expand_dims(image_np, axis=0)
            image_tensor = detection_graph.get_tensor_by_name('image_tensor:0')
            # Each box represents a part of the image where a particular object was detected.
            boxes = detection_graph.get_tensor_by_name('detection_boxes:0')
            # Each score represent how level of confidence for each of the objects.
            # Score is shown on the result image, together with the class label.
            scores = detection_graph.get_tensor_by_name('detection_scores:0')
            classes = detection_graph.get_tensor_by_name('detection_classes:0')
            num_detections = detection_graph.get_tensor_by_name('num_detections:0')
            # Actual detection.
            (boxes, scores, classes, num_detections) = sess.run(
                [boxes, scores, classes, num_detections],
                feed_dict={image_tensor: image_np_expanded})
            # Print the results of a detection.
            #print(boxes.shape)#(1, 100, 4)
            #print(boxes)
            # print(scores.shape)#(1, 100)
            # print(scores[0])
            #print(classes)
            #print(classes[0])
            # print(classes[0][0])
            # print(category_index)
            # print(num_detections)

            # Visualization of the results of a detection.
            vis_util.visualize_boxes_and_labels_on_image_array(
                image_np,
                np.squeeze(boxes),
                np.squeeze(classes).astype(np.int32),
                np.squeeze(scores),
                category_index,
                use_normalized_coordinates=True,
                line_thickness=8)
            plt.figure(figsize=IMAGE_SIZE)
            plt.imshow(image_np)
            plt.show()
            """下面是保存特定物体的图片"""
            width, height = image.size
            image_np_temp = image_np.copy()
            #print(width, height)
            for i in range(100):
                #如果该类id是1(也就是person)并且得分大于0.6的,获取它们的方框信息box
                if classes[0][i]==1 and scores[0][i] >0.6 :
                    box = np.squeeze(boxes)[i]
                    print("第%d次出现人"%index)
                    x_min_coord = int(box[0] * height)#获得实际的大小
                    y_min_coord = int(box[1] * width)
                    x_max_coord = int(box[2] * height)
                    y_max_coord = int(box[3] * width)
                    person_image = image_np_temp[x_min_coord:x_max_coord, y_min_coord:y_max_coord, :]
                    #定义保存的路径
                    cv2.imwrite(os.path.join(r'D:\models\dataset\saved', 'person'+str(index) + '.jpg'),person_image)
                    index += 1
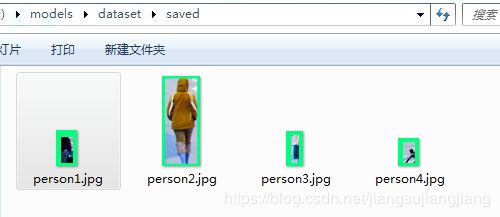
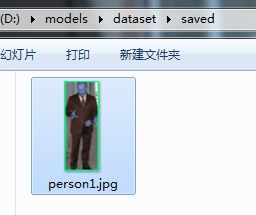
运行结果:
只有人被保存了下来
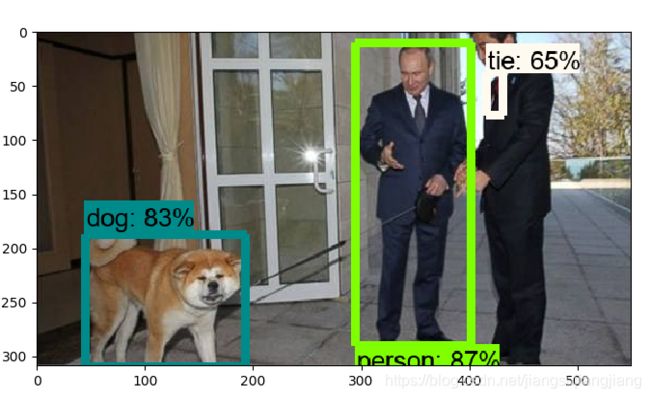
再换一张图片进行测试:
只把人保存了下来
以上是我个人的浅显理解,如有错误请及时提出,共同探讨,共同进步!
--------2019.6.24 周一

